


在这里学习到了常见的性能优化和如何将文件打包并且进行上传
性能优化包括以下部分
- 组件缓存
- 处理头像不在更新(缓存问题)
- 实现代码高亮
- loading效果
- 登录未遂地址
- 图片懒加载
- 自动聚焦问题
- 组件注册
- 从个人中心跳到滚动条位置
- 滚动条位置
- 持久化存储
额外的知识
- 如何处理大数
- 前端的数据格式
1 组件缓存
问题,当切换的时候,里面的数据每次切换切换都会刷新,形成卡顿
切换的时候,原先的数据不会完全刷新,结合 vue 内置的 keep-alive 组件,可以实现组件的状态保持。
-
在App.vue中的router-view外层套上一个keep-alive组件
- 缓存的一级路由页面切换不被释放, 但是首页还是会重新请求数据
-
在Layout.vue中的router-view外层套上一个keep-alive组件
- 这次Home和User页面都被缓存了(二级路由也要管)
/App.vue文件
- 这次Home和User页面都被缓存了(二级路由也要管)
<template>
  <div id="app">
<keep-alive exclude="Search,ArticleDetail,Detail,UserEdit" >
   <router-view></router-view>
</keep-alive>
  </div>
</template>
但发现搜索页面和详情页面多被缓存起来了 (多次进入不同的文章, 发现都是同一个文章详情)
对router-view使用exclude属性来区别, 哪些页面组件可以缓存
特别注意exclude里是组件的name名字(跟路由没什么关系)
<template>
  <div id="app">
<keep-alive exclude="Search,ArticleDetail,Detail,UserEdit" >
   <router-view></router-view>
</keep-alive>
  </div>
</template>
- 只有被切换销毁的组件, 才需要被缓存
- router-view是他们切换时的挂载点, 套在挂载点外来缓存内部组件
2 头像不更新问题
User.vue被缓存了, 所以改了头像回到User页面, created里获取用户资料接口不会执行
-
解决方案1: 把created换成activated钩子函数即可
-
解决方案2: UserEdit.vue修改头像成功后, 更新到vuex中, User页面使用的vuex数据也受到更新
- vuex中定义mutations修改头像
updatePhoto (state, photo) {
    state.user.photo = photo
    localStorage.setItem('user', JSON.stringify(state.user))
}
UserEdit.vue映射, 调用传成功头像覆盖
import { mapMutations } from 'vuex'
export default {
  // ...
  methods: {
    ...mapMutations(['updatePhoto']),

    async onFileChange (ev) {
      if (ev.target.files.length === 0) return
      const fd = new FormData()
      fd.append('photo', ev.target.files[0])
      const res = await updatePhotoAPI(fd)
      console.log(res)
      this.profile.photo = res.data.data.photo
      this.updatePhoto(res.data.data.photo) // 同步头像给vuex
    }
  }
}
引申 - 用户名字修改也是同理的
- vuex中定义修改名字的mutations
updateName (state, theName) {
    state.user.name = theName
    localStorage.setItem('user', JSON.stringify(state.user))
}
-
-
UserEdit.vue页面, 修改名字成功调用更新
import { mapMutations } from 'vuex'
export default {
  // ...
  methods: {
    // ...
    ...mapMutations(['updatePhoto', 'updateName']), // 映射updateName方法
    async onNameDialogBeforeClose (action, done) {
      if (action === 'confirm') {
        if (/^[A-Za-z0-9\u4e00-\u9fa5]{1,7}$/.test(this.userName)) {
          await updateProfileAPI({
            userName: this.userName
          })
          this.profile.name = this.userName
          this.updateName(this.userName) // 同步到vuex中
          done()
        }
      }
    }
  }
}
-
3、 文章高亮显示
文章详情页里代码片段高亮效果
有两种方法
- 想要让代码高亮, 必须在后台发布文章时, 就要把代码分段用pre+code标签包裹
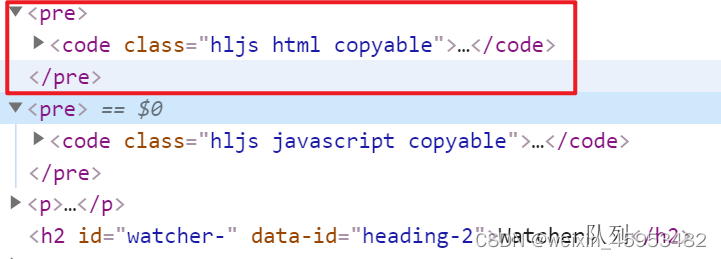
- 前端可以通过获取这些标签名/指定类名, 分别给予相应样式
步骤
基于 highlight.js 美化详情页的代码片段
英文文档(更全): https://highlightjs.readthedocs.io/en/latest/index.html
中文文档: https://fenxianglu.cn/highlight.html
-
下载此插件到项目中
一定要带.js名字
yarn add highlight.js -D -
在main.js 引入即可
import hljs from 'highlight.js' // hljs对象 import 'highlight.js/styles/default.css' // 代码高亮的样式 -
注册高亮代码-自定义指令
Vue.directive('highlight', function (el) { // 自定义一个代码高亮指令
    const highlight = el.querySelectorAll('pre, code') // 获取里面所有pre或者code标签
    highlight.forEach((block) => {
        hljs.highlightElement(block) // 突出显示这些标签(以及内部代码, 会自动识别语言)
    })
})
4 、loading功能
通过loading这个组件加载,给他垂直居中,如果需要距离上面有距离就添加padding-top
5. 登陆未遂跳转地址
如果refesh-token过期了,就重新跳回登录页面,但登录之后重新点赞
1.如果点赞了,token过期了,并且refesh-token也过期了,那么就跳转到登录页面
通过router.currentRoute.fullPath
  if (error.response.status === 401) { // 身份过期
  // 方式2: 使用refresh_token换回新的token再继续使用, JS代码实现, 用户无感知(效果好)
    const res = await getNewTokenAPI()
    setToken(res.data.data.token)
    } else if (error.response.status === 500 && error.config.url === '/v1_0/authorizations' && error.config.method === 'put') {
            // 刷新的refresh_token也过期了
            localStorage.clear() // 清除localStorage里所有值
            // localStorage当前网页, 域名划分, 每个域名下有自己范围的localStorage
          Toast('请重新登录');
      console.log(router.currentRoute.fullPath);
      router.push({ path: `/login?path=${router.currentRoute.fullPath}` })
        Notify({ type: 'warning', message: '身份已过期' })
      }

  return Promise.reject(error)
})
- 在Login/index.vue, 登录后, 判断有未遂地址, 跳这里, 否则去/路径
6、图片懒加载
- 图片标签进入视口才加载图片
- 图片src会调用浏览器请求图片资源
在这里通过组件库来实现
- vant组件库里有个叫LazyLoad指令, 在main.js中全局注册
import { Lazyload } from 'vant';

Vue.use(Lazyload);
-
先查看首页, 上来默认请求了多少张图片 / 点击别的频道查看
注意: 有的频道图片本身就不多
-
根据文档指示, 在src/components/ArticleItem.vue中, 把所有img的src换成v-lazy指令即可
注意: 有的频道图片本身就不多 -
根据文档指示, 在src/components/ArticleItem.vue中, 把所有img的src换成v-lazy指令即可
<!-- 标题区域的插槽 -->
<template #title>
<div class="title-box">
    <!-- 标题 -->
    <span>{{ obj.title }}</span>
    <!-- 单图 -->
    <img
         class="thumb"
         v-lazy="obj.cover.images[0]"
         v-if="obj.cover.type === 1"
         />
</div>
<!-- 三张图片 -->
<div class="thumb-box" v-if="obj.cover.type > 1">
    <img
         class="thumb"
         v-for="(imgUrl, index) in obj.cover.images"
         :key="index"
         v-lazy="imgUrl"
         />
</div>
</template>
7自动优化聚焦问题
- 用户名修改弹窗多次点击
- 只有第一次自动聚焦问题
-
自动聚焦依赖自定义指令inserted执行
而Dialog只有第一次出现是插入到真实DOM, 触发inserted方法
而Dialog以后初选是css层面的显示出现, 不会触发inserted方法
-
解决方案
给自定义指令添加update方法, 指定所在DOM更新时执行
import Vue from 'vue'
// 插件对象(必须有install方法, 才可以注入到Vue.use中)
export default {
  install () {
    Vue.directive('fofo', {
      inserted (el) {
        fn(el)
      },
      update (el) {
        fn(el)
      }
    })
  }
}
function fn (el) {
  if (el.nodeName === 'INPUT' || el.nodeName === 'TEXTAREA') {
    // 如果直接是input标签/textarea标签
    el.focus()
  } else {
    // 指令在van-search组件身上, 获取的是组件根标签div, 而input在标签内
    const inp = el.querySelector('input')
    const textArea = el.querySelector('textarea')
    // 如果找到了
    if (inp || textArea) {
      inp && inp.focus()
      textArea && textArea.focus()
    } else {
      // 本身也不是, 子标签里也没有
      console.error('请把v-fofo用在输入框标签上')
    }
  }
}
8 抽离组件
将组件抽离然后再导入
import Vue from 'vue'
import { NavBar, Form, Field, Button, Tabbar, TabbarItem, Icon, Tab, Tabs, Cell, List, PullRefresh, ActionSheet, Popup, Row, Col, Badge, Search, Divider, Tag, CellGroup, Image, Dialog, DatetimePicker, Loading, Lazyload } from 'vant'
Vue.use(Lazyload)

Vue.use(Loading)
Vue.use(DatetimePicker)
Vue.use(Dialog)
Vue.use(Image)
Vue.use(CellGroup)
Vue.use(Tag)
Vue.use(Divider)
Vue.use(Search)
Vue.use(Badge)
Vue.use(Row)
Vue.use(Col)
Vue.use(Popup)
Vue.use(ActionSheet)
Vue.use(PullRefresh)
Vue.use(List)
Vue.use(Cell)
Vue.use(Tab)
Vue.use(Tabs)
Vue.use(Icon)
Vue.use(Tabbar)
Vue.use(TabbarItem)
Vue.use(Form)
Vue.use(Field)
Vue.use(Button)
Vue.use(NavBar)
-
在main.js引入一下, 让代码执行
import './VantRegister' -
总结下模块化的3种使用方式
- 按需导出和导入
- 默认导出和导入
- 无导出和导入
步骤
keep-alive不会缓存滚动条的位置的
- 路由对象/home, 上添加meta额外信息
meta: { isRecord: true, top: 0 } // isRecord是否需要设置滚动位置
-
给Home设置组件内守卫
注意: 此方法与methods并列
// 路由离开 - 触发(保存滚动位置)
beforeRouteLeave (to, from, next) {
    from.meta.top = window.scrollY
    next()
}
- 在全局后置钩子设置页面滚动条
// 全局后置钩子
router.afterEach((to, from) => {
  // 如果当前的路由的元信息中,isRecord 的值为 true
  if (to.meta.isRecord) {
    setTimeout(() => {
      // 则把元信息中的 top 值设为滚动条纵向滚动的位置
      window.scrollTo(0, to.meta.top)
    }, 0)
  }
})
10、频道滚动条位置
-
明确数据结构, 在Home/index.vue定义变量
// “频道名称”和“滚动条位置”之间的对应关系,格式 { '推荐ID': 211, 'htmlID': 30, '开发者资讯ID': 890 } const nameToTop = {} -
tabs标签绑定before-change事件和方法实现
向nameToTop添加属性和位置, 缓存起来
<van-tabs v-model="channelId" animated sticky offset-top="1.226667rem" :before-change="tabBeforeChangeFn"> <script> methods: { // 频道切换之前触发 tabsBeforeChangeFn () { nameToTop[this.channelId] = window.scrollY // 先保存要被切走频道的滚动距离(一定要用哦this.channelId里存着的) // 只有return true才会让tabs切换 return true } } </script> -
监测tabs切换后, 从nameToTop对象里拿到原本滚动位置设置
<van-tabs v-model="channelId" animated sticky offset-top="1.226667rem"  :before-change="tabsBeforeChangeFn" @change="tabsChangeFn">

<script>
methods: {
    // 频道切换后
    tabsChangeFn (channelId) {
      // 等 DOM 更新完毕之后,根据记录的"滚动条位置",调用 window.scrollTo() 方法进行滚动
      this.$nextTick(() => {
        window.scrollTo(0, nameToTop[channelId] || 0)
      })
    }
}
</script>
11、统一封装LcalStorage
// 本地存储方式
// 如果同时有sessionStorage和localStorage, 可以封装2份
// 现在我只封装一种统一的方式
export const setStorage = (key, value) => {
  localStorage.setItem(key, value)
}
export const getStorage = (key) => {
  return localStorage.getItem(key)
}
export const removeStorage = (key) => {
  localStorage.removeItem(key)
}
export const clearStorage = () => {
  localStorage.clear()
}
- 把所有使用本地存储的地方, 都统一换成这里定义的方法
- 在store/index.js - vuex中使用过
- 在search/index.vue - 搜索页面使用过
12 封装统一的Notfy接口
方便统一,万一以后的通知框要统一更换
步骤
-
新建utils/Notify.js文件
// 基于vant组件库, UI层弹窗封装
// Notify函数
// import { Notify } from 'vant'
import { Toast } from 'vant'

export const MyNotify = ({ type, message }) => {
//   Notify({
//     type: type,
//     message: message
//   })

  if (type === 'warning') {
    Toast({
      type: 'fail',
      message
    })
  } else if (type === 'success') {
    Toast({
      type,
      message
    })
  }
}
演示登录页面Login.vue提示框, 别的页面也是这样用
import { MyNotify } from '@/utils/Notify'

methods: {
    ...mapActions(['asyncLoginAction']),
    async onSubmit () {
      try {
        await this.asyncLoginAction(this.formLogin)
        MyNotify({ type: 'success', message: '登录成功' })
        // 跳转到Layout页面
        this.$router.replace({
          path: this.$route.query.path || '/layout'
        })
      } catch (err) {
        MyNotify({ type: 'warning', message: '手机号或密码错误' })
      }
    }
  }
这样可以方便的统一替换
额外知识点
1、Blight解决精度丢失的问题
-
定义后台返回数据, 模拟大数
后台数据库id, 生成算法是19位置
const str = '[{"id": 1302900300041101987}, {"id": 1205340366642205763}, {"id": 7689021398237123422}]' -
尝试用JSON.parse转换, 发现转换后的值不对
后面3位精度错误
console.log(JSON.parse(str)) -
原因: JS范围的安全数打印
console.log(Number.MAX_SAFE_INTEGER) // 9007199254740991
这里可以通过Blight来解决精度丢失的问题
2、知识点-前端传参格式
请求头内容类型
只有请求体里有传递的值给后台, 才会出现Content-Type
字段: Content-Type值
作用: 告诉后端你传递请求体内容的类型, 后端用对应方式解析 (如果设置错了可能导致后台收不到请求体数据)
| Content-Type值 | 请求体值 | 解释 |
|---|---|---|
| application/json;charset=UTF-8 | {“target”:“8206”,“content”:“12123”} | JSON字符串 |
| multipart/form-data; boundary=----WebKitFormBoundaryDIG2g3sYegVy7GmH | ------WebKitFormBoundaryDIG2g3sYegVy7GmH Content-Disposition: form-data; name=“photo”; filename=“Koala.jpg” Content-Type: image/jpeg ------WebKitFormBoundaryDIG2g3sYegVy7GmH– | 表单对象 |
| application/x-www-form-urlencoded | key=value&key=value&key=value | 查询字符串 |
| text/plain | nihao啊后台 |
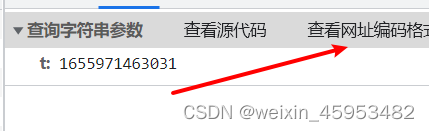
通过F12可以查看编码格式


 4534
4534


 被折叠的 条评论
为什么被折叠?
被折叠的 条评论
为什么被折叠?
 到【灌水乐园】发言


