


文章目录
基础操作
第一步导入场景配置yaml:
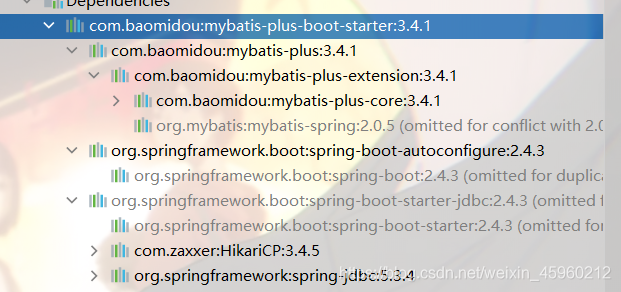
把最新版本号填入即可
<dependency>
        <groupId>com.baomidou</groupId>
        <artifactId>mybatis-plus-boot-starter</artifactId>
        <version>Latest Version</version>
    </dependency>
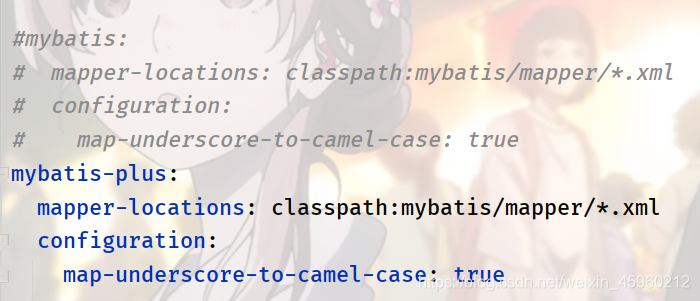
yaml 的基本配置 注意资源是 mabatis plus
 datasource:
    url: jdbc:mysql://localhost:3306/zyc
    username: root
    password: 1234
    driver-class-name: com.mysql.cj.jdbc.Driver


mybatis-plus:
  mapper-locations: classpath:mybatis/mapper/*.xml   #mapper 位置 有时候需要自#定义的sql 语句会需要到

  configuration:
    map-underscore-to-camel-case: true  #驼峰规则
#mybatis日志
  configuration.log-impl:
	org.apache.ibatis.logging.stdout.StdOutImpl
第二步导入数据库链接:
  <dependency>
            <groupId>mysql</groupId>
            <artifactId>mysql-connector-java</artifactId>
        </dependency>
其他的都不用导入了 比如什么 jdbc 等等 已经在 场景里面了
第三步 mapper 继承Basemapper
步骤和正常的mybatis 操作一样 不一样的地方是
mapper 这里:需要继承basemapper
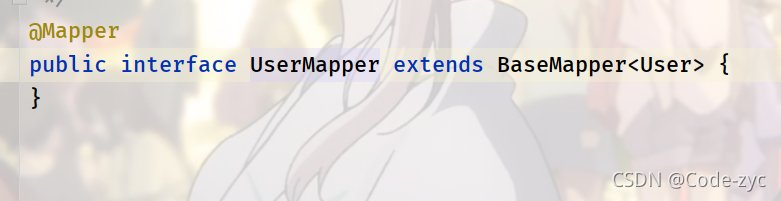
里面已经有了 很多的基本的增删改查 如果需要定制 还是普通的一样的操作
第四步:在 Spring Boot 启动类中添加 @MapperScan 注解,扫描 Mapper 文件夹:

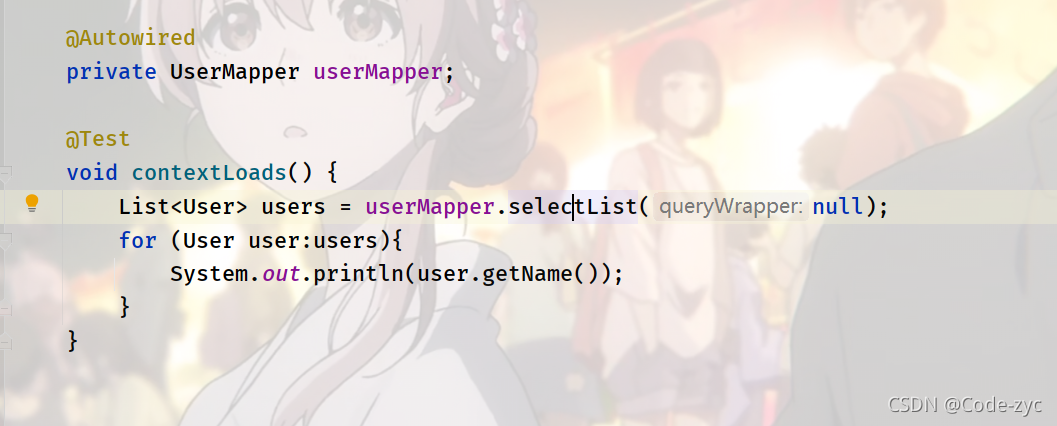
第五步:按照正常的调用即可:
补充:
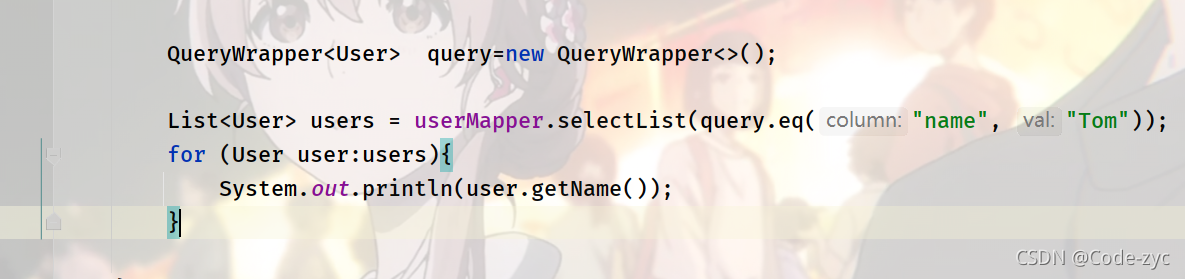
Wrapper
mybatis 里面的这个类是用来给用户 更好的自定义的
官网里面有 哪些eq 方法的解释 自行观看
官网
使用案列:
增删改查:
官网
里面看 mapper 的增删改查 就可以了 很全面有解释
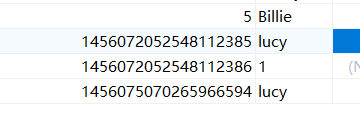
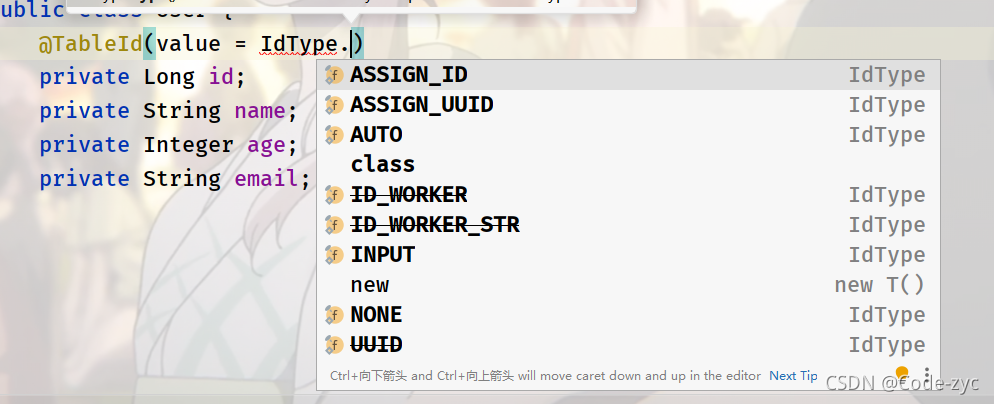
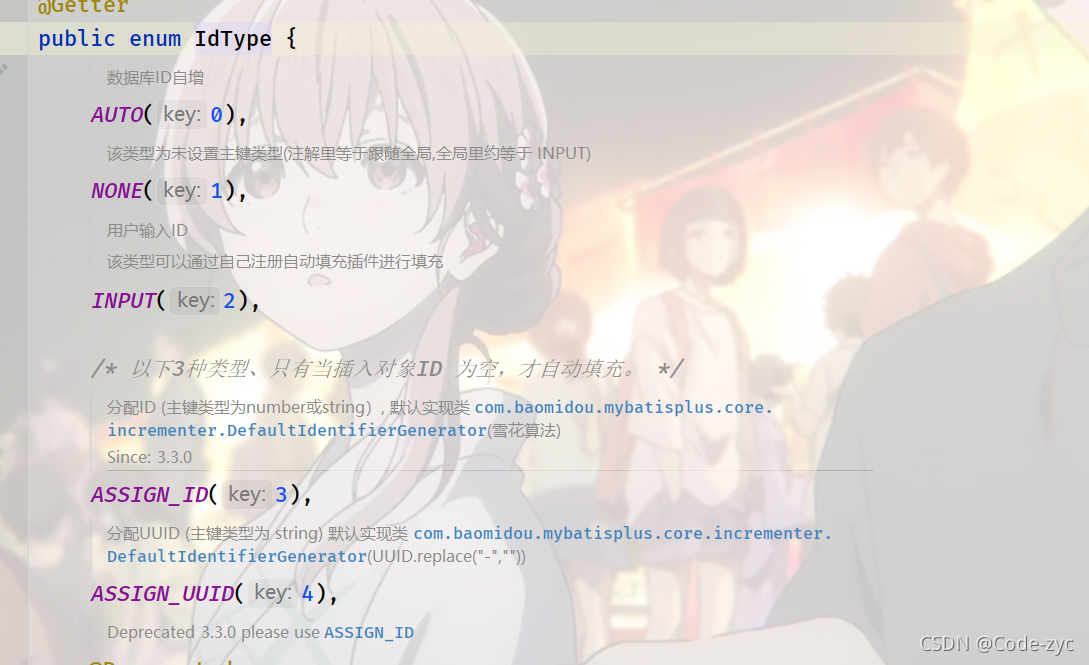
主键的策略:
一般情况下 默认是采用雪花算法:id 会生成唯一的
如何更改:
全局更改:
mybatis-plus.global-config.db-config.id-type=auto
单独更改:
常量的解释:
乐观锁
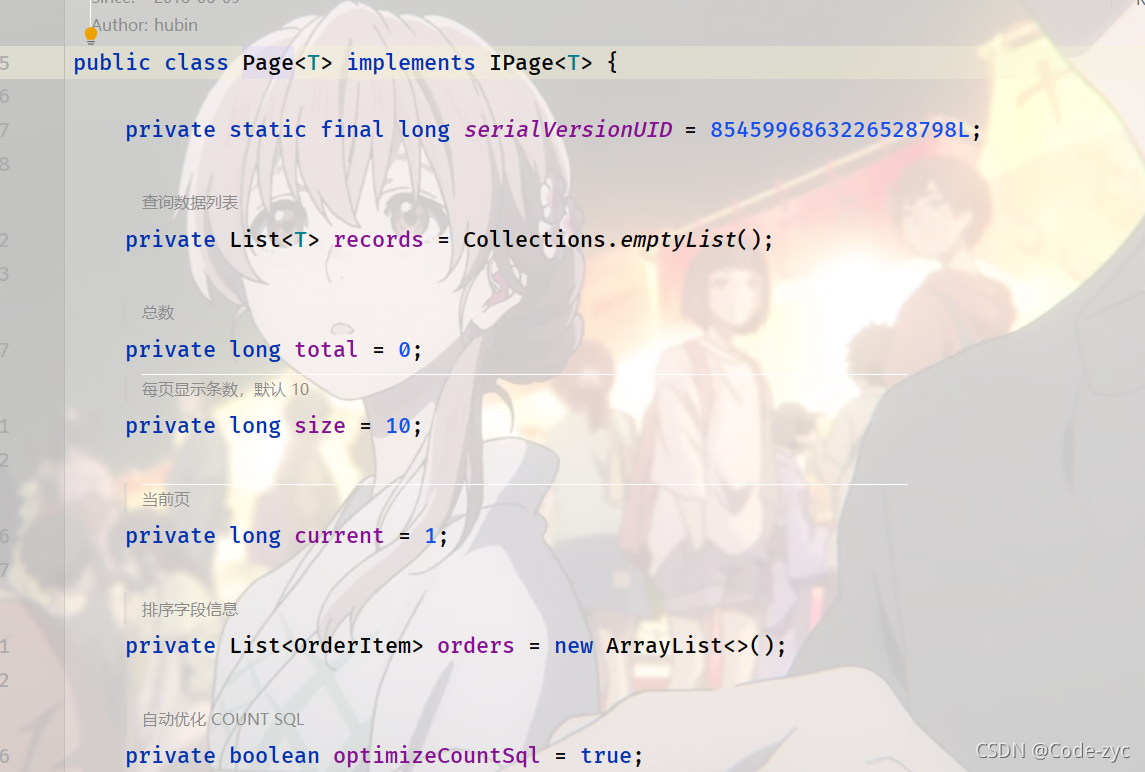
分页:
测试 :
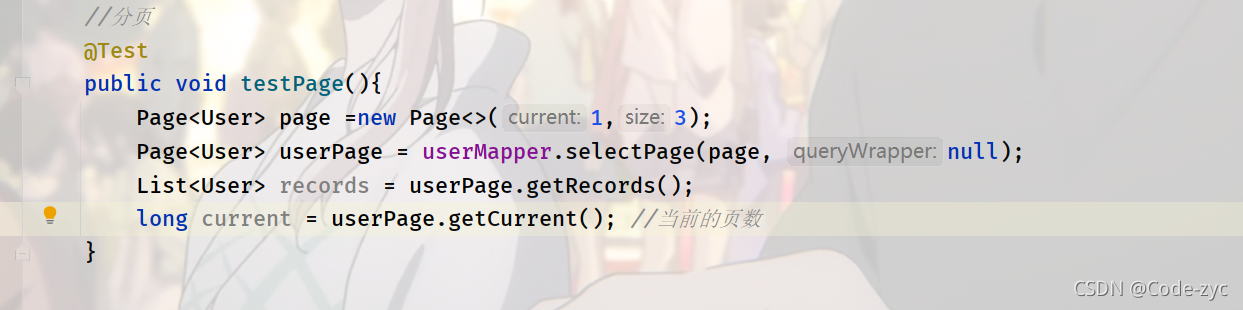
关于 Page里面的参数 点进去 自己下载源码就可以看清楚 全是中文:
yaml 的配置 是 :
如果是 继承BaseMapper 他是默认表名与类名一样
如果表名换了 在 类名需要加注解:
如果 bean类存在 表中无的数据 但是 有需要不删除 可以使用注解:

代码生成:
官网
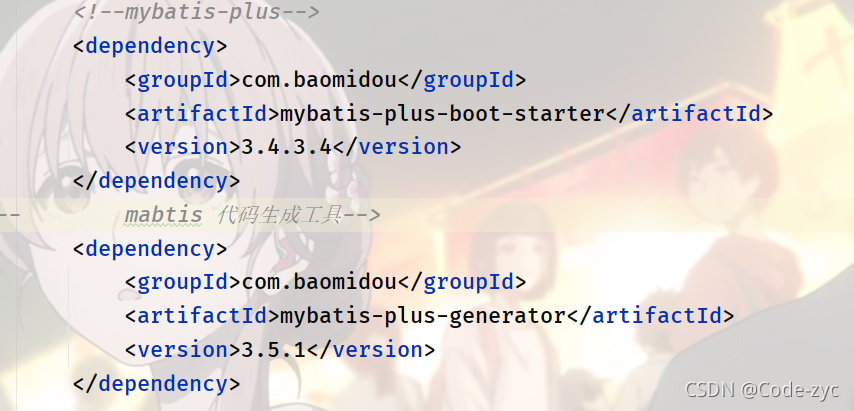
注意事项:
首先注意:这两个包里面的 mybatis -plus 版本要保持一致
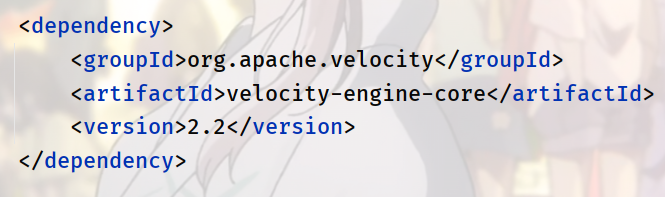
注意使用了什么引擎记得导入他的包:

然后就是路径的问题
比如我这个再导入之前路径是这样的

然后参数 是这样设置的:
   FastAutoGenerator.create("jdbc:mysql://127.0.0.1:3306/yygh_hosp", "root", "123456")
                .globalConfig(builder -> {
                    builder.author("zyc") // 设置作者
                            .enableSwagger() // 开启 swagger 模式
                            .fileOverride() // 覆盖已生成文件
                            .outputDir("C:\\JAVA201902227\\yygh_parent\\service\\service-hosp\\src\\main\\java"); // 指定输出目录
                })
                .packageConfig(builder -> {
                    builder.parent("com") // 设置父包名
                            .moduleName("zyc") // 设置父包模块名
                            .pathInfo(Collections.singletonMap(OutputFile.mapperXml, "C:\\JAVA201902227\\yygh_parent\\service\\service-hosp\\src\\main\\resources\\mapper")); // 设置mapperXml生成路径
                })
                .strategyConfig(builder -> {
                    builder.addInclude("hospital_set"); // 设置需要生成的表名
//                            .addTablePrefix("t_", "c_"); // 设置过滤表前缀
                })
//                .templateEngine(new FreemarkerTemplateEngine()) // 使用Freemarker引擎模板,默认的是Velocity引擎模板
                .execute();
结果:非常的完美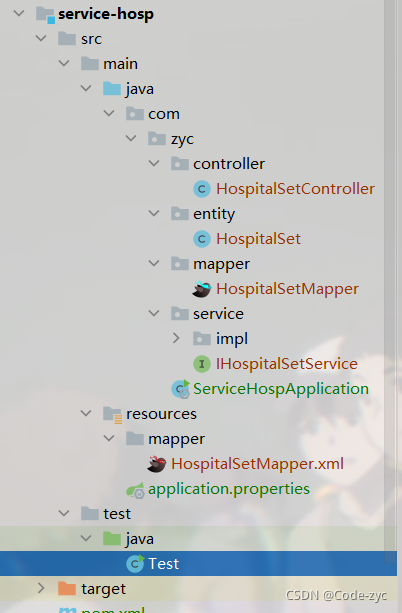


 2980
2980


 被折叠的 条评论
为什么被折叠?
被折叠的 条评论
为什么被折叠?
 到【灌水乐园】发言


