


本文章主要讲解yaml如何配置到实体类,配置类同理。
思路:
- 编写实体类
- 实体类在默认全局配置文件中寻找值(注解)
- 编写yaml配置文件
- 在测试类注入实体类
配置同理:
- 编写配置类
- 配置类在配置文件寻找值
- 使用配置类
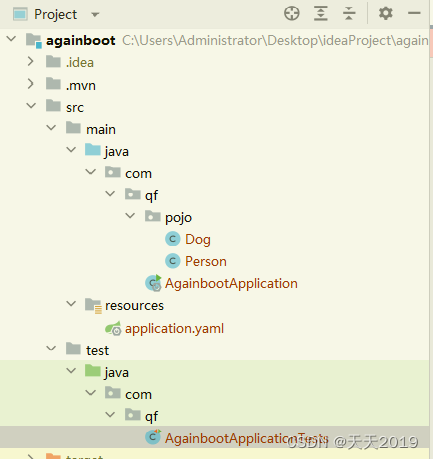
目录图:
首先编写两个实体类
@Component
@ConfigurationProperties(prefix = "person")
public class Person {
    private String name;
    private int age;
    private Map score;
    private List hobby;
    private Date birthday;
    private Dog dog;

    public Person() {
    }

    public Person(String name, int age, Map score, List hobby, Date birthday, Dog dog) {
        this.name = name;
        this.age = age;
        this.score = score;
        this.hobby = hobby;
        this.birthday = birthday;
        this.dog = dog;
    }

    public String getName() {
        return name;
    }

    public void setName(String name) {
        this.name = name;
    }

    public int getAge() {
        return age;
    }

    public void setAge(int age) {
        this.age = age;
    }

    public Map getScore() {
        return score;
    }

    public void setScore(Map score) {
        this.score = score;
    }

    public List getHobby() {
        return hobby;
    }

    public void setHobby(List hobby) {
        this.hobby = hobby;
    }

    public Date getBirthday() {
        return birthday;
    }

    public void setBirthday(Date birthday) {
        this.birthday = birthday;
    }

    public Dog getDog() {
        return dog;
    }

    public void setDog(Dog dog) {
        this.dog = dog;
    }

    @Override
    public String toString() {
        return "Person{" +
                "name='" + name + '\'' +
                ", age=" + age +
                ", score=" + score +
                ", hobby=" + hobby +
                ", birthday=" + birthday +
                ", dog=" + dog +
                '}';
    }
}
public class Dog {
    private int age;
    private String name;
    private String color;
}
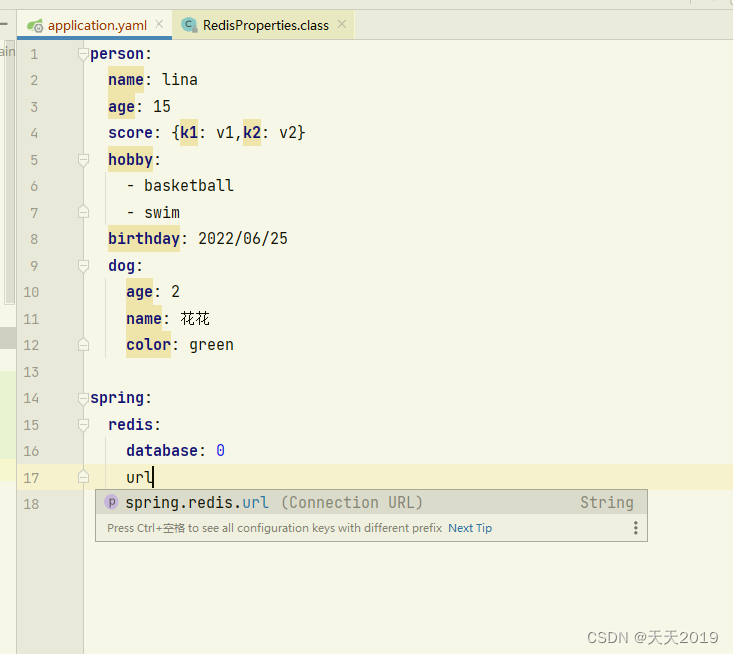
编写yaml配置文件
person:
  name: lina
  age: 15
  score: {k1: v1,k2: v2}
  hobby:
    - basketball
    - swim
  birthday: 2022/06/25
  dog:
    age: 2
    name: 花花
    color: green
测试类中测试以下
@SpringBootTest
class AgainbootApplicationTests {
    @Autowired
    private Person person;

    @Test
    void contextLoads() {
        System.out.println(person);
    }

}
扩展:springboot底层自动配置采用的配置类也是如此
- springboot底层只指向spring.factories文件,文件里表明自动配置的类有哪些
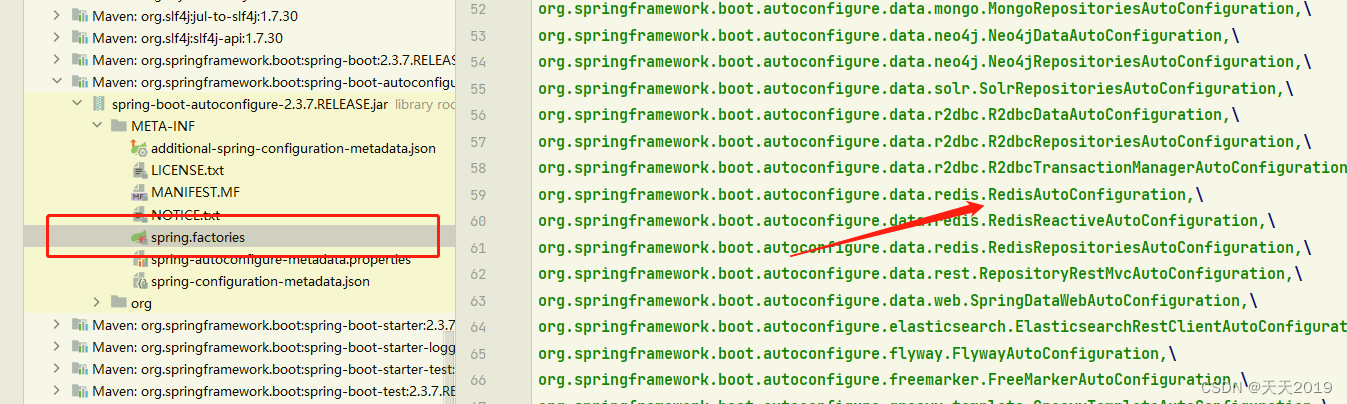
- 打开其中一个自动配置类,注解==@EnableConfigurationProperties==指向一个配置类
@Configuration(
   proxyBeanMethods = false
)
@ConditionalOnClass({RedisOperations.class})
@EnableConfigurationProperties({RedisProperties.class})
@Import({LettuceConnectionConfiguration.class, JedisConnectionConfiguration.class})
public class RedisAutoConfiguration {
   public RedisAutoConfiguration() {
   }
...
}
- 打开配置类RedisProperties.class,可以看到里面指向”spring.redis“开头的配置。和我们用的一样~
@ConfigurationProperties(
   prefix = "spring.redis"
)
public class RedisProperties {
   private int database = 0;
   private String url;
   private String host = "localhost";
   private String password;
   private int port = 6379;
   private boolean ssl;
   private Duration timeout;
   private String clientName;
   private RedisProperties.Sentinel sentinel;
   private RedisProperties.Cluster cluster;
   private final RedisProperties.Jedis jedis = new RedisProperties.Jedis();
   private final RedisProperties.Lettuce lettuce = new RedisProperties.Lettuce();
...
}
- 我们就可以在application.yaml配置它的方法了。


 3710
3710


 被折叠的 条评论
为什么被折叠?
被折叠的 条评论
为什么被折叠?
 到【灌水乐园】发言


