


0.环境声明
注意 Spring 和 Gradle 版本一定要配套意使用,如果过高或过低都容易出现问题,这里以我的为例:
Spring 5.0
Gradle 4.9
JDK8
一、Github 下载 Spring5 源码
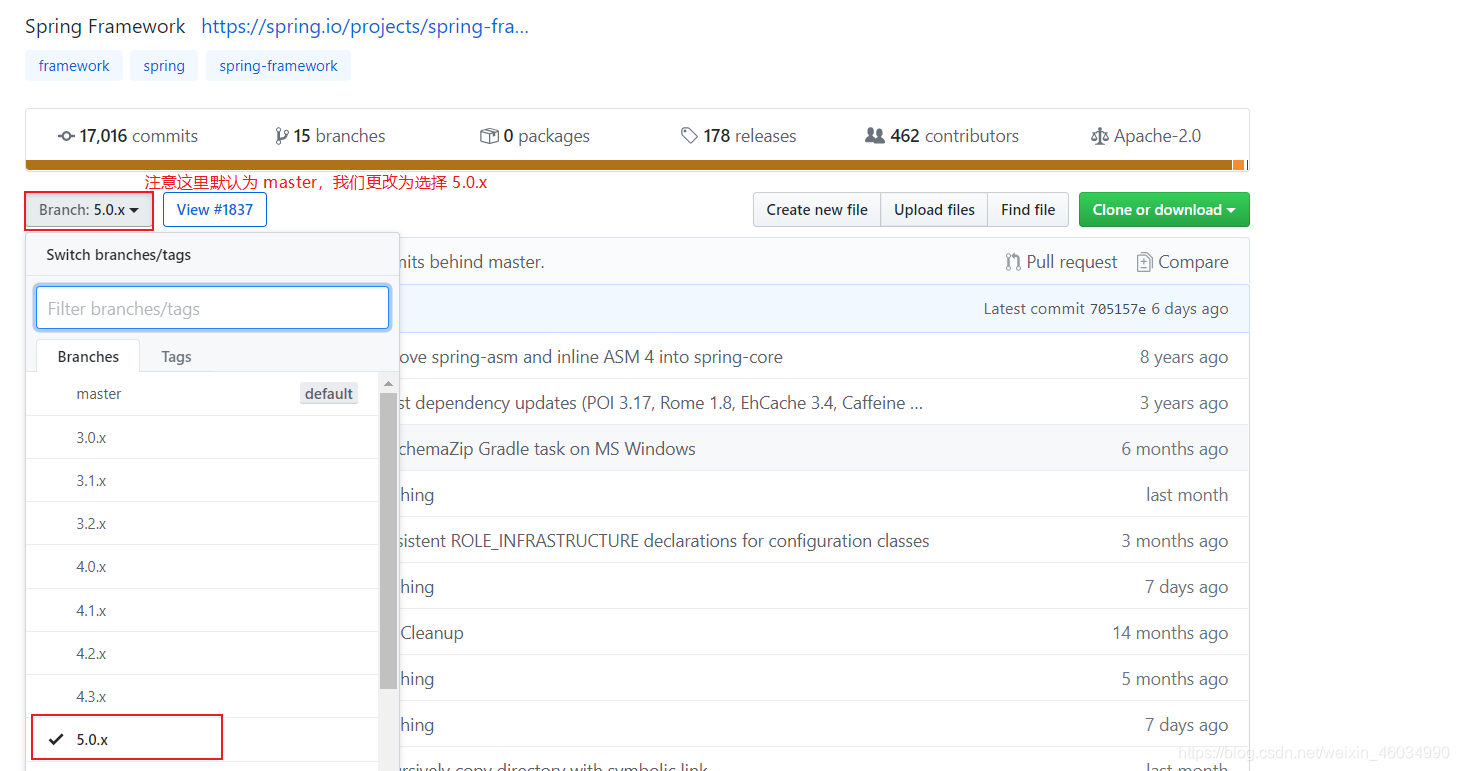
方法一:打开 Github 搜索 spring-framework
注意 Branch 选择 5.0.x,不要选择默认的 master。
方法二:直接打开如下链接
https://github.com/spring-projects/spring-framework/tree/5.0.x
直接点击右边绿色的 Clone or download 即可。压缩包下载成功后解压。
二、Gradle 的下载与配置
2.1 下载 Gradle
方法一:直接搜索 Gradle下载
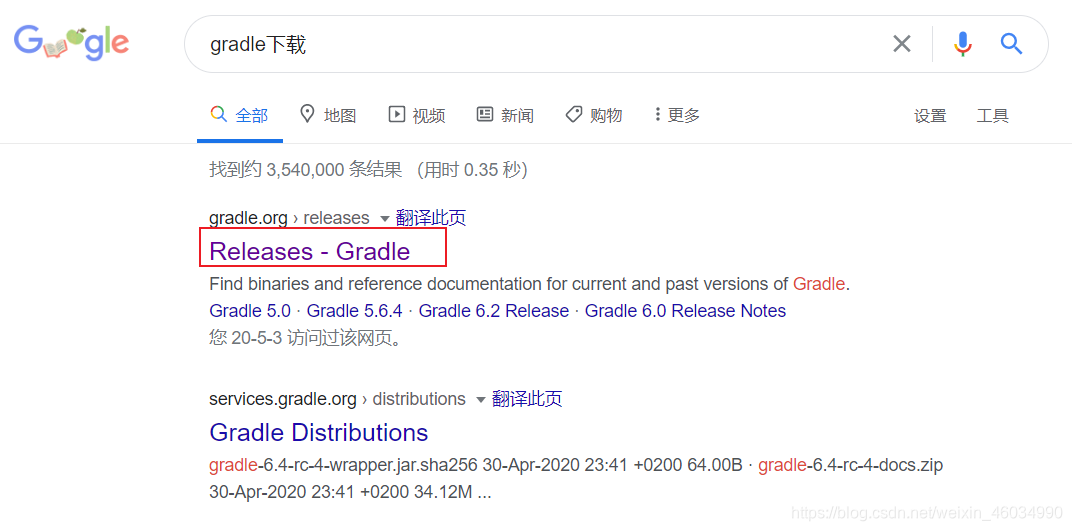
方法二:直接打开如下链接
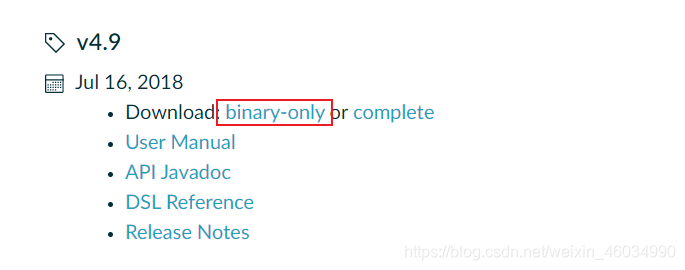
找到 Gradle4.9 版本,下载 binary 即可
2.2 解压压缩包
2.3 配置环境变量
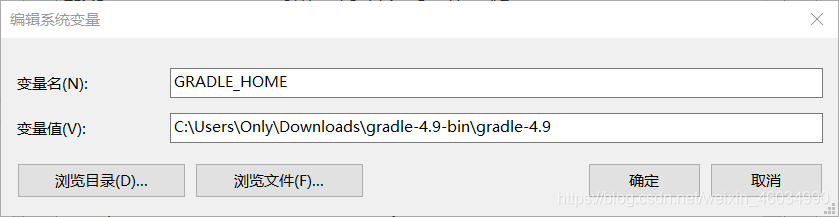
2.3.1新建系统变量
变量名为:GRADLE_HOME
变量值为:解压的 Gradle 的文件路径
2.3.2 将 Gradle 变量添加到系统变量 Path 中
在 Path 变量末尾追加 %GRADLE_HOME%\bin;
(如果前一个变量没有 ;,记得先添加 ; 后,再添加%GRADLE_HOME%\bin;)
2.4 测试 Gradle 是否成功配置
打开命令行(Win+R),输入 cmd
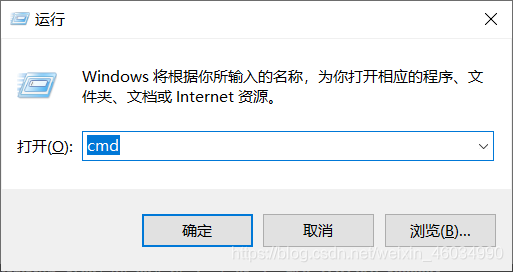
在 cmd 窗口内输入 gradle -v,出现下图所示效果,即为 Gradle 环境变量配置成功。

三、IDEA 内使用 Gradle 构建 Spring5 源码
3.1 打开 spring-framework-5.0.x 源码
打开 IDEA 编译器,File -> open
找到从 Github 上下载下来的 Spring5 源码

3.2 IDEA 内配置 Gradle
看网上的教程 open 了 spring-framework-5.0.x 之后,会直接弹出 Import Project from Gradle,如下图所示:
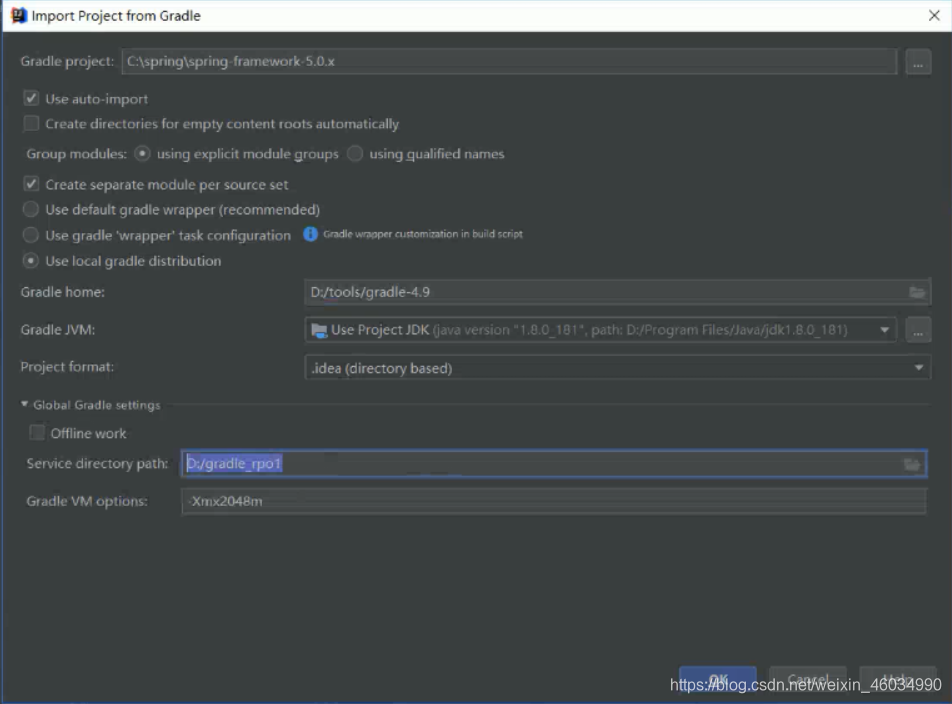
如果你open 了 spring-framework-5.0.x 之后,直接弹出了 Import Project from Gradle,直接按照上图配置即可。
但是,当我 open 了 spring-framework-5.0.x 之后,并没有弹出 Import Project from Gradle。而是直接询问我是在这个窗口还是下个窗口打开。如果你是和我一样的情况,不要慌,我们还有备用方案,任意选择此窗口还是下个窗口打开,成功打开项目之后,点击 File -> Setting,然后参照下图配置。
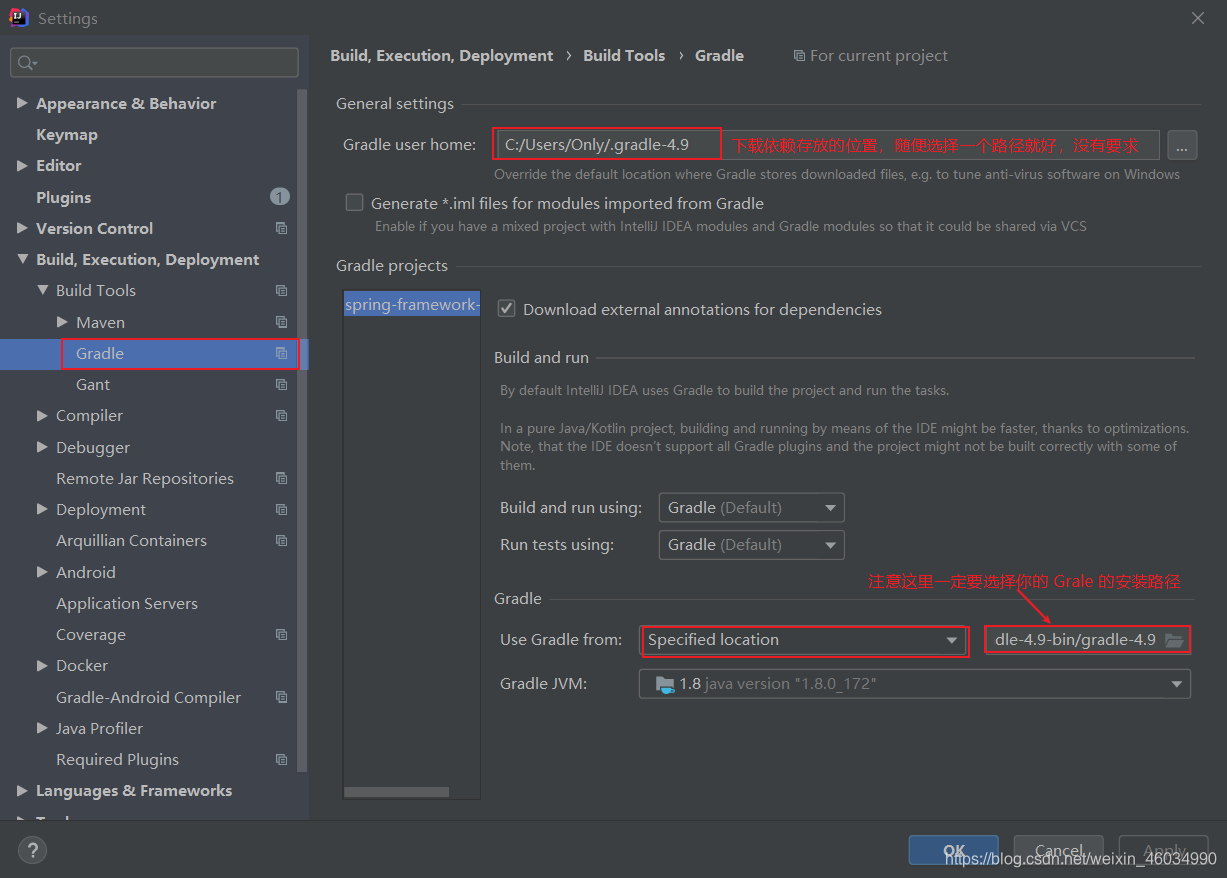
下图是我在网上看到的一个配置方法,如果你打开 Setting 后的 Gradle 显示信息与上图并不完全一致,可以看看是否与下图一致,如果与下图一致,请参照下图信息进行配置。
参考链接:https://blog.csdn.net/sinat_36710456/article/details/80329112

3.3 IDEA 使用 Gradle 构建 Spring5
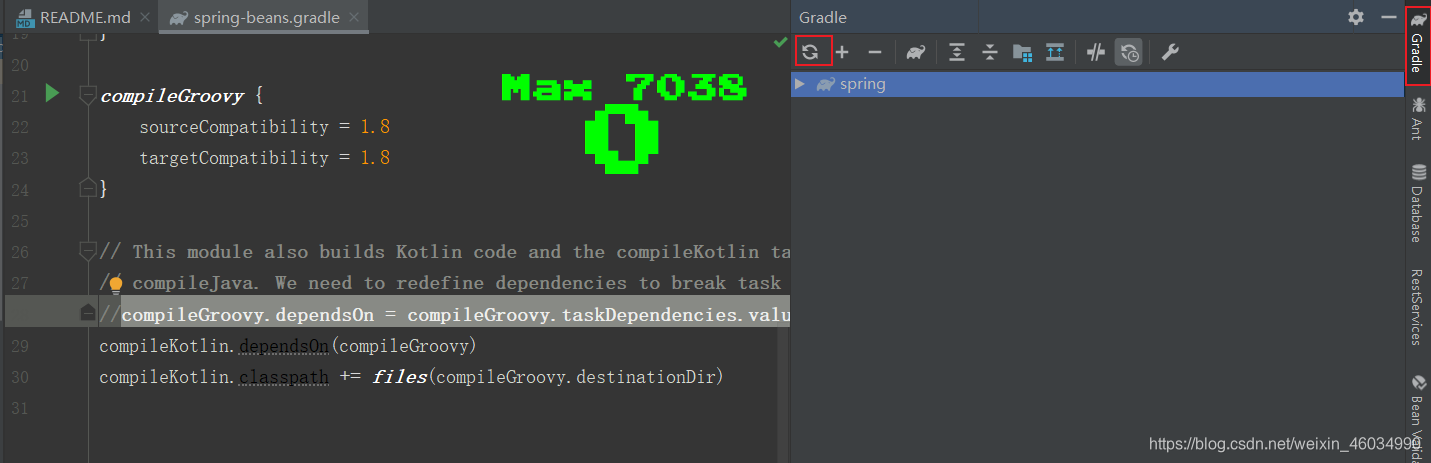
构建过程中报错信息如下:
file ‘C:\Users\Only\Downloads\spring-framework-5.0.x\spring-beans\spring-beans.gradle’ line: 28 A problem occurred evaluating project ‘:spring-beans’.
No such property: values for class: org.gradle.api.internal.tasks.DefaultTaskDependency Possible solutions: values
解决办法:打开 spring-beans.gradle ,注释掉 compileGroovy.dependsOn = compileGroovy.taskDependencies.values - "compileJava"

将上述代码注释后,点击右侧的 Gradle ,然后再点击 Reimport All Gradle Projects 重新导包即可。
如此开启了漫长的等待…
当右下角的进度条消失了,代表构建完成了。
3.3 IDEA 测试 Spring5 是否构建成功
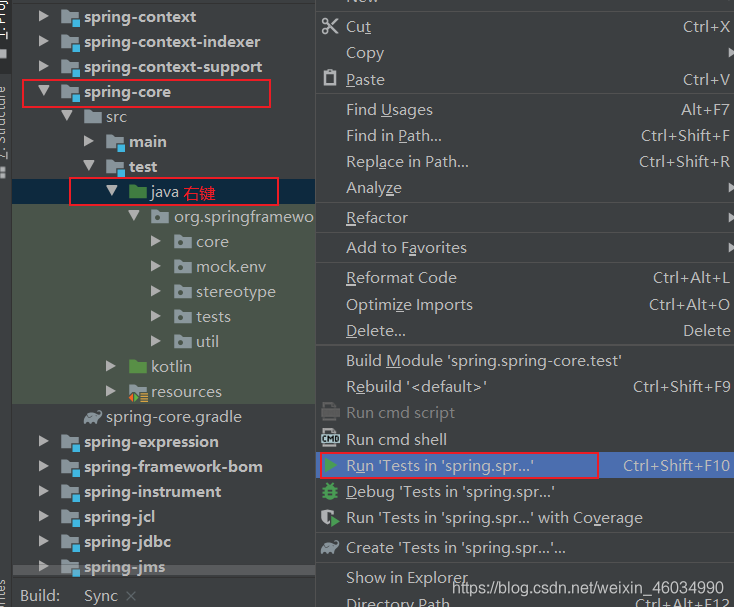
3.3.1 spring-core
打开 spring-core 的 src/test/java,然后右键,点击Run Tests in .spring-core运行:
(如果在 java 包下右键不出现 Run Tests in spring-core,就进入下一级目录 org.springframework,如果这里右键后依然没有 Run,再进入下一级目录 core)
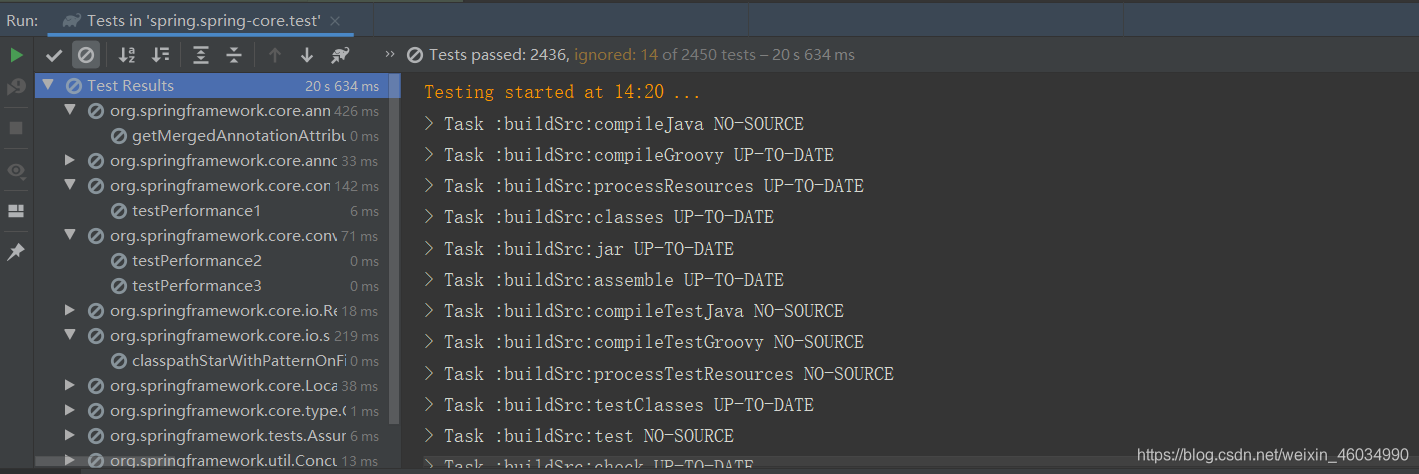
如果运行过程中没有报错就成功啦~
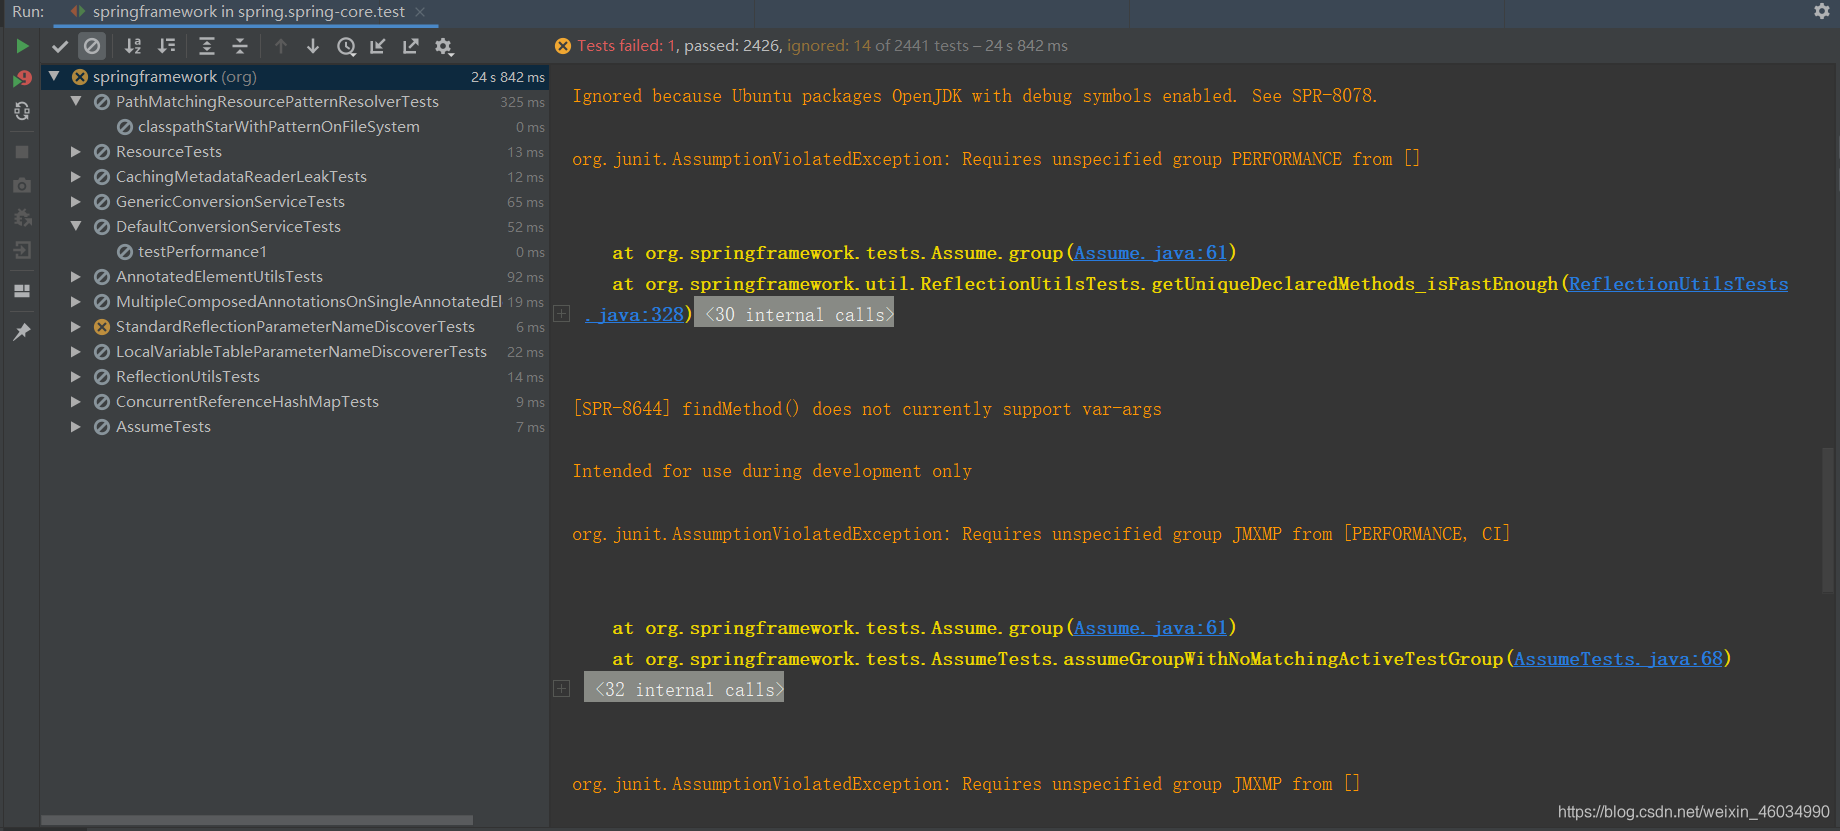
如果出现上述图片错误可以忽略。
3.3.2 spring-beans
按照上述 3.3.1 步骤测试 spring-bean 包
3.3.3 spring-context
按照上述 3.3.1 步骤测试 spring-context 包
四、测试是否构建成功
4.1 使用 Gradle 新建一个 Module
当前项目名右键,new Module..
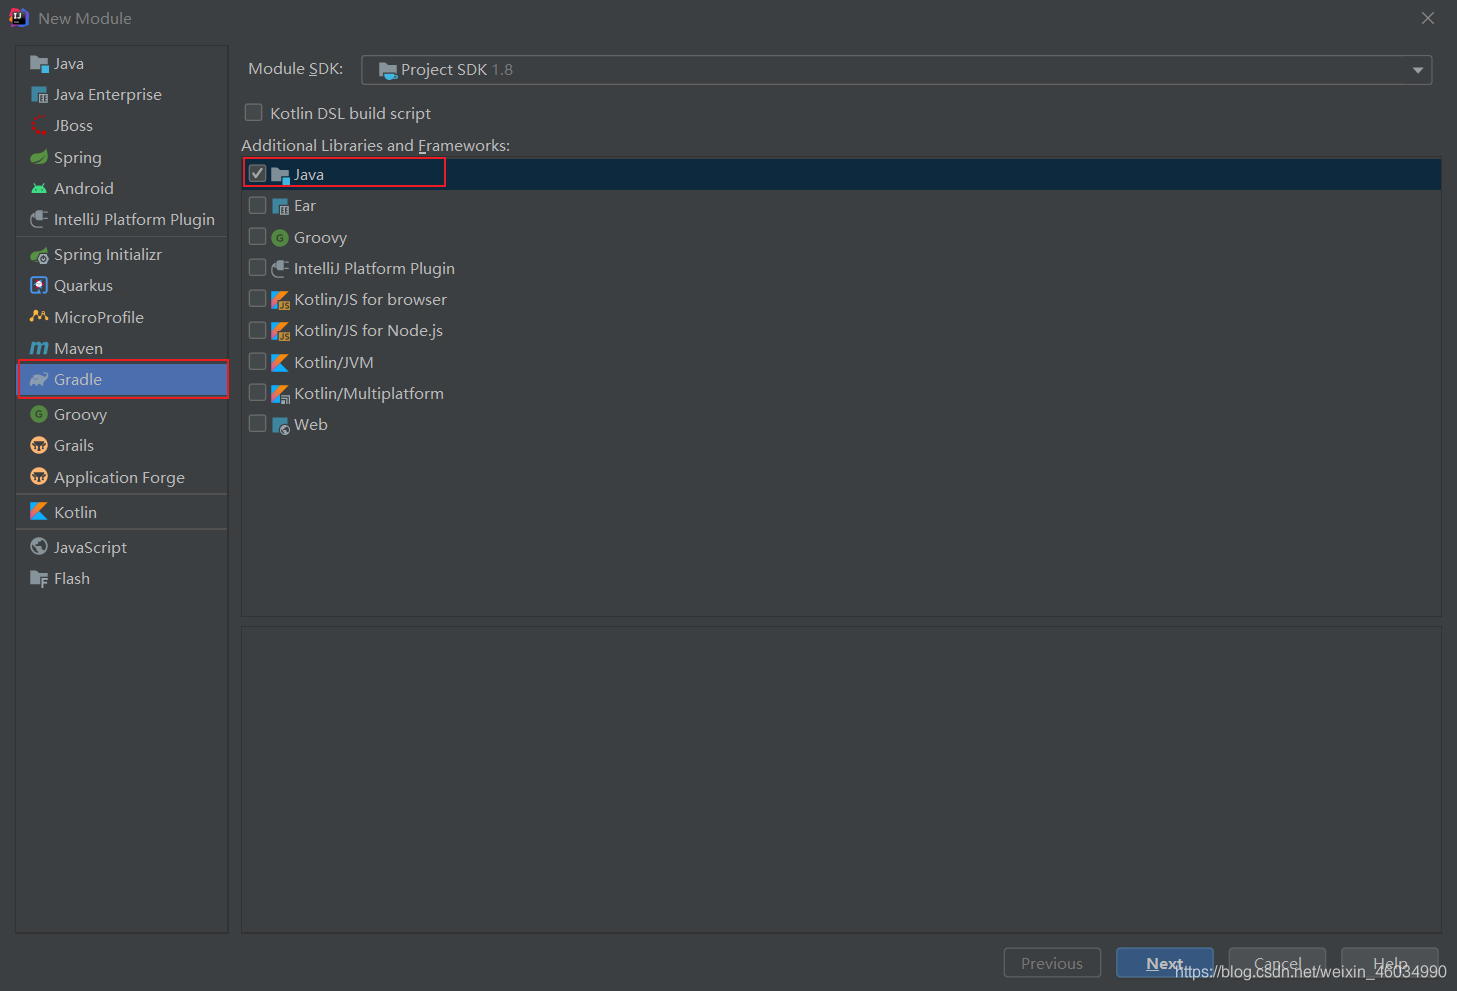
4.2 新建的 Gradle 中添加依赖
打开新建的 Module 中的 build.gradle,引入当前项目下的 spring-context 依赖:compile project(':spring-context')(需要提前构建好 spring-context ,即步骤 3.3.3 spring-context)
dependencies {
    testCompile group: 'junit', name: 'junit', version: '4.12'
    compile project(':spring-context')
}
4.3 编写简单代码
4.3.1 配置类
@Configuration
@ComponentScan("com.ssm")
public class AppConfig {
}
4.3.2 准备一个接口和接口实现类
public interface IndexDao {
	void query();
}
@Repository("indexDao")
public class IndexDaoImpl implements IndexDao {
	@Override
	public void query() {
		System.out.println("dao...模拟查询数据库");
	}
}
4.3.3 测试类
public class Test {
	public static void main(String[] args) {
		AnnotationConfigApplicationContext context = new AnnotationConfigApplicationContext(AppConfig.class);
		IndexDao indexDao = context.getBean(IndexDao.class);
		indexDao.query();
	}
}
测试结果:
dao...模拟查询数据库
如果出现错误:
org.gradle.api.CircularReferenceException: Circular dependency between the following tasks:
:spring-beans:compileGroovy
— :spring-beans:compileJava
— :spring-beans:compileKotlin
— :spring-beans:compileGroovy (*)
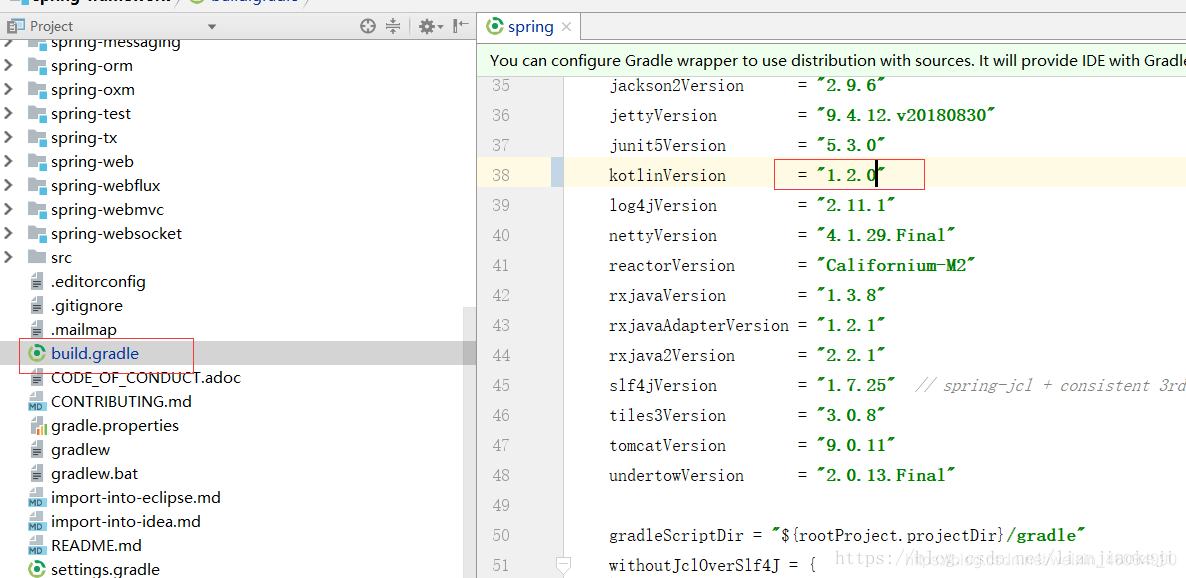
解决方案如下图所示:
原文链接:https://blog.csdn.net/lianjiaokeji/article/details/82177236
然后再重新构建一遍:

如果按照上述操作后仍报相同错误:
Circular dependency between the following tasks:
:spring-beans:compileGroovy
— :spring-beans:compileJava
— :spring-beans:compileKotlin
— :spring-beans:compileGroovy (*)
可尝试如下解决办法:修改spring-beans.gradle:
// This module also builds Kotlin code and the compileKotlin task naturally depends on
// compileJava. We need to redefine dependencies to break task cycles.
//将 spring-beans.gradle 最后三行:
//compileGroovy.dependsOn = compileGroovy.taskDependencies.values - "compileJava"
//compileKotlin.dependsOn(compileGroovy)
//compileKotlin.classpath += files(compileGroovy.destinationDir)
// 替换成:
def deps = compileGroovy.taskDependencies.immutableValues + compileGroovy.taskDependencies.mutableValues
compileGroovy.dependsOn = deps - "compileJava"
compileKotlin.dependsOn(compileGroovy)
compileKotlin.classpath += files(compileGroovy.destinationDir)
// 就可以将spring-beans编译成功了。


 322
322


 被折叠的 条评论
为什么被折叠?
被折叠的 条评论
为什么被折叠?
 到【灌水乐园】发言


