


Android开机动画,framework修改Bootanimation动画绘制文字。
frameworks/base/cmds/bootanimation/bootanimation.cpp
绘制时间的一个方法

// We render 12 or 24 hour time.
void BootAnimation::drawClock(const Font& font, const int xPos, const int yPos) {
    static constexpr char TIME_FORMAT_12[] = "%l:%M";
    static constexpr char TIME_FORMAT_24[] = "%H:%M";
    static constexpr int TIME_LENGTH = 6;
获取系统时间
    time_t rawtime;
    time(&rawtime);
    struct tm* timeInfo = localtime(&rawtime);

    char timeBuff[TIME_LENGTH];
    //显示时间的字符串
    const char* timeFormat = mTimeFormat12Hour ? TIME_FORMAT_12 : TIME_FORMAT_24;
    size_t length = strftime(timeBuff, TIME_LENGTH, timeFormat, timeInfo);

    if (length != TIME_LENGTH - 1) {
        SLOGE("Couldn't format time; abandoning boot animation clock");
        mClockEnabled = false;
        return;
    }

    char* out = timeBuff[0] == ' ' ? &timeBuff[1] : &timeBuff[0];
    int x = xPos;
    int y = yPos;
    //绘制文本
    drawText(out, font, false, &x, &y);
}
绘制文本
void BootAnimation::drawText(const char* str, const Font& font, bool bold, int* x, int* y) {
    glEnable(GL_BLEND);  // Allow us to draw on top of the animation
    glBindTexture(GL_TEXTURE_2D, font.texture.name);

    const int len = strlen(str);
    const int strWidth = font.char_width * len;

    if (*x == TEXT_CENTER_VALUE) {
        *x = (mWidth - strWidth) / 2;
    } else if (*x < 0) {
        *x = mWidth + *x - strWidth;
    }
    if (*y == TEXT_CENTER_VALUE) {
        *y = (mHeight - font.char_height) / 2;
    } else if (*y < 0) {
        *y = mHeight + *y - font.char_height;
    }

    int cropRect[4] = { 0, 0, font.char_width, -font.char_height };

    for (int i = 0; i < len; i++) {
        char c = str[i];

        if (c < FONT_BEGIN_CHAR || c > FONT_END_CHAR) {
            c = '?';
        }

        // Crop the texture to only the pixels in the current glyph
        const int charPos = (c - FONT_BEGIN_CHAR);  // Position in the list of valid characters
        const int row = charPos / FONT_NUM_COLS;
        const int col = charPos % FONT_NUM_COLS;
        cropRect[0] = col * font.char_width;  // Left of column
        cropRect[1] = row * font.char_height * 2; // Top of row
        // Move down to bottom of regular (one char_heigh) or bold (two char_heigh) line
        cropRect[1] += bold ? 2 * font.char_height : font.char_height;
        glTexParameteriv(GL_TEXTURE_2D, GL_TEXTURE_CROP_RECT_OES, cropRect);

        glDrawTexiOES(*x, *y, 0, font.char_width, font.char_height);

        *x += font.char_width;
    }

    glDisable(GL_BLEND);  // Return to the animation's default behaviour
    glBindTexture(GL_TEXTURE_2D, 0);
}
初始化字体

声明一个成员变量Font。

来到android()的initFont()

这是一个文件名字符串
static const char CLOCK_FONT_ASSET[] = "images/clock_font.png";
opengl只是支持图片纹理,所以文件是一张图片
然后会把这个图片加载进来,设置宽高等等。

绘制

对这个图片进行裁剪

我们新增代码在这里TEXT_CENTER_VALUE居中显示, yc + mAndroid[0].h计算绘制的y坐标系
yc是原本Android动画的一个坐标系,但是我们不能覆盖他,所以要比他高,放到原生Android动画的上边+ mAndroid[0].h
drawClock(mClockFont, TEXT_CENTER_VALUE, yc + mAndroid[0].h);

bool BootAnimation::android()
{
    SLOGD("%sAnimationShownTiming start time: %" PRId64 "ms", mShuttingDown ? "Shutdown" : "Boot",
            elapsedRealtime());
    initTexture(&mAndroid[0], mAssets, "images/android-logo-mask.png");
    initTexture(&mAndroid[1], mAssets, "images/android-logo-shine.png");

    mCallbacks->init({});

    // clear screen
    glShadeModel(GL_FLAT);
    //qfh add
    bool hasInitFont = false;
    if (initFont(&mClockFont, CLOCK_FONT_ASSET) == NO_ERROR) {
        hasInitFont = true;
        ALOGD("android init Font ok ,fontname = %u",mClockFont.texture.name);
    }
    //qfh add
    glDisable(GL_DITHER);
    glDisable(GL_SCISSOR_TEST);
    glClearColor(0,0,0,1);
    glClear(GL_COLOR_BUFFER_BIT);
    eglSwapBuffers(mDisplay, mSurface);

    glEnable(GL_TEXTURE_2D);
    glTexEnvx(GL_TEXTURE_ENV, GL_TEXTURE_ENV_MODE, GL_REPLACE);

    const GLint xc = (mWidth  - mAndroid[0].w) / 2;
    const GLint yc = (mHeight - mAndroid[0].h) / 2;
    // const Rect updateRect(xc, yc, xc + mAndroid[0].w, yc + mAndroid[0].h);
    //qfh modify
    const Rect updateRect(xc, yc, xc + mAndroid[0].w, yc + mAndroid[0].h*2);

    glScissor(updateRect.left, mHeight - updateRect.bottom, updateRect.width(),
            updateRect.height() * 2);
    //qfh modify
    // Blend state
    glBlendFunc(GL_SRC_ALPHA, GL_ONE_MINUS_SRC_ALPHA);
    glTexEnvx(GL_TEXTURE_ENV, GL_TEXTURE_ENV_MODE, GL_REPLACE);

    const nsecs_t startTime = systemTime();
    do {
        nsecs_t now = systemTime();
        double time = now - startTime;
        float t = 4.0f * float(time / us2ns(16667)) / mAndroid[1].w;
        GLint offset = (1 - (t - floorf(t))) * mAndroid[1].w;
        GLint x = xc - offset;

        glDisable(GL_SCISSOR_TEST);
        glClear(GL_COLOR_BUFFER_BIT);

        glEnable(GL_SCISSOR_TEST);
        glDisable(GL_BLEND);
        glBindTexture(GL_TEXTURE_2D, mAndroid[1].name);
        glDrawTexiOES(x,                 yc, 0, mAndroid[1].w, mAndroid[1].h);
        glDrawTexiOES(x + mAndroid[1].w, yc, 0, mAndroid[1].w, mAndroid[1].h);

        glEnable(GL_BLEND);
        glBindTexture(GL_TEXTURE_2D, mAndroid[0].name);
        glDrawTexiOES(xc, yc, 0, mAndroid[0].w, mAndroid[0].h);
        drawClock(mClockFont, TEXT_CENTER_VALUE, yc + mAndroid[0].h);
        EGLBoolean res = eglSwapBuffers(mDisplay, mSurface);
        if (res == EGL_FALSE)
            break;

        // 12fps: don't animate too fast to preserve CPU
        const nsecs_t sleepTime = 83333 - ns2us(systemTime() - now);
        if (sleepTime > 0)
            usleep(sleepTime);

        checkExit();
    } while (!exitPending());

    glDeleteTextures(1, &mAndroid[0].name);
    glDeleteTextures(1, &mAndroid[1].name);
    //qfh add
        if (hasInitFont)
           glDeleteTextures(1, &mClockFont.texture.name);
    //qfh add
    return false;
}
opengl绘制源码分析
安卓原生的开机动画是一个渐变色,由白色到灰色的渐变,直到launcher启动完成。
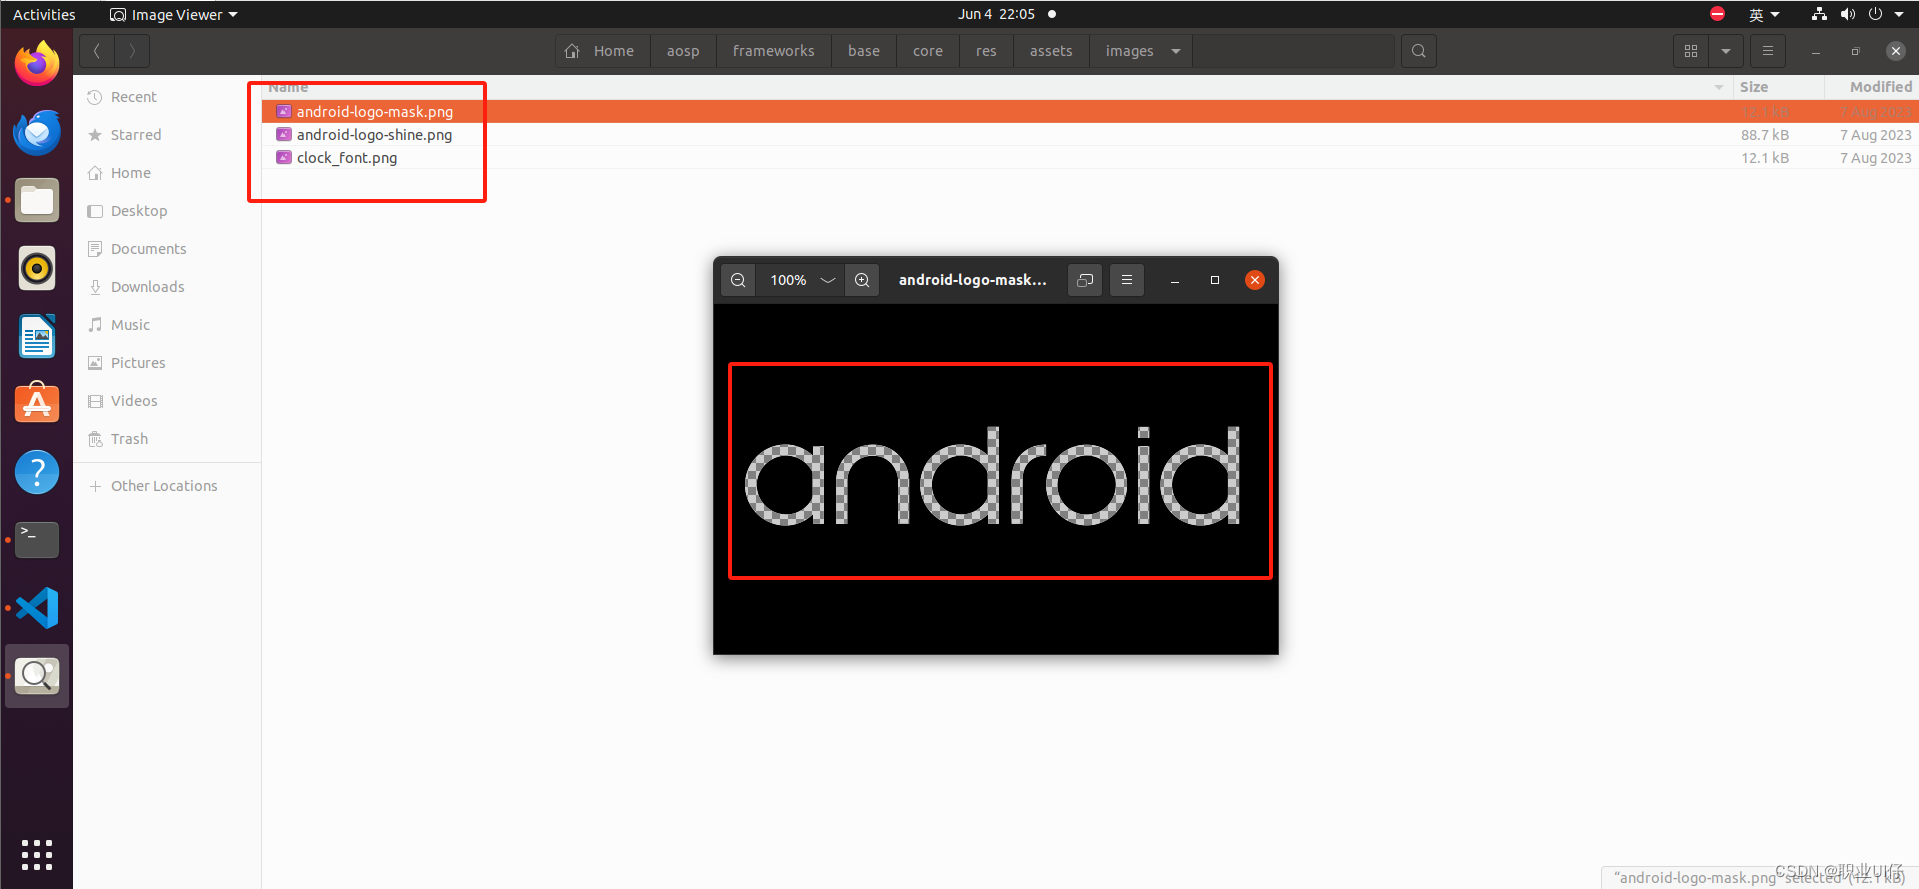
主要是这两个图片起作用
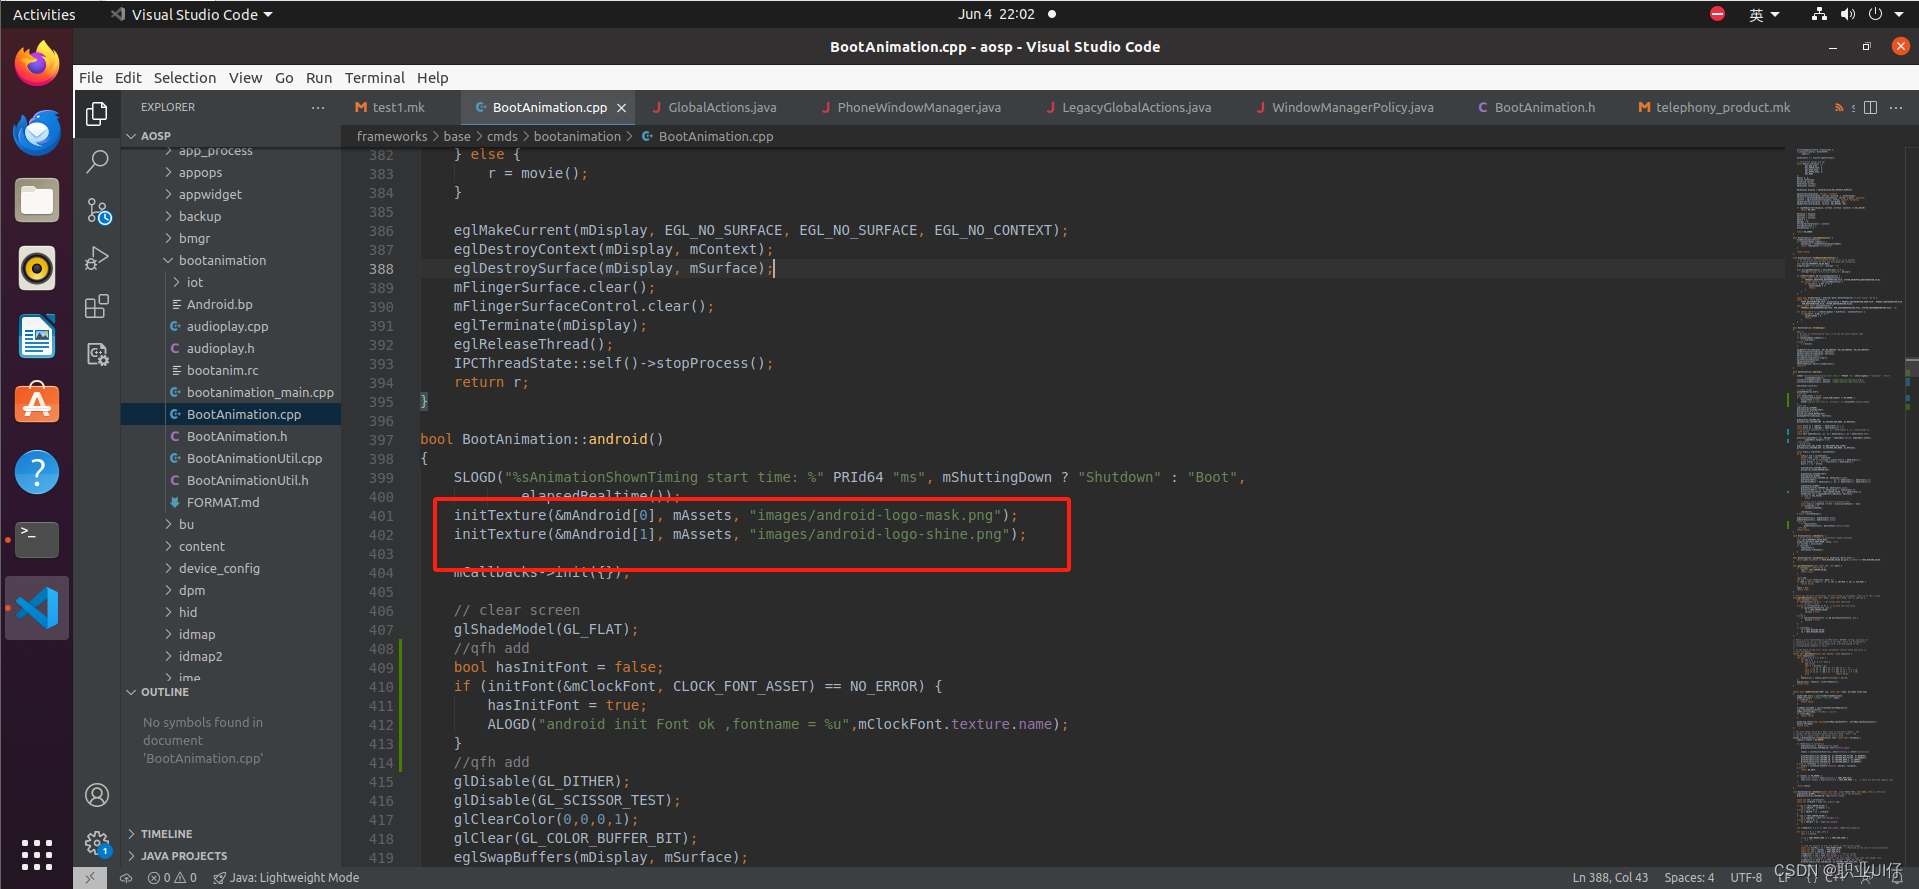
initTexture就是初始化纹理的意思,这就是aosp原生的动画图片,这个Android字样是镂空的,由其他图片去填充它,
下面这是第二张图片,也加载了
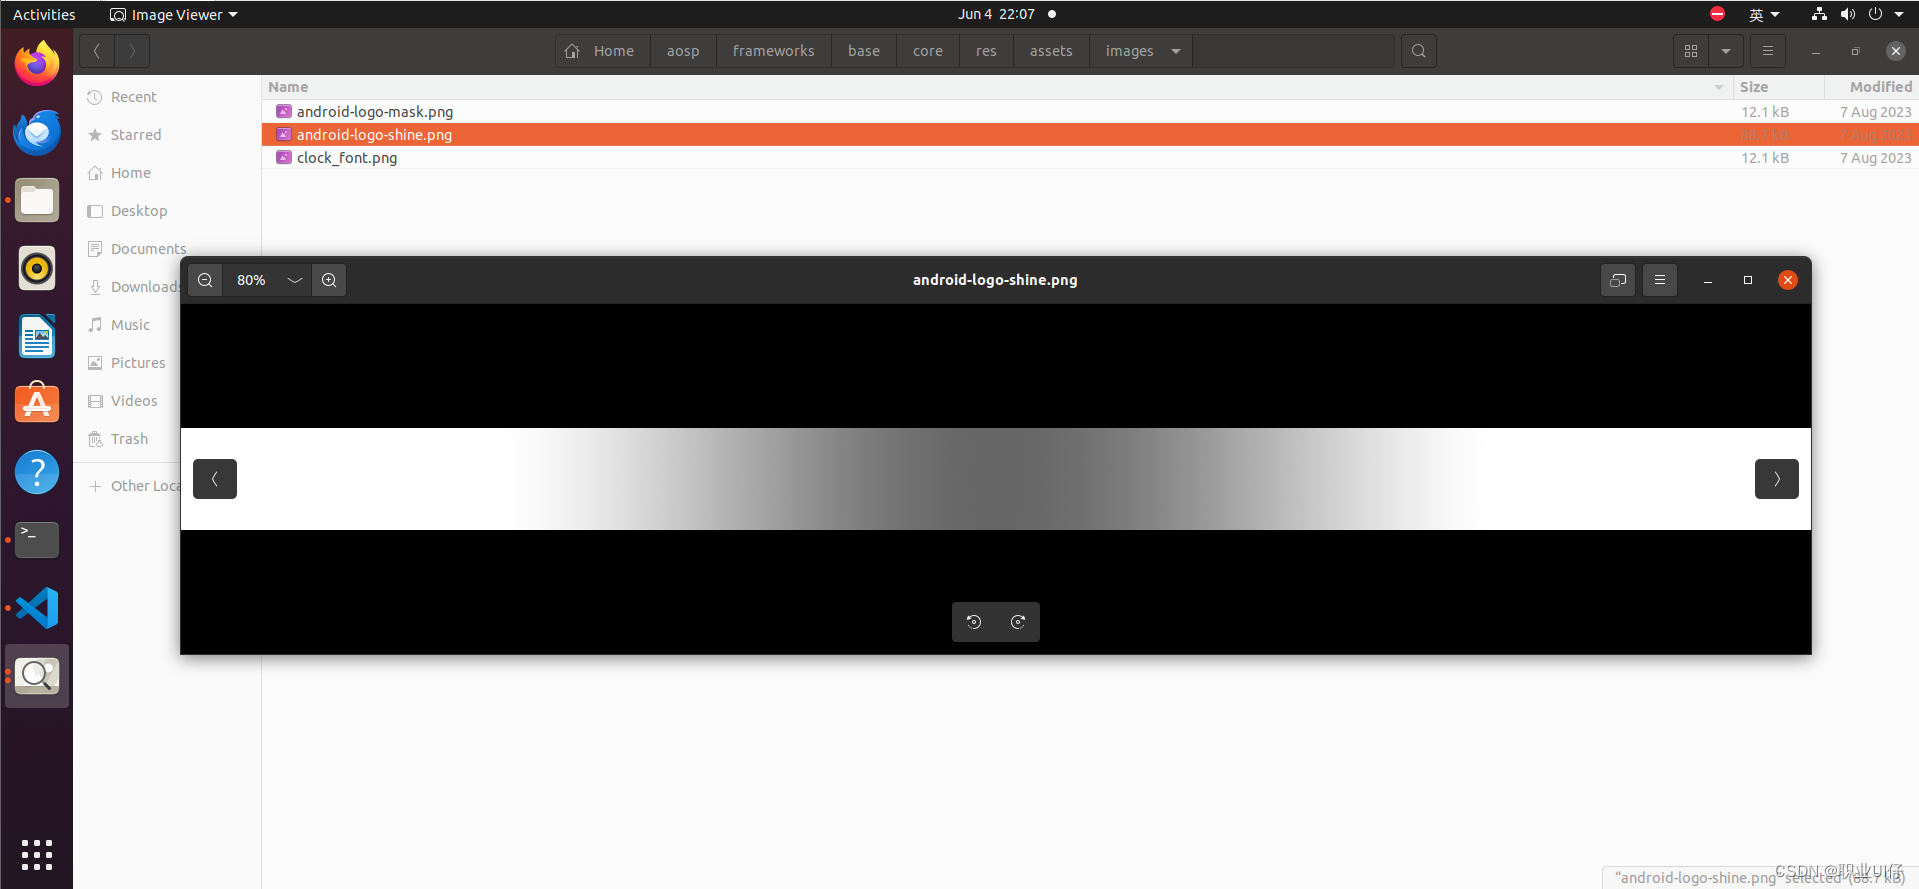
一白一灰,原理就是扫光动画,它在最底层,,两张图片叠加就可以动画了,把这张图片从左往右一直反复移动,就可看到一白一灰的渐变动画了。
看下这个方法做了什么
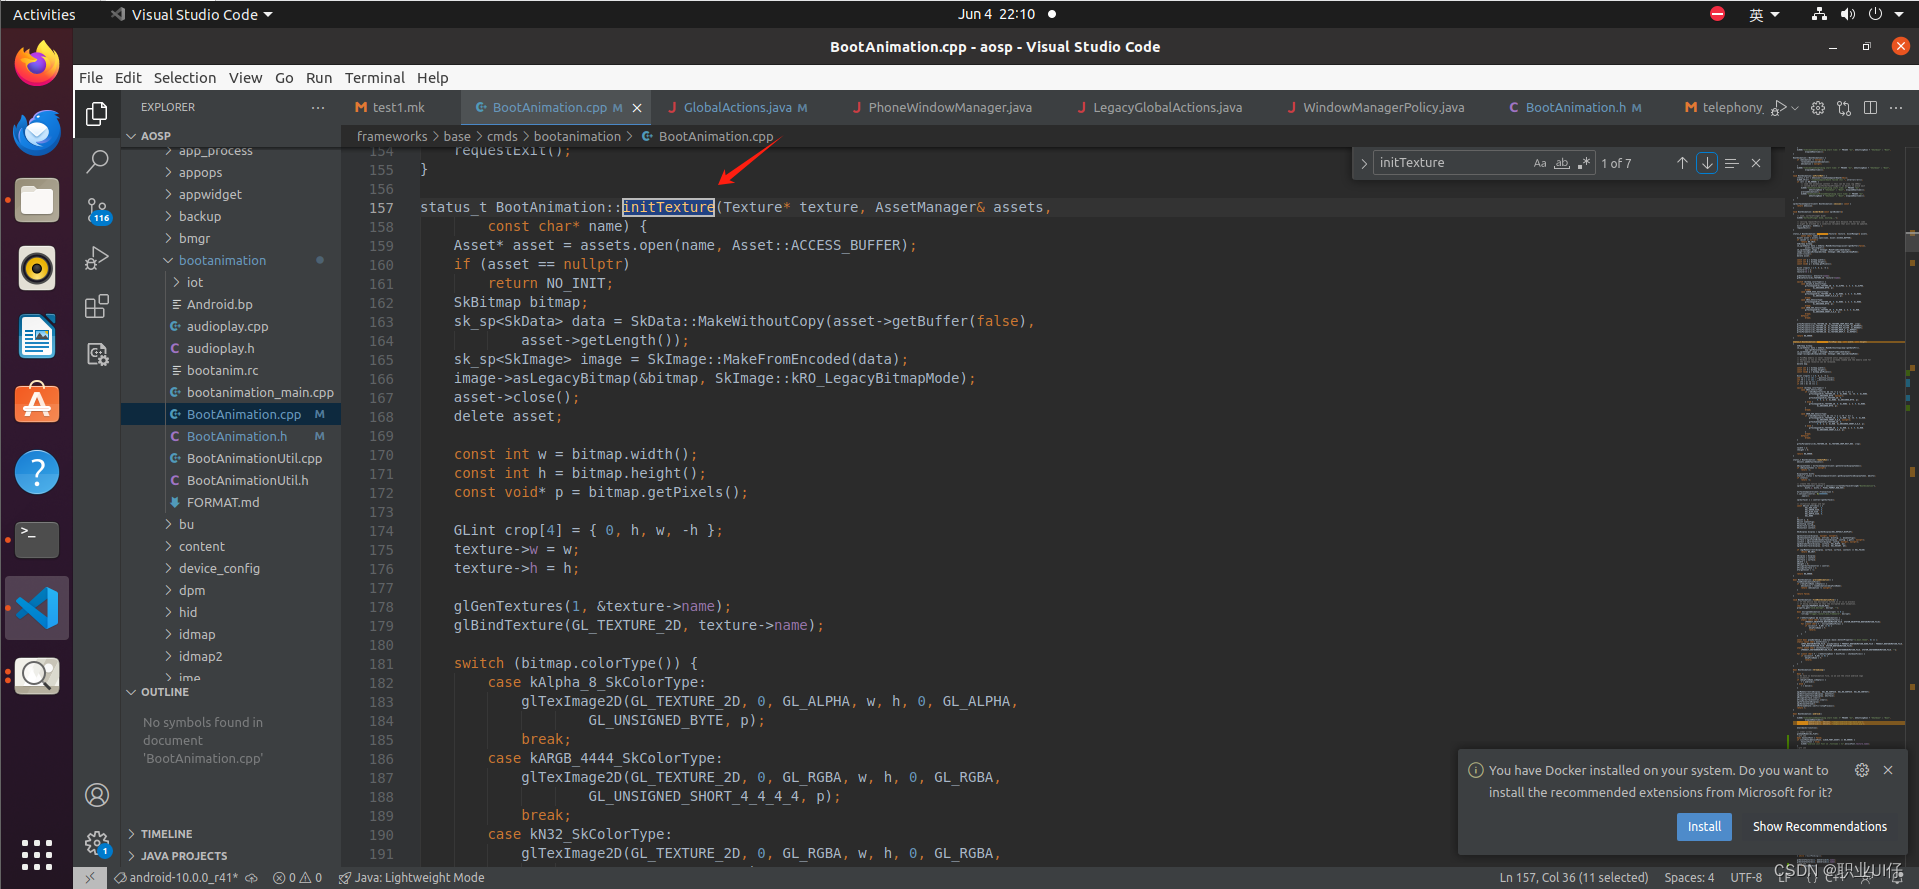
打开一个文件转换成Bitmap
Asset* asset = assets.open(name, Asset::ACCESS_BUFFER);
    if (asset == nullptr)
        return NO_INIT;
    SkBitmap bitmap;
    sk_sp<SkData> data = SkData::MakeWithoutCopy(asset->getBuffer(false),
            asset->getLength());
    sk_sp<SkImage> image = SkImage::MakeFromEncoded(data);
    image->asLegacyBitmap(&bitmap, SkImage::kRO_LegacyBitmapMode);
    asset->close();
    delete asset;
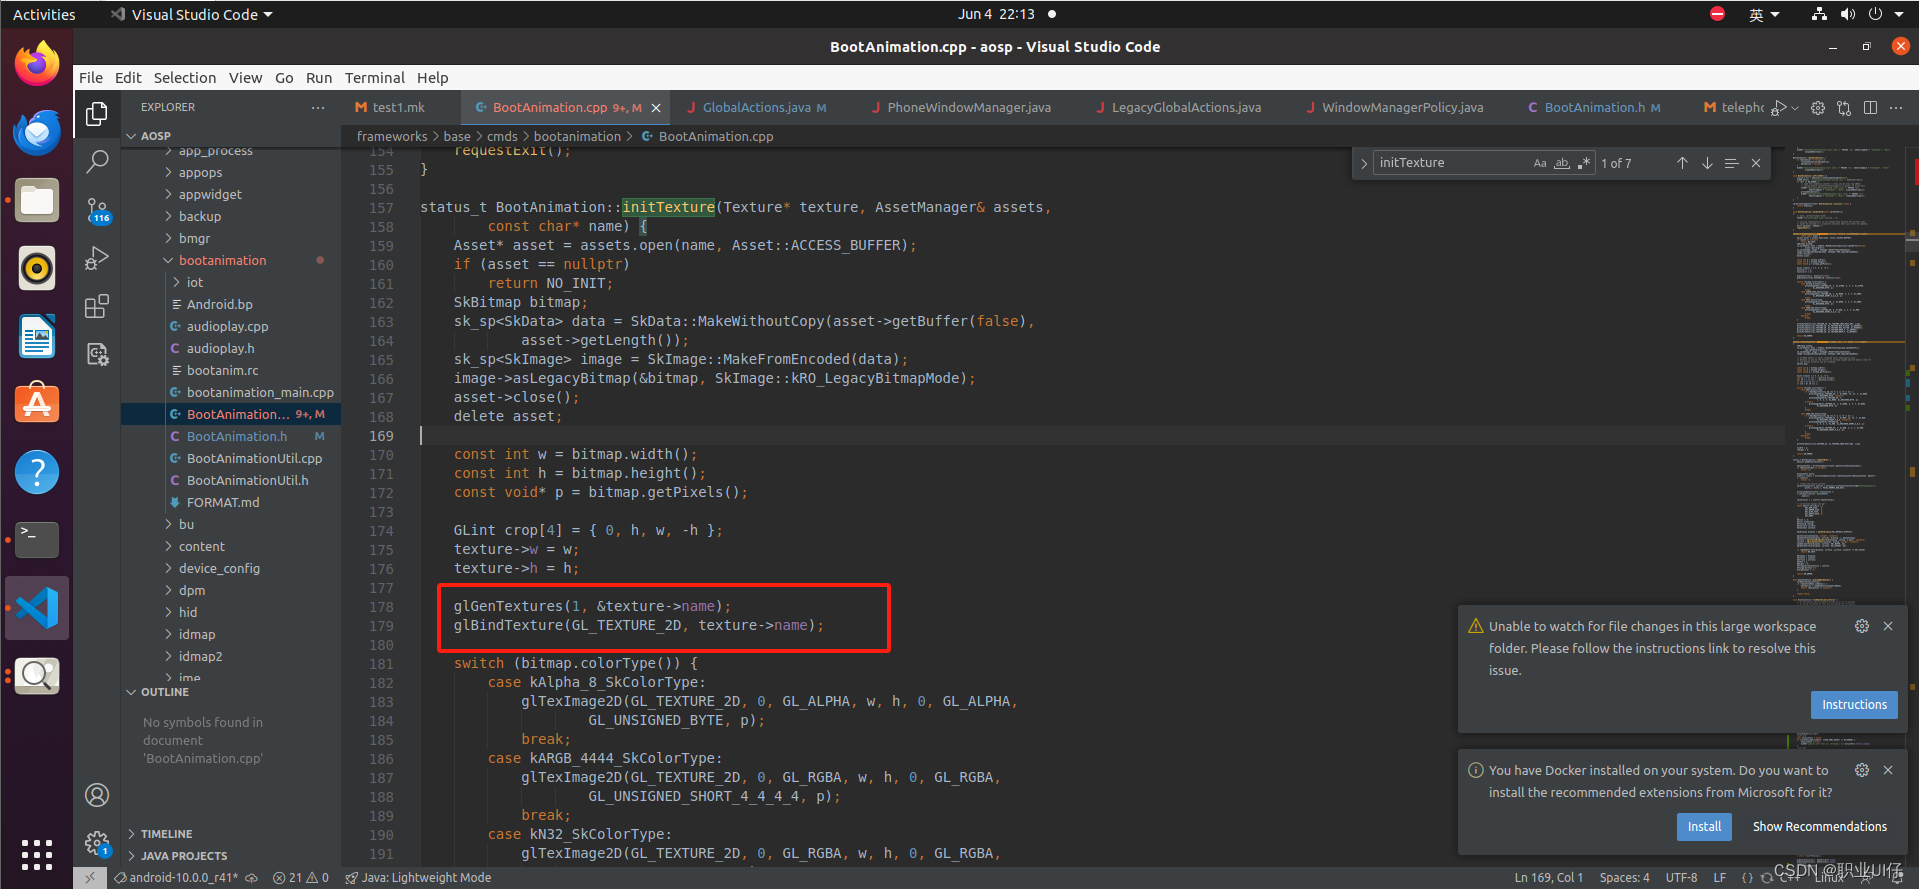
这两个才是opengl部分。绑定图片纹理图案,
glScissor(updateRect.left, mHeight - updateRect.bottom, updateRect.width(),
            updateRect.height() * 2);
裁剪区域,不完全绘制屏幕的全部区域,选择性裁剪绘制显示区域。
glBlendFunc(GL_SRC_ALPHA, GL_ONE_MINUS_SRC_ALPHA);
    glTexEnvx(GL_TEXTURE_ENV, GL_TEXTURE_ENV_MODE, GL_REPLACE);
叠加融合,就是两张图片叠加在一起绘制显示,
 do {
        nsecs_t now = systemTime();
        double time = now - startTime;
        float t = 4.0f * float(time / us2ns(16667)) / mAndroid[1].w;
        GLint offset = (1 - (t - floorf(t))) * mAndroid[1].w;
        GLint x = xc - offset;

        glDisable(GL_SCISSOR_TEST);
        glClear(GL_COLOR_BUFFER_BIT);

        glEnable(GL_SCISSOR_TEST);
        glDisable(GL_BLEND);
        //绑定,绘制mAndroid[1]的图片
        glBindTexture(GL_TEXTURE_2D, mAndroid[1].name);
        glDrawTexiOES(x,                 yc, 0, mAndroid[1].w, mAndroid[1].h);
        glDrawTexiOES(x + mAndroid[1].w, yc, 0, mAndroid[1].w, mAndroid[1].h);
		//开启融合
        glEnable(GL_BLEND);
        //绑定 mAndroid[0]的图片,
        glBindTexture(GL_TEXTURE_2D, mAndroid[0].name);
        glDrawTexiOES(xc, yc, 0, mAndroid[0].w, mAndroid[0].h);
        drawClock(mClockFont, TEXT_CENTER_VALUE, yc + mAndroid[0].h);
        //调用opengl的方法显示到屏幕上
        EGLBoolean res = eglSwapBuffers(mDisplay, mSurface);
        if (res == EGL_FALSE)
            break;

        // 12fps: don't animate too fast to preserve CPU
        const nsecs_t sleepTime = 83333 - ns2us(systemTime() - now);
        if (sleepTime > 0)
            usleep(sleepTime);

        checkExit();
    } while (!exitPending());
do,while循环绘制核心,开机动画是不断变化的,所以肯定在这个循环里实现,不断绘制的过程,绘制是有帧率的,循环不会一直执行的,因为会有功耗,所以12fps为一次绘制,一秒绘制12张图片


 1412
1412


 被折叠的 条评论
为什么被折叠?
被折叠的 条评论
为什么被折叠?
 到【灌水乐园】发言


