


Canvas入门教程
1. Canvas初识
1.1 Canvas基础
- 初始化canvas
<canvas id="canvas" width="600" height="400"><canvas>

<script>
	const canvas = document.getElementById('canvas')
	let ctx = canvas.getContext('2d')
	or
	let ctx = document.getElementById('canvas').getContext('2d')
	// ...
</script>
- 开始绘制到结束绘制
beginPath&closePath
ctx.beginPath();
// ....
ctx.closePath();
- 移动画笔
moveTo可防止绘制一条连续的路径
ctx.moveTo(x, y);
1.2 Canvas填充与路径绘制
- 绘制图形路径
strokeRect
ctx.strokeRect(x, y, 矩形宽度, 矩形高度);
or
ctx.rect(x, y, 矩形宽度, 矩形高度)
ctx.stroke()
- 清除图像
clearRect
ctx.clearRect(x, y, 清除宽度(clientWidth), 清除高度(clientHeight));
- 填充图形
fillRect
ctx.fillRect(x, y, 矩形宽度, 矩形高度);
or
ctx.rect(x, y, 矩形宽度, 矩形高度)
ctx.fill()
1.3 Canvas绘制圆
- 绘制圆形
arc(圆心x, 圆心y, radius, 开始角度, 结束角度, 逆时针&顺时针)
// false = 顺时针,true = 逆时针,默认值是false
ctx.arc(300, 200, 50, 0, Math.PI / 2, true)
ctx.fill()
- 绘制圆弧
arcTo
// ctx.arcTo(x1, y1, x2, y2, radius)
ctx.arcTo(300, 200, 50, 0)
ctx.fill()
1.4 Canvas绘制折线线段
- 绘制直线
lineTo
ctx.lineTo(x, y);
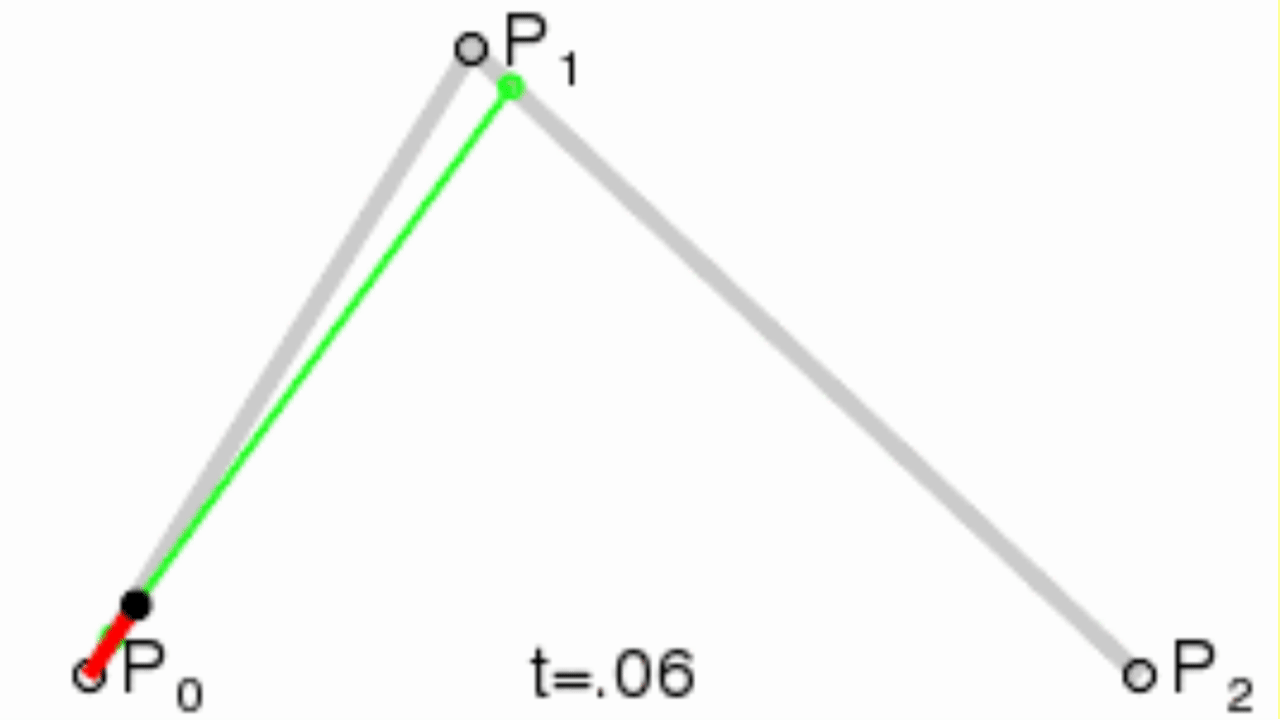
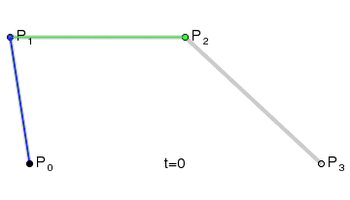
1.5 贝塞尔曲线实现
- 二次贝塞曲线
quadraticCurveTo(控制点cpx, 控制点cpy, 终点x, 终点y)
例:绘制气泡框
ctx.moveTo(200, 300)
ctx.quadraicCurveTo(150, 300, 150, 200)
ctx.quadraicCurveTo(150, 100, 300, 100)
ctx.quadraicCurveTo(450, 100, 450, 200)
ctx.quadraicCurveTo(450, 300, 250, 300)

ctx.quadraicCurveTo(250, 350, 150, 350)
ctx.quadraicCurveTo(200, 350, 200, 300)

ctx.stroke()
- 三次贝塞曲线
bezierCurveTo(控制点cpx1, 控制点cpy1, 控制点cpx2, 控制点cpy2, 终点x, 终点y)
例:绘制爱心
ctx.moveTo(300, 200)
ctx.bezierCurveTo(350, 150, 400, 240, 300, 280)

ctx.moveTo(300, 200)
ctx.bezierCurveTo(250, 150, 200, 240, 300, 280)

ctx.stroke()
1.6 封装路径 Path2D
- 通过 Path2D 封装路径,更好的开发
let heartPath = new Path2D()
heartPath.moveTo(300, 200)
heartPath.bezierCurveTo(350, 150, 400, 240, 300, 280)

heartPath.moveTo(300, 200)
heartPath.bezierCurveTo(250, 150, 200, 240, 300, 280)

ctx.stroke(heartPath)
- SVG写法 可填路径
- 位置 M x y
- 水平 h
- 垂直 v
- 回到起点 z
let polyline = new Path2D('M10 10 h 80 v 80 h-80 z')
ctx.stroke(polyline)
1.7 颜色样式控制
- 设置画笔颜色
strokeStyle
ctx.strokeStyle = '#f00'
- 设置填充颜色
fillStyle
ctx.fillStyle = 'rgba(255, 0, 0)'
- 设置全局透明度
globalAlpha
ctx.globalAlpha = 0.5
1.8 线型渐变&径向渐变&圆锥渐变
- 线型渐变
createLinearGradient
let linearGradient = ctx.createLinearGradient(0, 0, 600, 400)
linearGradient.addColorStop(0, 'red')
linearGradient.addColorStop(0.3, 'deeppink')
linearGradient.addColorStop(1, 'blue')
ctx.fillStyle = linearGradient
ctx.fillRect(100, 200, 300, 300)
- 径向渐变
createRadialGradient(startX, startY, r0, endX, endY, r1)
let radialGradient = ctx.createRadialGradient(300, 200, 0, 300, 200, 100)
radialGradient.addColorStop(0, 'red')
radialGradient.addColorStop(0.3, 'deeppink')
radialGradient.addColorStop(1, 'blue')
ctx.fillStyle = radialGradient
ctx.fillRect(100, 200, 300, 300)
- 圆锥渐变
createConicGradient(角度, x, y)
let conicGradient = ctx.createConicGradient(0, 300, 200)
conicGradient.addColorStop(0, 'red')
conicGradient.addColorStop(1, 'blue')
ctx.fillStyle = conicGradient
ctx.fillRect(0, 0, 300, 200)
- 请求动画帧
requestAnimationFrame
let index = 0
let render = () => {
	ctx.clearRect(0, 0, 600, 400)
	index += 0.01
	if (index > 1) index = 0

	let linearGradient = ctx.createLinearGradient(0, 0, 600, 400)
	linearGradient.addColorStop(0, 'red')
	linearGradient.addColorStop(index, 'deeppink')
	linearGradient.addColorStop(1, 'blue')
	ctx.fillStyle = linearGradient
	ctx.fillRect(100, 200, 300, 300)
	requestAnimationFrame(render)
}

requestAnimationFrame(render)
1.9 pattern印章填充
- 印章
createPattern(img, 重复方式)
let img = new Image()
img.src = ''

img.onload = () => {
	// img 可以是image,也可以是canvas对象
	let pattern = ctx.createPattern(img, 'no-repeat')
	ctx.fillStyle = pattern
	ctx.fillRect(0, 0, 600, 400)
}
2. Canvas初阶
2.1 线段及虚线样式
- 线段
lineTo
ctx.moveTo(200, 150)
ctx.lineTo(300, 200)
ctx.lineTo(400, 150)
- 线段宽度
lineWidth - 线条端点样式
lineCap- 平齐
butt - 半圆
round - 正方形
square
- 平齐
- 连接处样式
lineJoin- 尖角
mitter - 圆滑
round - 折断
bevel
- 尖角
- 斜截面限制
miterLimit
- 虚线
setLineDash([虚线长度, 空白长度])
- 虚线偏移
lineDashOffset
let index = 0
let render = () => {
	ctx.clearRect(0, 0, 600, 400)
	index++
	if (index > 400) index = 0

	ctx.moveTo(150, 150)
	ctx.lineTo(300, 200)
	ctx.lineTo(450, 150)

	ctx.setLineDash([20, 30])
	ctx.lineDashOffset = index
	ctx.stroke()
	requestAnimationFrame(render)
}

render()
2.2 阴影
- 设置阴影
ctx.shadowOffsetX = 10
ctx.shadowOffsetY = 10
ctx.shadowBlur = 5
ctx.shadowColor = 'rgba(255, 100, 100, 1)'
2.3 图像和视频
- 图像绘制
drawImage
- drawImage(img, x, y) 简单显示
- drawImage(img, x, y, 缩放宽度, 缩放高度) 缩放
- drawImage(img, 裁切位置x, 裁切位置y, 裁切宽度, 裁切高度, x, y, 缩放宽度, 缩放高度) 裁切
let img = new Image()
img.src = ''
img.onload = () => {
	// 1. drawImage(img, x, y)
	ctx.drawImage(img, 0, 0)
	// 2. drawImage(img, x, y, 缩放宽度, 缩放高度)
	ctx.drawImage(img, 0, 0, 600, 400)
}
- 视频绘制
let video = document.createElement('video')
video.src = ''
video.play()
let render = () => {
	ctx.drawImage(video, 0, 0, 600, 400)
	requestAnimationFrame(render)
}
render()
2.4 文字绘制
- 字体
font
ctx.font = '100px Microsoft YaHei'
- 填充渲染文字
fillText(text, x, y, 文字最大宽度)
ctx.fillText('txt', 300, 200, 100)
- 轮廓
stokeText(text, x, y, 文字最大宽度)
ctx.strokeText('txt', 300, 200)
- 文本对齐
textAlign - 文本基线对齐
textBaseLinetextBaseline top bottom alphabetic - 文本方向
direction反向:rtl - 预测文本宽度
measureText
let txt = ctx.measureText('txt')
2.5 位移&缩放&旋转&变换
注: 位移&缩放&旋转的是坐标系
- 位移
translate(x, y)
ctx.translate(100, 100)
ctx.fillRect(0, 0, 50, 50)
- 缩放
scale(h, v)
ctx.scale(5, 2)
ctx.fillRect(0, 0, 50, 50)
- 旋转
rotate(deg)
ctx.rotate(Math.PI / 6)
ctx.fillRect(0, 0, 50, 50)
- 变形
transform(a, b, c, d, e, f)
[ a c e b d f 0 0 1 ] \left[ \begin{matrix} a & c & e \\ b & d & f \\ 0 & 0 & 1 \end{matrix} \right] ab0cd0ef1
- a 和 b为水平坐标轴
- c 和 d为垂直坐标轴
- e 和 f为位移距离
ctx.transform(1, 0, 0, 1, 100, 100)
ctx.fillRect(0, 0, 50, 50)
2.6 合成图像
图层合成
[globalCompositeOperation](https://developer.mozilla.org/zh-CN/docs/Web/API/CanvasRenderingContext2D/globalCompositeOperation)
source-over默认设置,并在现有画布上下文之上绘制新图形。source-in在新图形和目标画布重叠的地方绘制。其他的都是透明的。source-out在不与现有画布内容重叠的地方绘制新图形。source-atop新图形只在与现有画布内容重叠的地方绘制。destination-over在现有的画布内容后面绘制新的图形。destination-in现有的画布内容保持在新图形和现有画布内容重叠的位置。其他的都是透明的。destination-out现有内容保持在新图形不重叠的地方。destination-atop现有的画布只保留与新图形重叠的部分,新的图形是在画布内容后面绘制的。lighter两个重叠图形的颜色是通过颜色值相加来确定的。copy只显示新图形。xor图像中,那些重叠和正常绘制之外的其他地方是透明的。multiply将顶层像素与底层相应像素相乘,结果是一幅更黑暗的图片。screen像素被倒转,相乘,再倒转,结果是一幅更明亮的图片。overlaymultiply 和 screen 的结合,原本暗的地方更暗,原本亮的地方更亮。darken保留两个图层中最暗的像素。lighten保留两个图层中最亮的像素。color-dodge将底层除以顶层的反置。color-burn将反置的底层除以顶层,然后将结果反过来。hard-light屏幕相乘(A combination of multiply and screen)类似于叠加,但上下图层互换了soft-light用顶层减去底层或者相反来得到一个正值。difference一个柔和版本的强光(hard-light)。纯黑或纯白不会导致纯黑或纯白。exclusion和 difference 相似,但对比度较低。hue保留了底层的亮度(luma)和色度(chroma),同时采用了顶层的色调(hue)。saturation保留底层的亮度(luma)和色调(hue),同时采用顶层的色度(chroma)。color保留了底层的亮度(luma),同时采用了顶层的色调 (hue) 和色度 (chroma)。luminosity保持底层的色调(hue)和色度(chroma),同时采用顶层的亮度(luma)。
2.7 裁剪
裁剪路径
clip
let heartPath = new Path2D()
heartPath.moveTo(300, 200)
heartPath.bezierCurveTo(350, 150, 400, 240, 300, 280)

heartPath.moveTo(300, 200)
heartPath.bezierCurveTo(250, 150, 200, 240, 300, 280)

ctx.clip(heartPath)
ctx.stroke(heartPath)

let img = new Image()
img.src = ''
img.onload = () => {
	ctx.drawImage(img, 0, 0, 600, 400)
}
2.8 状态的保存&恢复
- 状态保存
save
ctx.fillStyle = 'red'
ctx.fillRect(0, 0, 100, 100)
ctx.save()
- 状态恢复
restore
ctx.fillStyle = 'red'
ctx.fillRect(0, 0, 100, 100)
ctx.save()

ctx.fillStyle = 'blue'
ctx.fillRect(100, 100, 100, 100)
ctx.save()

ctx.fillStyle = 'yellow'
ctx.fillRect(200, 200, 100, 100)

ctx.restore()
ctx.fillRect(300, 300, 100, 100) // color: blue

ctx.restore()
ctx.fillRect(400, 400, 100, 100) // color: red
2.9 像素操作
- 获取像素
getImageData - 渲染像素
putImageData(imagedata, dx, dy, dirtyX<可选>, dirtyY<可选>, dirtyWidth<可选>, dirtyHeight<可选>)
let img = new Image()
img.src = ''
img.onload = () => {
	ctx.drawImage(img, 0, 0, 600, 400)
}

/* 将图层改成灰色 */
// 获取像素数据
let imageData = ctx.getImageData(0, 0, 600, 400)
// 循环修改数据
for (let i = 0; i < imageData.data.length; i += 4) {
	// 计算当前像素的平均值
	let avg = (imageData.data[i] + imageData.data[i + 1] + imageData.data[i + 2]) / 3
	imageData.data[i] = avg
	imageData.data[i + 1] = avg
	imageData.data[i + 2] = avg
	imageData.data[i + 3] = 255
}
// 将修改的数据重新渲染到画布上
ctx.putImageData(imageData, 0, 0)
2.10 封装绘制
- 封装体
class Heart {
  constructor(x, y) {
    this.x = x
    this.y = y
  }

  draw () {

    this.heartPath = new Path2D()
    // 起点
    this.heartPath.moveTo(this.x, this.y)
    this.heartPath.bezierCurveTo(this.x + 50, this.y - 50, this.x + 100, this.y + 40, this.x, this.y + 80)
    this.heartPath.moveTo(this.x, this.y)
    this.heartPath.bezierCurveTo(this.x - 50, this.y - 50, this.x - 100, this.y + 40, this.x, this.y + 80)

    ctx.save()
    ctx.fillStyle = `rgba(${Math.floor(Math.random() * 255)}, ${Math.floor(Math.random() * 255)}, ${Math.floor(Math.random() * 255)}, 0.5)`
    ctx.fill(this.heartPath)
    // ctx.translate(this.x, this.y)
    ctx.scale(0.5, 0.5)
    // ctx.stroke(heartPath)
    ctx.restore()
  }
}

const render = () => {
  ctx.clearRect(0, 0, 600, 400)
  let heart = new Heart(300, 200)
  heart.draw()
  requestAnimationFrame(render)
}

render()
3. Canvas实例
3.1 时钟绘制
<canvas id="canvas" width="800" height="600"></canvas>
let ctx = document.getElementById('canvas').getContext('2d')

const render = () => {
	ctx.clearRect(0, 0, 800, 600)
	ctx.save()
	ctx.translate(400, 300)
	ctx.rotate(-Math.PI / 2)
	ctx.lineCap = 'round'

	ctx.save()
	for (let i = 0; i < 12; i++) {
		ctx.beginPath()
		ctx.moveTo(170, 0)
		ctx.lineTo(190, 0)
		ctx.lineWidth = 8
		ctx.strokeStyle = 'gray'
		ctx.stroke()
		ctx.closePath()
		ctx.rotate(2 * Math.PI / 12)
	}
	ctx.restore()

	ctx.save()
	for (let i = 0; i < 60; i++) {
		ctx.beginPath()
		ctx.moveTo(180, 0)
		ctx.lineTo(190, 0)
		ctx.lineWidth = 2
		ctx.strokeStyle = 'gray'
		ctx.stroke()
		ctx.closePath()
		ctx.rotate(2 * Math.PI / 60)
	}
	ctx.restore()

	// 获取当前时间
	let time = new Date()

	// 绘制秒针
	ctx.save()
	let second = time.getSeconds()
	ctx.rotate(2 * Math.PI / 60 * second)
	ctx.beginPath()
	ctx.moveTo(-30, 0)
	ctx.lineTo(190, 0)
	ctx.lineWidth = 2
	ctx.strokeStyle = 'red'
	ctx.stroke()
	ctx.closePath()
	ctx.restore()

	// 绘制分针
	ctx.save()
	let minute = time.getMinutes()
	ctx.rotate(2 * Math.PI / 60 * minute + 2 * Math.PI / 60 / 60 * second)
	ctx.beginPath()
	ctx.moveTo(-20, 0)
	ctx.lineTo(130, 0)
	ctx.lineWidth = 4
	ctx.strokeStyle = '#888'
	ctx.stroke()
	ctx.closePath()
	ctx.restore()

	// 绘制时针
	ctx.save()
	let hour = time.getHours() >= 12 ? time.getHours() - 12 : time.getHours()
	ctx.rotate(2 * Math.PI / 12 * hour + 2 * Math.PI / 12 / 60 * minute + 2 * Math.PI / 12 / 60 / 60 * second)
	ctx.beginPath()
	ctx.moveTo(-15, 0)
	ctx.lineTo(110, 0)
	ctx.lineWidth = 8
	ctx.strokeStyle = '#333'
	ctx.stroke()
	ctx.closePath()
	ctx.restore()

	ctx.restore()
	requestAnimationFrame(render)
}
render()


 753
753


 被折叠的 条评论
为什么被折叠?
被折叠的 条评论
为什么被折叠?
 到【灌水乐园】发言


