


文章目录
16.1 使用Centos 6部署PXE+Kickstart,安装centos6系统,ks文件自定义
16.1.1 准备工作
关闭selinux重启
[root@pxe ~]# setenforce 0
[root@pxe ~]# service iptables stop
安装软件
[root@pxe ~]# yum install -y tftp-server dhcp syslinux vsftpd
[root@pxe ~]# yum groupinstall -y "X Window System" "Desktop"
[root@pxe ~]# yum install -y system-config-kickstart
挂载光盘
[root@pxe ~]# mkdir  /var/ftp/pub/cd
[root@pxe ~]# mount -t iso9660 /dev/cdrom /var/ftp/pub/cd
注:最好写到/etc/fstab中
16.1.2 配置tftp服务
[root@pxe ~]# vim /etc/xinetd.d/tftp

disable = no

[root@pxe ~]# service xinetd restart
Stopping xinetd: [  OK  ]
Starting xinetd: [  OK  ]
16.1.3 配置dhcp服务
[root@pxe ~]# vim /etc/dhcp/dhcpd.conf

subnet 192.168.217.0 netmask 255.255.255.0 {
  range 192.168.217.200 192.168.217.210;
  option domain-name-servers 114.114.114.114;
  option routers 192.168.217.165;
  next-server 192.168.217.165;
  filename "pxelinux.0";
}

[root@pxe ~]# service dhcpd restart
Starting dhcpd: [  OK  ]
16.1.4 配置ftp服务
[root@pxe ~]# service vsftpd restart
Shutting down vsftpd: [  OK  ]
Starting vsftpd for vsftpd: [  OK  ]
16.1.5 准备相关文件
[root@pxe ~]# mkdir /var/lib/tftpboot/pxelinux.cfg
[root@pxe ~]# cp /usr/share/syslinux/pxelinux.0  /var/lib/tftpboot/
[root@pxe ~]# cp /var/ftp/pub/cd/images/pxeboot/initrd.img /var/ftp/pub/cd/images/pxeboot/vmlinuz  /var/lib/tftpboot/
[root@pxe ~]# cp /var/ftp/pub/cd/isolinux/isolinux.cfg /var/lib/tftpboot/pxelinux.cfg/default
内容/var/lib/tftpboot/pxelinux.cfg/default
default linux
label linux
  menu label ^Install CentOS6.9
  menu default
  kernel vmlinuz
  append initrd=initrd.img ks=ftp://192.168.217.165/pub/ks.cfg
16.1.6 部署ks文件
打开图形化界面
[root@pxe ~]# init 5
打开/usr/bin/system-config-kickstart
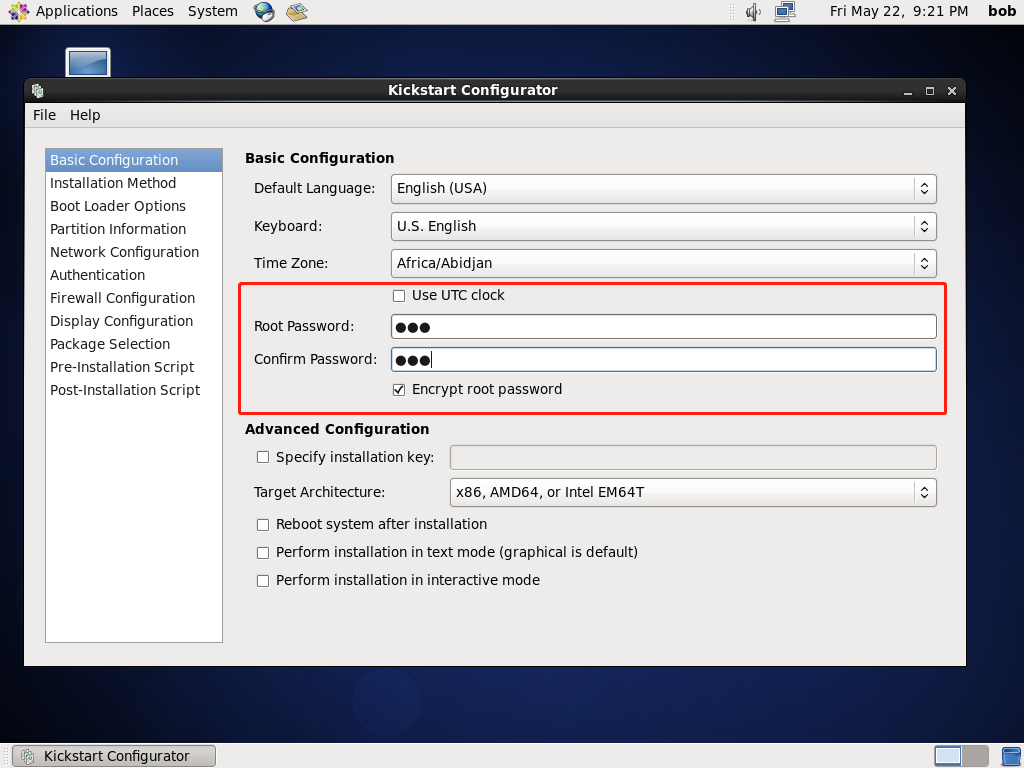
设置密码
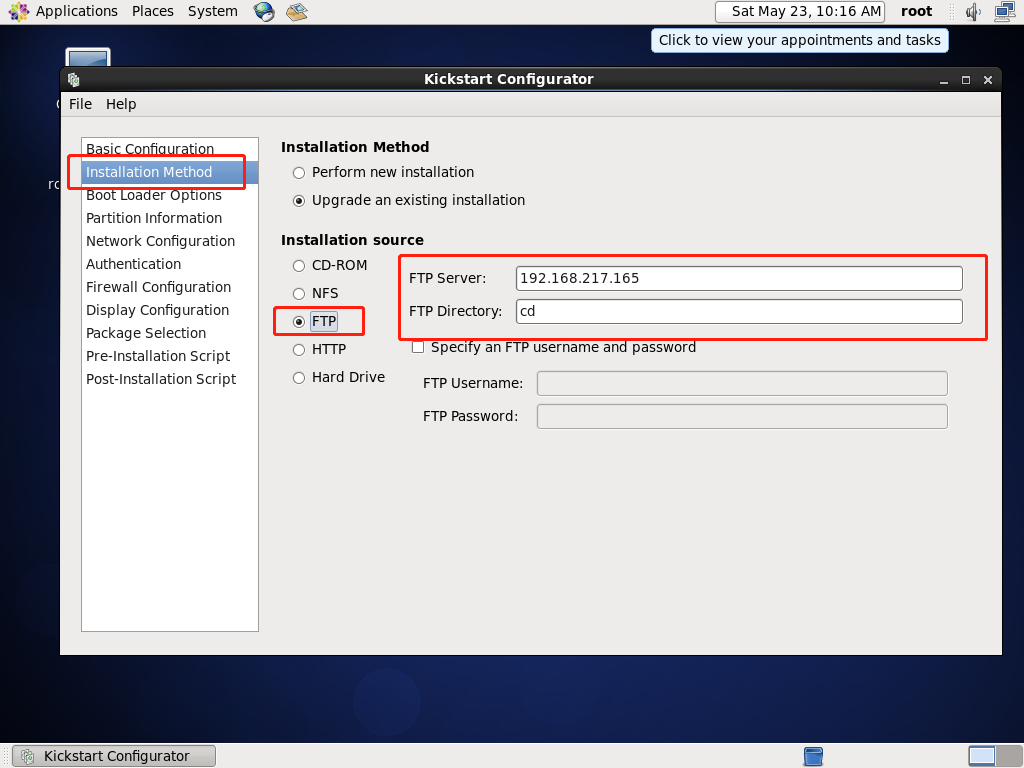
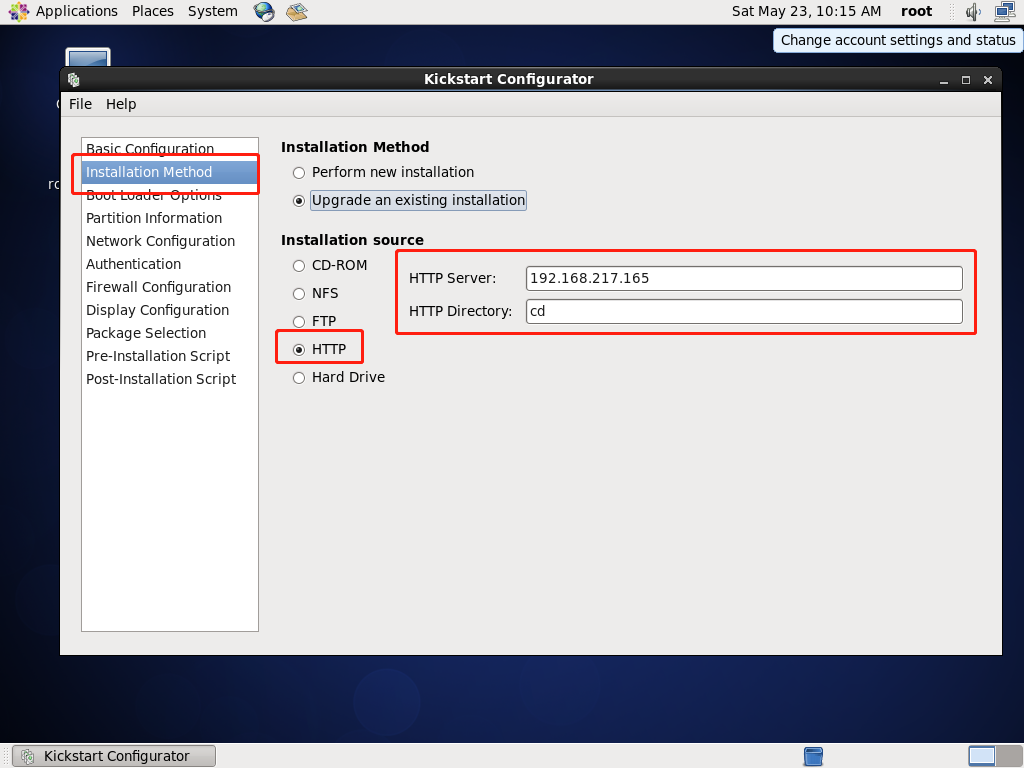
指定安装源
可以是FTP的,也可以是HTTP的
如果是HTTP的,就要把挂载的目录复制到/var/www/html/目录下
开启http服务
cp -r cp -rp /var/ftp/pub/cd /var/www/html
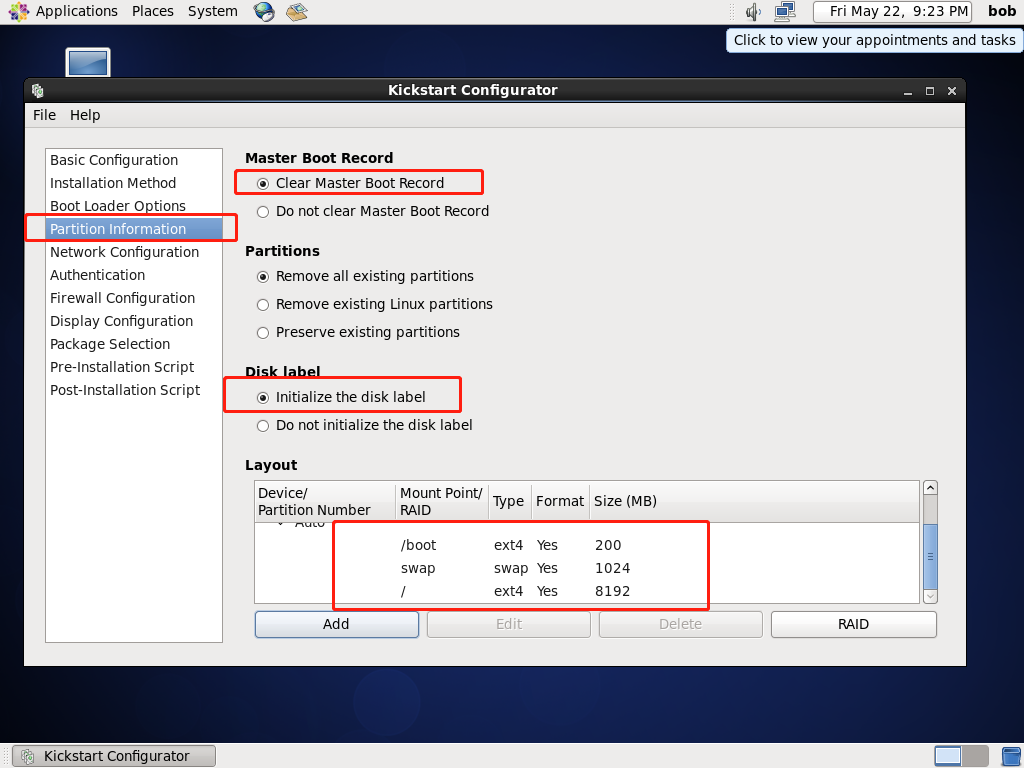
手动分区
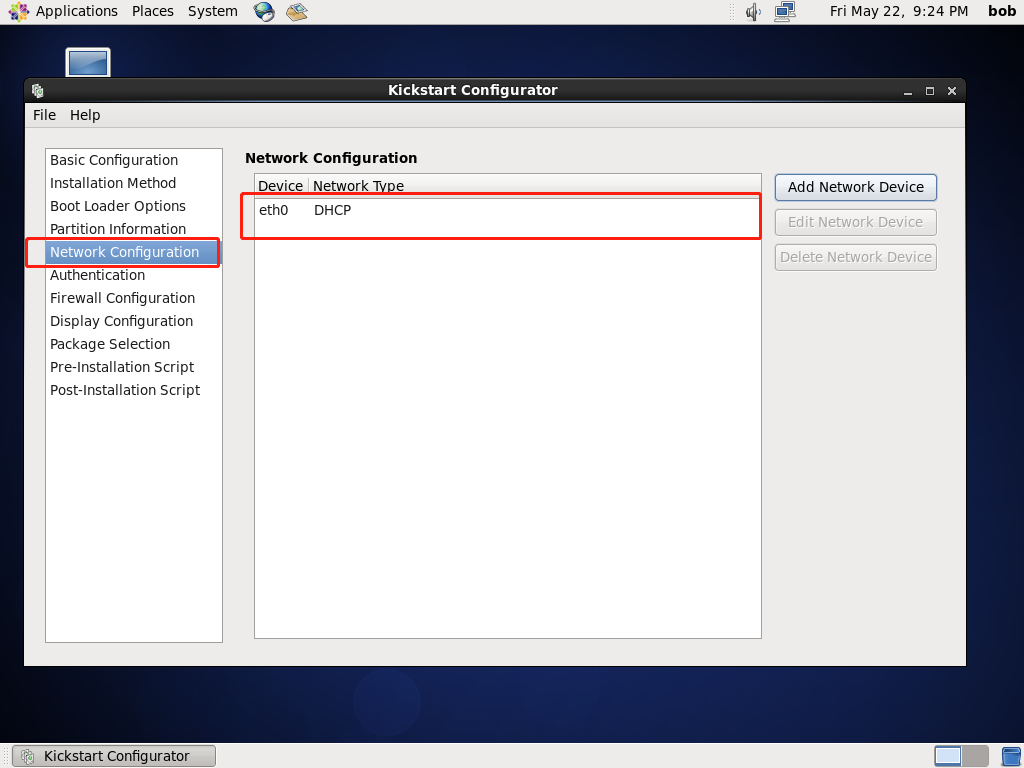
设置网卡
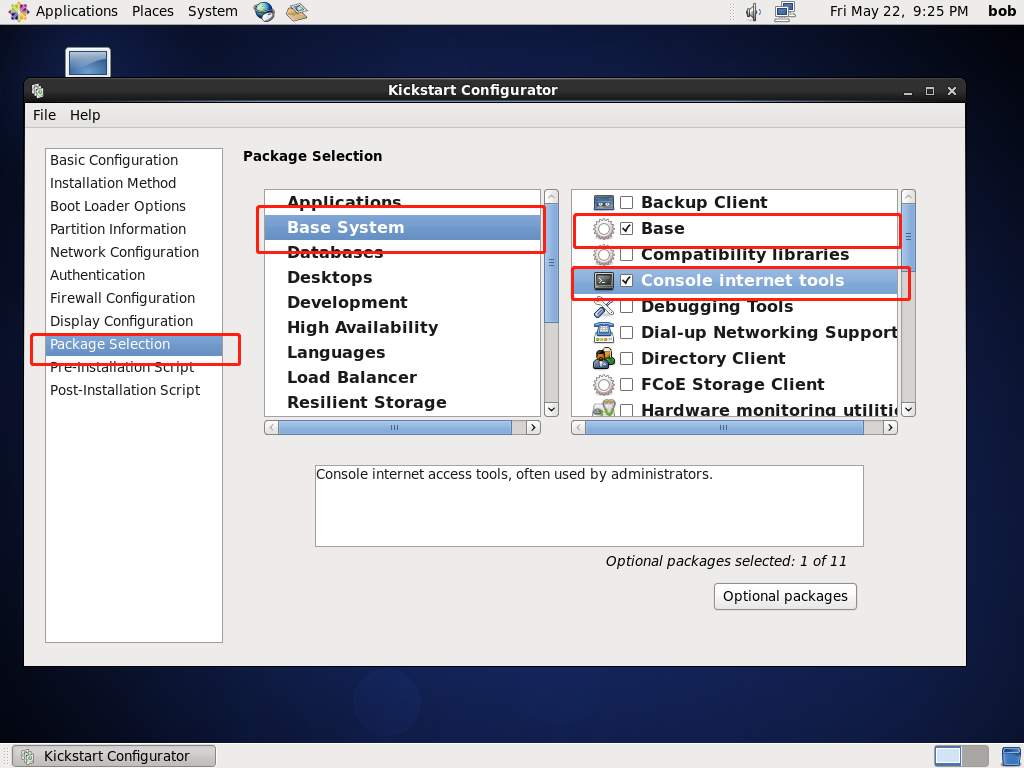
选择安装两个基础包
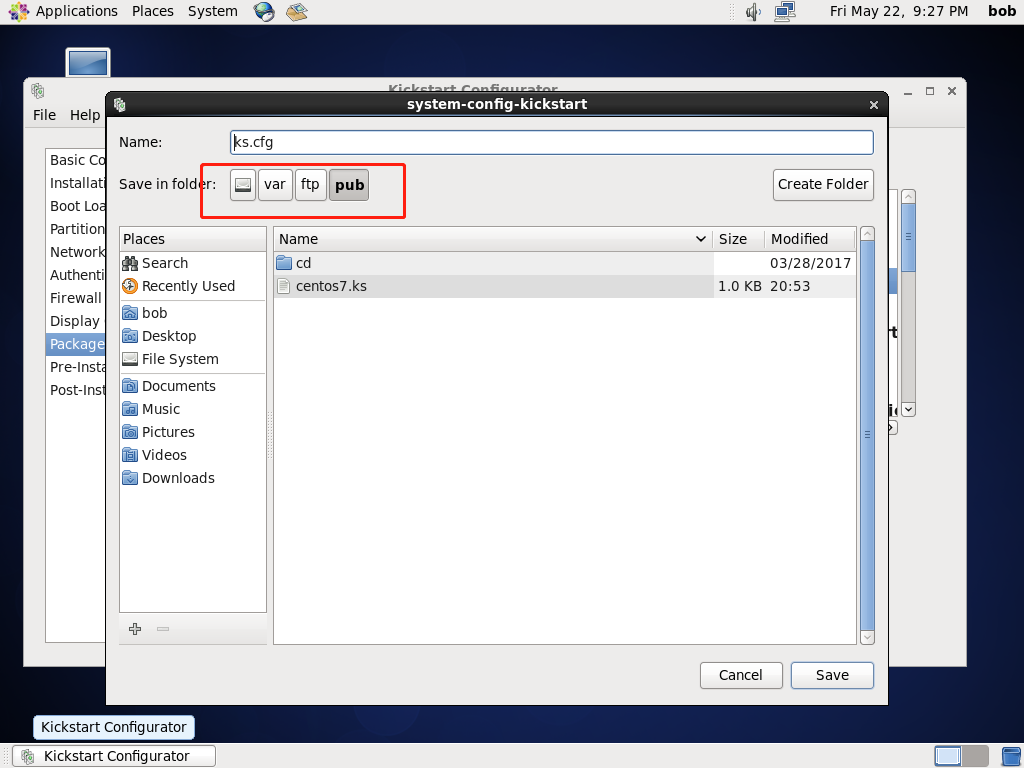
保存ctrl +s
路径要选择
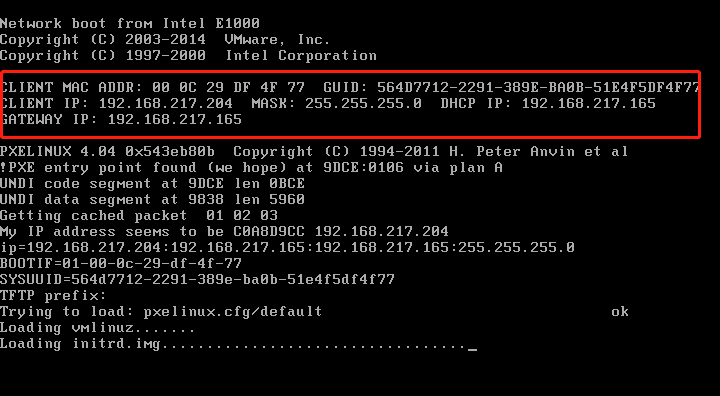
新建虚拟机
可以看到这里分配的ip为192.168.217.200,
16.1.7 完成
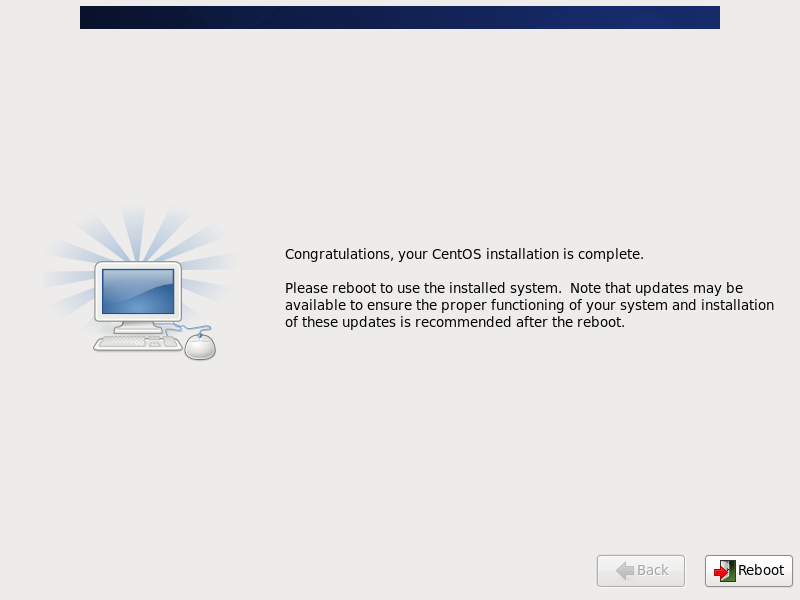
完成
16.2 使用Centos 7部署Cobbler,安装Centos7与Ubuntu
16.2.1 Cobbler安装
基础环境部署
关闭selinux:
[root@localhost ~]# setenforce 0
[root@localhost ~]# systemctl stop firewalld
[root@localhost ~]# systemctl disable firewalld
yum配置:
#讲旧仓库配置转移到某目录中
[root@localhost ~]# mkdir /etc/yum.repos.d/old && mv /etc/yum.repos.d/C* /etc/yum.repos.d/old/

#安装wget,添加aliyun Base仓库及epel仓库
[root@localhost ~]# yum install -y wget
[root@localhost ~]# wget -O /etc/yum.repos.d/CentOS-Base.repo http://mirrors.aliyun.com/repo/Centos-7.repo
[root@localhost ~]# wget -O /etc/yum.repos.d/epel.repo http://mirrors.aliyun.com/repo/epel-7.repo
16.2.2 Cobbler服务部署
安装服务:
[root@localhost ~]# yum install cobbler cobbler-web dhcp tftp-server pykickstart httpd xinetd python-ctypes -y
服务自启动:
[root@localhost ~]# systemctl enable httpd
[root@localhost ~]# systemctl enable xinetd
[root@localhost ~]# systemctl enable rsyncd
[root@localhost ~]# systemctl enable tftp
[root@localhost ~]# systemctl enable cobblerd
启动服务:
[root@localhost ~]# systemctl restart httpd
[root@localhost ~]# systemctl restart xinetd
[root@localhost ~]# systemctl restart tftp
[root@localhost ~]# systemctl restart cobblerd
 最低0.47元/天 解锁文章


 7万+
7万+


 被折叠的 条评论
为什么被折叠?
被折叠的 条评论
为什么被折叠?
 到【灌水乐园】发言


