


一、函数介绍
头文件
#include <ESP8266WiFi.h>
#include <ESP8266WiFiMulti.h>
ESP8266WiFi.h库主要用于连接单个WiFi网络。如果需要连接到多个WiFi网络,例如在需要切换不同网络或者备用网络时,可以使用ESP8266WiFiMulti.h头文件,它是ESP8266WiFi.h的扩展
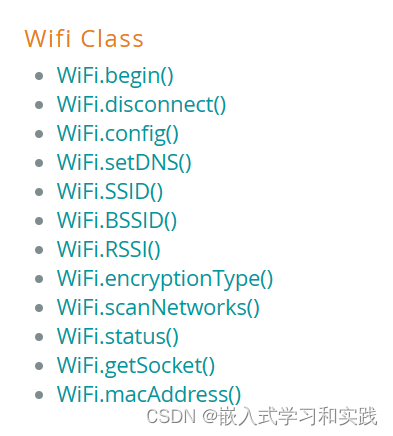
ESP8266WiFi.h头文件的内容如下:
/*
 ESP8266WiFi.h - esp8266 Wifi support.
 Based on WiFi.h from Arduino WiFi shield library.
 Copyright (c) 2011-2014 Arduino.  All right reserved.
 Modified by Ivan Grokhotkov, December 2014

 This library is free software; you can redistribute it and/or
 modify it under the terms of the GNU Lesser General Public
 License as published by the Free Software Foundation; either
 version 2.1 of the License, or (at your option) any later version.

 This library is distributed in the hope that it will be useful,
 but WITHOUT ANY WARRANTY; without even the implied warranty of
 MERCHANTABILITY or FITNESS FOR A PARTICULAR PURPOSE.  See the GNU
 Lesser General Public License for more details.

 You should have received a copy of the GNU Lesser General Public
 License along with this library; if not, write to the Free Software
 Foundation, Inc., 51 Franklin St, Fifth Floor, Boston, MA  02110-1301  USA
 */

#ifndef WiFi_h
#define WiFi_h

#include <stdint.h>

extern "C" {
#include <wl_definitions.h>
}

#include "IPAddress.h"

#include "ESP8266WiFiType.h"
#include "ESP8266WiFiSTA.h"
#include "ESP8266WiFiAP.h"
#include "ESP8266WiFiScan.h"
#include "ESP8266WiFiGeneric.h"

#include "WiFiClient.h"
#include "WiFiServer.h"
#include "WiFiServerSecure.h"
#include "WiFiClientSecure.h"
#include "BearSSLHelpers.h"
#include "CertStoreBearSSL.h"

#ifdef DEBUG_ESP_WIFI
#ifdef DEBUG_ESP_PORT
#define DEBUG_WIFI(fmt, ...) DEBUG_ESP_PORT.printf_P( (PGM_P)PSTR(fmt), ##__VA_ARGS__ )
#endif
#endif

#ifndef DEBUG_WIFI
#define DEBUG_WIFI(...) do { (void)0; } while (0)
#endif

extern "C" void enableWiFiAtBootTime (void) __attribute__((noinline));

class ESP8266WiFiClass : public ESP8266WiFiGenericClass, public ESP8266WiFiSTAClass, public ESP8266WiFiScanClass, public ESP8266WiFiAPClass {
    public:

        // workaround same function name with different signature
        using ESP8266WiFiGenericClass::channel;

        using ESP8266WiFiSTAClass::SSID;
        using ESP8266WiFiSTAClass::RSSI;
        using ESP8266WiFiSTAClass::BSSID;
        using ESP8266WiFiSTAClass::BSSIDstr;

        using ESP8266WiFiScanClass::SSID;
        using ESP8266WiFiScanClass::encryptionType;
        using ESP8266WiFiScanClass::RSSI;
        using ESP8266WiFiScanClass::BSSID;
        using ESP8266WiFiScanClass::BSSIDstr;
        using ESP8266WiFiScanClass::channel;
        using ESP8266WiFiScanClass::isHidden;

        // ----------------------------------------------------------------------------------------------
        // ------------------------------------------- Debug --------------------------------------------
        // ----------------------------------------------------------------------------------------------

    public:

        void printDiag(Print& dest);

        friend class WiFiClient;
        friend class WiFiServer;

};

extern ESP8266WiFiClass WiFi;

#endif
ESP8266 Wi-Fi库是基于ESP8266 SDK开发的。
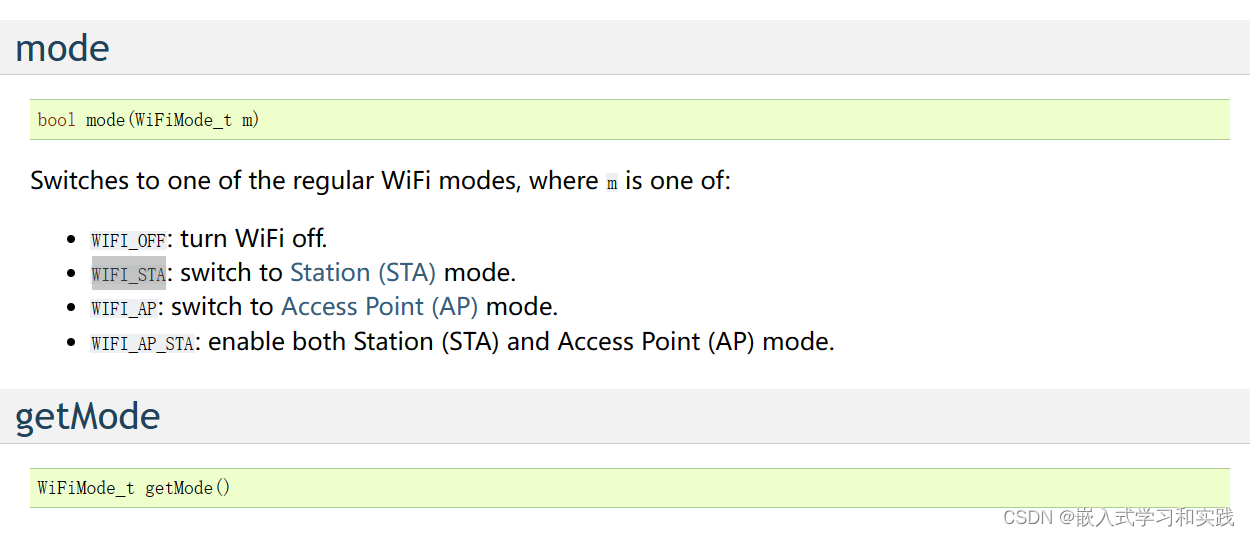
WiFi.mode函数
WiFi.mode()//设置模式
WiFi.begin函数
WiFi.begin("network-name", "pass-to-network");
WiFi.status函数
WiFi.status()//获取连接是否已经完成,连接过程可能需要几秒钟
WiFi.localIP函数
WiFi.localIP()//获取DHCP分配给ESP模块的IP地址
根据以上一个函数,可以编写一个测试代码,来进行esp8266的联网功能测试。
二、测试例程
测试代码如下:
#include <ESP8266WiFi.h>

void setup()
{
  Serial.begin(115200);
  Serial.println();

  WiFi.begin("network-name", "pass-to-network");

  Serial.print("Connecting");
  while (WiFi.status() != WL_CONNECTED)
  {
    delay(500);
    Serial.print(".");
  }
  Serial.println();

  Serial.print("Connected, IP address: ");
  Serial.println(WiFi.localIP());
}

void loop() {}
如果串口输出只有越来越多的点… ,原因可能是输入的Wi-Fi网络的名称或密码就不正确。可通过PC或手机从头连接到该Wi-Fi网络,验证名称和密码。
注意:如果建立了连接,然后由于某种原因失去了连接,ESP将自动重新连接到上次使用的接入点,一旦它再次联机。这将由Wi-Fi库自动完成,无需任何用户干预。

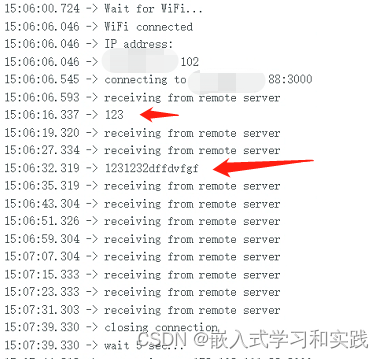
编写复杂点的功能,连接tcp服务器,并进行通信,代码示例如下:
#include <ESP8266WiFi.h>
#include <ESP8266WiFiMulti.h>

#ifndef STASSID
#define STASSID "your-ssid"
#define STAPSK "your-password"
#endif

const char* ssid = STASSID;
const char* password = STAPSK;

const char* host = "djxmmx.net";
const uint16_t port = 3000;

ESP8266WiFiMulti WiFiMulti;

void setup() {
  Serial.begin(115200);

  // We start by connecting to a WiFi network
  WiFi.mode(WIFI_STA);
  WiFiMulti.addAP(ssid, password);

  Serial.println();
  Serial.println();
  Serial.print("Wait for WiFi... ");

  while (WiFiMulti.run() != WL_CONNECTED) {
    Serial.print(".");
    delay(500);
  }

  Serial.println("");
  Serial.println("WiFi connected");
  Serial.println("IP address: ");
  Serial.println(WiFi.localIP());

  delay(500);
}


void loop() {
  Serial.print("connecting to ");
  Serial.print(host);
  Serial.print(':');
  Serial.println(port);

  // Use WiFiClient class to create TCP connections
  WiFiClient client;

  if (!client.connect(host, port)) {
    Serial.println("connection failed");
    Serial.println("wait 5 sec...");
    delay(5000);
    return;
  }

  // This will send the request to the server
  client.println("hello from ESP8266");
  while(client.status() == ESTABLISHED)
  {
    // read back one line from server
    Serial.println("receiving from remote server");
    String line = client.readStringUntil('\r');
    if(!line.isEmpty())
    {
      Serial.println(line);
      client.println(line);
    }
    delay(3000);
  }

  // not testing 'client.connected()' since we do not need to send data here
  //while (client.available()) {
    char ch = static_cast<char>(client.read());
    Serial.print(ch);
    //String line = client.readStringUntil('\r');
    //Serial.println(line);
 // }

  Serial.println("closing connection");
  client.stop();

  Serial.println("wait 5 sec...");
  delay(5000);
}
参考:
https://arduino-esp8266.readthedocs.io/en/latest/index.html
https://github.com/esp8266/Arduino.git
https://arduino-esp8266.readthedocs.io/en/2.4.2/


 被折叠的 条评论
为什么被折叠?
被折叠的 条评论
为什么被折叠?
 到【灌水乐园】发言


