


一、准备
安装 USB 驱动
- ESP32 开发板通常使用 CP210x 或 CH340 芯片,需安装对应驱动:
https://docs.espressif.com/projects/esp-idf/zh_CN/latest/esp32/get-started/establish-serial-connection.html
*Windows 平台下 ESP32开发环境搭建
开发环境搭建,可参考:
Windows 平台下 ESP32开发环境搭建
https://mp.weixin.qq.com/s/z4sIBKdK9CeX87X4qaxzTA
二、工程创建的方法
方法 1:
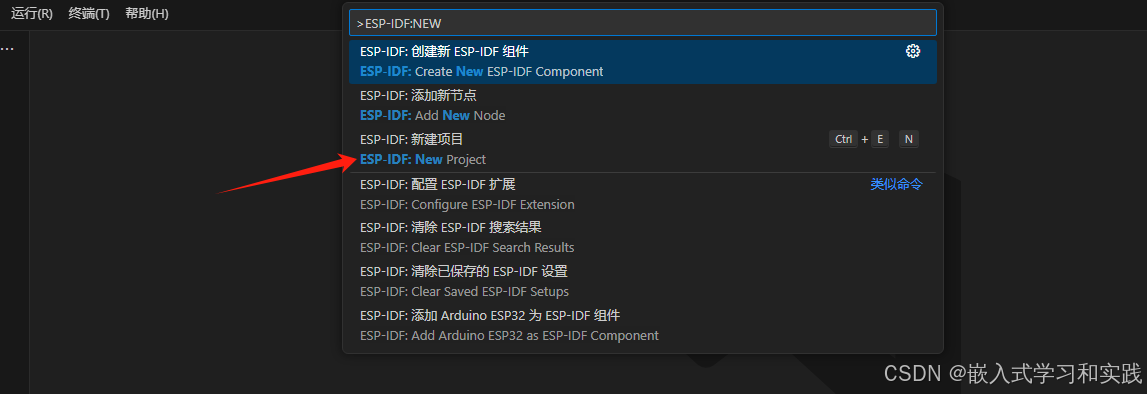
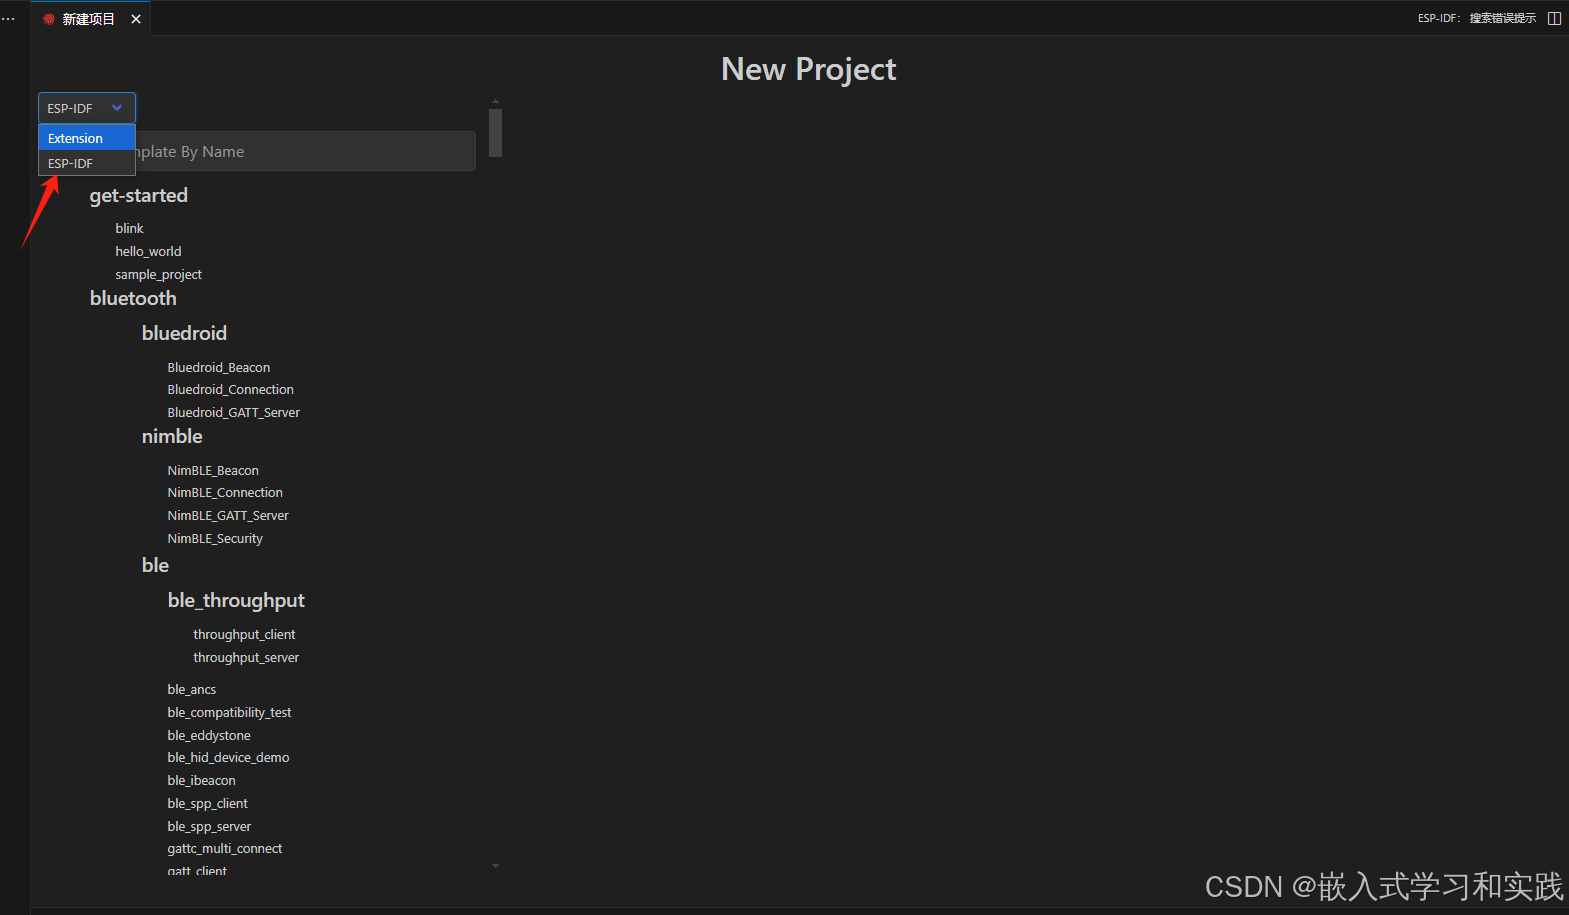
步骤 1:创建新项目
-
按
F1或者Ctrl + Shift + P 打开命令面板,输入ESP-IDF: New Project。
-
选择框架
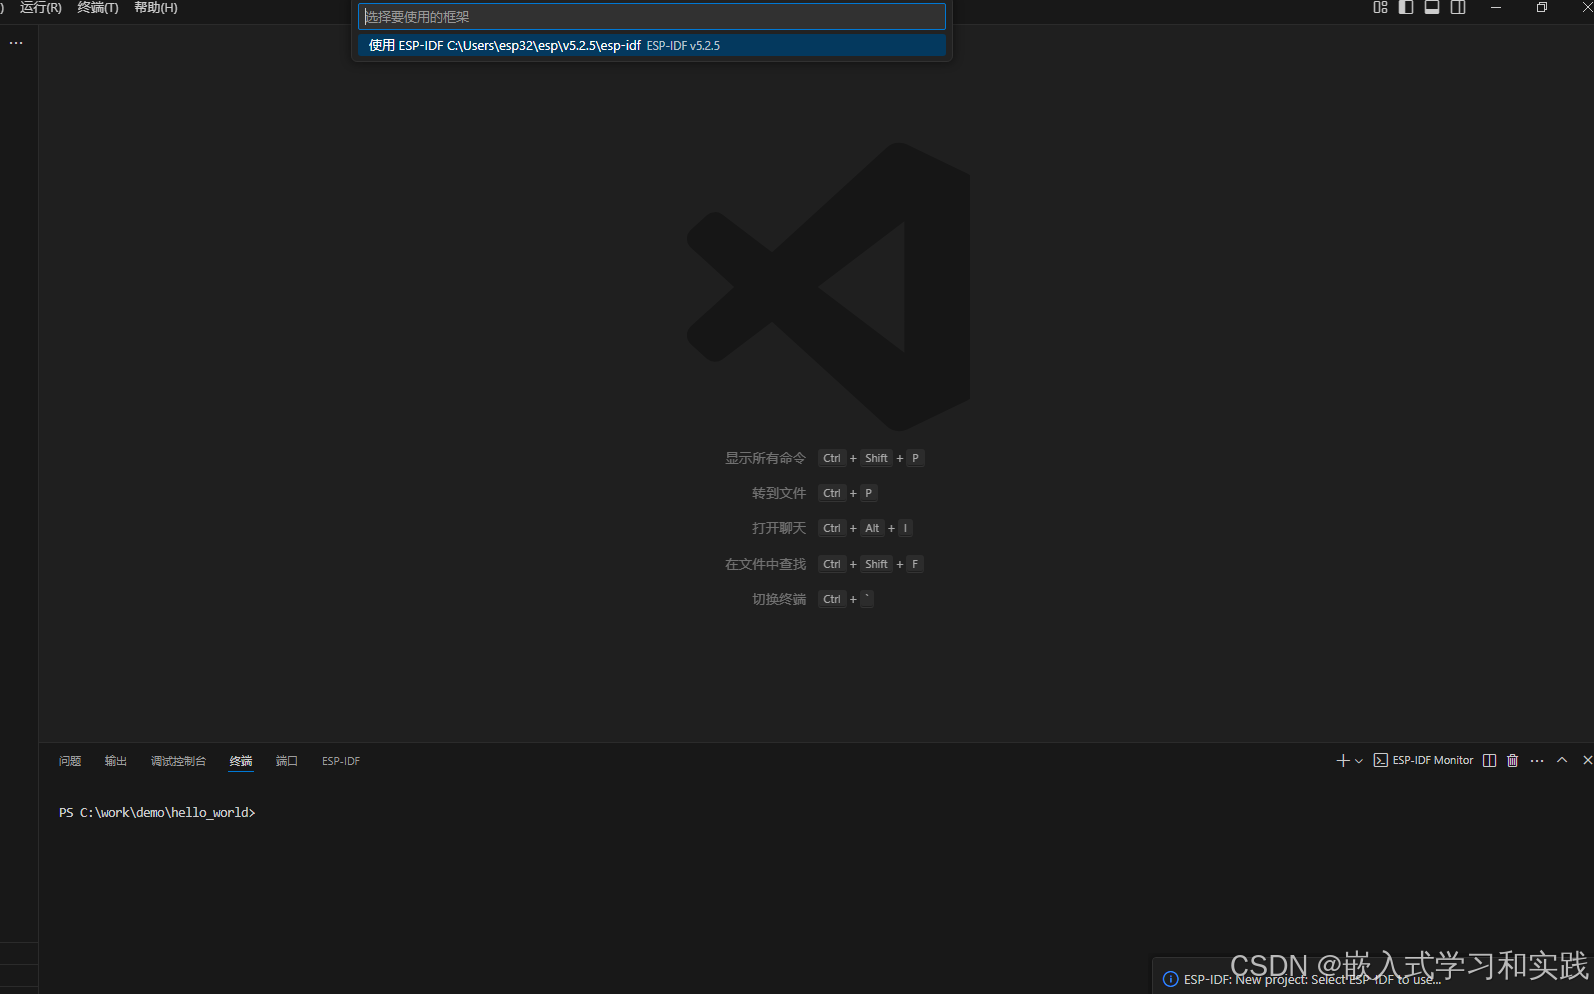
-
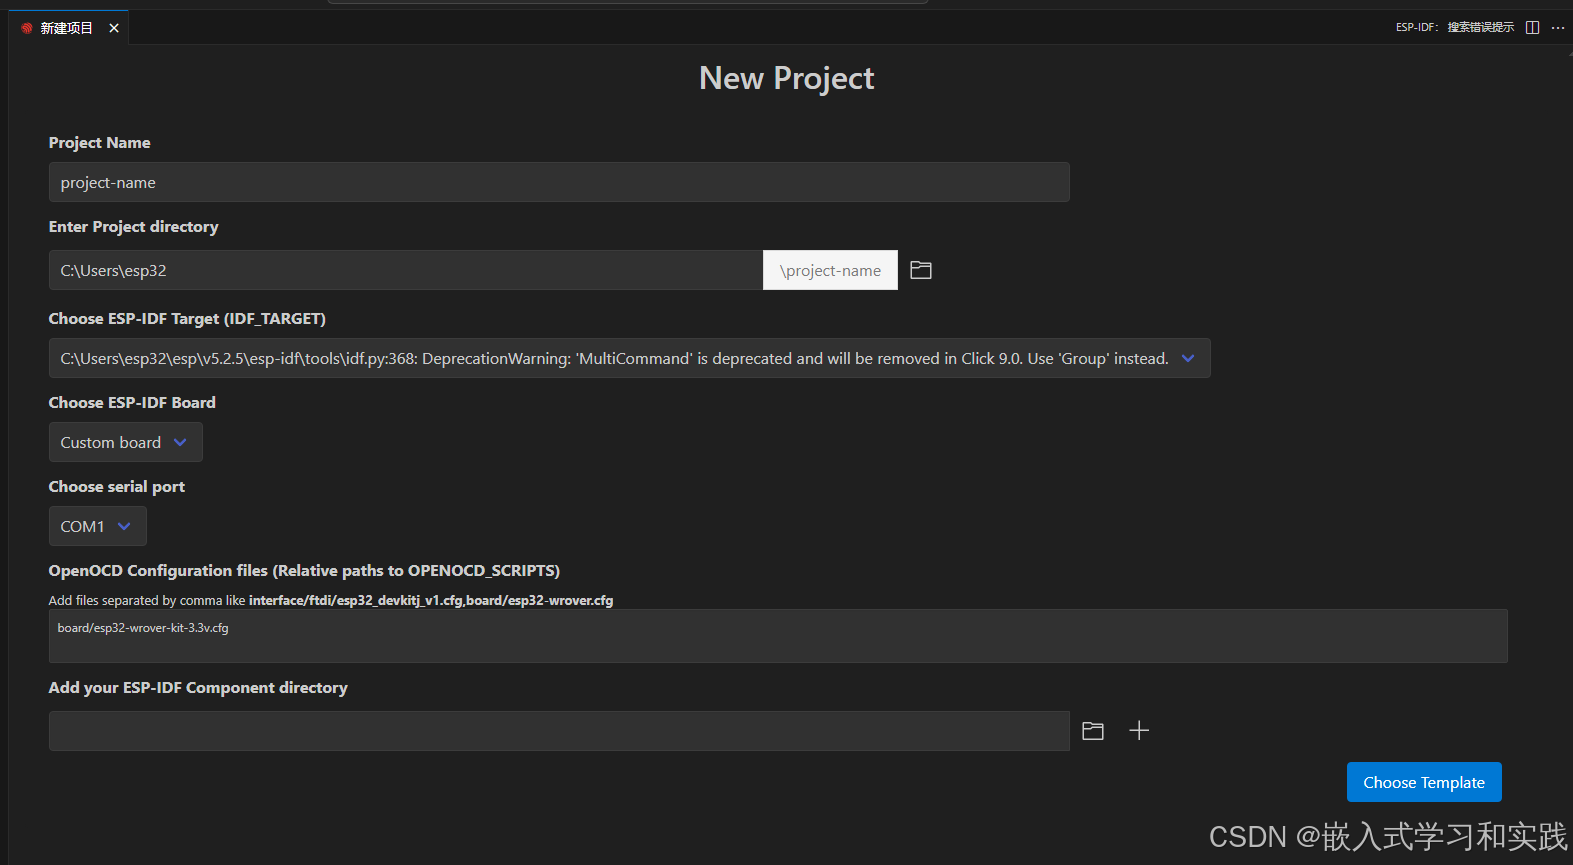
配置项目:
- 指定工程名(如
hello示例)。 - 指定项目路径和名称。
- 选择 ESP32 目标芯片(如
ESP32)。 - 选择模板
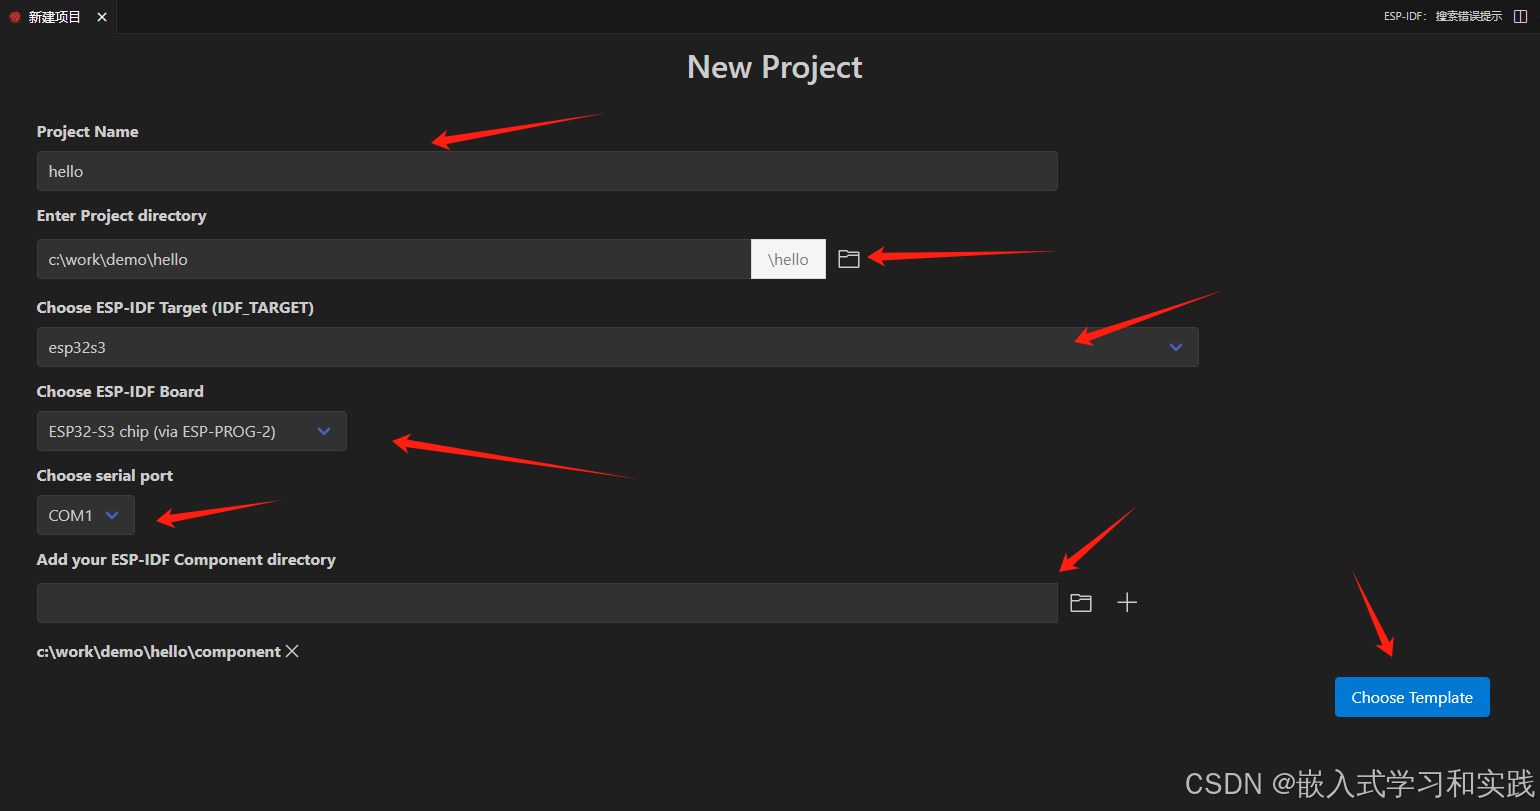
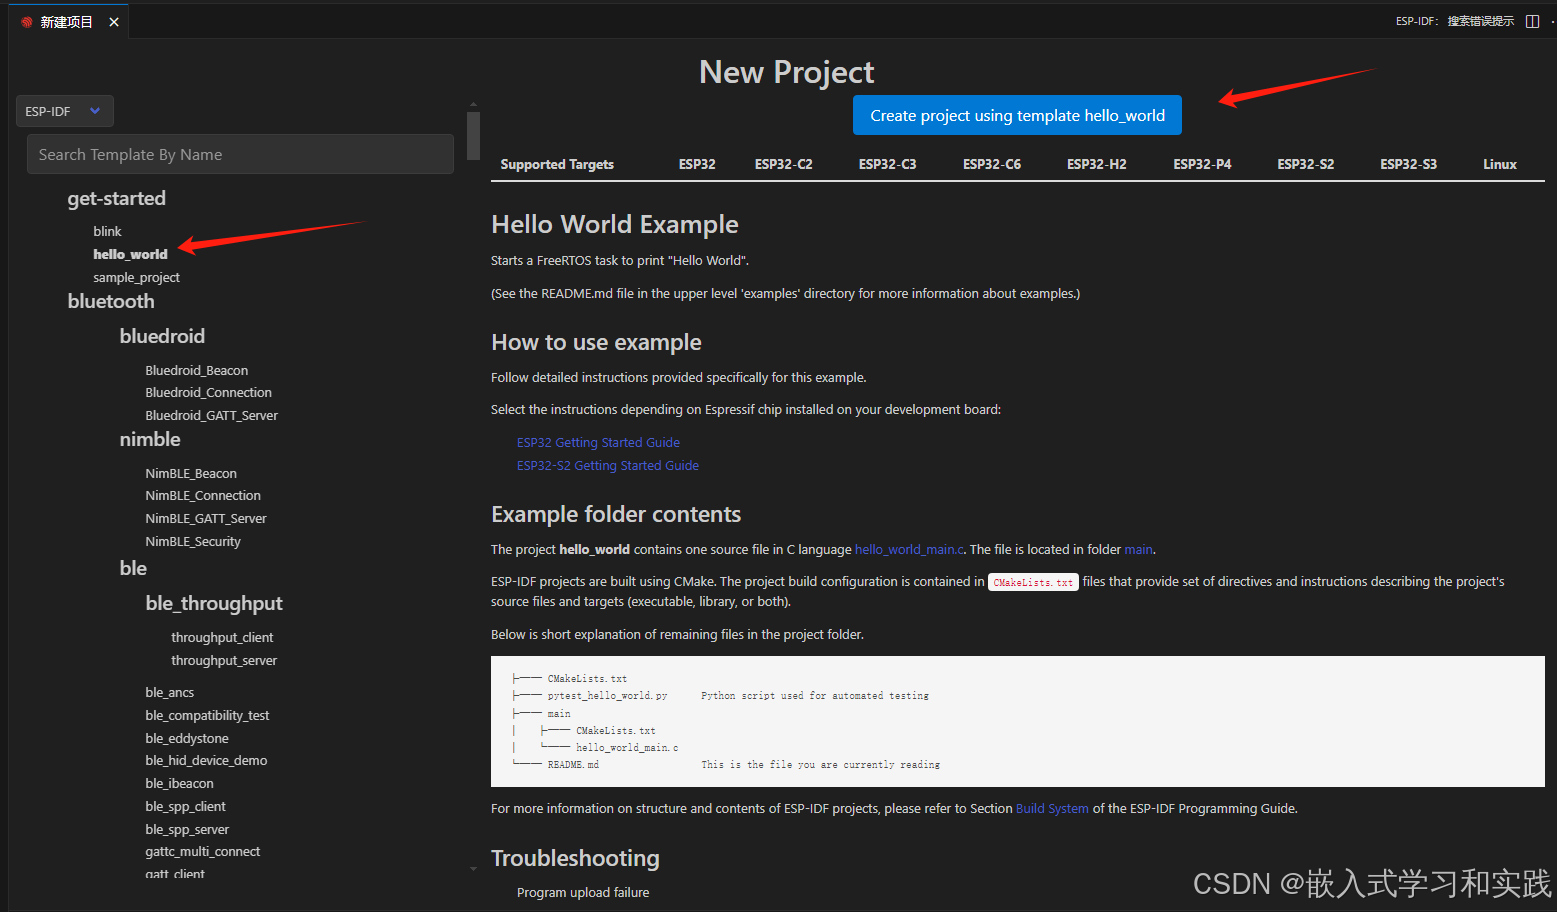
- 指定工程名(如
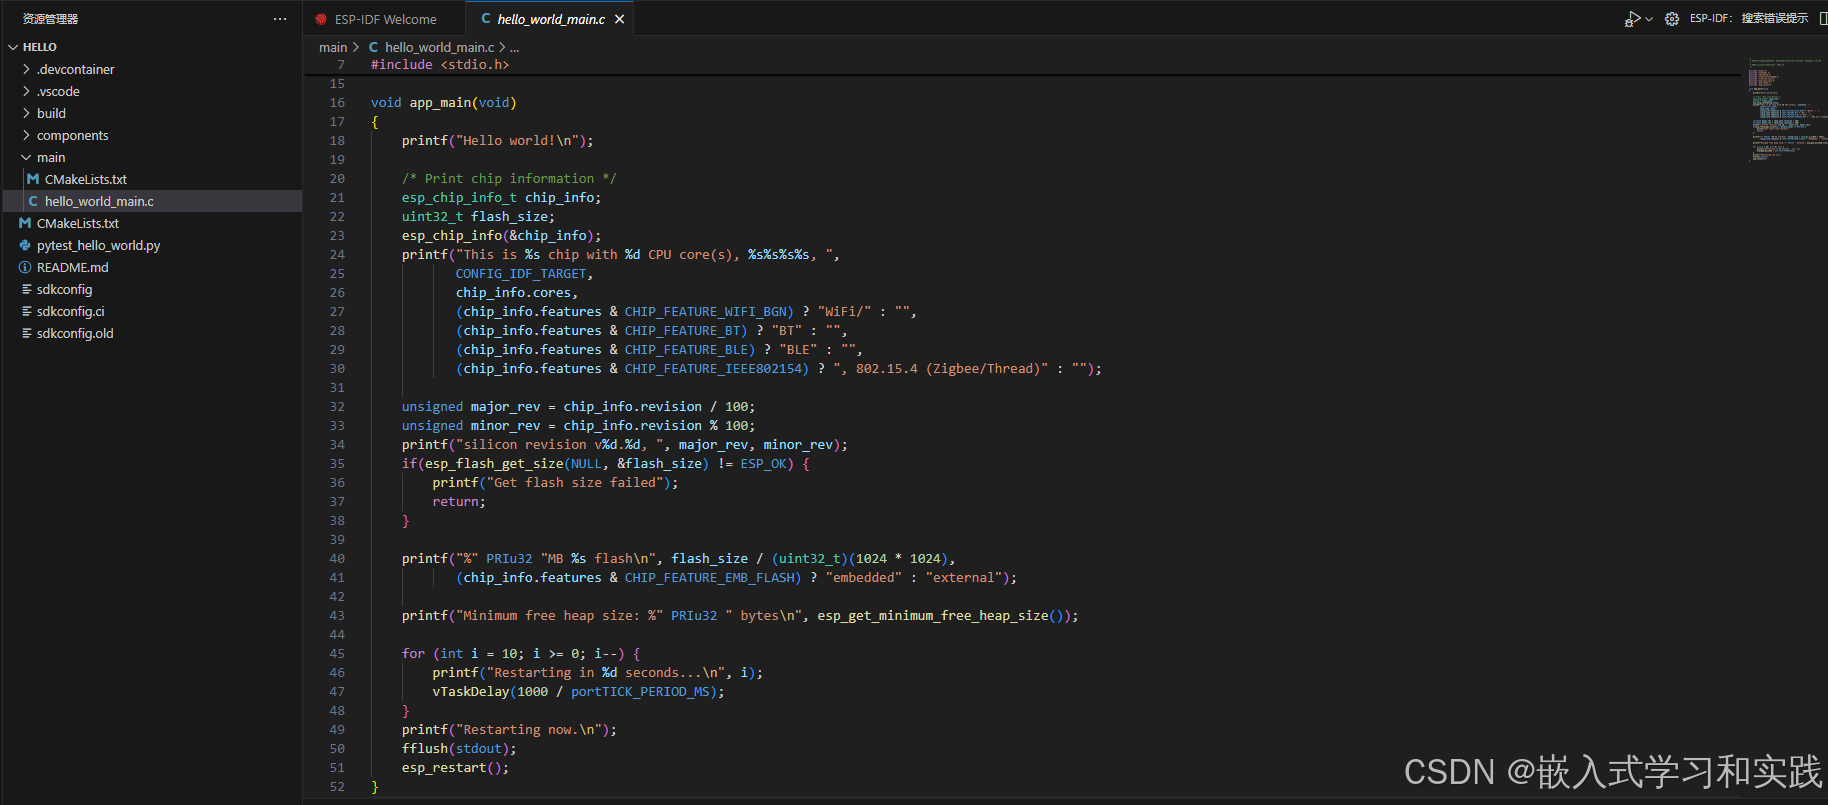
步骤 2:编写代码
- 打开
main/hello_world_main.c,修改代码:
void app_main(void)
{
   printf("\n***************************************\n");
   printf("Hello world demo!\n");

   /* Print chip information */
   esp_chip_info_t chip_info;
   uint32_t flash_size;
   esp_chip_info(&chip_info);
   printf("This is %s chip with %d CPU core(s), %s%s%s%s, ",
          CONFIG_IDF_TARGET,
          chip_info.cores,
          (chip_info.features & CHIP_FEATURE_WIFI_BGN) ? "WiFi/" : "",
          (chip_info.features & CHIP_FEATURE_BT) ? "BT" : "",
          (chip_info.features & CHIP_FEATURE_BLE) ? "BLE" : "",
          (chip_info.features & CHIP_FEATURE_IEEE802154) ? ", 802.15.4 (Zigbee/Thread)" : "");

   unsigned major_rev = chip_info.revision / 100;
   unsigned minor_rev = chip_info.revision % 100;
   printf("silicon revision v%d.%d, ", major_rev, minor_rev);
   if(esp_flash_get_size(NULL, &flash_size) != ESP_OK) {
       printf("Get flash size failed");
       return;
   }
   printf("\n***************************************\n");
   printf("%" PRIu32 "MB %s flash\n", flash_size / (uint32_t)(1024 * 1024),
          (chip_info.features & CHIP_FEATURE_EMB_FLASH) ? "embedded" : "external");
   printf("\n***************************************\n");
   printf("Minimum free heap size: %" PRIu32 " bytes\n", esp_get_minimum_free_heap_size());
   printf("\n***************************************\n");
   fflush(stdout);

}
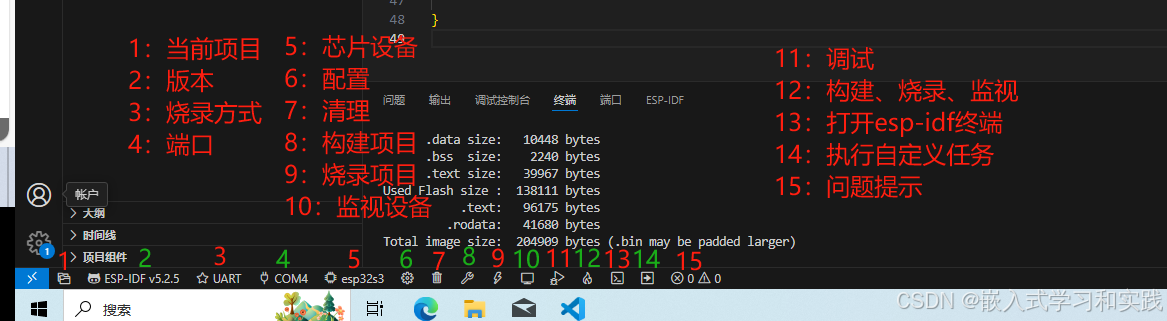
步骤 3:配置和编译
- 按
F1输入ESP-IDF: Select Device Port选择串口。 - 点击底部状态栏的 ⚡ 图标编译项目。
- 点击 → 图标上传代码。
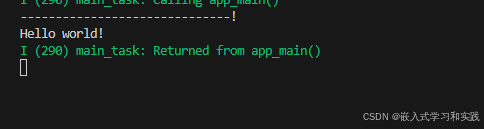
步骤 4:监视输出
- 点击底部 串口终端 图标查看调试信息。
步骤3 和 步骤4 可 使用按钮(构建、烧录、监视),一次完成。

方法 2:
- 找到examples安装位置:esp32\esp\v5.2.5\esp-idf\examples
- 复制参考工程,到指定位置,如hello_world

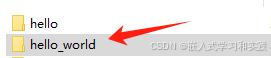
- 根据芯片设备实际进行配置
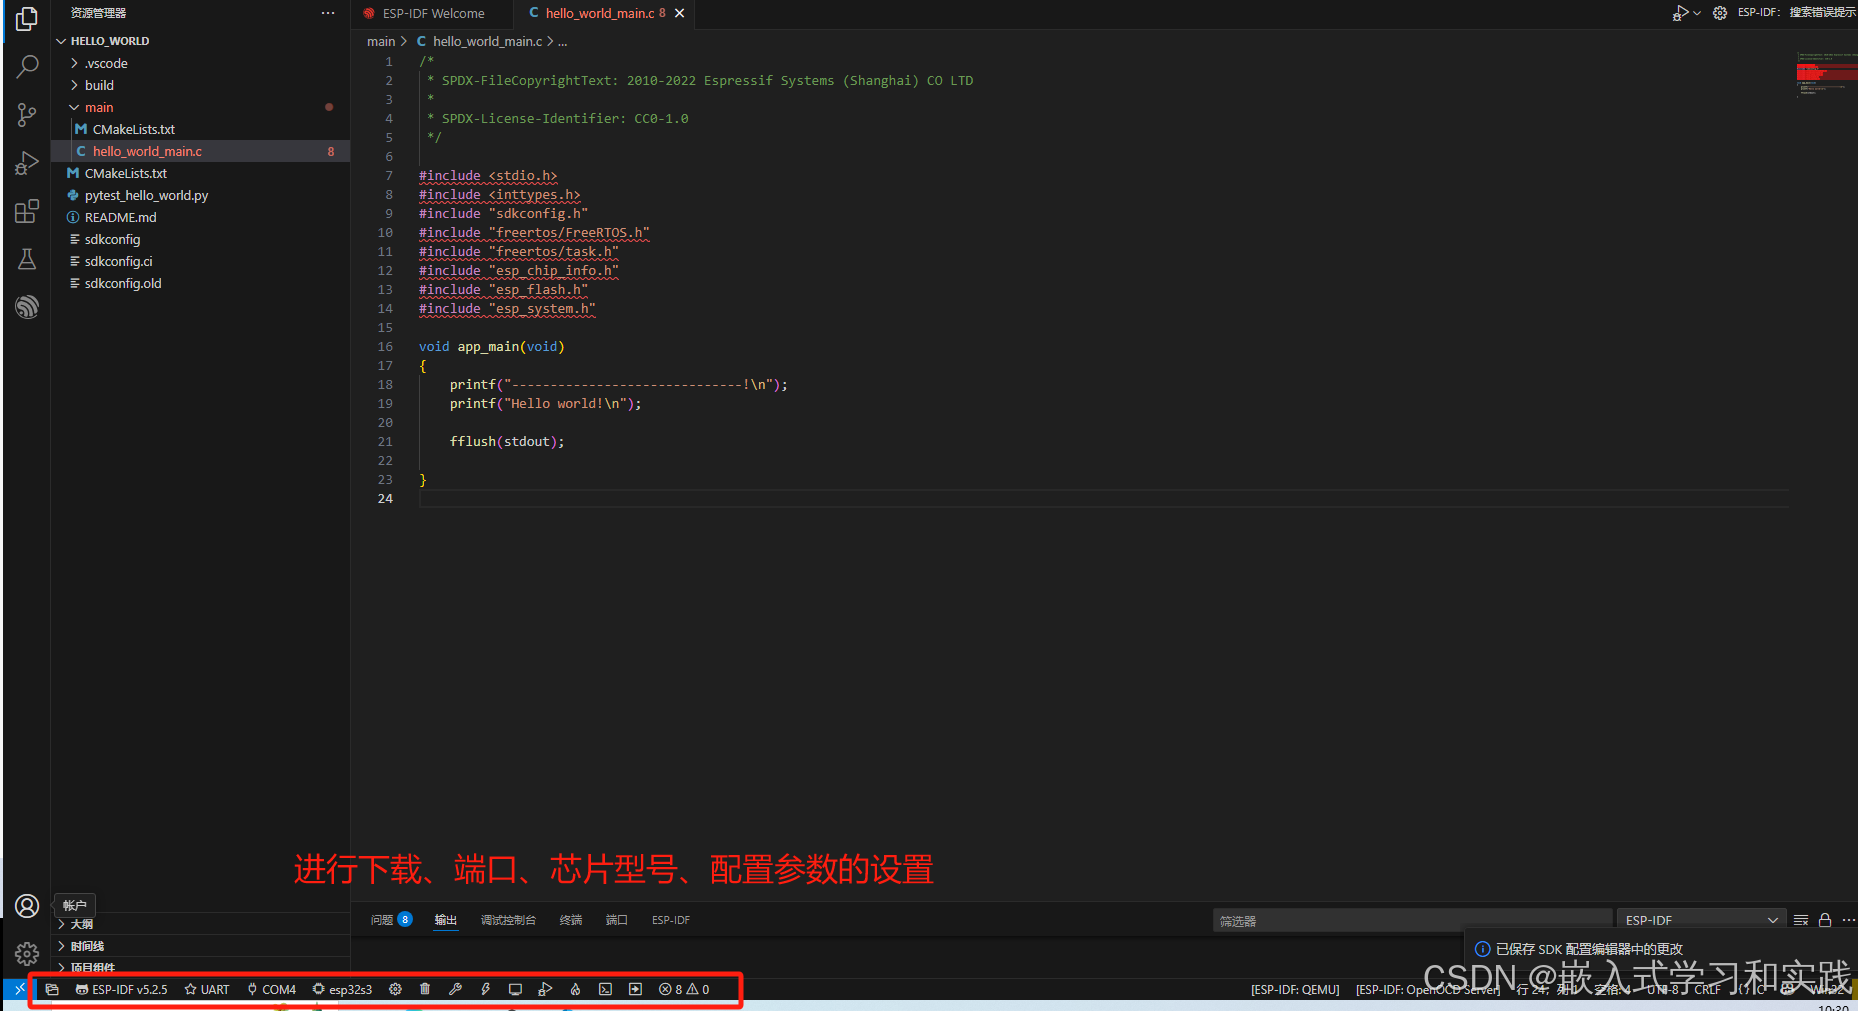
- 代码修改
#include <stdio.h>
#include <inttypes.h>
#include "sdkconfig.h"
#include "freertos/FreeRTOS.h"
#include "freertos/task.h"
#include "esp_chip_info.h"
#include "esp_flash.h"
#include "esp_system.h"

void app_main(void)
{
    printf("------------------------------!\n");
    printf("Hello world!\n");

    fflush(stdout);

}
- 编译下载、监视输出
三、常见问题
-
串口无法识别
- 检查驱动是否安装,尝试重新拔插 USB 线。
- Linux/Mac 用户需运行
sudo usermod -a -G dialout $USER并重启。
-
编译错误
- 确保工具链安装完整(ESP-IDF 扩展需联网下载依赖)。
- 路径不要包含中文或空格。
参考:
与 ESP32 创建串口连接:
https://docs.espressif.com/projects/esp-idf/zh_CN/latest/esp32/get-started/establish-serial-connection.html
创建 ESP-IDF 项目:
https://docs.espressif.com/projects/vscode-esp-idf-extension/zh_CN/latest/startproject.html


 1403
1403

 被折叠的 条评论
为什么被折叠?
被折叠的 条评论
为什么被折叠?
 到【灌水乐园】发言


