


angular目录结构的分析
node_modules(需要的依赖,通过cnpm安装的那个)
//主要管这俩 src(代码在这里边写):
app:组件和根模块
assets:静态资源文件 package.json(项目的配置文件)
angular创建项目*
1.找到目录
2.创建项目:ng new 项目名称
3.跳过 npm i的安装(可以按ctrl+c退出*别忘了cd到目录下)–skip-install(指定跳过依赖的安装)
4.输入cnpm install安装依赖
5.ng serve --open来运行这个项目y
6.出现红色空心angular cli字样表明安装成功
angular定义属性*
声明属性的几种方式:
public: 共有 *(默认) 可以在这个类里边使用,也可以在外边
protected:保护类型 只有在当前类和子类里可以访问
private: 私有 只有在当前类里才可以访问这个属性
angular绑定属性
<!-- 静态 -->
<div title="我是一个div">

    鼠标瞄上去看一下
</div>

<!-- 动态 -->
//此属性在另一个ts文件中
public student:any="我是一个学生的属性(数据)"
//分割线
<div [title]="student">

    张三
</div>
angular数据循环
<h1>angular里边的数据循环</h1>

<ol>
<li *ngFor="let item of arr">

        {{item}}
</li>

</ol>
angular服务*
angular服务*
组件之间的方法不能互相调用,如果想调用,放进服务里就可以引入 以下是具体操作和引用。
1.ng g service services/storage来创建服务
2.app.module.ts里边引入创建的服务并且声明这个服务
引入:import {StorageService} from ‘./services/storage.service’;
声明: providers: [StorageService]
3.在用到的组件里面引入服务(注意路径的变化)
    import {StorageService} from '../../services/storage.service';

    //初始化

     constructor(public storage:StorageService) {

     let s = this.storage.get();

      console.log(s);

  }
viewChild获取dom节点
1.模板中给dom起一个名字
  <div #myBox>

      我是一个dom节点
  </div>
2.在业务逻辑里边引入viewChild
import { Component, OnInit,ViewChild } from '@angular/core';
3.写在类里边
@ViewChild('myBox') myBox:any;
4.在生命周期函数里边获取dom
angular父子组件以及之间的通讯
一、父组件给子组件传值-@Input
父组件不仅可以给子组件传递简单的数据,还可以把自己的方法以及整个父组件传给子组件
1.父组件调用子组件的时候传入数据
//传入子组件的数据
<app-header [title]="title" [msg]="msg"></app-header>
2.子组件引入 Input 模块
```html
//用装饰器首先得引入装饰器
import { Component, OnInit,Input } from '@angular/core';
3.子组件中 @Input接收父组件传过来的数据
<!--在子组件中  -->
 //接收父组件传来的数据
  @Input() title:any;
  @Input() msg:any;

//父组件中的数据

 public title:string="我是首页组件的标题";

 public msg:string="我是一个父组件的msg";


<!--在其他组件中的调用  -->
<header>{{title}}--{{msg}}</header>
```typescript
二、父组件通过@ViewChild主动获取子组件的数据和方法
1.调用子组件给子组件定义一个名称
<app-footer #footer>
在父组件调用
@ViewChild(‘footer’) footer:any;
三、子组件通过@Output触发父组件的方法(了解,比较复杂不建议用)
1.子组件引入 Output 和 EventEmitter
import{Component,OnInit,Input,Output,EventEmitter} from '@angular/core';
2.子组件中实例化 EventEmitter
@Output() private outer=new EventEmitter<string>();
	/*用EventEmitter 和 output装饰器配合使用 <string>指定类型变量*/
3.子组件通过 EventEmitter 对象 outer 实例广播数据
sendParent(){

//alert(zhixing)
this.outer.emit('msg from child')
}
4.父组件调用子组件的时候,定义接收事件,outer 就是子组件的 EventEmitter 对象 outer
<app-header (outer)="runParent($event)"></app-header>
5.父组件接收到数据会调用自己的runParent方法,这个时候就能拿到子组件的数据
父组件给子组件传值
1.子组件可以获取父组件的数据
2.子组件可以执行父组件的方法
子组件给父组件传值
1.父组件可以获取子组件的数据
2.父组件可以获取子组件的方法
非父子组件
1.组件之间传值
2.共享方法Locoalstorage来实现非父子组件的通信 服务
生命周期函数
constructor(){}//构造函数
ngOnInit(){}//请求数据放在这里边
ngAfterViewInit(){}//做dom操作
ngOnDestory(){}//销毁函数
ngOnChanges(){}//父子组件传值时触发
rxjs异步数据流编程

ng中的数据请求,内置模块httpclient实现
一、angular get 请求数据
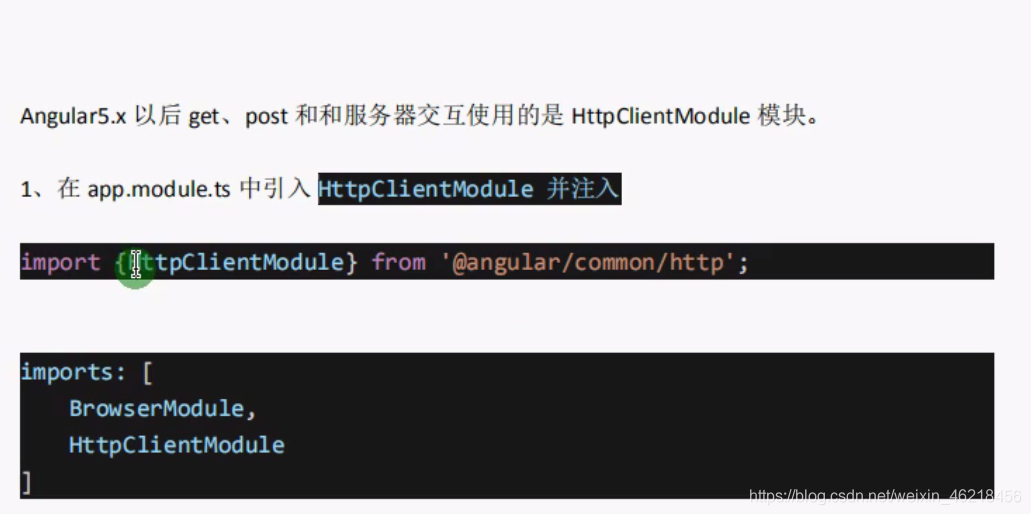
1、在app.module.ts 中引入HttpclientModule并注入
import {HttpClientModule} from ‘@angular/common/ http’; 注入 imports:[
BrowserModule, HttpClientModule ]
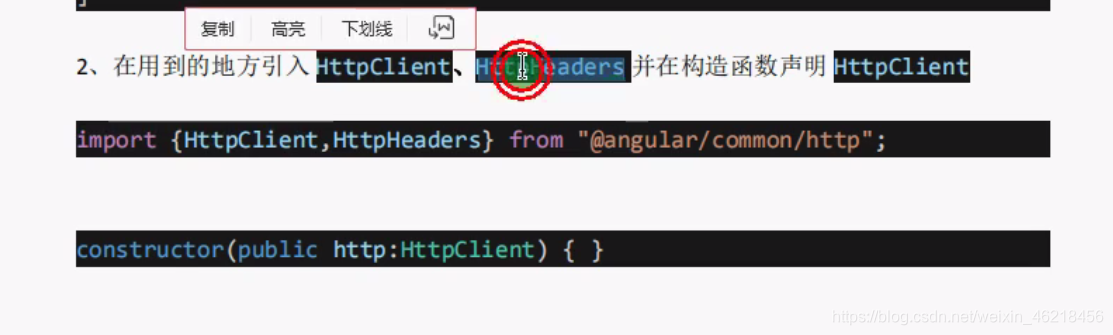
2、在用到的地方引入Httpclient并在构造函数声明
import {HttpClient} from “@angular/common/ http” ;
constructor(public http:HttpClient){ }
3、get 请求数据
var api = “”; this.http.get(api).subscribe(response => {
console.log(respose); });
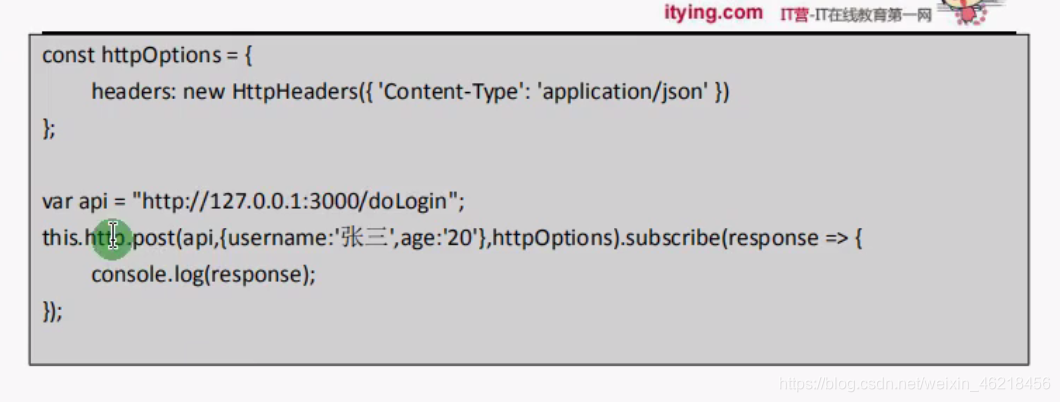
二、angular post 提交数据
3.在函数中调用
三、angular jsonp请求数据
//在app.module.ts引入 HttpClientModule,HttpClientJsonpModule 并注入
import { HttpClientModule,HttpClientJsonpModule, } from '@angular/common/http';
//注入
  imports: [
    BrowserModule,
    HttpClientModule,
    HttpClientJsonpModule
  ]
  getJsonData(){

    //jsonp请求,服务器得支持jsonp
    /*    http://a.itying.com/api/productlist?callback=xxx

    http://a.itying.com/api/productlist?cb=xxx


    */

    let api = "http://a.itying.com/api/productlist";
    this.http.jsonp(api,'callback').subscribe((response)=>{
      console.log(response);
    });

  }
四、使用第三方模块axios请求数据
1.安装axios
cnpm install axios --save
2.用到的地方引入axios
import axios from ‘axios’;
3.看文档使用
// Make a request for a user with a given ID
axios.get(’/user?ID=12345’) .then(function (response) {
// handle success
console.log(response); }) .catch(function (error) {
// handle error
console.log(error); })
ps:剩下的还没学,随时更新
有兴趣的可以看我前一篇关于typescript的笔记
https://blog.csdn.net/weixin_46218456/article/details/112784999
学习教程
https://www.bilibili.com/video/BV1yt411e7xV?p=31


 1500
1500


 被折叠的 条评论
为什么被折叠?
被折叠的 条评论
为什么被折叠?
 到【灌水乐园】发言


