


nmcli
NetworkManager command line tool
基于会话的网路管理
team
所谓teaming技术就是把同一台服务器上的多个物理网卡通过软件绑定成一个虚拟的网卡,也就是说,对于外部网络而言,这台服务器只有一个可见的网卡。对于任何应用程序,以及本服务器所在的网络,这台服务器只有一个网络链接或者说只有一个可以访问的IP地址。
之所以要利用Teaming 技术,除了利用多网卡同时工作来提高网络速度以外,还有可以通过Teaming 实现不同网卡之间的负载均衡(Load balancing)和网卡冗余(Fault tolerance)
bonding
网卡绑定bonding可以提高网络的冗余,保证网络可靠性,提高网络速度。为了提高网络容错或吞吐量,一般服务器都会采取多网卡绑定的策略。
在RHEL5/RHEL6中使用的是Bonding。
而RHEL7提供了一项新的实现技术Teaming,用来实现链路聚合的功能,但是在RHEL7中,不会使用teaming替换bonding,它们是并存的,我们可以选择Teaming,也可以选择Bonding
模式
- broadcast 广播模式
- activebackup 主备模式
- roundrobin 轮训模式
- loadbalance 负载均衡 LACP
案例一:配置主从网卡
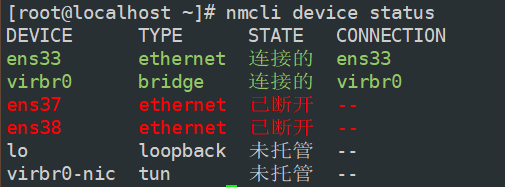
添加两个网卡

通过ip a查看到刚刚新添加的网卡

nmcli device status
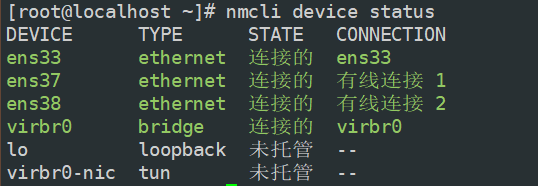
激活网卡:
[root@localhost ~]# nmcli device connect ens37
成功用 'ens37' 激活了设备 'b71348b5-6550-3d05-98e2-32b53291c9b4'。

[root@localhost ~]# nmcli device connect ens38
成功用 'ens38' 激活了设备 '870931c1-eff6-32d8-94dd-2e9ee2c70ebc'。
查看示例:
[root@localhost ~]# ll /usr/share/doc/teamd-1.27/example_configs/
总用量 64
-rw-r--r--. 1 root root 305 3月  18 2017 activebackup_arp_ping_1.conf
-rw-r--r--. 1 root root 465 3月  18 2017 activebackup_arp_ping_2.conf
-rw-r--r--. 1 root root 194 3月  18 2017 activebackup_ethtool_1.conf
-rw-r--r--. 1 root root 212 3月  18 2017 activebackup_ethtool_2.conf
-rw-r--r--. 1 root root 241 3月  18 2017 activebackup_ethtool_3.conf
-rw-r--r--. 1 root root 447 3月  18 2017 activebackup_multi_lw_1.conf
-rw-r--r--. 1 root root 285 3月  18 2017 activebackup_nsna_ping_1.conf
-rw-r--r--. 1 root root 318 3月  18 2017 activebackup_tipc.conf
-rw-r--r--. 1 root root  96 3月  18 2017 broadcast.conf
-rw-r--r--. 1 root root 209 3月  18 2017 lacp_1.conf
-rw-r--r--. 1 root root  98 3月  18 2017 loadbalance_1.conf
-rw-r--r--. 1 root root 140 3月  18 2017 loadbalance_2.conf
-rw-r--r--. 1 root root 183 3月  18 2017 loadbalance_3.conf
-rw-r--r--. 1 root root  93 3月  18 2017 random.conf
-rw-r--r--. 1 root root 244 3月  18 2017 roundrobin_2.conf
-rw-r--r--. 1 root root  97 3月  18 2017 roundrobin.conf

[root@localhost ~]# vim /usr/share/doc/teamd-1.27/example_configs/activebackup_arp_ping_1.conf

添加虚拟设备
[root@localhost ~]# nmcli connection add type team con-name team0 ifname team0 config '{"runner":       {"name": "activebackup"}}'

#config 后面的内容放在 '{ 这里面 }'  就是刚刚复制的东西

查看刚刚创建的虚拟网卡

对这个虚拟网卡中 加入真实从网卡
[root@localhost ~]# nmcli connection add type team-slave con-name team0-port1 ifname ens37 master team0
连接“team0-port1”(6f8f6a1f-c492-47b1-89fa-263a39fdb074) 已成功添加。

[root@localhost ~]# nmcli connection add type team-slave con-name team0-port2 ifname ens38 master team0
连接“team0-port2”(9f9216d0-c99e-42c7-994a-d59af6d955ca) 已成功添加。

#但是没有启用
[root@localhost ~]# nmcli connection show
NAME         UUID                                  TYPE      DEVICE
ens33        35293eda-8993-4a6b-9dc4-b6272fd1e99b  ethernet  ens33
virbr0       557822b2-a6f0-438b-ada7-f36bca5a9532  bridge    virbr0
有线连接 1   b71348b5-6550-3d05-98e2-32b53291c9b4  ethernet  ens37
有线连接 2   870931c1-eff6-32d8-94dd-2e9ee2c70ebc  ethernet  ens38
team0        37afc0a3-f865-43be-afb4-ed811fca14e3  team      team0
team0-port1  6f8f6a1f-c492-47b1-89fa-263a39fdb074  ethernet  --
team0-port2  9f9216d0-c99e-42c7-994a-d59af6d955ca  ethernet  --
把刚刚那两个从网卡启动连接
[root@localhost ~]# nmcli connection up team0-port1
连接已成功激活(D-Bus 活动路径:/org/freedesktop/NetworkManager/ActiveConnection/11)

[root@localhost ~]# nmcli connection up team0-port2
连接已成功激活(D-Bus 活动路径:/org/freedesktop/NetworkManager/ActiveConnection/12)

[root@localhost ~]# nmcli connection show
NAME         UUID                                  TYPE      DEVICE
ens33        35293eda-8993-4a6b-9dc4-b6272fd1e99b  ethernet  ens33
team0        37afc0a3-f865-43be-afb4-ed811fca14e3  team      team0
team0-port1  6f8f6a1f-c492-47b1-89fa-263a39fdb074  ethernet  ens37
team0-port2  9f9216d0-c99e-42c7-994a-d59af6d955ca  ethernet  ens38
virbr0       557822b2-a6f0-438b-ada7-f36bca5a9532  bridge    virbr0
有线连接 1   b71348b5-6550-3d05-98e2-32b53291c9b4  ethernet  --
有线连接 2   870931c1-eff6-32d8-94dd-2e9ee2c70ebc  ethernet  --

查看虚拟设备的情况
[root@localhost ~]# teamdctl team0 stat
setup:
  runner: activebackup		#方式
ports:
  ens37
    link watches:
      link summary: up
      instance[link_watch_0]:
        name: ethtool
        link: up
        down count: 0
  ens38
    link watches:
      link summary: up
      instance[link_watch_0]:
        name: ethtool
        link: up
        down count: 0
runner:
  active port: ens37		#37现在是激活的
案例二:配置桥接网卡
创建虚拟桥接网卡
[root@localhost ~]# nmcli connection add type bridge con-name br1 ifname br1
连接“br1”(e62b483c-c4ec-4788-a86b-a44f6ddcc142) 已成功添加。
为这个虚拟桥接网卡添加真实从网卡
[root@localhost ~]# nmcli connection add type ethernet con-name br1-slave1 ifname ens33 master br1
连接“br1-slave1”(dec70999-78f0-4fe6-8823-e0cc433fb55c) 已成功添加。


#添加之后默认还是没有启用的
[root@localhost ~]# nmcli connection show
NAME         UUID                                  TYPE      DEVICE
ens33        35293eda-8993-4a6b-9dc4-b6272fd1e99b  ethernet  ens33
team0        37afc0a3-f865-43be-afb4-ed811fca14e3  team      team0
team0-port1  6f8f6a1f-c492-47b1-89fa-263a39fdb074  ethernet  ens37
team0-port2  9f9216d0-c99e-42c7-994a-d59af6d955ca  ethernet  ens38
virbr0       557822b2-a6f0-438b-ada7-f36bca5a9532  bridge    virbr0
br1          e62b483c-c4ec-4788-a86b-a44f6ddcc142  bridge    br1
br1-slave1   dec70999-78f0-4fe6-8823-e0cc433fb55c  ethernet  --
有线连接 1   b71348b5-6550-3d05-98e2-32b53291c9b4  ethernet  --
有线连接 2   870931c1-eff6-32d8-94dd-2e9ee2c70ebc  ethernet  --
启动刚刚添加的真实从网卡
[root@localhost ~]# nmcli connection up br1-slave1
连接已成功激活(D-Bus 活动路径:/org/freedesktop/NetworkManager/ActiveConnection/14)

[root@localhost ~]# nmcli connection show

查看ip


 2045
2045


 被折叠的 条评论
为什么被折叠?
被折叠的 条评论
为什么被折叠?
 到【灌水乐园】发言


