


vue-router
- 创建vue实例时,配置了router选项,此时会给vue实例注入两个属性$ route(当前路由规则)和$router(路由对象)
- 使用步骤:
1.创建跟路由相关的组件,也就是视图
2.注册路由插件
import VueRouter from ‘vue-router’
Vue.use(VueRouter)
3.创建router对象,并配置路由规则
const router = new VueRouter({ routes})
4.在创建vue实例的时候,在选项里配置创建好的路由对象
5.通过router-view占位
动态路由
const routes = [
  {
    path: '/',
    name: 'Index',
    component: Index
  },
  {
    path: '/detail/:id',
    name: 'Detail',
    // 开启 props,会把 URL 中的参数传递给组件
    // 在组件中通过 props 来接收 URL 参数
    props: true,
    component: () => import(/* webpackChunkName: "detail" */ '../views/Detail.vue')
  }
]
<template>
  <div>
    <!-- 方式1: 通过当前路由规则,获取数据 -->
    通过当前路由规则获取:{{ $route.params.id }}

    <br>
    <!-- 方式2:路由规则中开启 props 传参 -->
    通过开启 props 获取:{{ id }}
  </div>
</template>

<script>
export default {
  name: 'Detail',
  props: ['id']
}
</script>

<style>

</style>
嵌套路由

const routes = [
  {
    name: 'login',
    path: '/login',
    component: Login
  },
  // 嵌套路由
  {
    path: '/',
    component: Layout,
    children: [
      {
        name: 'index',
        path: '',
        component: Index
      },
      {
        name: 'detail',
        path: 'detail/:id',
        props: true,
        component: () => import('@/views/Detail.vue')
      }
    ]
  }
]
详情页组件匹配时,是把外层路径的’/‘和’detail/:id’进行拼接’,也就是’/detail/:id’
编程式导航
push
replace
go
this.$ router.push()里面可以传递字符串或者对象两种方式,传递字符串表示要跳转的路径,传递对象需要给路由起一个名字
this.$router.push({name:‘login’})
Hash模式和History模式


- hash
通过锚点的值作为路由地址,当地址发生变化后触发onhashchange事件,根据路径决定页面呈现的内容
- history
通过调用history.pushState() 改变浏览器地址栏地址,但是不会发送请求,并会把地址保存到历史记录当中;
history模式需要服务端支持,当属性页面的时候,服务端返回的都是单页应用默认的首页index.html,浏览器接受后会判断路由地址,加载对应的组件


node服务配置history模式

nginx服务配置history模式
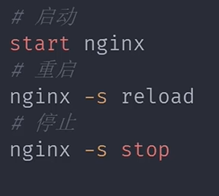
nginx启动命令
nginx安装目录
打包好的前端项目存放到html文件夹下
修改nginx配置文件(conf文件夹下的nginx.conf)支持history模式


vueRouter模拟实现
vue.use()可以传入函数或者对象,如果传入函数vue.use内部会直接调用这个函数;如果传入对象vue.use()会调用对象的install方法

1.options:记录构造函数中传入的对象
2.data:是一个对象有current属性,记录当前路由地址
data是响应式对象,路由地址发生变化后对应的组件会变化
3.routeMap:记录路由地址和组件的对应关系
4._install 实现vue插件机制
5.initEvent用来注册popState事件
6.createRouteMap用来初始化routeMap属性,把构造函数中传入的路由规则转化为键值对形式,存储到routeMap中
7.initComponents:用来创建route-link和route-view组件
- 完整版本的vue包含运行时和编译器,编译器就是把template编译成render函数
- 运行时版本的vue在组件中要写render函数,不支持template
观察者模式与发布订阅模式

    // 发布者-目标
    class Dep {
      constructor () {
        // 记录所有的订阅者
        this.subs = []
      }
      // 添加订阅者
      addSub (sub) {
        if (sub && sub.update) {
          this.subs.push(sub)
        }
      }
      // 发布通知
      notify () {
        this.subs.forEach(sub => {
          sub.update()
        })
      }
    }
    // 订阅者-观察者
    class Watcher {
      update () {
        console.log('update')
      }
    }

    // 测试
    let dep = new Dep()
    let watcher = new Watcher()
   // 将订阅者添加到发布者中
    dep.addSub(watcher)
	// 当事件发生时发布者调用订阅者中的方法
    dep.notify()
vue响应式原理分析
vue
负责接受初始化的参数
负责把data中的属性注入到vue实例,转化成getter/setter
负责调用observe监听data中所有属性的变化
负责调用compiler解析指令/插值表达式


类图

- vue
class Vue {
  constructor (options) {
    // 1. 通过属性保存选项的数据
    this.$options = options || {}
    this.$data = options.data || {}
    this.$el = typeof options.el === 'string' ? document.querySelector(options.el) : options.el
    // 2. 把data中的成员转换成getter和setter,注入到vue实例中
    this._proxyData(this.$data)
    // 3. 调用observer对象,监听数据的变化
    new Observer(this.$data)
    // 4. 调用compiler对象,解析指令和差值表达式
    new Compiler(this)
  }
  _proxyData (data) {
    // 遍历data中的所有属性
    Object.keys(data).forEach(key => {
      // 把data的属性注入到vue实例中
      Object.defineProperty(this, key, {
        enumerable: true,
        configurable: true,
        get () {
          return data[key]
        },
        set (newValue) {
          if (newValue === data[key]) {
            return
          }
          data[key] = newValue
        }
      })
    })
  }
}
- observer
walk方法首先会判断参数是不是对象,如果不是对象return,如果是对象就遍历对象的所有key,调用defineReactive方法转化成getter、setter
负责数据劫持,监听数据的变化,把data中的数据转化成getter、setter
class Observer {
  constructor (data) {
    this.walk(data)
  }
  walk (data) {
    // 1. 判断data是否是对象
    if (!data || typeof data !== 'object') {
      return
    }
    // 2. 遍历data对象的所有属性
    Object.keys(data).forEach(key => {
      this.defineReactive(data, key, data[key])
    })
  }
  defineReactive (obj, key, val) {
    let that = this
    // 负责收集依赖,并发送通知
    let dep = new Dep()
    // 如果val是对象,把val内部的属性转换成响应式数据
    this.walk(val)
    Object.defineProperty(obj, key, {
      enumerable: true,
      configurable: true,
      get () {
        // 收集依赖
        //targt就是watcher对象,判断并添加target到subs数组中
        Dep.target && dep.addSub(Dep.target)
        return val
      },
      set (newValue) {
        if (newValue === val) {
          return
        }
        val = newValue
        // data中的数据发生改变时也要是响应式的也就是要调用walk方法
        that.walk(newValue)
        // 数据改变 发送通知
        //notify方法中会遍历所有的watcher对象,调用watcher对象的update方法去更新视图
        dep.notify()
      }
    })
  }
}
- compiler
class Compiler {
  constructor (vm) {
    this.el = vm.$el
    this.vm = vm
    this.compile(this.el)
  }
  // 编译模板,处理文本节点和元素节点
  compile (el) {
    let childNodes = el.childNodes
    Array.from(childNodes).forEach(node => {
      // 处理文本节点
      if (this.isTextNode( node)) {
        this.compileText(node)
      } else if (this.isElementNode(node)) {
        // 处理元素节点
        this.compileElement(node)
      }

      // 判断node节点,是否有子节点,如果有子节点,要递归调用compile
      if (node.childNodes && node.childNodes.length) {
        this.compile(node)
      }
    })
  }
  // 编译元素节点,处理指令
  compileElement (node) {
    // console.log(node.attributes)
    // 遍历所有的属性节点
    Array.from(node.attributes).forEach(attr => {
      // 判断是否是指令
      let attrName = attr.name
      if (this.isDirective(attrName)) {
        // v-text --> text
        attrName = attrName.substr(2)
        let key = attr.value
        this.update(node, key, attrName)
      }
    })
  }

  update (node, key, attrName) {
    let updateFn = this[attrName + 'Updater']
    updateFn && updateFn.call(this, node, this.vm[key], key)
  }

  // 处理 v-text 指令
  textUpdater (node, value, key) {
    node.textContent = value
    new Watcher(this.vm, key, (newValue) => {
      node.textContent = newValue
    })
  }
  // v-model
  modelUpdater (node, value, key) {
    node.value = value
    new Watcher(this.vm, key, (newValue) => {
      node.value = newValue
    })
    // 双向绑定
    node.addEventListener('input', () => {
      this.vm[key] = node.value
    })
  }

  // 编译文本节点,处理差值表达式
  compileText (node) {
    // console.dir(node)
    // {{  msg }}
    //插值表达式正则
    let reg = /\{\{(.+?)\}\}/
    //获取文本节点内容
    let value = node.textContent
    if (reg.test(value)) {
    //
      let key = RegExp.$1.trim()
      node.textContent = value.replace(reg, this.vm[key])

      // 创建watcher对象,当数据改变更新视图
      new Watcher(this.vm, key, (newValue) => {
        node.textContent = newValue
      })
    }
  }
  // 判断元素属性是否是指令
  isDirective (attrName) {
    return attrName.startsWith('v-')
  }
  // 判断节点是否是文本节点
  isTextNode (node) {
    return node.nodeType === 3
  }
  // 判断节点是否是元素节点
  isElementNode (node) {
    return node.nodeType === 1
  }
}
- Dep

class Dep {
  constructor () {
    // 存储所有的观察者
    this.subs = []
  }
  // 添加观察者
  addSub (sub) {
    if (sub && sub.update) {
      this.subs.push(sub)
    }
  }
  // 发送通知
  notify () {
    this.subs.forEach(sub => {
      sub.update()
    })
  }
}
- watcher
watcher完成两件事
- 创建watcher的时候把watcher对象添加到Dep类作为静态属性
- 数据改变的时候更新视图
new watcher的时候传一个cb,也就是回调函数,告诉watcher如何更新视图,数据发生变化的时候,调用这个cb回调

class Watcher {
  constructor (vm, key, cb) {
    this.vm = vm
    // data中的属性名称
    this.key = key
    // 回调函数负责更新视图
    this.cb = cb

    // 把watcher对象记录到Dep类的静态属性target
    Dep.target = this
    // 触发get方法,在get方法中会调用addSub
    this.oldValue = vm[key]
    Dep.target = null
  }
  // 当数据发生变化的时候更新视图
  update () {
    let newValue = this.vm[this.key]
    if (this.oldValue === newValue) {
      return
    }
    this.cb(newValue)
  }
}
整体流程
- 记录data中传入的值,调用proxyData把data中的属性注入到vue实例
- 接着创建Observer类 Compiler类
- Observer类的作用是数据劫持,把data中的属性转化成getter setter
- 当数据变化的时候触发setter方法通知变化,告诉Dep,调用Dep的notify方法,notify方法中要遍历所有的watcher并调用watcher的update方法,通知watcher更新视图
- 当创建watcher对象的时候会把当前的watcher对象添加到dep的subs数组中,收集依赖
- compiler对象的作用是解析指令解析插值,页面首次加载的时候会调用compiler里的相关方法更新视图,同时compiler需要订阅数据的变化,绑定更新函数,compiler中在处理指令或者插值表达式时还需要创建watcher对象,在数据更新的时候通过watcher传递回调函数更新视图


 300
300


 被折叠的 条评论
为什么被折叠?
被折叠的 条评论
为什么被折叠?
 到【灌水乐园】发言


