


文章目录
测试数据库是否连接
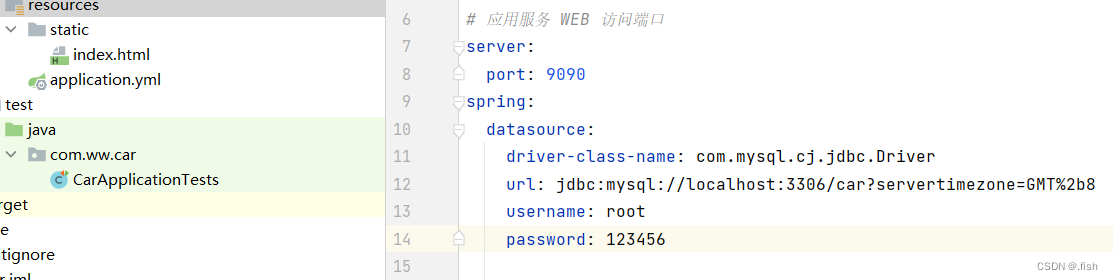
将application.properties后缀更改为yml,节省代码
对比:
propeties:

**yml:**冒号后面要空一格!!!
在数据库中创建表
表名sys_user
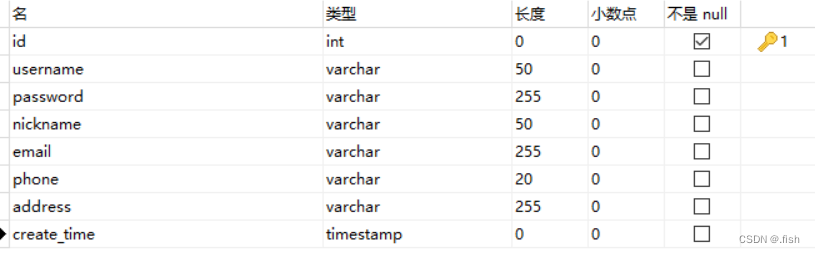
插入数据

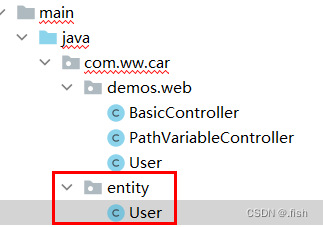
设置entity包并书写User实体类
①使用alt+insert快捷键迅速填充get/set方法
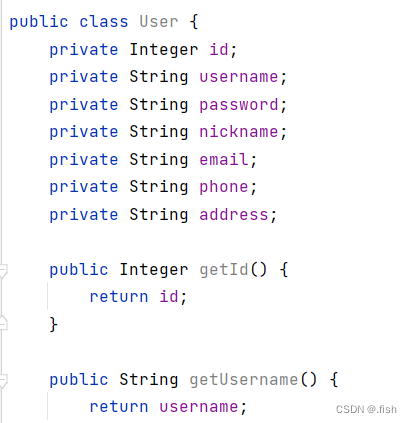
②使用@Data注解,自动代替get/set方法
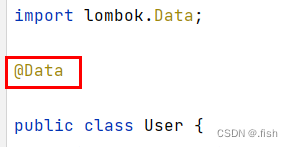
此时就无需书写get/set方法,但可以在其他地方直接使用get/set方法
类似还有
@NoArgsConstructor代替无参构造函数
@AllArgsConstructor代替有参构造函数
定义Mapper包,定义数据库的查询接口
与数据库进行交互

定义一个查询所有数据的函数
使用MyBatis提供的select注解
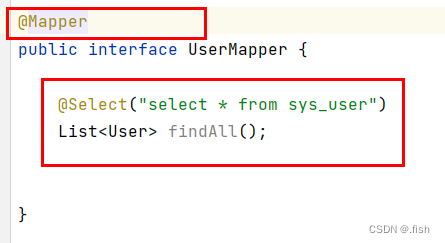
@Mapper可以把UserMapper这个bean注入到spring boot,即可以直接使用UserMapper类,如下图
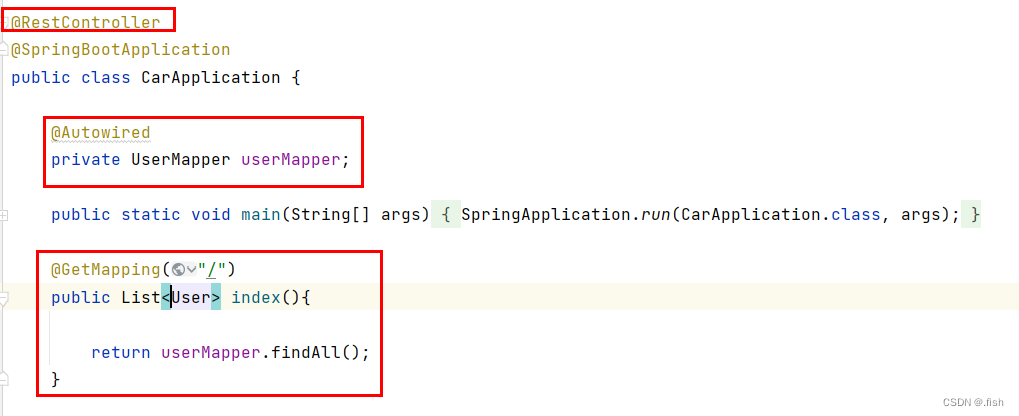
要想使用GetMapping注解,必须先添加@RestController注解!
@AutoWired注解可以向spring中注入userMapper类,生成对应bean
此时,运行9090端口,即可出现数据库中对应数据

即表示数据库连接成功
写任何注解前都要添加RestController注解!!
Controller包
定义专门的controller包
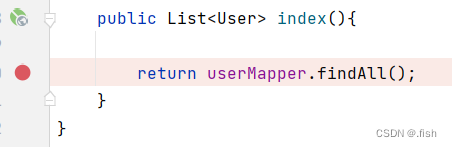
如下将刚刚写的代码复制到UserController中
package com.ww.car.controller;

import com.ww.car.entity.User;
import com.ww.car.mapper.UserMapper;
import org.springframework.beans.factory.annotation.Autowired;
import org.springframework.web.bind.annotation.GetMapping;
import org.springframework.web.bind.annotation.RestController;

import java.util.List;

@RestController
public class UserController {

    @Autowired
    private UserMapper userMapper;

    @GetMapping("/")
    public List<User> index(){

        return userMapper.findAll();
    }
}
运行后与之前界面相同
idea的Debug
debug过程
运行按钮旁边的小虫子即为debug按钮

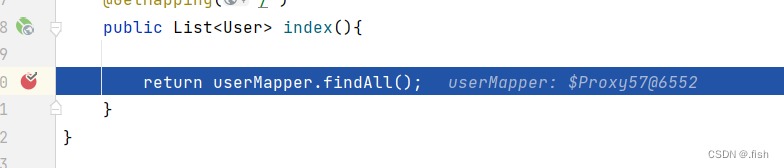
在任意一行代码前标红(此行代码不能只有括号),即在此行代码处打断点
此时运行程序,程序会自动跳到该行代码上
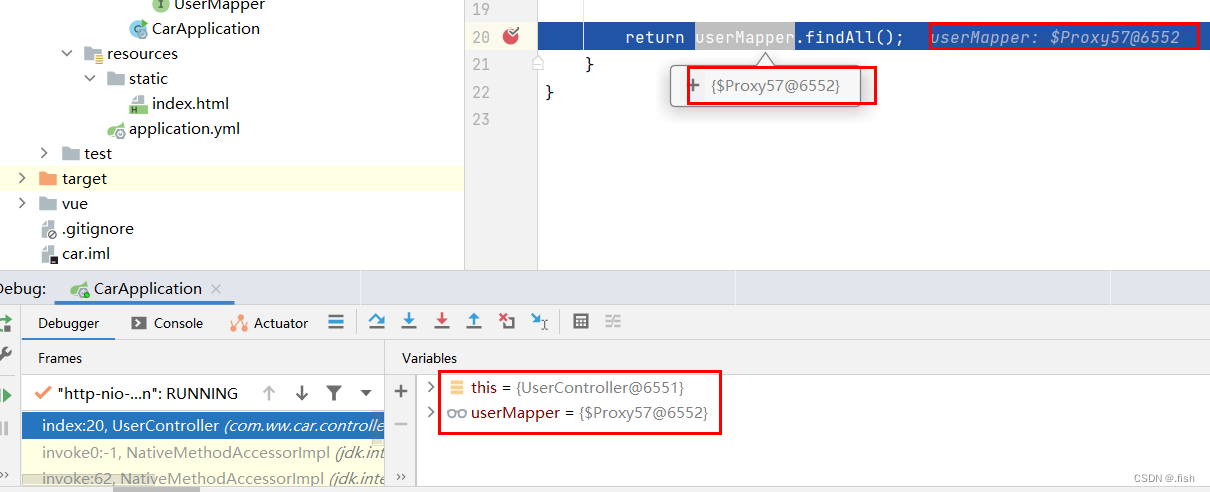
表明springboot中存在代理对象,userMapper对象真实存在于springboot
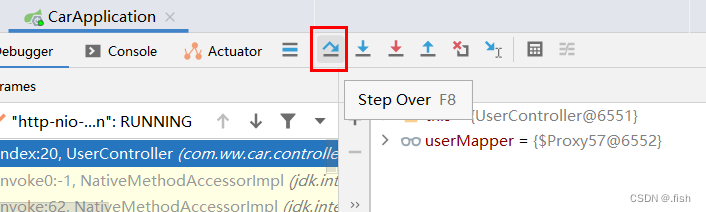
点击单步执行按钮
此时可以看到数据库中弹出的数据
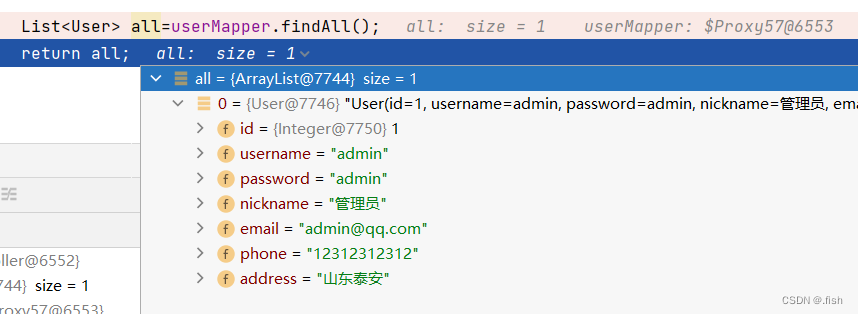
此过程即为debug


 2181
2181


 被折叠的 条评论
为什么被折叠?
被折叠的 条评论
为什么被折叠?
 到【灌水乐园】发言


