


什么是GraphQL
简介
GraphQL是一种用于 API 的查询语言,也是一个基于服务端的运行引擎。GraphQL 提供了一套完整的规范和描述用于查询 API,服务端能够根据客户端的需要自动适配并返回准确的数据。
优势
- 在目前流行的restful架构下,服务端返回的接口数据大多由后端开发所定义,而不是由前端来提出,比如对于同一个用户信息,有时后端接口返回来的数据中,仅有部分是前端所需要的,这是其他返回的数据便是冗余的。如果为了解决冗余的问题,编写对应返回数据的接口,又会使得接口数量变得庞大臃肿。
- 而使用GraphQL可以使开发者可以自定义数据模型、查询规范和查询参数,并在一个请求中指定需要返回的数据以准确获取所有想要的数据。
spring boot整合GraphQL
下面创建一个简单的spring boot项目整合GraphQL,做简单的演示
-
创建一个mavan项目
-
在pom文件中导入GraphQL的依赖,
<dependencies> <!--graphql-spring-boot--> <dependency> <groupId>org.springframework.boot</groupId> <artifactId>spring-boot-starter-graphql</artifactId> </dependency> <dependency> <groupId>com.graphql-java</groupId> <artifactId>graphiql-spring-boot-starter</artifactId> <version>5.0.2</version> </dependency> <!-- spring-boot web服务的依赖 --> <dependency> <groupId>org.springframework.boot</groupId> <artifactId>spring-boot-starter-web</artifactId> </dependency> </dependencies> -
在application.yaml文件中添加GraphQL相关的配置
server: port: 8889 spring: graphql: graphiql: enabled: true path: /graphql schema: locations: classpath:graphql/ -
接口代码编写
- TestController
- 此处有两个注解,@QueryMapping,@MutationMapping分别对应graphQL所支持的数据操作query(查询:支持对数据的基本查询)与mutation(变更:支持对数据的增删改操作)
@Controller public class TestController { /** * 经典 hollo graphql */ @QueryMapping public String hello(){ return "hello graphql"; } /** * 查询学生列表 */ @QueryMapping public List<Student> getStudent(@Argument("flag") String flag){ //此处的业务操作就不写了,直接返回Student对象集合 ArrayList<Student> list = new ArrayList<>(); list.add(new Student(1,"zmx")); list.add(new Student(2,"cyn")); return list; } /** * 修改学生信息 * @param Student * @return */ @MutationMapping public String updateStudent(@Argument StudentDTO Student){//@Argument 注解可以指定参数名 //执行修改逻辑,这里就不写了 return "success!"; } }- Student实体类与StudentDTO实体类
@Data @AllArgsConstructor @NoArgsConstructor public class Student { private int id; private String name; } @Data @AllArgsConstructor @NoArgsConstructor public class StudentDTO { private int id; private String name; }- 启动类
@ComponentScan("org.example.graphql") @SpringBootApplication() public class PartApplication { public static void main(String[] args) { //如果启动类启动失败,可以输出异常信息,查看原因 try { SpringApplication.run(PartApplication.class, args); } catch (Exception e) { System.out.println(e.toString()); } } /** * 注入WebGraphQlInterceptor Bean * @return */ @Bean public WebGraphQlInterceptor interceptor() { return (webInput, interceptorChain) -> // Switch threads to prove ThreadLocal context propagation works interceptorChain .next(webInput) .timeout(Duration.ofMinutes(5), Mono.error(new ResponseStatusException(HttpStatus.SERVICE_UNAVAILABLE))); } } -
在resource文件夹下创建graphql文件夹(与配置文件中的schma-locations对应),在其中编写.graphqls文件
- 编写.graphqls文件前,我们可以在使用idea安装一个GraphQL插件
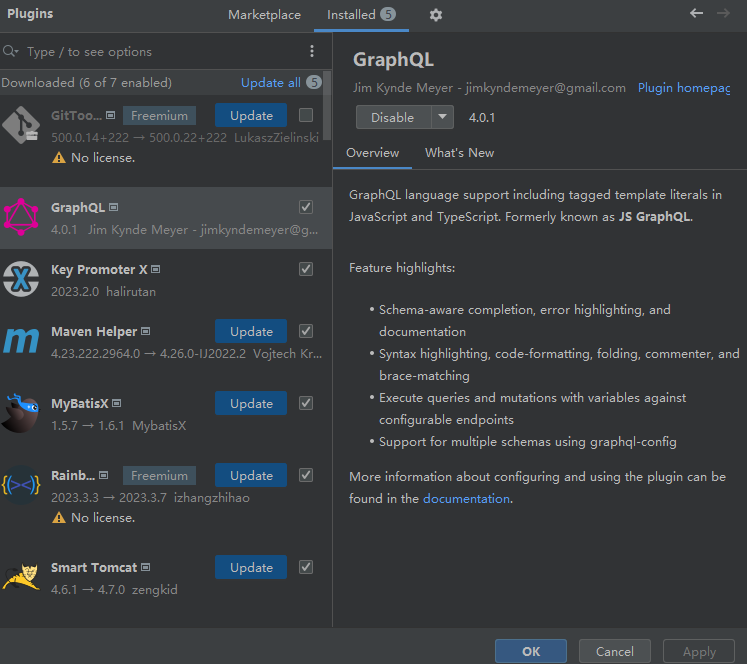
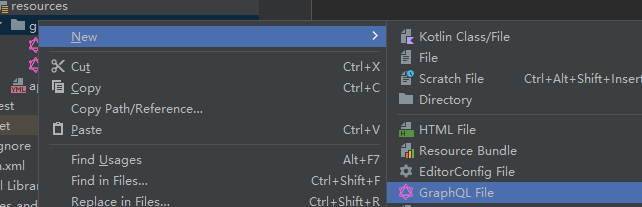
- 安装后新建文件时,便可以选择.graphqls文件
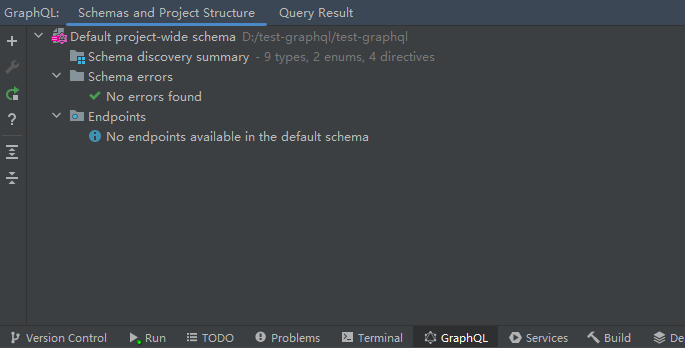
- 在idea下方工具栏也会出现GraphQL栏,可以检查我们书写的GraphQL语法是否正确
- 好了,回归正题,我们来编写.graphqls文件,使用到的schema语法可以参考链接: GraphQL官网 ,根据Controller层的接口,写出的代码如下
-
代码目录
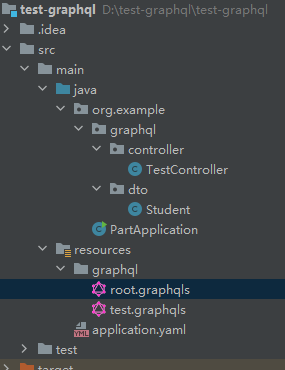
-
root.graphqls的内容
schema { query: Query mutation: Mutation } type Mutation{ } type Query{ } -
test.graphqls的内容
 extend type Query{
   hello:String
   getStudent(flag:String):[Student]
 }
 extend type Mutation {
   updateStudent(studentDto:StudentDTO):String
 }
 type Student{
   id:Int
   name:String
 }
 input StudentDTO{
   id:Int
   name:String
 }
-
- 编写.graphqls文件前,我们可以在使用idea安装一个GraphQL插件
-
到此代码,测试编写完成,可以启动项目测试一下接口了。
网页工具测试
- 项目启动后,我们可以返回GraphiQL网站查看自己的GraphQL文档,并调试
- 访问地址:http://localhost:8889/graphiql 端口号为启动服务的端口号,我这里是8889
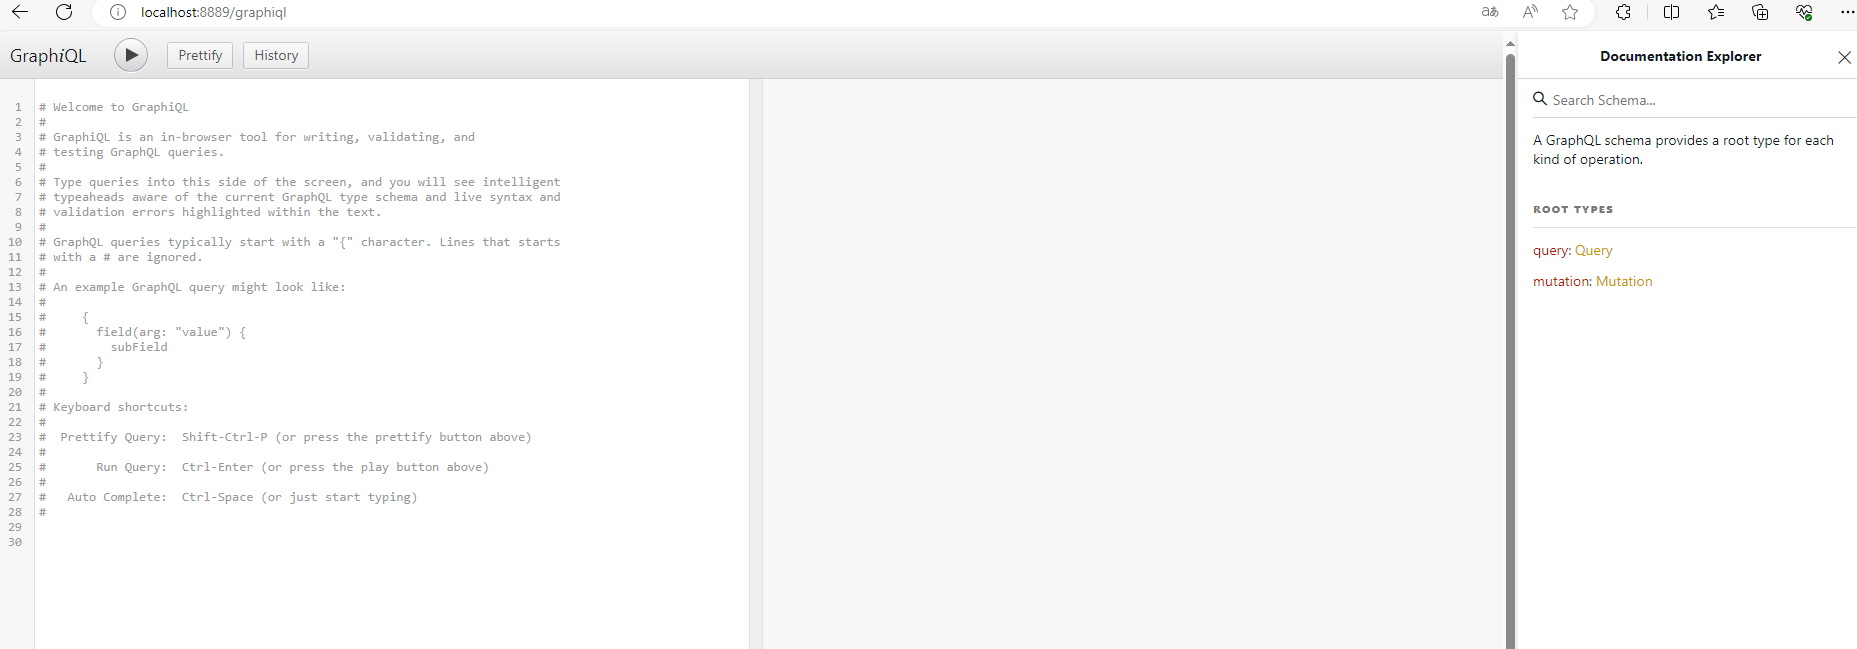
如图所示,我们页面左侧编写GraphQL请求,中间返回请求得到的数据,最后侧我们可以看到自己编写的GraphQL文档。
- 试着访问刚才写的查询接口,点击左上方的三角形按钮即可运行
{ getStudent(flag: "1") { id name } hello }- 返回结果

- 我们可以发现,一个请求我们同时调用了getStudent(String flag)和hello()两个接口,并且同时得到了它们的返回数据。并且如果你想要在getStudent返回的时候,只返回id的列表,那么你在查询时可以不写name字段,这样返回的结果便不会携带name(即实现了按要求返回)
{ getStudent(flag: "1") { id } hello } - 返回结果

- 返回结果
- 再试一下修改接口
mutation{ updateStudent(studentDto:{ id:1 name:"zmx"} ) }- 返回结果
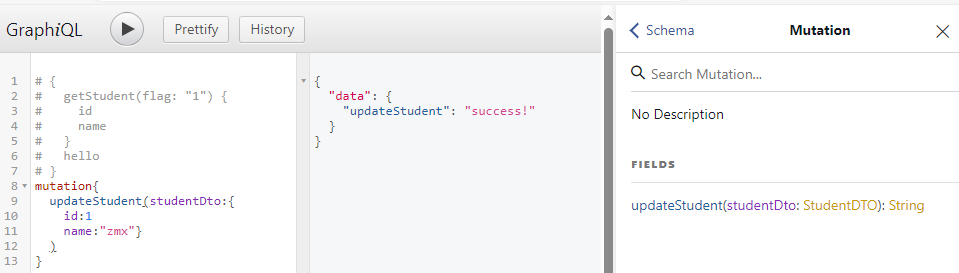
- 返回结果
postman测试
- 除了可以用GraphiQL网页进行测试之外,我们还可以使用PostMan进行测试
-
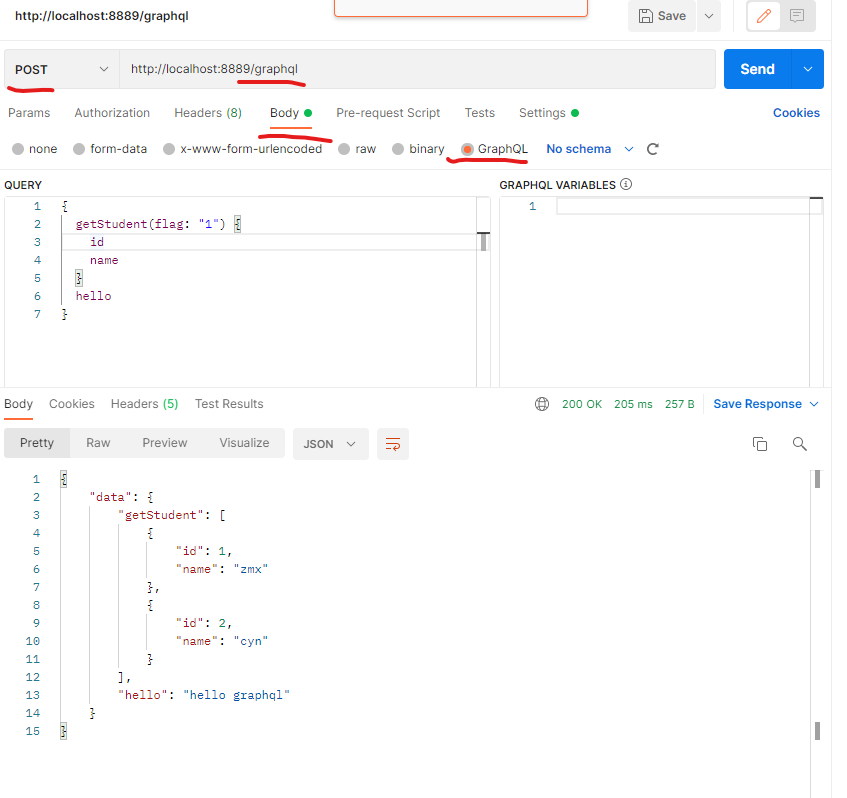
查询
-
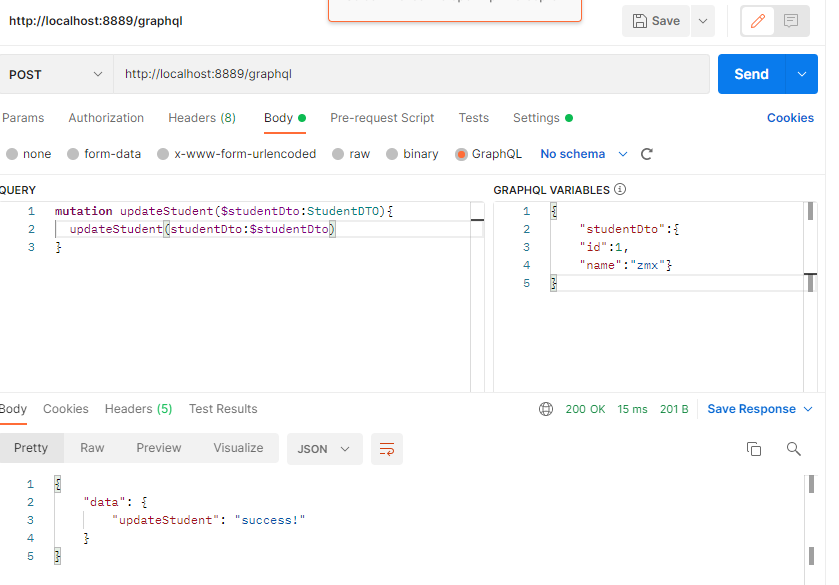
修改
-
- 注意要点:
- 请求为POST请求
- Url为 http://localhost:8889/graphql
- 选择请求体(body),选择"GraphQL"。
- 下方GRAPHQL VARIABLES的框内,可以填入请求的参数,在修改学生信息接口中为StudentDTO对象。
总结
- 本文简单的介绍了GraphQL,并将其与Spring Boot整合起来,简单用其实现了几个接口,并进行接口调用。目的在于认识GraphQL,并能进行简单使用。GraphQL的内容还有很多,文章没讲到的部分,就靠大家自己研究啦。


 512
512


 被折叠的 条评论
为什么被折叠?
被折叠的 条评论
为什么被折叠?
 到【灌水乐园】发言


