


一、集合类
(一)ArrayList
1、看底层源代码
-
new了一个Object数组

-
默认初始为new Object[10]


但是如果你什么都没有传入的情况下是不会先创建数组的,只有在你添加了第一条数据的时候才会被创建出来数组

-
当我们有25个数据怎么办呢?
答案是跟随你原来的值+ 原来的值除2【比如10 --> 15 ,15–>22,22–> 33】


-
可以观察源代码发现它的方法都没有通过synchronized来修饰方法或者类,所以它不是线程安全的。
2、线程不安全
- 演示线程不安全【会发现我们明明是应该放三个,但是却就放了两个,你多执行两次就会发现】

- 再演示报错情况:java.util.ConcurrentModificationException


- 上面解决办法
(1)使用Vector
第一种想法【这种不建议因为synchronized锁住了整张表,并发性就下降,性能不行】


(2)使用的Collections的synchronizedList方法
- 使用Collections接口的类

(3)第三种方法CopyOnWriteArrayList


咱不能只做api调用工程师,所以去看看底层
- CopyOnWriteArrayList【【写时复制技术】是读写思想分离的体现】


(二)Set
1、看看set源代码


-
底层采用的什么数据结构:答案是HashMap<E,Object>

-
添加一个数据的时候是什么情况呢


-
set也是不安全的:可以看到源代码并没有定义为安全的
2、解决办法
- 也是采用写时复制技术

(三)Map
1、看源代码

其实都差不多的,可以自己去点源代码看看
2、解决办法
- 处理为ConcurrentHashMap

二、java锁
(一)八个锁
- 线程 --------操作 --------资源类
1、标准访问看看谁先打印
(1)看代码和结果
package cn.mldn.Juc.class2;

class Phone {
    public synchronized void wangzry() throws Exception {
        System.out.println("打开王者荣耀");
    }
    public synchronized void juedqs() throws Exception {
        System.out.println("打开绝地求生");
    }

    public synchronized void baid() throws Exception {
        System.out.println("打开了百度");
    }
}


public class LockTest {

    public static void main(String[] args) {

        //1、资源类
        Phone phone = new Phone();

        new Thread(() -> {
            try {
                phone.wangzry();
            } catch (Exception e) {
                e.printStackTrace();
            }
        },"线程A");

        new Thread(() -> {
            try {
                phone.juedqs();
            } catch (Exception e) {
                e.printStackTrace();
            }
        },"线程B");

        new Thread(() -> {
            try {
                phone.baid();
            } catch (Exception e) {
                e.printStackTrace();
            }
        },"线程C");
    }

}
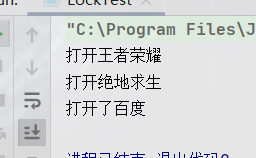
- 这种情况的结果【一般情况下会是这个,但是要知道出现这个答案是偶然的,并不是绝对的,但是一般情况下你写的顺序,被加载的顺序的原因,执行顺序就是从上往下进行执行,首先A被调度,然后到B,然后到C】
(2)结果分析
创建线程A后,只要你访问的是synchronized标注的方法,那么这个类对象都会被锁住(它的性能就下降了),所以我A只要锁住了,后续的向要进行操作的就要乖乖排队。
2、加个sleep看看
(1)看代码和结果
package cn.mldn.Juc.class2;

import java.util.concurrent.TimeUnit;

class Phone {
    public synchronized void wangzry() throws Exception {
        try {
            Thread.sleep(4000);
        } catch (InterruptedException e) {
            e.printStackTrace();
        }
        System.out.println("打开王者荣耀");
    }
    public synchronized void juedqs() throws Exception {
        System.out.println("打开绝地求生");
    }

}


public class LockTest {

    public static void main(String[] args) {

        //1、资源类
        Phone phone = new Phone();


        new Thread(() -> {
            try {
                phone.wangzry();
            } catch (Exception e) {
                e.printStackTrace();
            }
        },"线程A").start();


        new Thread(() -> {
            try {
                phone.juedqs();
            } catch (Exception e) {
                e.printStackTrace();
            }
        },"线程B").start();


    }


}
- 看结果

(2)结果分析
原因其实是一样的,我的A线程根据顺序得到先被加载,然后它会把整个对象锁起来,然后进行它的操作。

(3)对1和2进行分析
它们两个锁的是this,锁的是当前对象,并不是同时进来,各回各家,各找各妈的,而是A先占用了,那么B就要等着,等我A用完了,你再用。

3、加另外一个sleep看看
package cn.mldn.Juc.class2;


class Phone {
    public synchronized void wangzry() throws Exception {
        System.out.println("打开王者荣耀");
    }
    public synchronized void juedqs() throws Exception {

        System.out.println("打开绝地求生");
    }

    public synchronized void baid() throws Exception {
        System.out.println("打开了百度");
    }
}


public class LockTest {

    public static void main(String[] args) {

        //1、资源类
        Phone phone = new Phone();


        new Thread(() -> {
            try {
                phone.wangzry();
            } catch (Exception e) {
                e.printStackTrace();
            }
        },"线程A").start();

        new Thread(() -> {
            try {
                phone.wangzry();
            } catch (Exception e) {
                e.printStackTrace();
            }
        },"线程B").start();


        try {
            Thread.sleep(4000);
        } catch (InterruptedException e) {
            e.printStackTrace();
        }

        new Thread(() -> {
            try {
                phone.baid();
            } catch (Exception e) {
                e.printStackTrace();
            }
        },"线程C").start();
    }


}

4、加个普通方法看看
(1)看代码和结果
package cn.mldn.Juc.class2;

import java.util.concurrent.TimeUnit;

class Phone {
    public synchronized void wangzry() throws Exception {
        TimeUnit.SECONDS.sleep(4);
        System.out.println("打开王者荣耀");
    }

    public synchronized  void baid() throws Exception {
        System.out.println("打开了百度");
    }

    public void sayHello() throws Exception {
        System.out.println("SayHello");
    }
}


public class LockTest {

    public static void main(String[] args) {

        //1、资源类
        Phone phone = new Phone();


            new Thread(() -> {
                try {
                    phone.wangzry();
                } catch (Exception e) {
                    e.printStackTrace();
                }
            },"线程A").start();


           /* new Thread(() -> {
                try {
                    phone.baid();
                } catch (Exception e) {
                    e.printStackTrace();
                }
            },"线程C").start();*/

        new Thread(() -> {
            try {
                phone.sayHello();
            } catch (Exception e) {
                e.printStackTrace();
            }
        },"线程D").start();
        }


}
- 看看结果

(2)结果分析
为什么我们的SayHello方法进去就打印了呢?
原因其实你虽然对和那些方法是没什么关系的,你该调则调。它们之间没什么冲突。【一定要注意它是同一个资源,即同一个对象】
5、打开两部手机
(1)看代码和结果分析
- 看代码
package cn.mldn.Juc.class2;

import java.util.concurrent.TimeUnit;

class Phone {
    public synchronized void wangzry() throws Exception {
        TimeUnit.SECONDS.sleep(4);
        System.out.println("打开王者荣耀");
    }

    public synchronized  void baid() throws Exception {
        System.out.println("打开了百度");
    }

    public void sayHello() throws Exception {
        System.out.println("SayHello");
    }
}


public class LockTest {

    public static void main(String[] args) {

        //1、资源类
        Phone phone = new Phone();
        Phone phone1 = new Phone();


        //2、操作资源
        new Thread(() -> {
            try {
                phone.wangzry();
            } catch (Exception e) {
                e.printStackTrace();
            }
        },"线程A").start();


        new Thread(() -> {
            try {
                phone1.baid();
            } catch (Exception e) {
                e.printStackTrace();
            }
        },"线程B").start();

    }
}
- 结果

(2)结果分析
此时不存在争取的问题,是存在各自回家的样子了。两个都不是同一把锁的了,根本不会冲突了。
6、两个静态方法(一部手机)
(1)看代码和结果
package cn.mldn.Juc.class2;

import java.util.concurrent.TimeUnit;

class Phone {
    public static synchronized void wangzry() throws Exception {
        TimeUnit.SECONDS.sleep(4);
        System.out.println("打开王者荣耀");
    }

    public static synchronized  void baid() throws Exception {
        System.out.println("打开了百度");
    }

}


public class LockTest {

    public static void main(String[] args) {

        //1、资源类
        Phone phone = new Phone();


        //2、操作资源
        new Thread(() -> {
            try {
                phone.wangzry();
            } catch (Exception e) {
                e.printStackTrace();
            }
        },"线程A").start();


        new Thread(() -> {
            try {
                phone.baid();
            } catch (Exception e) {
                e.printStackTrace();
            }
        },"线程B").start();

    }
}
- 看结果

(2)结果分析
其实就和加不加没什么区别的吧,但是有很大的区别。
- 被static的方法加上一个synchronized之后,它是属于当前类的模板部分。它是把你的整个类锁了,【这就是对象锁和全局锁(这么一个类)的一个区别,static锁的全局,对象锁去哪个就是哪个对象】
(3)对象锁和类型锁
- 不加static的情况下,我们的两步手机是没什么影响的,锁的是对象。但是如果加了锁的就是当前类了。
- 看如下的代码
class Phone {
    public static synchronized void wangzry() throws Exception {
        TimeUnit.SECONDS.sleep(4);
        System.out.println("打开王者荣耀");
    }

    public static synchronized  void baid() throws Exception {
        System.out.println("打开了百度");
    }

    public  void sayHello() throws Exception {
        System.out.println("sayHello");
    }

}


public class LockTest {

    public static void main(String[] args) {

        //1、资源类
        Phone phone = new Phone();
        Phone phone1 = new Phone();


        //2、操作资源
        new Thread(() -> {
            try {
                phone.wangzry();
            } catch (Exception e) {
                e.printStackTrace();
            }
        },"线程A").start();


        new Thread(() -> {
            try {
                phone1.baid();
            } catch (Exception e) {
                e.printStackTrace();
            }
        },"线程B").start();


        new Thread(() -> {
            try {
                phone.sayHello();
            } catch (Exception e) {
                e.printStackTrace();
            }
        },"线程C").start();
    }
}
- 总结:对于普通的同步方法锁的是当前对象【synchronized(this)一样的】。而对于static是锁的类型了。其实加上了static就相当于锁住当前类型。
7、两部手机实现第六步
(1)看代码和结果
package cn.mldn.Juc.class2;

import java.util.concurrent.TimeUnit;

class Phone {
    public static synchronized void wangzry() throws Exception {
        TimeUnit.SECONDS.sleep(4);
        System.out.println("打开王者荣耀");
    }

    public static synchronized  void baid() throws Exception {
        System.out.println("打开了百度");
    }

}


public class LockTest {

    public static void main(String[] args) {

        //1、资源类
        Phone phone = new Phone();


        //2、操作资源
        new Thread(() -> {
            try {
                phone.wangzry();
            } catch (Exception e) {
                e.printStackTrace();
            }
        },"线程A").start();


        new Thread(() -> {
            try {
                phone.baid();
            } catch (Exception e) {
                e.printStackTrace();
            }
        },"线程B").start();

    }
}
- 答案是和上一步分析是一样的

8、一个静态同步方法,一个普通同步方法,同一部手机
(1)看代码和结果
package cn.mldn.Juc.class2;

import java.util.concurrent.TimeUnit;

class Phone {
    public static synchronized void wangzry() throws Exception {
        TimeUnit.SECONDS.sleep(4);
        System.out.println("打开王者荣耀");
    }

    public synchronized  void baid() throws Exception {
        System.out.println("打开了百度");
    }

}


public class LockTest {

    public static void main(String[] args) {

        //1、资源类
        Phone phone = new Phone();


        //2、操作资源
        new Thread(() -> {
            try {
                phone.wangzry();
            } catch (Exception e) {
                e.printStackTrace();
            }
        },"线程A").start();


        new Thread(() -> {
            try {
                phone.baid();
            } catch (Exception e) {
                e.printStackTrace();
            }
        },"线程B").start();

    }
}
- 看结果

(2)分析
他们两个是互相不冲突的。普通方法锁的是当前对象。
9、两部手机完成上面
(1)看代码和结果
- 看代码
package cn.mldn.Juc.class2;

import java.util.concurrent.TimeUnit;

class Phone {
    public static synchronized void wangzry() throws Exception {
        TimeUnit.SECONDS.sleep(4);
        System.out.println("打开王者荣耀");
    }

    public synchronized  void baid() throws Exception {
        System.out.println("打开了百度");
    }

}


public class LockTest {

    public static void main(String[] args) {

        //1、资源类
        Phone phone = new Phone();
        Phone phone2 = new Phone();


        //2、操作资源
        new Thread(() -> {
            try {
                phone.wangzry();
            } catch (Exception e) {
                e.printStackTrace();
            }
        },"线程A").start();


        new Thread(() -> {
            try {
                phone2.baid();
            } catch (Exception e) {
                e.printStackTrace();
            }
        },"线程B").start();

    }
}
- 看结果

(2)结果分析
这个不用分析了吧,比较简单了。
10、小总结

(二)生产者–消费者
1)消费者上【传统版本】
1、代码实现(第一个版本)
package cn.mldn.Juc.producerAndcustomer;

class Message1 {
    private int number = 0;

    public synchronized void Producer() {
        //1判断
        if (number != 0) {
            try {
                this.wait();
            } catch (InterruptedException e) {
                e.printStackTrace();
            }
        }
        //2生产
        number++;
        System.out.println("当前线程" + Thread.currentThread().getName()+ "完成工作" + number);
        //3通知
        this.notify();
    }

    public synchronized void Consumer() {

        //1判断
        if (number != 1) {
            try {
                this.wait();
            } catch (InterruptedException e) {
                e.printStackTrace();
            }
        }
        //2消费
        number--;
        System.out.println("当前线程" + Thread.currentThread().getName()+ "完成工作" + number);
        //3通知
        this.notify();
    }
}


public class mainClass1 {

    public static void main(String[] args) {
        Message1 message = new Message1();
        new Thread(() -> {
            for (int i = 0; i < 10; i++) {
                message.Producer();
            }
        },"线程A").start();

        new Thread(() -> {
            for (int i = 0; i < 10; i++) {
                message.Producer();
            }
        },"线程B").start();
    }
}
2、第二种版本(有问题)
package cn.mldn.Juc.producerAndcustomer;

class Message1 {
    private int number = 0;

    public synchronized void Producer() {
        //1判断
        if (number != 0) {
            try {
                this.wait();
            } catch (InterruptedException e) {
                e.printStackTrace();
            }
        }
        //2生产
        number++;
        System.out.println("当前线程" + Thread.currentThread().getName()+ "完成工作" + number);
        //3通知
        this.notify();
    }

    public synchronized void Consumer() {

        //1判断
        if (number != 1) {
            try {
                this.wait();
            } catch (InterruptedException e) {
                e.printStackTrace();
            }
        }
        //2消费
        number--;
        System.out.println("当前线程" + Thread.currentThread().getName()+ "完成工作" + number);
        //3通知
        this.notify();
    }
}


public class mainClass1 {

    public static void main(String[] args) {
        Message1 message = new Message1();
        new Thread(() -> {
            for (int i = 0; i < 10; i++) {
                message.Producer();
            }
        },"线程A").start();

        new Thread(() -> {
            for (int i = 0; i < 10; i++) {
                message.Producer();
            }
        },"线程B").start();

        new Thread(() -> {
            for (int i = 0; i < 10; i++) {
                message.Consumer();
            }
        },"线程C").start();

		new Thread(() -> {
            for (int i = 0; i < 10; i++) {
                message.Consumer();
            }
        },"消费线程D").start();
    }
}
3、第二个版本的解决办法
class Message1 {
    private int number = 0;

    public synchronized void Producer() {
        //1判断
        while (number != 0) {
            try {
                this.wait();
            } catch (InterruptedException e) {
                e.printStackTrace();
            }
        }
        //2生产
        number++;
        System.out.println("当前线程" + Thread.currentThread().getName()+ "完成工作" + number);
        //3通知
        this.notifyAll();
    }

    public synchronized void Consumer() {

        //1判断
        while (number != 1) {
            try {
                this.wait();
            } catch (InterruptedException e) {
                e.printStackTrace();
            }
        }
        //2消费
        number--;
        System.out.println("当前线程" + Thread.currentThread().getName()+ "完成工作" + number);
        //3通知
        this.notifyAll();
    }
}


public class mainClass1 {

    public static void main(String[] args) {
        Message1 message = new Message1();
        new Thread(() -> {
            for (int i = 0; i < 10; i++) {
                message.Producer();
            }
        },"生产线程A").start();

        new Thread(() -> {
            for (int i = 0; i < 10; i++) {
                message.Producer();
            }
        },"生产线程B").start();

        new Thread(() -> {
            for (int i = 0; i < 10; i++) {
                message.Consumer();
            }
        },"消费线程C").start();

		 new Thread(() -> {
            for (int i = 0; i < 10; i++) {
                message.Consumer();
            }
        },"消费线程D").start();
    }
}
为什么呢?其实我们的while本质是循环加判断。所以它可以判断,而且当你通过了,还要拉回来重新判断。
4、到这里的一个小总结
我们在第(一)中已经完成了高内聚低耦合下,线程操作资源类
第(二)完成了判断,干活,通知的处理,在第(二)步骤的3步完成了防止了虚假唤醒。
5、第2步的问题分析
为什么用if判断,用两个线程就没问题了呢,四个就出问题了呢
- 其实很好理解:两个线程,就你跟我,你生产我消费,你生产了,就叫我去消费,我消费了就叫你生产。但是四个来就不好理解了,A和B生产,C和D消费,如果通知生产,A和B同时生成。那就出现了2的情况了。
- 四个的情况:用了while后,为什么就可以了?其实也比较好理解,while的本质是循环加判断。我判断你了,还要把你循环拉回来再判断。
2)消费者线程下【Lock版本】
-
多线程套路为多线程格式+while判断。
-
Lock(可重复的可递归的非公平的锁)

1、存在问题版本
package cn.mldn.Juc.producerAndcustomer;

import java.util.concurrent.locks.Lock;
import java.util.concurrent.locks.ReentrantLock;

class Message1 {
    private int number = 0;
    private Lock lock = new ReentrantLock();

    public void Producer() {
        //1判断
        lock.lock();
        try {
            while (number != 0) {
                try {
                        this.wait();
                } catch (InterruptedException e) {
                    e.printStackTrace();
                }
            }
        } catch (Exception e) {
            e.printStackTrace();
        } finally {
            lock.unlock();
        }

        //2生产
        number++;
        System.out.println("当前线程" + Thread.currentThread().getName()+ "完成工作" + number);
        //3通知
        this.notifyAll();
    }

    public void Consumer() {

        //1判断
        lock.lock();
        try {
            while (number != 1) {
                try {
                    this.wait();
                } catch (InterruptedException e) {
                    e.printStackTrace();
                }
            }
        } catch (Exception e) {
            e.printStackTrace();
        } finally {
            lock.unlock();
        }
        //2消费
        number--;
        System.out.println("当前线程" + Thread.currentThread().getName()+ "完成工作" + number);
        //3通知
        this.notifyAll();
    }

}


public class mainClass1 {

    public static void main(String[] args) {
        Message1 message = new Message1();
        new Thread(() -> {
            for (int i = 0; i < 10; i++) {
                message.Producer();
            }
        },"生产线程A").start();

        new Thread(() -> {
            for (int i = 0; i < 10; i++) {
                message.Producer();
            }
        },"生产线程B").start();

        new Thread(() -> {
            for (int i = 0; i < 10; i++) {
                message.Consumer();
            }
        },"消费线程C").start();

        new Thread(() -> {
            for (int i = 0; i < 10; i++) {
                message.Consumer();
            }
        },"消费线程D").start();
    }
}

我们之前的唤醒和休眠,用的方法不行,报错了。接下来用lock的解决。
2、解决办法


package cn.mldn.Juc.producerAndcustomer;

import java.util.concurrent.locks.Condition;
import java.util.concurrent.locks.Lock;
import java.util.concurrent.locks.ReentrantLock;

class Message1 {
    private int number = 0;
    private Lock lock = new ReentrantLock();
    private Condition condition = lock.newCondition();
    public void Producer() {
        //1判断
        lock.lock();
        try {
            while (number != 0) {
                try {
                        condition.await();
                } catch (InterruptedException e) {
                    e.printStackTrace();
                }
            }

            //2生产
            number++;
            System.out.println("当前线程" + Thread.currentThread().getName()+ "完成工作" + number);
            //3通知
            condition.signalAll();
        } catch (Exception e) {
            e.printStackTrace();
        } finally {
            lock.unlock();
        }


    }

    public void Consumer() {

        //1判断
        lock.lock();
        try {
            while (number != 1) {
                try {
                    condition.await();
                } catch (InterruptedException e) {
                    e.printStackTrace();
                }
            }

            //2消费
            number--;
            System.out.println("当前线程" + Thread.currentThread().getName()+ "完成工作" + number);
            //3通知
            condition.signalAll();
        } catch (Exception e) {
            e.printStackTrace();
        } finally {
            lock.unlock();
        }

    }

}


public class mainClass1 {

    public static void main(String[] args) {
        Message1 message = new Message1();
        new Thread(() -> {
            for (int i = 0; i < 10; i++) {
                message.Producer();
            }
        },"生产线程A").start();

        new Thread(() -> {
            for (int i = 0; i < 10; i++) {
                message.Producer();
            }
        },"生产线程B").start();

        new Thread(() -> {
            for (int i = 0; i < 10; i++) {
                message.Consumer();
            }
        },"消费线程C").start();

        new Thread(() -> {
            for (int i = 0; i < 10; i++) {
                message.Consumer();
            }
        },"消费线程D").start();
    }
}
3、ConditionDemo(为了解决多线程间按顺序调用A-B-C)

package cn.mldn.Juc.producerAndcustomer;

import java.util.concurrent.locks.Condition;
import java.util.concurrent.locks.Lock;
import java.util.concurrent.locks.ReentrantLock;

class ShareDate {
    //标志位为1,A:打印 2:B打印,3:C打印
    private int number = 1;
    private Lock lock = new ReentrantLock();
    private Condition condition = lock.newCondition();
    private Condition condition1 = lock.newCondition();
    private Condition condition2 = lock.newCondition();

    public void print5() {
        lock.lock();
        try {
            //1判断
            while (number != 1) {
                condition.await();
            }
            //2A干活打印5次
            for (int i = 0; i < 5; i++) {
                System.out.println("" + Thread.currentThread().getName() + i);
            }
            //3通知(现在是通知某一个吧)
            number = 2;
            condition.signal();

        } catch (Exception e) {
            e.printStackTrace();
        } finally {
            lock.unlock();
        }
    }

    public void print10() {
        lock.lock();
        try {
            //1判断
            while (number != 2) {
                condition1.await();
            }
            //2A干活打印5次
            for (int i = 0; i < 5; i++) {
                System.out.println("" + Thread.currentThread().getName() + i);
            }
            //3通知(现在是通知某一个吧)
            number = 3;
            condition2.signal();

        } catch (Exception e) {
            e.printStackTrace();
        } finally {
            lock.unlock();
        }
    }

    public void print15() {
        lock.lock();
        try {
            //1判断
            while (number != 3) {
                condition2.await();
            }
            //2A干活打印5次
            for (int i = 0; i < 5; i++) {
                System.out.println("" + Thread.currentThread().getName() + i);
            }
            //3通知(现在是通知某一个吧)
            number = 3;
            condition.signal();

        } catch (Exception e) {
            e.printStackTrace();
        } finally {
            lock.unlock();
        }
    }

}

public class ConditionDemo {

    public static void main(String[] args) {
        ShareDate shareDate = new ShareDate();
        new Thread(() -> {
            for (int i = 0; i < 10; i++) {
                shareDate.print5();
            }
        },"线程A").start();

        new Thread(() -> {
            for (int i = 0; i < 10; i++) {
                shareDate.print10();
            }
        },"线程B").start();

        new Thread(() -> {
            for (int i = 0; i < 10; i++) {
                shareDate.print15();
            }
        },"线程C").start();
    }
}
一个锁配置了三把钥匙进行精确打击处理。
三、Callable实现多线程
- 我们之前学习过了Runnable和Thread实现多线程,其实有三种可以实现多线程的方法(后续还会有一种)。【其实和Runnabl差不多的,它的最大的区别就是Callable有返回值(另外它还有区别,它还有异常)】
1、看源代码

这个call方法和run差不多的。而且看注解和只有一个方法,那可以用Lambda表达式。
2、如何实现启动
- 看到这个

- 我们用FutureTask(后面的SwingWorker不用,它不会用)


通过继承关系,就可以发现最终我们传递的就是一个Runnable接口的子接口吧。
import java.util.concurrent.Callable;
import java.util.concurrent.FutureTask;

class CallableMessage implements Callable<Integer> {

    @Override
    public Integer call() throws Exception {
        System.out.println(1+1+1+1+1+1+1+1);
        return 1+1+1+1+1+1+1+1;
    }
}

public class CallableTest {

    public static void main(String[] args) {

        FutureTask futureTask = new FutureTask(new CallableMessage());

        new Thread(futureTask,"线程A").start();

    }
}
、


 1万+
1万+


 被折叠的 条评论
为什么被折叠?
被折叠的 条评论
为什么被折叠?
 到【灌水乐园】发言


