


1. 搭建config配置中心
SpringCloud-config 配置中心用于存放所有项目的配置文件,并将这些文件集中存放到git仓库,便于维护
1.1 安装Git
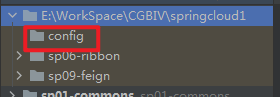
1.2 项目新建config文件夹
新建config文件夹,并复制项目02,03,04,11的配置文件到config文件夹中

- 复制02配置文件,并改名为: item-service-dev.yml
- 复制03配置文件,并改名为: user-service-dev.yml
- 复制04配置文件,并改名为: order-service-dev.yml
- 复制1配置文件,并改名为: zuul-dev.yml
1.3 禁止配置中心的配置信息覆盖客户端配置
默认配置中心配置优先级高,配置中心配置会覆盖客户端的所有配置,包括命令行参数配置,这样我们在item-service和order-service中配置的端口号启动参数会无效
在四个配置文件中添加下面的配置:
spring:
  cloud:
    config:
      override-none: true
2. 创建本地仓库
- 按shift+shift,查询:create Git Repository,点击项目名,进行创建(已经创建无需重复创建)
- 保存到本地仓库,并提交到git远程仓库

3.1 创建sp12-config项目module
3.2 添加config-server/eureka client依赖
		<dependency>
			<groupId>org.springframework.cloud</groupId>
			<artifactId>spring-cloud-config-server</artifactId>
		</dependency>
		<dependency>
			<groupId>org.springframework.cloud</groupId>
			<artifactId>spring-cloud-starter-netflix-eureka-client</artifactId>
		</dependency>
3.3 配置application.yml
spring:
  application:
    name: config-server
  cloud:
    config:
      server:
        git:
          #仓库地址
          uri: https://gitee.com/zhou-16/springcloud1
          #仓库中的子目录
          searchPaths: config

server:
  port: 6001

eureka:
  client:
    service-url:
      defaultZone: http://eureka1:2001/eureka,http://eureka2:2002/eureka
3.4 启动类添加注解
- @EnableConfigServer
- @EnableDiscoveryClient
package cn.tedu.sp12;

import org.springframework.boot.SpringApplication;
import org.springframework.boot.autoconfigure.SpringBootApplication;
import org.springframework.cloud.client.discovery.EnableDiscoveryClient;
import org.springframework.cloud.config.server.EnableConfigServer;

@EnableConfigServer
@EnableDiscoveryClient
@SpringBootApplication
public class Sp12ConfigApplication {

	public static void main(String[] args) {
		SpringApplication.run(Sp12ConfigApplication.class, args);
	}

}
3.5 启动测试
-
访问 item-service-dev.yml 可以使用以下形式:
http://localhost:6001/item-service-dev.yml
http://localhost:6001/item-service/dev -
测试其他文件
http://localhost:6001/user-service/dev
http://localhost:6001/zuul/dev
http://localhost:6001/order-service/dev
4. 修改客户端项目从配置中心获取配置信息
4.1 将项目中的application.yml文件删除/注释掉所有内容
4.2 添加config-client依赖
config client
4.3 每个项目添加bootstrap.yml文件
bootstrap.yml文件是springboot定义的配置文件,用于引导配置,优先于application.yml加载
4.3.1 item-service
spring:
  cloud:
    config:
      discovery:
        enabled: true
        service-id: config-server
      name: item-service
      profile: dev

eureka:
  client:
    service-url:
      defaultZone: http://eureka1:2001/eureka, http://eureka2:2002/eureka
4.3.2 user-service
spring:
  cloud:
    config:
      discovery:
        enabled: true
        service-id: config-server
      name: item-service
      profile: dev

eureka:
  client:
    service-url:
      defaultZone: http://eureka1:2001/eureka, http://eureka2:2002/eureka
4.3.3 order-service
spring:
  cloud:
    config:
      discovery:
        enabled: true
        service-id: config-server
      name: item-service
      profile: dev

eureka:
  client:
    service-url:
      defaultZone: http://eureka1:2001/eureka, http://eureka2:2002/eureka
4.4 启动服务,查看日志信息

5 实现动态刷新
spring cloud 允许运行时动态刷新配置,可以重新从配置中心获取新的配置信息
配置user-service,作为演示案例
5.1 在user-service项目添加actuator依赖
		<dependency>
			<groupId>org.springframework.boot</groupId>
			<artifactId>spring-boot-starter-actuator</artifactId>
		</dependency>
5.2 修改config文件夹中user-service-dev.yml
management:
  endpoints:
    web:
      exposure:
        include: refresh
5.3 在UserServiceImpl类上天添加注解@RefreshScope
package cn.tedu.sp03.user.service;

import cn.tedu.sp01.pojo.User;
import cn.tedu.sp01.service.UserService;
import cn.tedu.web.util.JsonUtil;
import com.fasterxml.jackson.core.type.TypeReference;
import lombok.extern.slf4j.Slf4j;
import org.springframework.beans.factory.annotation.Value;
import org.springframework.cloud.context.config.annotation.RefreshScope;
import org.springframework.stereotype.Service;

import java.util.List;

@Service
@Slf4j
@RefreshScope
public class UserServiceImpl implements UserService {

    @Value("${sp.user-service.users}")
    private String userJson;//注入yml配置中的测试用户数据

    @Override
    public User getUser(Integer id) {
        log.info("id"+id+", users="+userJson);
        //手动转换用户数据格式:Json --> List<User> 集合
        List<User> users = JsonUtil.from(userJson, new TypeReference<List<User>>() {});

        for(User u:users){
            if(id.equals(u.getId())){
                return u;
            }
        }
        return new User(id,"用户名"+id,"密码"+id);
    }

    @Override
    public void addScore(Integer id, Integer score) {
        log.info("增加用户积分, userId"+id+", score="+score);

    }
}
5.4 重启配置中心, 再重启sp03, 查看暴露的刷新端点
- 查看暴露的刷新端点
http://localhost:8101/actuator

5.5 在user-service-dev.yml文件添加99用户的数据
- 添加完并提交到远程仓库
sp:
  user-service:
    users: "[{\"id\":7, \"username\":\"abc\",\"password\":\"123\"},{\"id\":8, \"username\":\"def\",\"password\":\"456\"},{\"id\":9, \"username\":\"ghi\",\"password\":\"789\"},{\"id\":99, \"username\":\"aaa\",\"password\":\"111\"}]"
5.6 用postman访问刷新端点, 刷新配置
- 刷新端点路径:
http://localhost:8101/actuator/refresh - 使用 postman 向刷新端点发送 post 请求

5.7 访问 user-service,查看动态更新的新用户数据
- http://localhost:8101/99


 1276
1276


 被折叠的 条评论
为什么被折叠?
被折叠的 条评论
为什么被折叠?
 到【灌水乐园】发言


