


1、配置样式
1、配置less
less的配置见 【css篇】
2、使用 styled-components
cnpm install styled-components
- 因为在TS中需要设置类型所以需要下载类型依赖包
cnpm install --save-dev @types/styled-components
3、设置主题
- 1、创建一个theme文件

const theme = {
  color: {
    primary: '#C20C0C',
    secondary: ''
  },
  size: {},
  mixin: {
    wrapv1: `
      width: 1100px;
      margin: 0 auto;
    `
  }
}

export default theme
- 2、根index.ts中使用
import React from 'react'
import ReactDOM from 'react-dom/client'
import App from '@/App'
import { BrowserRouter } from 'react-router-dom'
import { Provider } from 'react-redux'
import 'normalize.css'
import '@/assets/css/index.less'
import store from './store'
import { ThemeProvider } from 'styled-components'
import theme from '@/assets/theme'

const root = ReactDOM.createRoot(document.getElementById('root') as HTMLElement)
root.render(
  <Provider store={store}>
    {/* 在这里使用主题 */}
    <ThemeProvider theme={theme}>
      <BrowserRouter>
        <App />
      </BrowserRouter>
    </ThemeProvider>
  </Provider>
)
- 3、使用主题
4、使用antDesign
- 查看官网
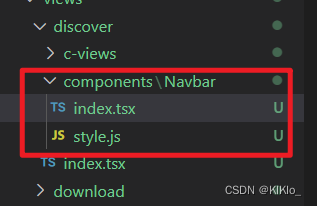
2、导航栏代码实例

[{
    "title": "发现音乐",
    "type": "path",
    "link": "/discover"
  },
  {
    "title": "我的音乐",
    "type": "path",
    "link": "/mine"
  },
  {
    "title": "关注",
    "type": "path",
    "link": "/focus"
  },
  {
    "title": "商城",
    "type": "link",
    "link": "https://music.163.com/store/product"
  },
  {
    "title": "音乐人",
    "type": "link",
    "link": "https://music.163.com/st/musician"
  },
  {
    "title": "下载客户端",
    "type": "path",
    "link": "/download"
  }
]
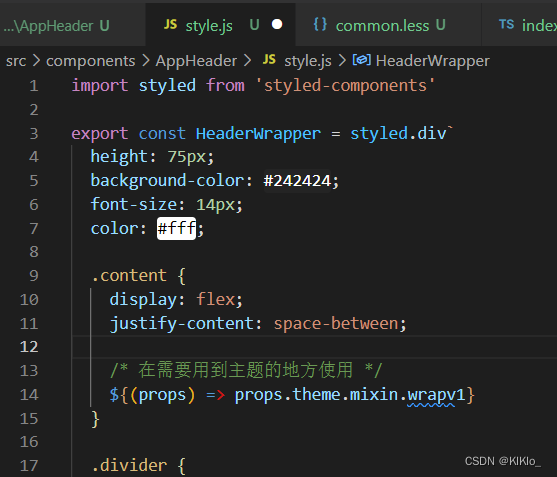
- style.js
import styled from 'styled-components'

export const HeaderWrapper = styled.div`
  height: 75px;
  background-color: #242424;
  font-size: 14px;
  color: #fff;

  .content {
    display: flex;
    justify-content: space-between;

    /* 在需要用到主题的地方使用 */
    ${(props) => props.theme.mixin.wrapv1}
  }

  .divider {
    height: 5px;
    background-color: #c20c0c;
  }
`

export const HeaderLeft = styled.div`
  display: flex;

  .logo {
    display: block;
    width: 176px;
    height: 70px;
    background-position: 0 0;
    text-indent: -9999px;
  }

  .title-list {
    display: flex;
    line-height: 70px;

    .item {
      position: relative;

      a {
        display: block;
        padding: 0 20px;
        color: #ccc;
      }

      :last-of-type a {
        position: relative;
        ::after {
          position: absolute;
          content: '';
          width: 28px;
          height: 19px;
          background-image: url(${require('@/assets/img/sprite_01.png')});
          background-position: -190px 0;
          top: 20px;
          right: -15px;
        }
      }

      &:hover a,
      .active {
        color: #fff;
        background: #000;
        text-decoration: none;
      }

      .active .icon {
        position: absolute;
        display: inline-block;
        width: 12px;
        height: 7px;
        bottom: -1px;
        left: 50%;
        transform: translate(-50%, 0);
        background-position: -226px 0;
      }
    }
  }
`
export const HeaderRight = styled.div`
  display: flex;
  align-items: center;
  color: #787878;
  font-size: 12px;

  > .search {
    width: 158px;
    height: 32px;
    border-radius: 16px;

    input {
      &::placeholder {
        font-size: 12px;
      }
    }
  }

  .center {
    width: 90px;
    height: 32px;
    line-height: 32px;
    margin: 0 16px;
    text-align: center;
    border: 1px solid #666;
    border-radius: 16px;
    color: #ccc;
    cursor: pointer;

    :hover {
      color: #fff;
      border-color: #fff;
    }
  }
`
- index.js
import React, { memo } from 'react'
import type { FC, ReactNode } from 'react'
import headerTitle from '@/assets/data/header_titles.json'
import { NavLink } from 'react-router-dom'
import { HeaderLeft, HeaderRight, HeaderWrapper } from './style'
import { Button, Input } from 'antd'
import { SearchOutlined } from '@ant-design/icons'

interface IProps {
  children?: ReactNode
}

function showItem(item: any) {
  if (item.type === 'path') {
    return (
      // 这里用navLink是因为在路由的时候 他有记录状态且有特定的样式
      <NavLink
        to={item.link}
        // 这个函数可以解构出来如果是isActive的话就设置对应的样式
        className={({ isActive }) => {
          return isActive ? 'active' : undefined
        }}
      >
        {item.title}
        <i className="icon sprite_01"></i>
      </NavLink>
    )
  } else {
    return (
      // 他用a标签跳转到了其他页面
      <a href={item.link} rel="noopener" target="_blank">
        {item.title}
      </a>
    )
  }
}

const AppHeader: FC<IProps> = () => {
  return (
    <HeaderWrapper>
      <div className="content wrapv1">
        <HeaderLeft>
          <a className="logo sprite_01" href="/">
            网易云音乐
          </a>
          <div className="title-list">
            {headerTitle.map((item) => {
              return (
                <div className="item" key={item.title}>
                  {showItem(item)}
                </div>
              )
            })}
          </div>
        </HeaderLeft>
        <HeaderRight>
          <Input
            className="search"
            placeholder="音乐/视频/电台/用户"
            prefix={<SearchOutlined />}
          />
          <span className="center">创作者中心</span>
          <span className="login">登录</span>
        </HeaderRight>
      </div>
      <div className="divider"></div>
    </HeaderWrapper>
  )
}

export default memo(AppHeader)
3、发现页的副标题

import React, { memo } from 'react'
import type { FC, ReactNode } from 'react'
import { NavWrapper } from './style'
import { discoverMenu } from '@/assets/data/local_data'
import { NavLink } from 'react-router-dom'

interface IProps {
  children?: ReactNode
}

const Navbar: FC<IProps> = () => {
  return (
    <NavWrapper>
      <div className="nav wrap-v1">
        {discoverMenu.map((item) => {
          return (
            <div className="item" key={item.link}>
              <NavLink to={item.link}>{item.title}</NavLink>
            </div>
          )
        })}
      </div>
    </NavWrapper>
  )
}

export default memo(Navbar)
import styled from 'styled-components'

export const NavWrapper = styled.div`
  height: 30px;
  background-color: ${(props) => props.theme.color.primary};

  .nav {
    display: flex;
    top: -4px;
    position: relative;
    padding-left: 180px;
    .item {
      a {
        display: inline-block;
        height: 30px;
        line-height: 30px;
        padding: 0 13px;
        color: #fff;
        font-size: 12px;
        &:hover,
        &.active {
          text-decoration: none;
          background-color: #9b0909;
          border-radius: 20px;
        }
      }
    }
  }
`
4、轮播图网络请求
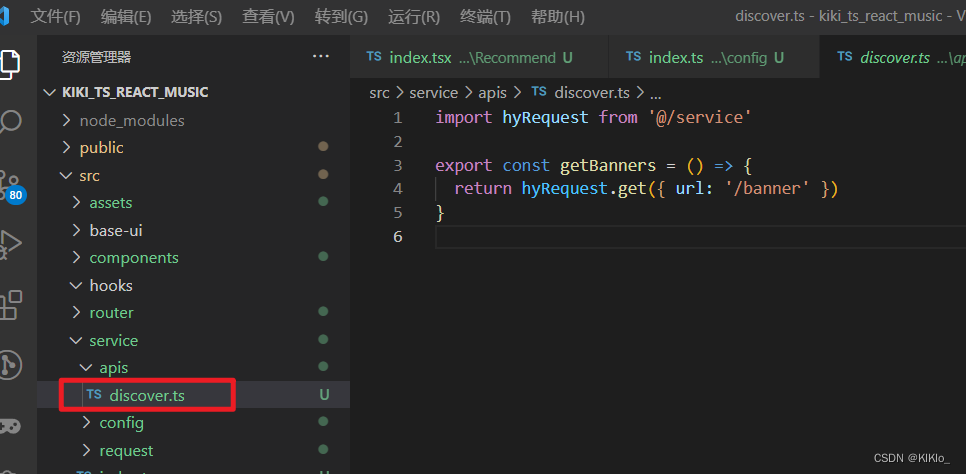
import { getBanners } from './../../service/apis/discover'
import { createSlice, createAsyncThunk } from '@reduxjs/toolkit'

interface IDiscoverState {
  banners: any
}

const initialState: IDiscoverState = {
  banners: []
}

export const fetchBannerDataAction = createAsyncThunk(
  'discover/banner',
  async (arg, { dispatch }) => {
    const res = await getBanners()
    // 在下面要进行导出才可以用
    // 本来是会在extraReducers里面写的但是这样写比较方便
    dispatch(changeBannersAction(res.banners))
  }
)

const discoverSlice = createSlice({
  name: 'discover',
  initialState,
  reducers: {
    changeBannersAction(state, { payload }) {
      state.banners = payload
    }
  }
})

export const { changeBannersAction } = discoverSlice.actions
export default discoverSlice.reducer
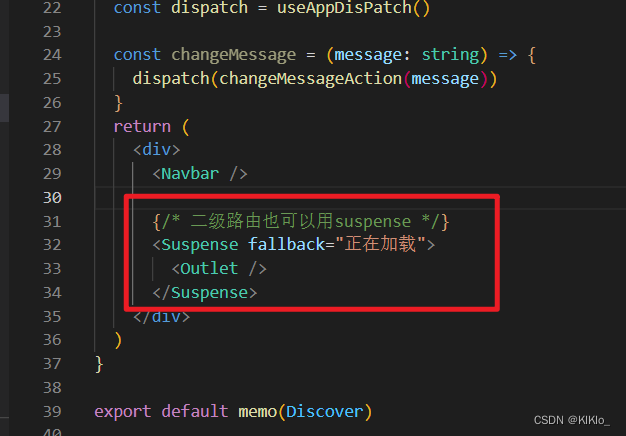
import React, { memo, useEffect } from 'react'
import type { FC, ReactNode } from 'react'
import { useAppDisPatch } from '@/store'
import { fetchBannerDataAction } from '@/store/modules/discover'

// 轮播图
interface IProps {
  children?: ReactNode
}

const Recommend: FC<IProps> = () => {
  const dispatch = useAppDisPatch()
  useEffect(() => {
    dispatch(fetchBannerDataAction())
  }, [])
  return <div> Recommend</div>
}

export default memo(Recommend)
5、轮播图
- 暂时很卡顿 因为只是练习一下实战 所以没优化
cnpm install classnames
import React, { ElementRef, memo, useEffect, useRef, useState } from 'react'
import type { FC, ReactNode } from 'react'
import { useAppDisPatch, useAppSelector } from '@/store'
import { fetchBannerDataAction } from '@/store/modules/discover'
import { shallowEqual } from 'react-redux'
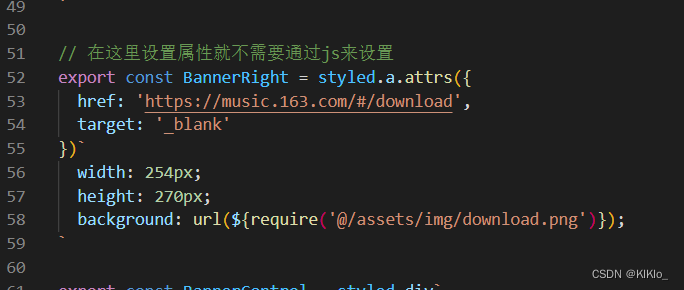
import { BannerControl, BannerLeft, BannerRight, BannerWrapper } from './style'
import { Carousel } from 'antd'
import classNames from 'classnames'
// 轮播图
interface IProps {
children?: ReactNode
}
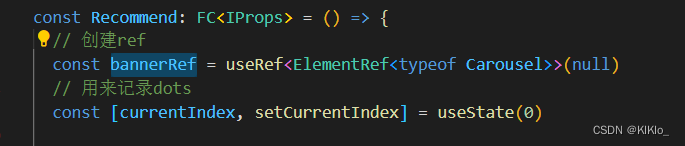
const Recommend: FC<IProps> = () => {
// 创建ref
const bannerRef = useRef<ElementRef<typeof Carousel>>(null)
// 用来记录dots
const [currentIndex, setCurrentIndex] = useState(0)
// 发送网络请求
const dispatch = useAppDisPatch()
useEffect(() => {
dispatch(fetchBannerDataAction())
}, [])
// 从store中获取数据
const { banners } = useAppSelector(
(state) => ({
banners: state.recommend.banners
}),
shallowEqual
)
const handlePrevClick = () => {
bannerRef.current?.prev()
}
const handleNextClick = () => {
bannerRef.current?.next()
}
const handleAfterChange = (index: number) => {
setCurrentIndex(index)
}
/** 获取背景图片 */
let bgImageUrl
if (currentIndex >= 0 && banners.length > 0) {
bgImageUrl = banners[currentIndex].imageUrl + '?imageView&blur=40x20'
}
return (
<div>
<BannerWrapper
style={{ background: `url('${bgImageUrl}') center center / 6000px` }}
>
<div className="banner wrap-v2">
<BannerLeft>
<Carousel
ref={bannerRef}
autoplay
dots={false}
effect="fade"
afterChange={handleAfterChange}
>
{banners.map((item: any, index: number) => {
return (
<div className="banner-item" key={index}>
<img className="image" src={item.imageUrl} />
</div>
)
})}
</Carousel>
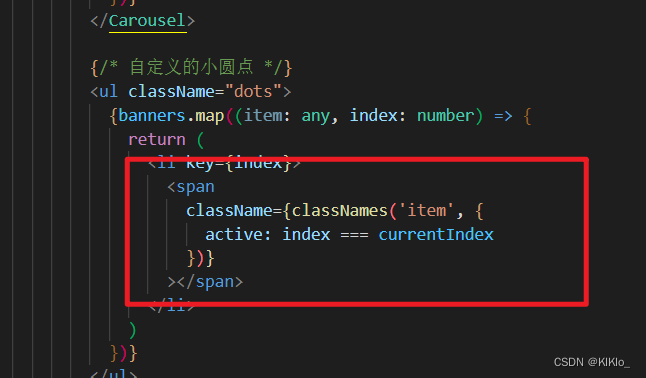
{/* 自定义的小圆点 */}
<ul className="dots">
{banners.map((item: any, index: number) => {
return (
<li key={index}>
<span
className={classNames('item', {
active: index === currentIndex
})}
></span>
</li>
)
})}
</ul>
</BannerLeft>
<BannerRight></BannerRight>
<BannerControl>
<button className="btn left" onClick={handlePrevClick}></button>
<button className="btn right" onClick={handleNextClick}></button>
</BannerControl>
</div>
</BannerWrapper>
</div>
)
}
export default memo(Recommend)


 1374
1374


 被折叠的 条评论
为什么被折叠?
被折叠的 条评论
为什么被折叠?
 到【灌水乐园】发言


