Springboot 使用Security完成注册

1.方便测试功能时,关闭登陆功能

2.新建三张表 用户表 角色表 用户角色关系表

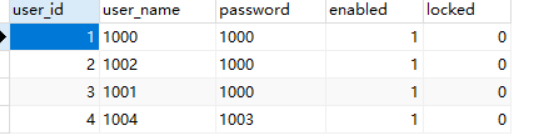
enabled表示用户是否过期,locked表示用户是否被锁

这里密码是明文的,不正确。后面有加密的办法


3.创建实体类


  1. public class User implements UserDetails {
  2. private Integer userId;
  3. private String username;
  4. private String password;
  5. private Boolean enabled;
  6. private Boolean locked;
  7. private List<Role> roles;
  8. /*
  9. * 获取当前用户对象具有的角色信息
  10. * */
  11. @Override
  12. public Collection<? extends GrantedAuthority> getAuthorities() {
  13. List<SimpleGrantedAuthority> authorities = new ArrayList<>();
  14. for (Role role : roles){
  15. authorities.add( new SimpleGrantedAuthority(role.getName()));
  16. }
  17. return authorities;
  18. }
  19. /*
  20. * 获取当前用户的密码
  21. * */
  22. @Override
  23. public String getPassword () {
  24. return password;
  25. }
  26. /*
  27. * 获取当前用户的用户名
  28. * */
  29. @Override
  30. public String getUsername () {
  31. return username;
  32. }
  33. /*
  34. * 当前用户是否未过期
  35. * */
  36. @Override
  37. public boolean isAccountNonExpired () {
  38. return true;
  39. }
  40. /*
  41. * 当前用户是否未锁定
  42. * */
  43. @Override
  44. public boolean isAccountNonLocked () {
  45. return !locked;
  46. }
  47. /*
  48. * 当前账户密码是否未过期
  49. * */
  50. @Override
  51. public boolean isCredentialsNonExpired () {
  52. return true;
  53. }
  54. /*
  55. * 当前账户是否可用
  56. * */
  57. @Override
  58. public boolean isEnabled () {
  59. return enabled;
  60. }
  61. public Integer getUserId () {
  62. return userId;
  63. }
  64. public void setUserId (Integer userId) {
  65. this.userId = userId;
  66. }
  67. public void setUsername (String username) {
  68. this.username = username;
  69. }
  70. public void setPassword (String password) {
  71. this.password = password;
  72. }
  73. public Boolean getEnabled () {
  74. return enabled;
  75. }
  76. public void setEnabled (Boolean enabled) {
  77. this.enabled = enabled;
  78. }
  79. public Boolean getLocked () {
  80. return locked;
  81. }
  82. public void setLocked (Boolean locked) {
  83. this.locked = locked;
  84. }
  85. public List<Role> getRoles () {
  86. return roles;
  87. }
  88. public void setRoles (List<Role> roles) {
  89. this.roles = roles;
  90. }
  91. }

4.注册Dao编写


这里注意一下:


  1. mapper的xml中, 不需要(也不能)给 insert, update, delete指定resultType, 如这里所解释
  2. http: / /mybatis.github.io /mybatis -3 /sqlmap -xml.html
  3. insert, update, delete只支持这些Attributes: id, parameterType, parameterMap, flushCache, timeout, statementType, useGeneratedKeys, keyProperty, keyColumn, databaseId

5.注册Service编写


6.注册控制层编写


7.如果出现403的情况

暂时将csrf关闭

  • 1
    点赞
  • 2
    收藏
    觉得还不错? 一键收藏
  • 0
    评论
可以使用Spring Security来整合登陆注册功能。具体步骤如下: 1. 引入Spring Security依赖 在pom.xml文件中引入Spring Security的依赖: ```xml <dependency> <groupId>org.springframework.security</groupId> <artifactId>spring-security-web</artifactId> <version>5.2.1.RELEASE</version> </dependency> <dependency> <groupId>org.springframework.security</groupId> <artifactId>spring-security-config</artifactId> <version>5.2.1.RELEASE</version> </dependency> ``` 2. 配置Spring SecuritySpring Boot的配置类中通过@EnableWebSecurity注解开启Spring Security的配置,然后通过继承WebSecurityConfigurerAdapter类来重写相关方法实现自定义配置。 示例代码: ```java @Configuration @EnableWebSecurity public class SecurityConfig extends WebSecurityConfigurerAdapter { @Autowired private UserService userService; @Override protected void configure(HttpSecurity http) throws Exception { http.authorizeRequests() .antMatchers("/register", "/login").permitAll() .anyRequest().authenticated() .and() .formLogin() .loginPage("/login") .defaultSuccessUrl("/index") .permitAll() .and() .logout() .logoutUrl("/logout") .logoutSuccessUrl("/login") .permitAll(); } @Override protected void configure(AuthenticationManagerBuilder auth) throws Exception { auth.userDetailsService(userService).passwordEncoder(new BCryptPasswordEncoder()); } } ``` 其中,configure(HttpSecurity http)方法用于配置登录、注销、授权等相关设置;configure(AuthenticationManagerBuilder auth)方法用于配置用户信息和密码加密方式。 3. 实现UserDetailsService接口 在UserService类中实现UserDetailsService接口,重写loadUserByUsername方法,用于从数据库中获取用户信息和权限信息。 示例代码: ```java @Service public class UserService implements UserDetailsService { @Autowired private UserRepository userRepository; @Override public UserDetails loadUserByUsername(String username) throws UsernameNotFoundException { User user = userRepository.findByUsername(username); if (user == null) { throw new UsernameNotFoundException("用户不存在"); } List<SimpleGrantedAuthority> authorities = new ArrayList<>(); authorities.add(new SimpleGrantedAuthority(user.getRole())); return new org.springframework.security.core.userdetails.User(user.getUsername(), user.getPassword(), authorities); } } ``` 4. 编写登录注册功能代码 在Controller中编写登录、注册功能的代码,可以使用Spring MVC的相关注解来实现。 示例代码: ```java @Controller public class UserController { @Autowired private UserService userService; @GetMapping("/login") public String login() { return "login"; } @GetMapping("/register") public String register() { return "register"; } @PostMapping("/register") public String doRegister(User user) { user.setPassword(new BCryptPasswordEncoder().encode(user.getPassword())); user.setRole("ROLE_USER"); userService.save(user); return "redirect:/login"; } } ``` 至此,Spring Security与登陆注册功能的整合就完成了。

“相关推荐”对你有帮助么?

  • 非常没帮助
  • 没帮助
  • 一般
  • 有帮助
  • 非常有帮助
提交
评论
添加红包

请填写红包祝福语或标题

红包个数最小为10个

红包金额最低5元

当前余额3.43前往充值 >
需支付:10.00
成就一亿技术人!
领取后你会自动成为博主和红包主的粉丝 规则
hope_wisdom
发出的红包
实付
使用余额支付
点击重新获取
扫码支付
钱包余额 0

抵扣说明:

1.余额是钱包充值的虚拟货币,按照1:1的比例进行支付金额的抵扣。
2.余额无法直接购买下载,可以购买VIP、付费专栏及课程。

余额充值