


缓存
Redisson官方文档
一、缓存
1.缓存的使用
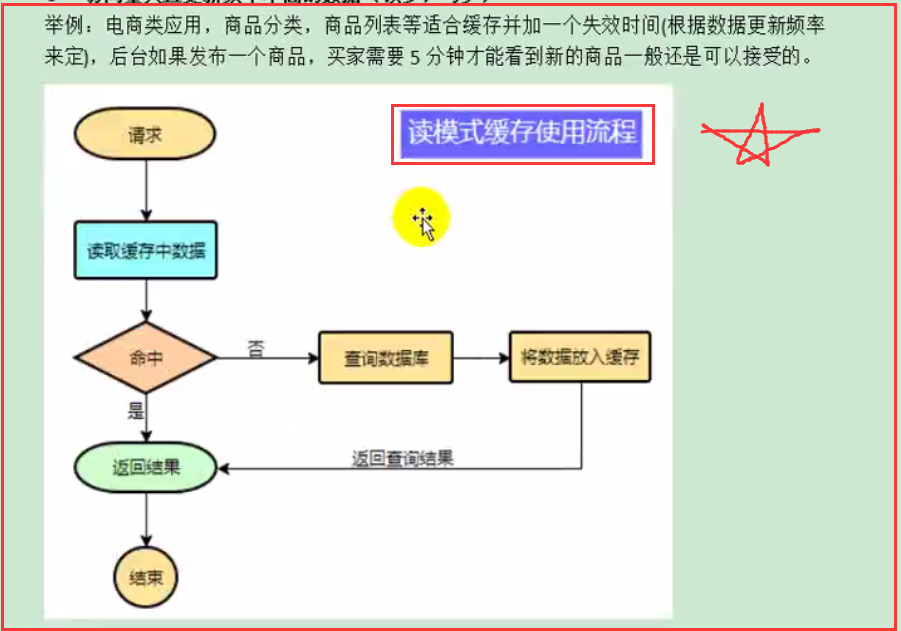
为了系统性能的提升,我们一般都会将部分数据放入缓存中,加速访问。而db承担数据落盘工作。
哪些数据适合放入缓存?
即时性、数据一致性要求不高的访问量大且更新频率不高的数据(读多,写少)
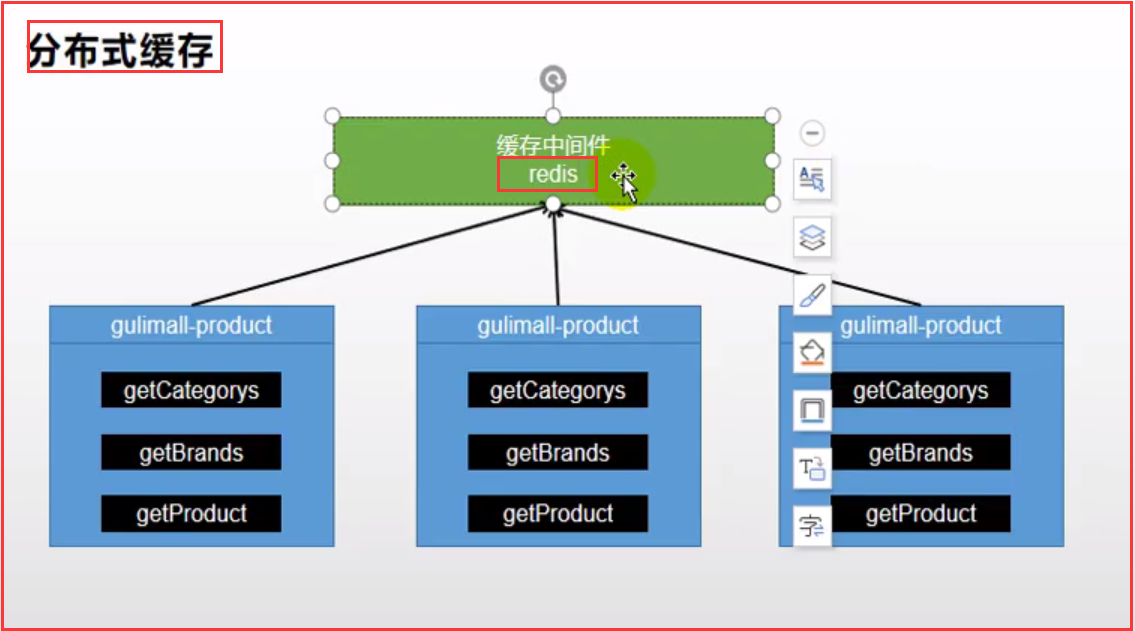
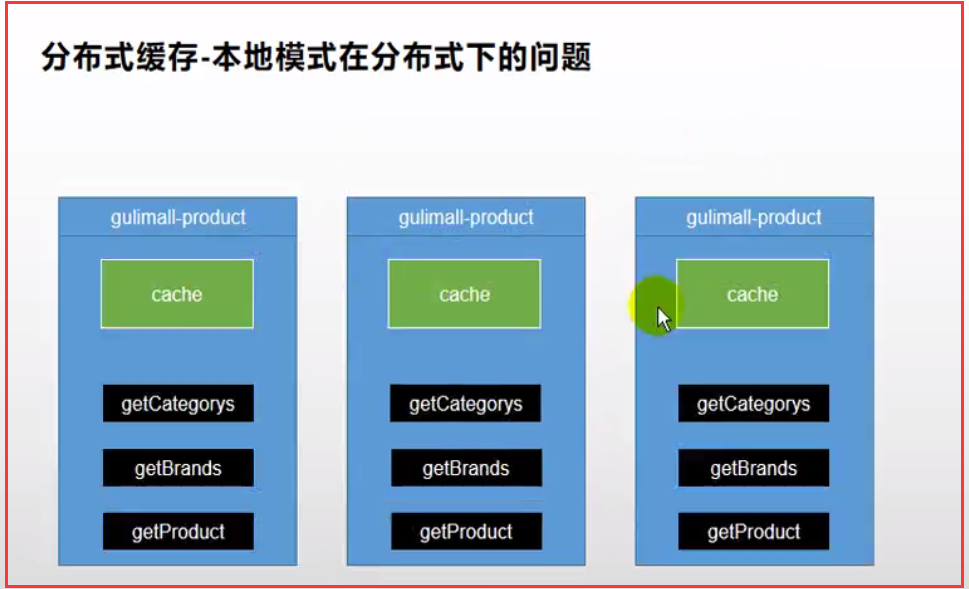
2.分布式缓存(Redis)
二、SpringBoot整合Redis
1.引入Redis场景启动器(starter)
<!--引入redis-->
<dependency>
   <groupId>org.springframework.boot</groupId>
   <artifactId>spring-boot-starter-data-redis</artifactId>
</dependency>
2.配置Redis相关信息
  # Redis相关配置
  redis:
    host: 192.168.10.22  # Redis主机地址
    port: 6379           # Redis端口号
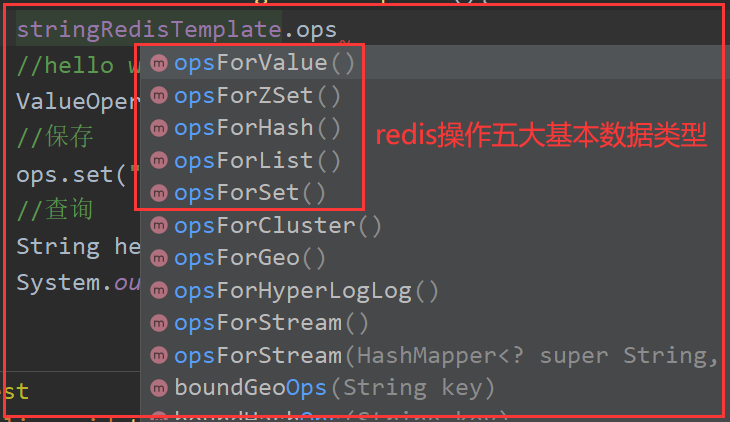
Redis相关类
Redis自动配置类
RedisAutoConfiguration
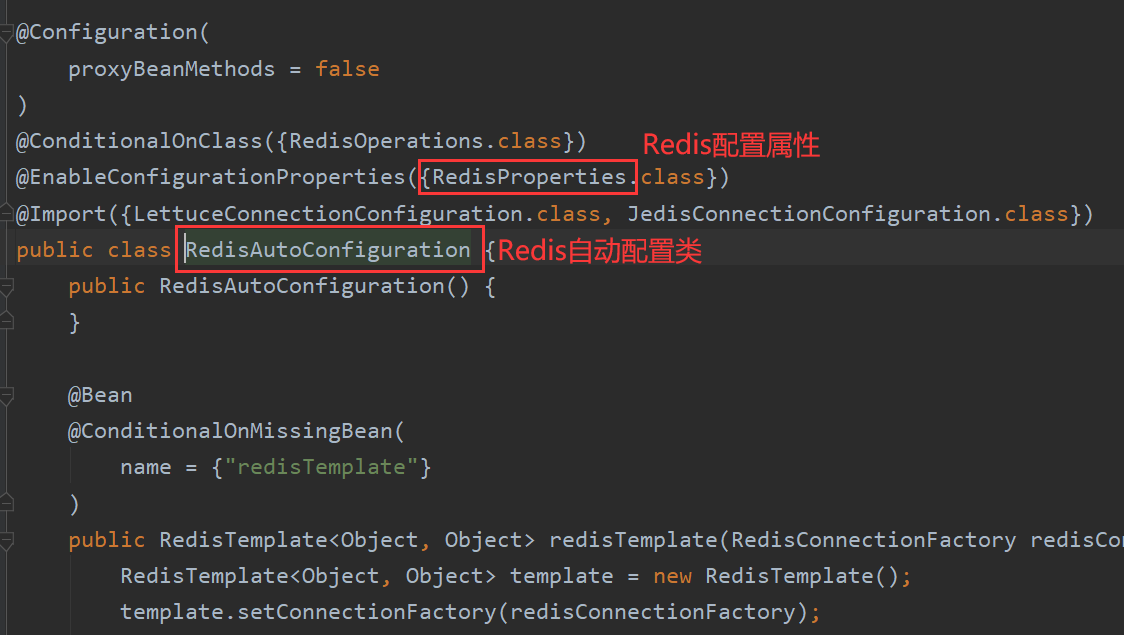
Redis所有的相关属性配置类
RedisProperties
@ConfigurationProperties(
    prefix = "spring.redis"
)
public class RedisProperties {
    private int database = 0;
    private String url;
    private String host = "localhost";
    private String password;
    private int port = 6379;
    private boolean ssl;
    private Duration timeout;
    private String clientName;
    private RedisProperties.Sentinel sentinel;
    private RedisProperties.Cluster cluster;
    private final RedisProperties.Jedis jedis = new RedisProperties.Jedis();
    private final RedisProperties.Lettuce lettuce = new RedisProperties.Lettuce();
三、高并发下缓存失效问题(缓存穿透、雪崩、击穿)
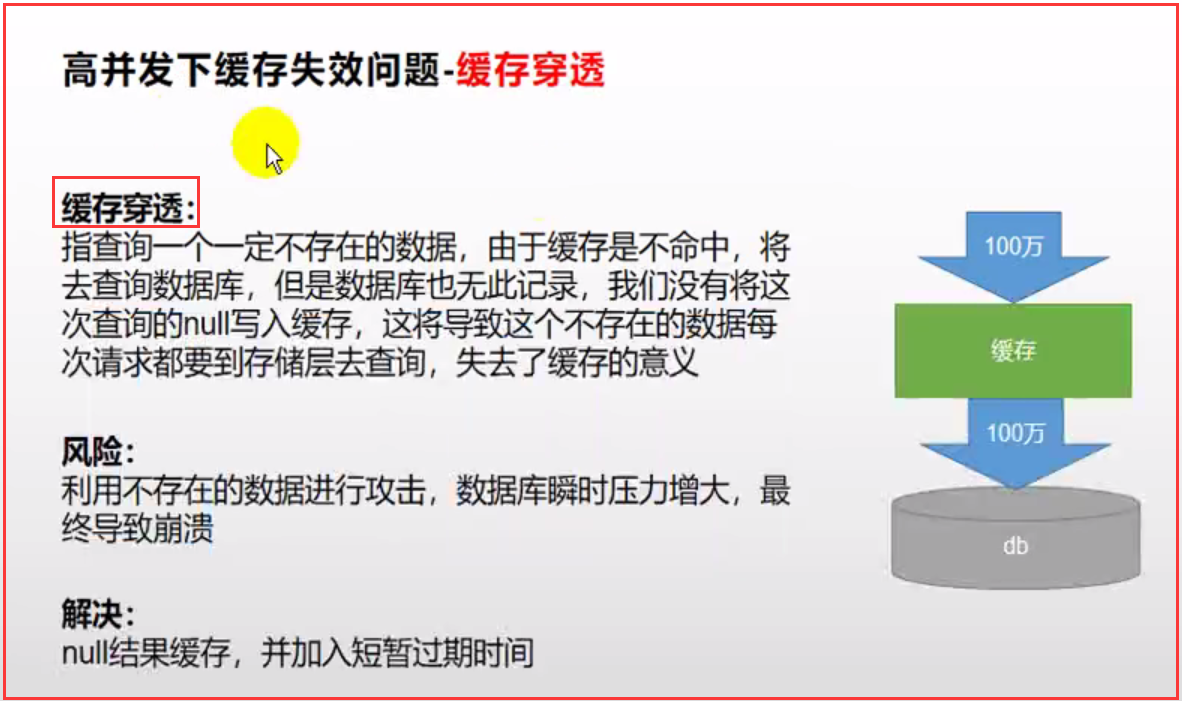
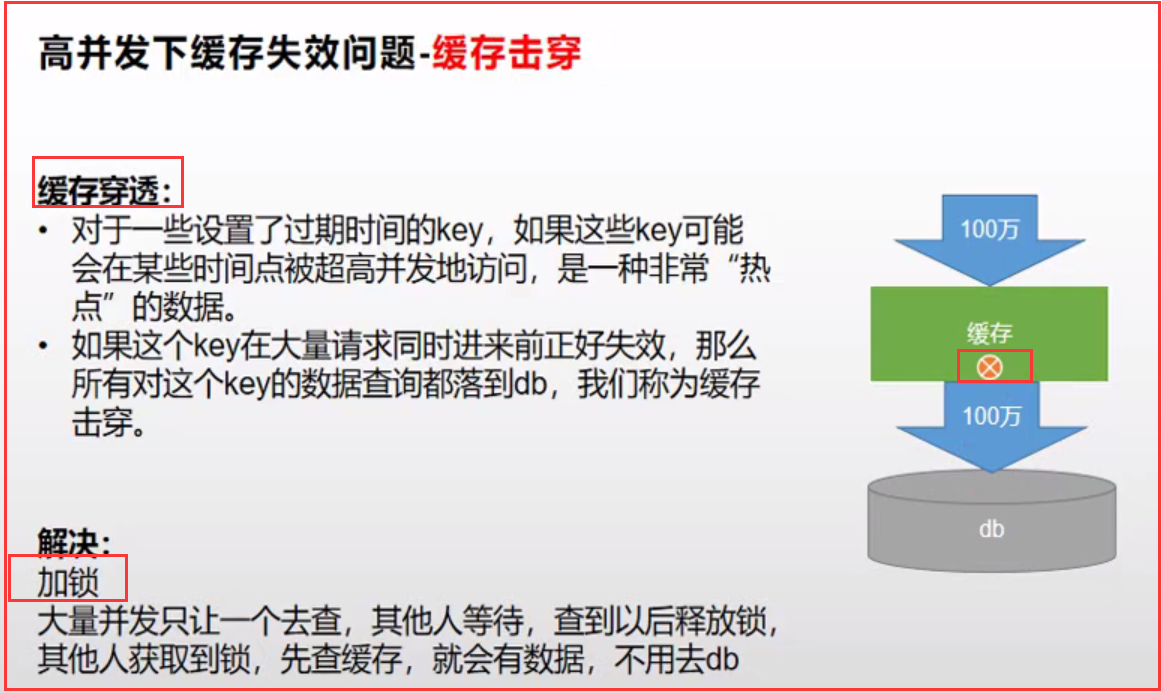
1.缓存穿透
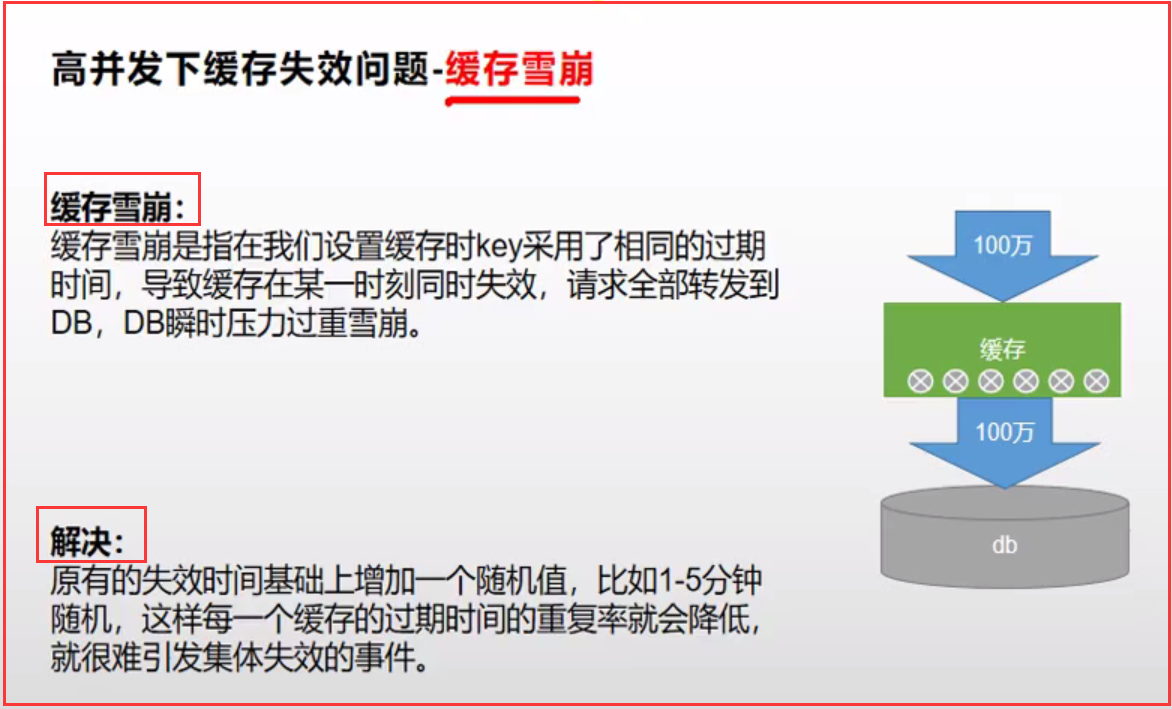
2.缓存雪崩
3.缓存击穿
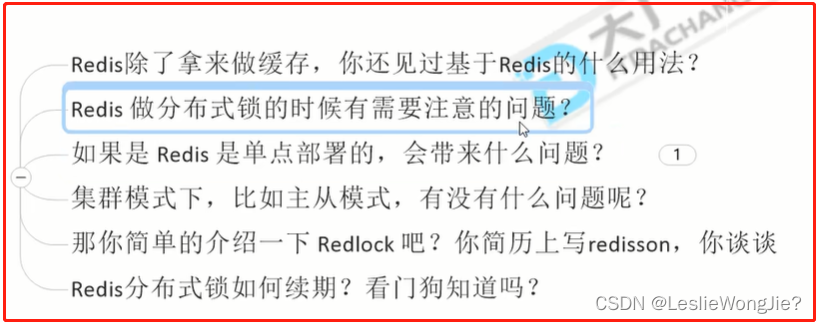
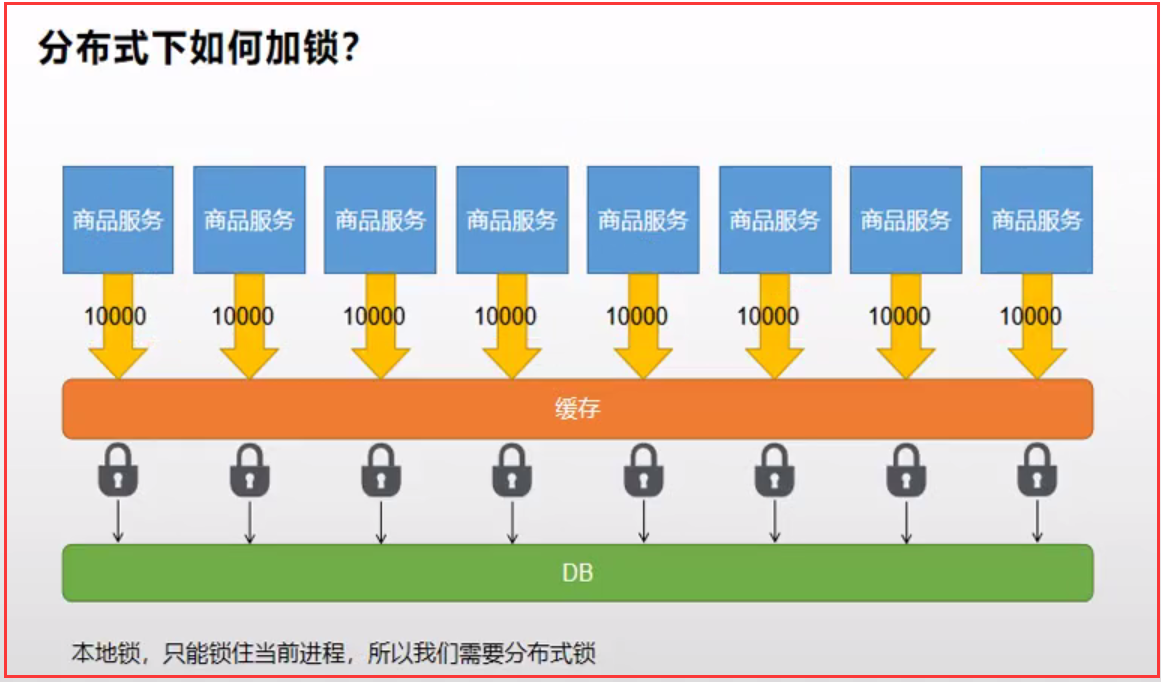
分布式下如何枷锁?
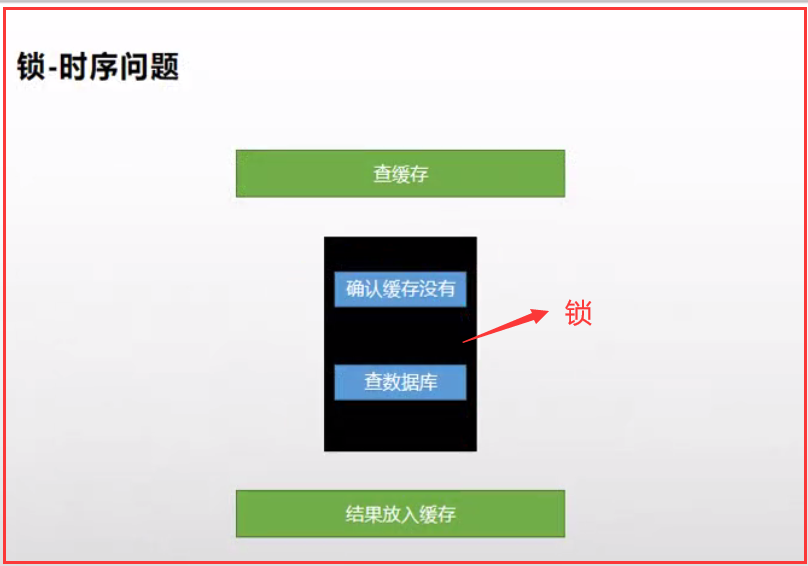
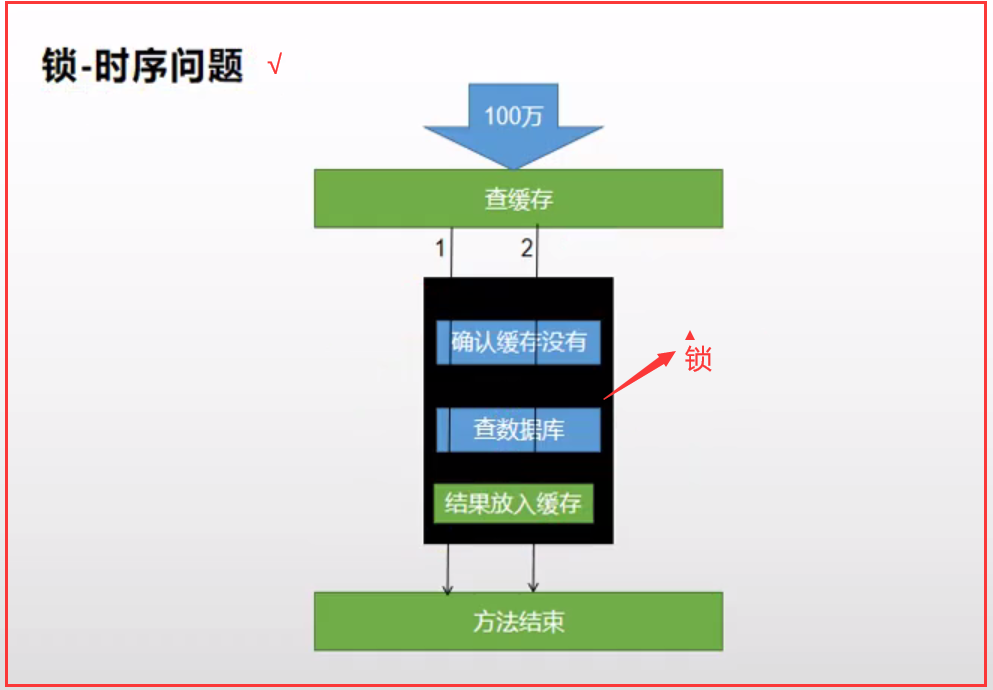
锁时序问题
第一个错误的
×
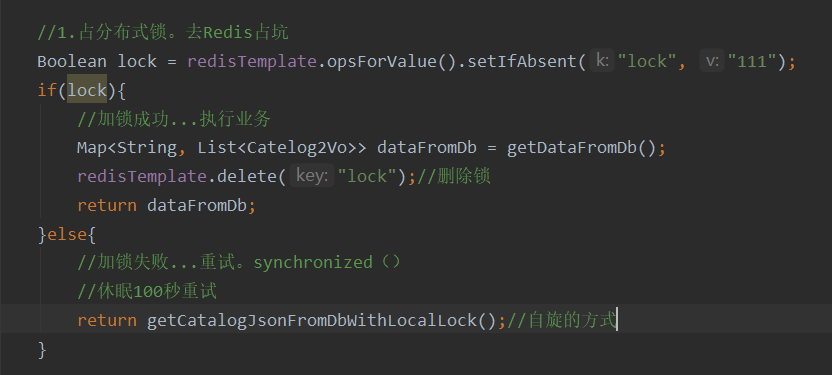
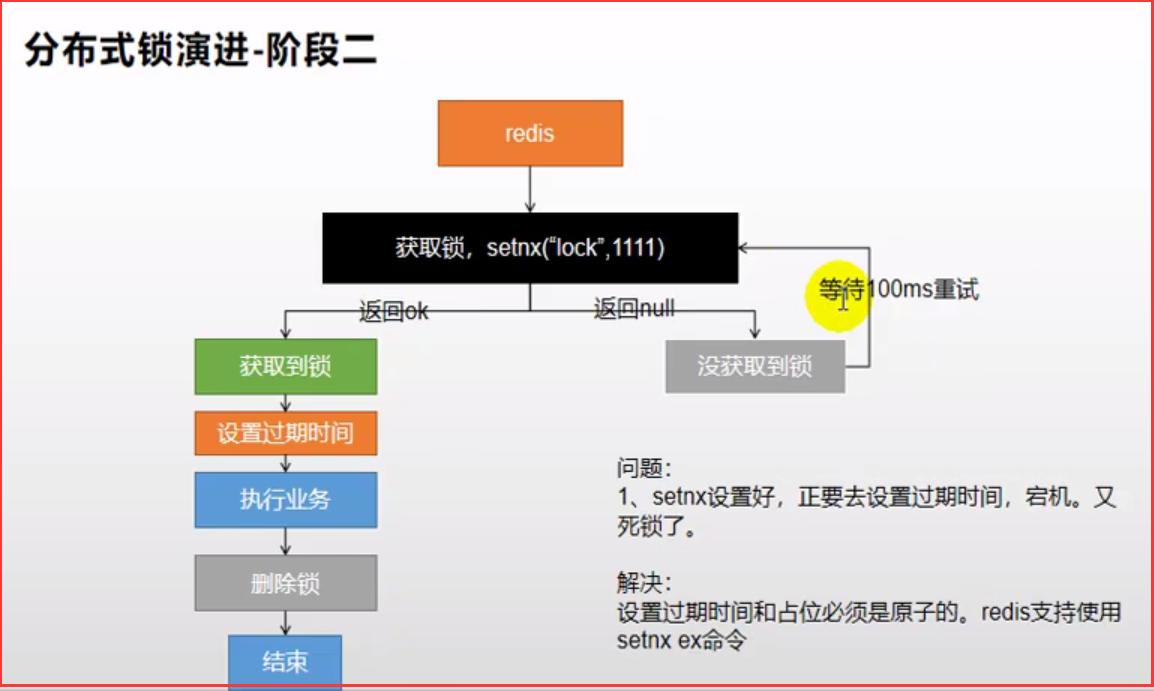
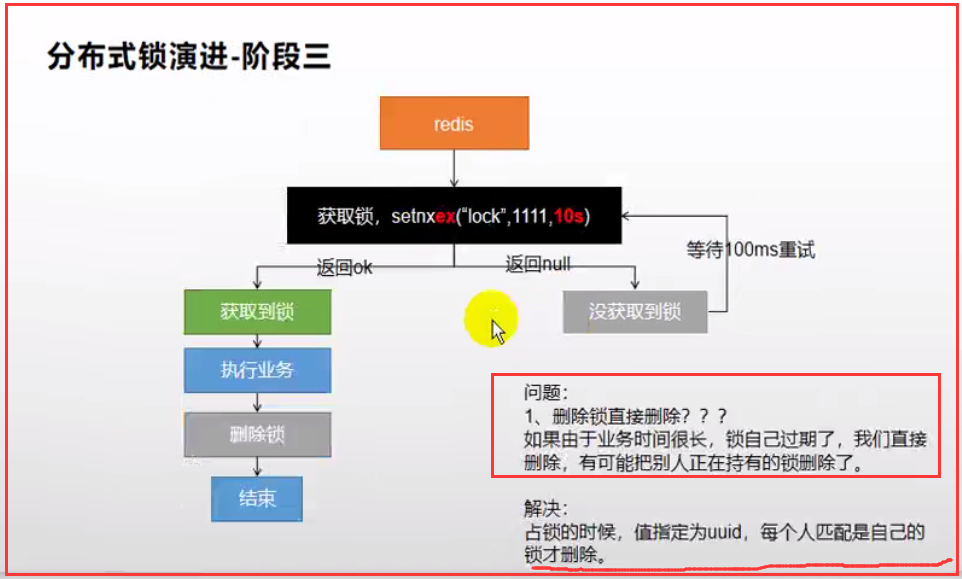
分布式锁演进
阶段一

阶段二

阶段三
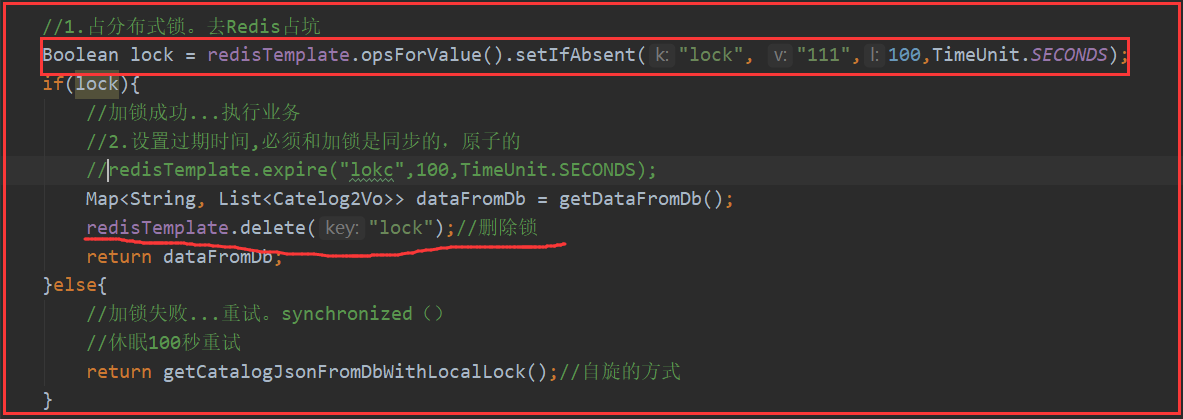
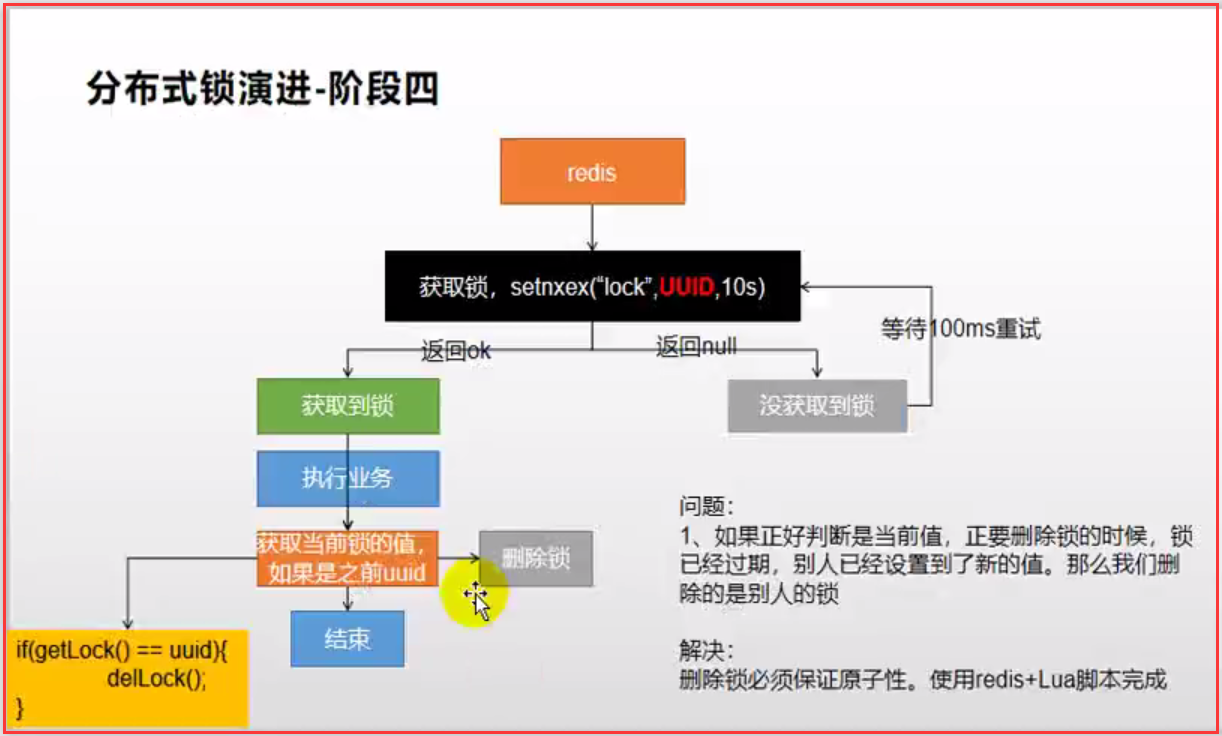
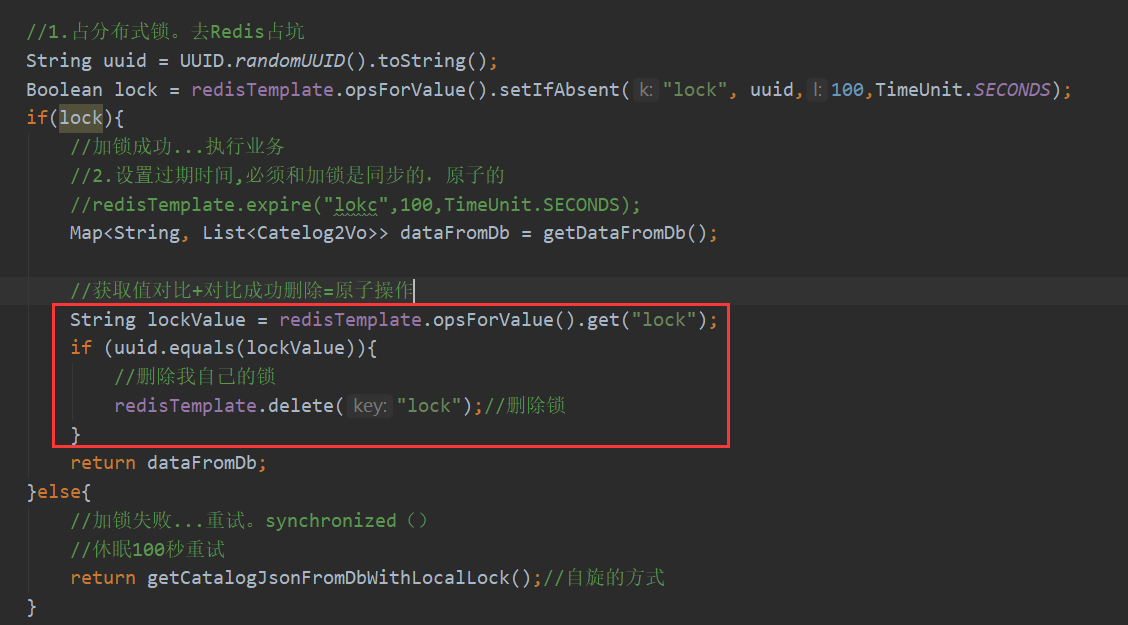
阶段四
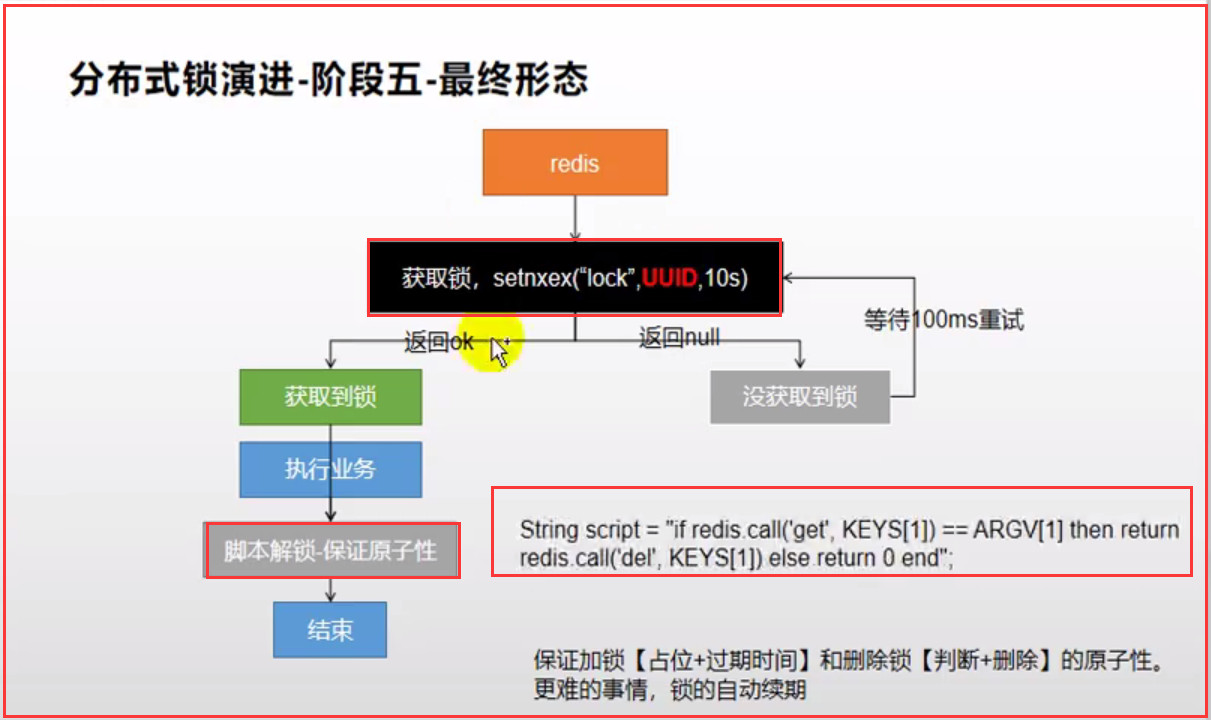
阶段五:最终形态

四、缓存分布式锁之Redisson
1.整合redisson作为分布式锁等功能框架
1)、引入依赖
     <dependency>
          <groupId>org.redisson</groupId>
          <artifactId>redisson</artifactId>
          <version>3.12.0</version>
    </dependency>
2)、配置redisson
/**
 * @description <功能描述> 缓存分布式锁之Redisson配置
 * @Author leslie
 * @Date 2021/8/1
 */
@Configuration
public class MyRedissonConfig {
    /**
     * 所有对Redisson的使用都是通过RedissonClient对象
     * @return
     * @throws IOException
     */
    @Bean(destroyMethod="shutdown")
    public RedissonClient redisson() throws IOException {
        // 1.创建配置
        Config config = new Config();
        // 单节点模式
        // Redis url should start with redis:// or rediss:// (for SSL connection)
        config.useSingleServer().setAddress("redis://192.168.10.22:6379");
        // config.useClusterServers().addNodeAddress("127.0.0.1:7004", "127.0.0.1:7001");//Redis集群地址

        // 2.根据config创建出RedissonClient实例
        RedissonClient redissonClient = Redisson.create(config);
        return redissonClient;
    }
}
3.Redisson分布式锁之可重入锁RLock
@ResponseBody
@GetMapping("/hello")
public String hello(){
    // 1.获取一把锁,只要锁的名字一样。就是同一把锁
    RLock lock = redisson.getLock("my-lock");
    // 2.加锁
    //lock.lock();//阻塞是等待。默认加的锁都是30s时间。
    //1)、锁的自动续期,如果业务超长,运行期间自动给锁续上新的30s。不用担心业务时间长,锁自动过期被删除
    //2)、加锁的业务只要运行完成,就不会给当前锁续期,即使不手动解锁,锁默认在30s以后自动删除

    lock.lock(10, TimeUnit.SECONDS);// 10秒钟自动解锁,自动解锁时间一定要大于业务的执行时间
    // 问题:lock.lock(10, TimeUnit.SECONDS);在锁时间到了以后,不会自动续期
    // 1.如果我们传递了锁的超时时间,就发送给redis执行脚本,进行占锁,默认超时就是我们指定的时间
    // 2.如果我们未指定锁的超时时间,就使用30*1000【LockWatchdogTimeout看门狗的默认时间】;
    //      只要占锁成功,就会启动一个定时任务【重新给锁设置过期时间,新的过期时间就是看门狗的默认时间】,每隔10s都会自动再次续期,续成30s
    //      internalLockLeaseTime【看门时间】/3,10s

    // 最佳实战
    // 1)、lock.lock(10, TimeUnit.SECONDS);省掉整个续期操作。手动解锁
    try{
        System.out.println("加锁成功,执行业务..."+Thread.currentThread().getId());
        Thread.sleep(30000);
    }catch (Exception e){

    }finally {
        // 3.解锁  假设解锁代码没有运行,Redisson会不会出现死锁
        System.out.println("释放锁"+Thread.currentThread().getId());
        lock.unlock();
    }
    return "hello";
}
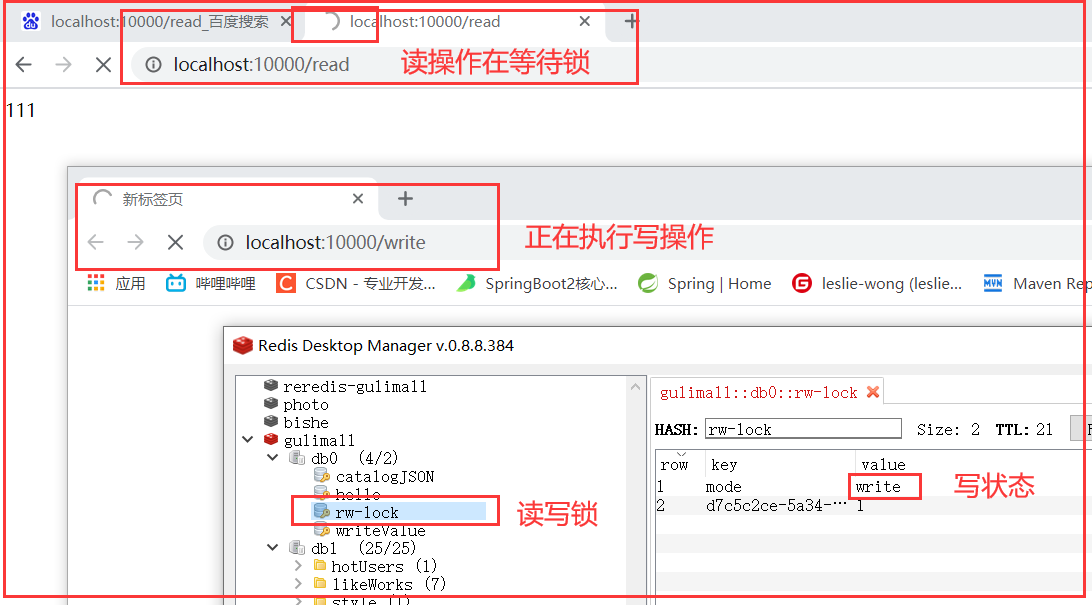
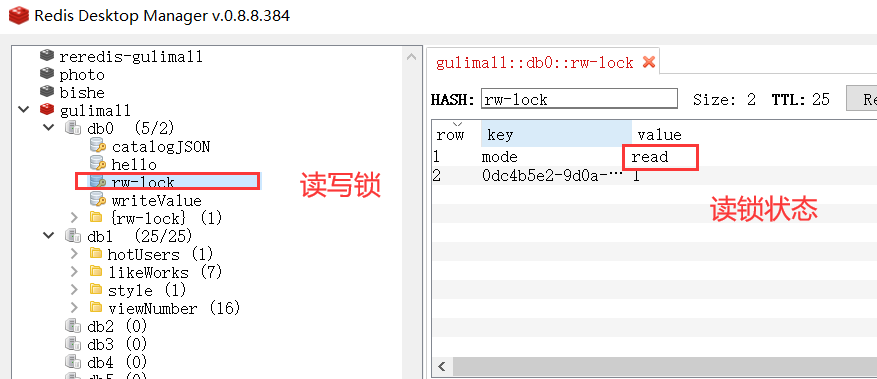
4.Redisson分布式锁之读写锁(ReadWriteLock)
保证一定能读到最新数据,修改期间,写锁是一个排他锁(互斥锁、独享锁)。读锁是一个共享锁。
写锁没释放读就必须等待
读 + 读:相当于无锁状态,并发读,只会在redis中记录好,所有当前的读锁。他们都会同时加锁成功写 + 读:读等待写锁释放写 + 写 :阻塞方式读 + 写:有读锁。写也需要等待- 只要有写的存在,都必须等待
// 保证一定能读到最新数据,修改期间,写锁是一个排他锁(互斥锁、独享锁)。读锁是一个共享锁。
// 写锁没释放读就必须等待
// 读 + 读:相当于无锁状态,并发读,只会在redis中记录好,所有当前的读锁。他们都会同时加锁成功
// 写 + 读:读等待写锁释放
// 写 + 写 :阻塞方式
// 读 + 写:有读锁。写也需要等待
// 只要有写的存在,都必须等待
@GetMapping("/write")
@ResponseBody
public String writeValue(){
    RReadWriteLock lock = redisson.getReadWriteLock("rw-lock");
    String s = "";
    // 1. 改数据加写锁,读数据加读锁
    RLock rLock = lock.writeLock();
    rLock.lock();
    try{
        System.out.println("写锁加锁成功..."+Thread.currentThread().getId());
        s = UUID.randomUUID().toString();
        Thread.sleep(30000);
        redisTemplate.opsForValue().set("writeValue",s);
    }catch (InterruptedException e){
        e.printStackTrace();
    }finally {
        rLock.unlock();
        System.out.println("写锁释放..."+Thread.currentThread().getId());
    }
    return s;
}
@GetMapping("/read")
@ResponseBody
public String readValue(){
    RReadWriteLock lock = redisson.getReadWriteLock("rw-lock");
    String s = "";
    // 加读锁
    RLock rLock = lock.readLock();
    rLock.lock();
    try{
        System.out.println("读锁加锁成功..."+Thread.currentThread().getId());
        s = redisTemplate.opsForValue().get("writeValue");
        Thread.sleep(30000);
    }catch (Exception e){
        e.printStackTrace();
    }finally {
        rLock.unlock();
        System.out.println("读锁释放..."+Thread.currentThread().getId());
    }
    return s;
}
5.Redisson分布式锁之信号量(Semaphore)
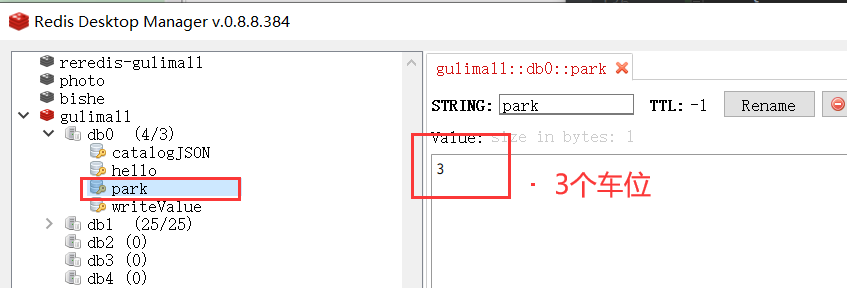
/**
 * 车库停车
 * 3车位
 * 信号量也可以用作分布式限流
 */
@GetMapping("/park")
@ResponseBody
public String park() throws InterruptedException {
    RSemaphore park = redisson.getSemaphore("park");
    //park.acquire();// 获取一个信号,获取一个值,一个车位
    boolean b = park.tryAcquire();// 尝试获取
    if(b){
        // 执行业务
    }else{
        return "error";
    }
    return "ok"+b;
}
@GetMapping("/go")
@ResponseBody
public String go() throws InterruptedException {
    RSemaphore park = redisson.getSemaphore("park");
    park.release();// 释放一个车位
    return "ok";
}
}
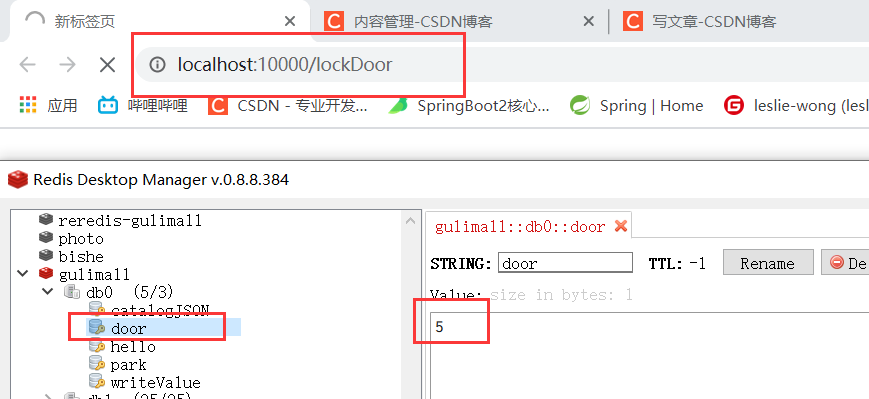
6.Redisson分布式锁之闭锁(CountDownLatch)
/**
* 放假,锁门
* 1班没人了 ,2班没人了
* 5个班全部走完,我们可以锁大门
*/
@GetMapping("/lockDoor")
@ResponseBody
public String lockDoor() throws InterruptedException {
RCountDownLatch door = redisson.getCountDownLatch("door");
door.trySetCount(5);
door.await();// 等待闭锁都完成
return "放假了";
}
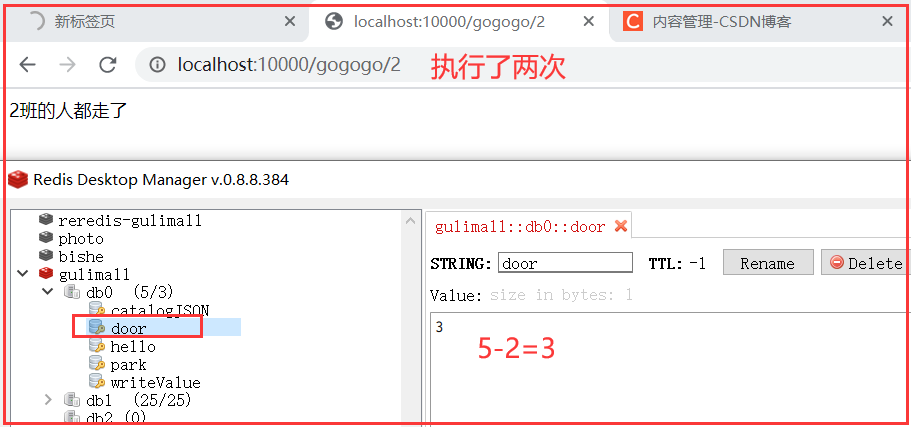
@GetMapping("/gogogo/{id}")
@ResponseBody
public String gogogo(@PathVariable("id") Long id){
RCountDownLatch door = redisson.getCountDownLatch("door");
door.countDown();// 计数减1
return id+"班的人都走了";
}
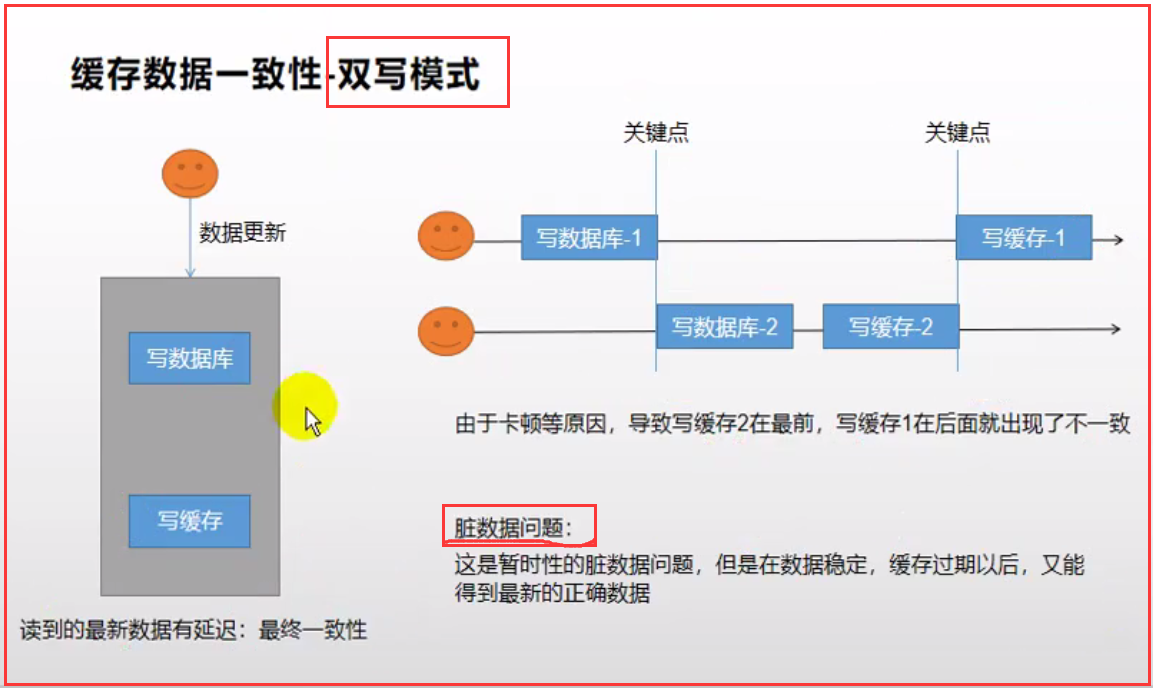
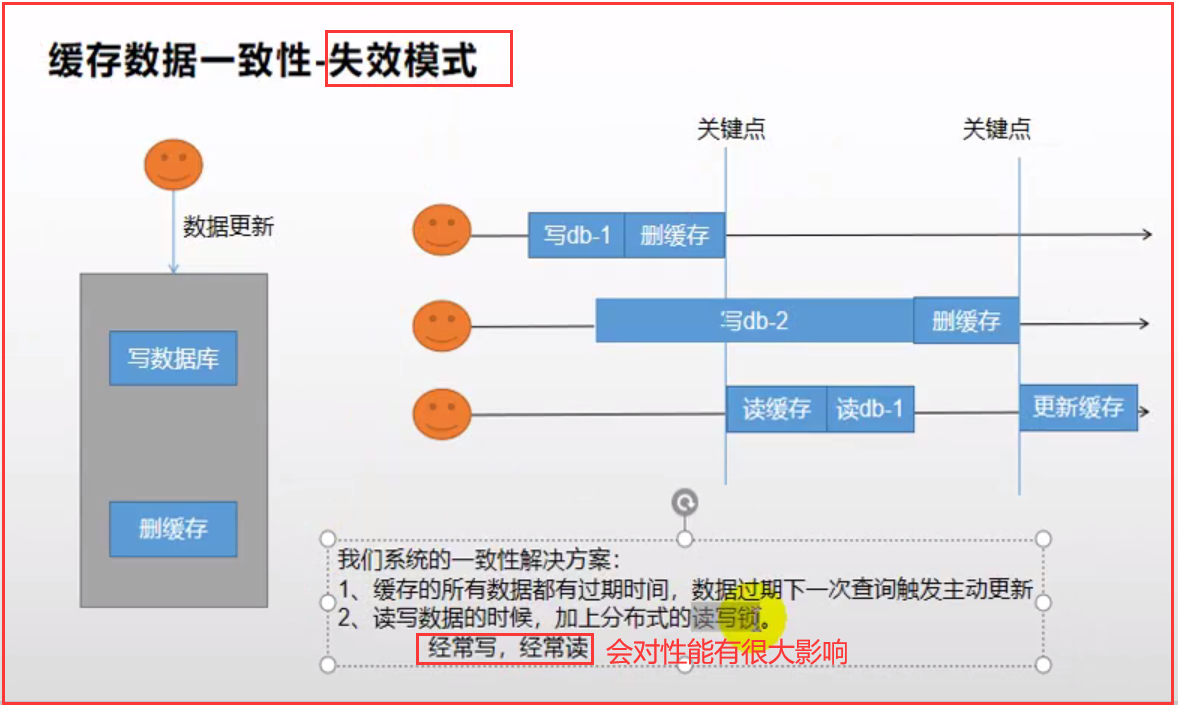
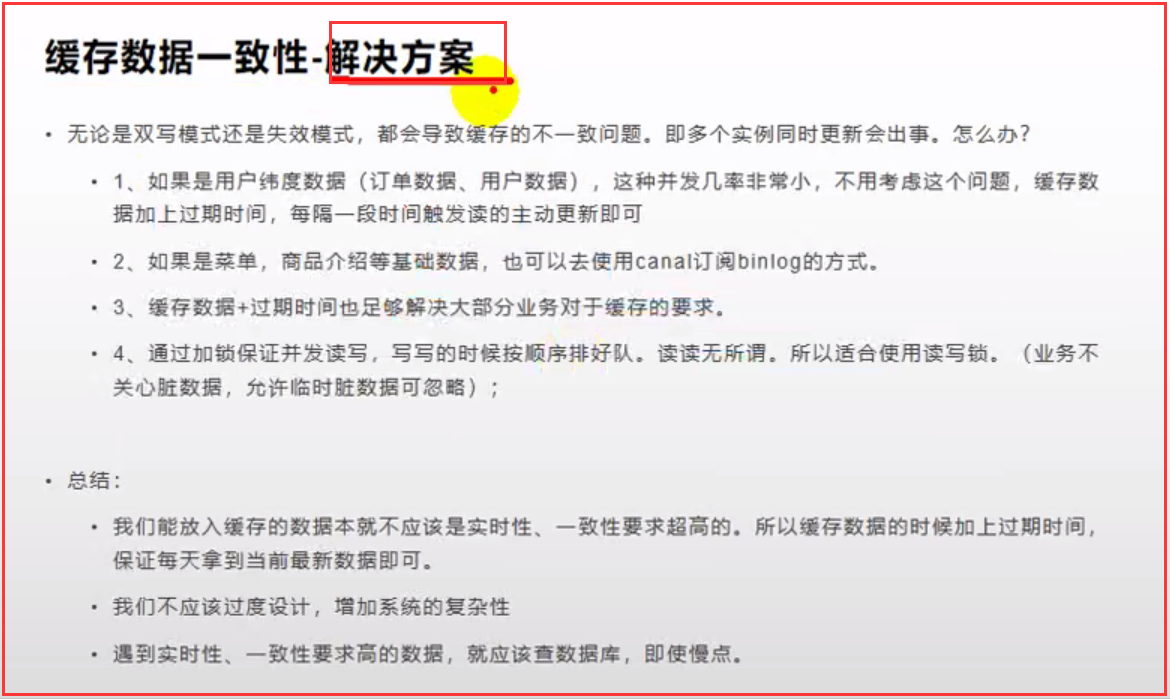
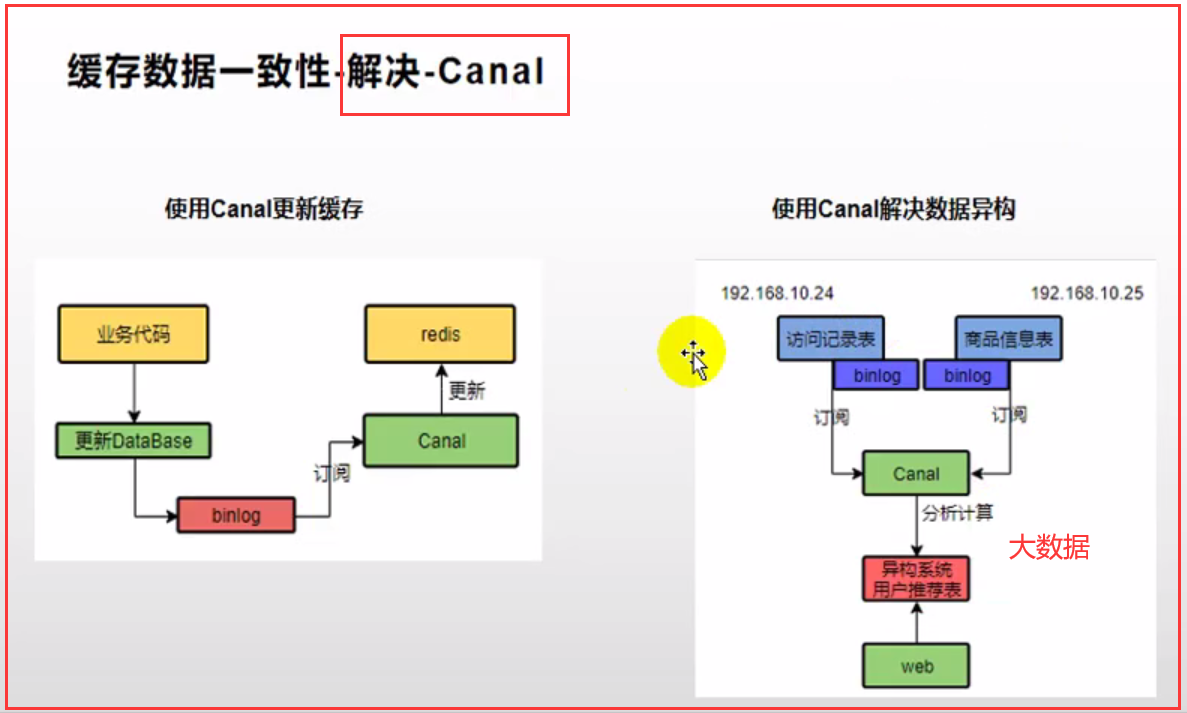
五、缓存数据一致性(双写模式、失效模式)
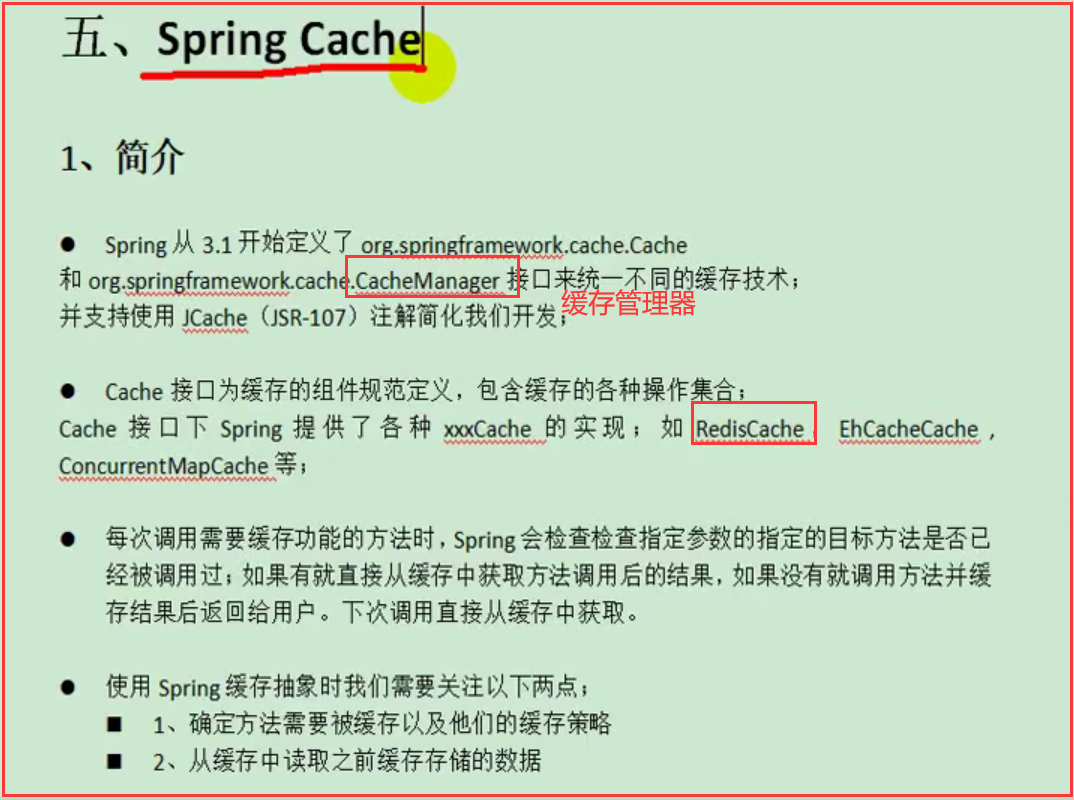
六.Spring Cache

整合
1.引入场景启动器
<dependency>
    <groupId>org.springframework.boot</groupId>
    <artifactId>spring-boot-starter-cache</artifactId>
</dependency>
2.写配置
- 1)、自动配置了哪些
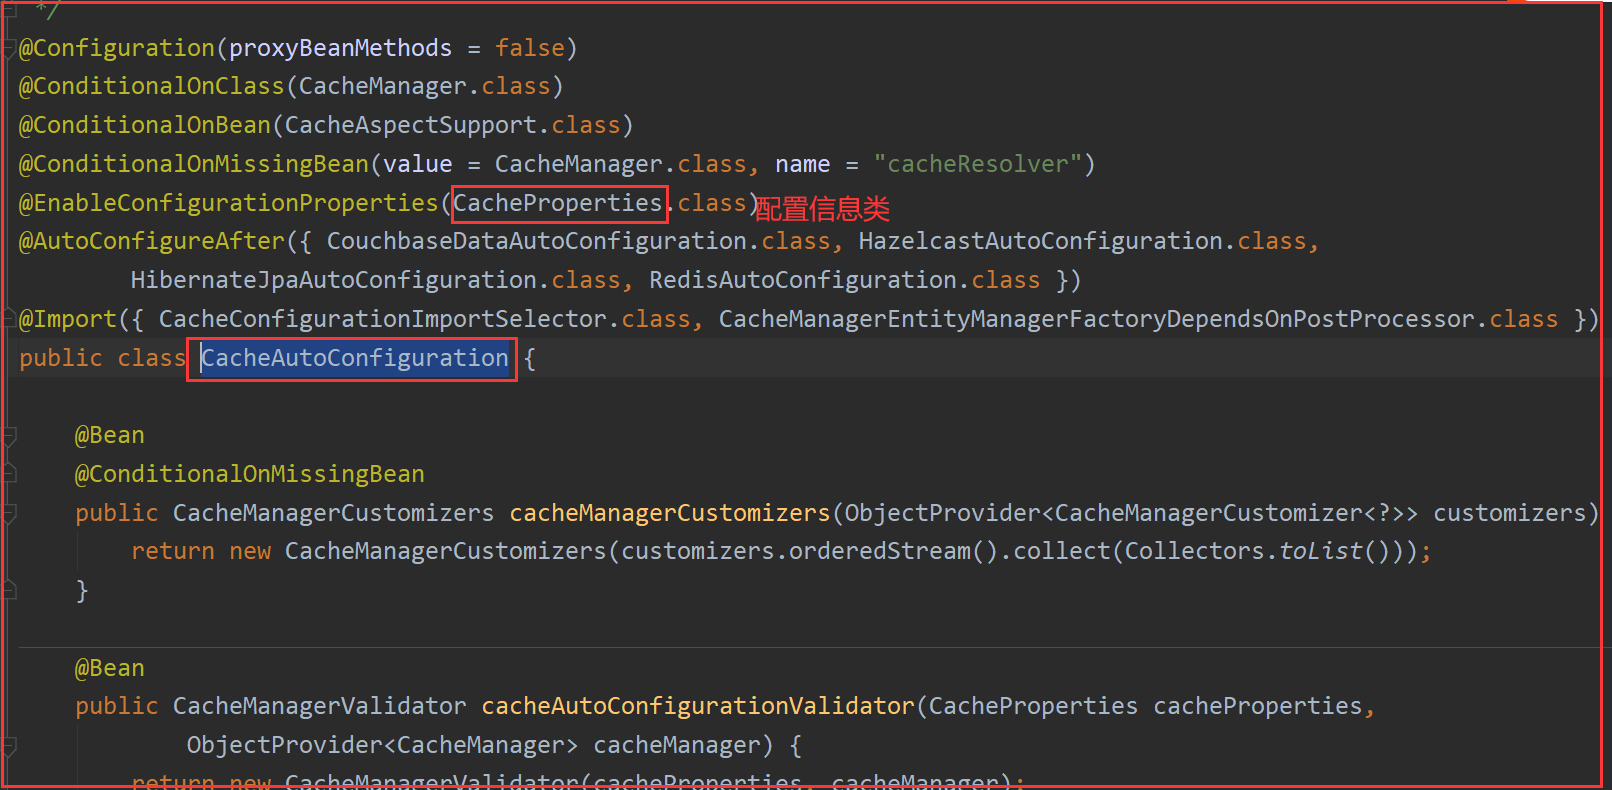
CacheAutoConfiguration会导入 RedisCacheConfiguration;
自动配置好了缓存管理器RedisCacheManager- 2)、配置使用Redis作为缓存
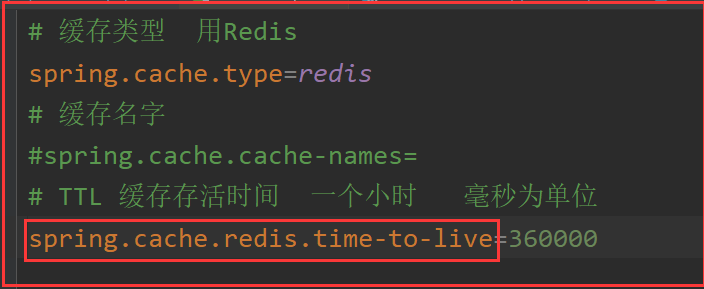
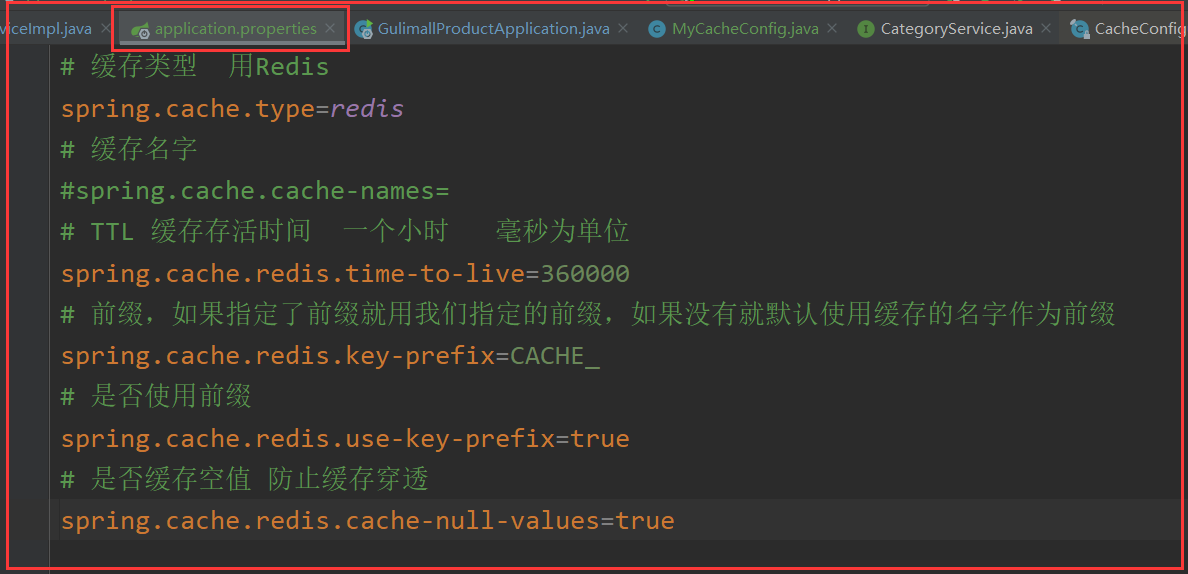
在application.properties配置
# 缓存类型  用Redis
spring.cache.type=redis
3.测试使用缓存
@Cacheable: Triggers cache population.:触发将数据保存到缓存的操作@CacheEvict: Triggers cache eviction.:触发将数据从缓存删除@CachePut: Updates the cache without interfering with the method execution.:不影响方法执行更新缓存@Caching: Regroups multiple cache operations to be applied on a method.:组合以上多个操作@CacheConfig: Shares some common cache-related settings at class-level.:在类级别共享缓存的相同配置
.
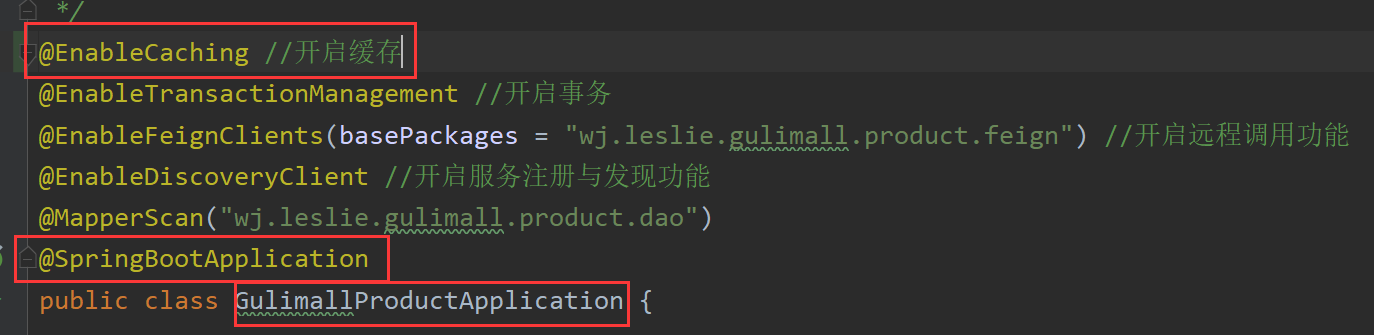
开启缓存功能@EnableCaching
只需要使用注解就能完成缓存操作
/**
* 查出商品三级分类所有的1级分类
*
* 1.每一个需要缓存的数据我们都来指定要放到哪个名字的缓存。【缓存的分区(按照业务类型分)】
* 2.@Cacheable({"category"})
* 代表当前方法的结果需要缓存,如果缓存中有,方法不用调用。
* 如果缓存中没有,会调用方法,最后将方法的结果放入缓存
* 3.默认行为
* 1)、如果缓存中有,方法不用调用。
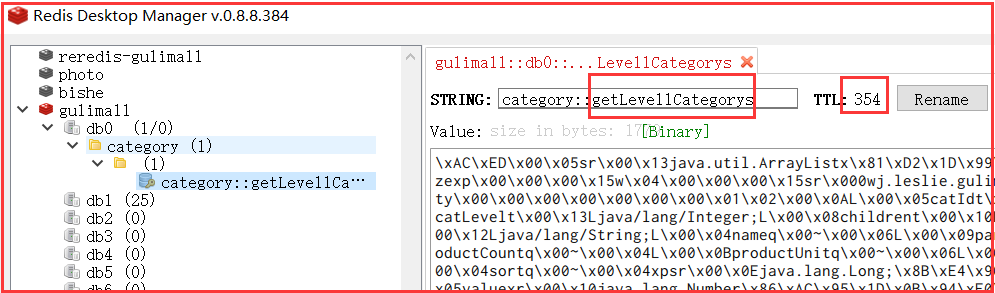
* 2)、key默认生成;缓存的名字::SimpleKey [](自主生成的key值)
* 3)、缓存的value值。默认使用jdk序列化机制。将序列化后的数据缓存到Redis
* 4)、默认TTL(过期时间) -1(永不过期);
*
*
* 自定义:
* 1)、指定生成的缓存使用的key: key属性指定。接收一个SpEL
* 2)、指定缓存的数据存活时间: 配置文件中修改TTL
* 3)、将数据保存为json格式
* 4.Sring-Cache的不足
* 1)、读模式:
* 缓存穿透:查询一个null数据。解决:缓存空数据;spring.cache.redis.cache-null-values=true
* 缓存击穿:大量并发进来同时查询一个正好过期的数据。解决:加锁;?默认是无加锁的;sync = true(加锁,解决击穿)
* 缓存雪崩:大量的key同时过期。解决:加随机时间。加上过期时间。:spring.cache.redis.time-to-live=360000
* 2)、写模式(缓存与数据一致)
* 1)、读写加锁。
* 2)、引入Canal,感知到MySQL的更新去更新数据库
* 3)、读多写多,直接去数据库查询就行
* 总结:
* 常规数据(读多写少,即时性、一致性要求不高的数据);完全可以使用Spring-Cache;写模式(只要缓存的数据有过期时间就够了)
* 特殊数据:特殊设计
* 原理:
* CacheManager(RedisCacheManager)-->Cache(RedisCache)-->Cache负责缓存的读写
* @return
*/
@Cacheable(value = {"category"},key = "#root.method.name",sync = true)
@Override
public List<CategoryEntity> getLevel1Categorys() {
System.out.println("getLevel1Categorys...");
long l = System.currentTimeMillis();
List<CategoryEntity> categoryEntities = baseMapper.selectList(new QueryWrapper<CategoryEntity>().eq("parent_cid", 0));
return categoryEntities;
}
/**
 * 级联更新所有关联的数据
 * @CacheEvict:失效模式
 * 1.组合多个操作,同时进行多种缓存操作 @Caching
 * 2.指定删除某个分区下的所有数据 @CacheEvict(value = "category",allEntries = true)
 * 3.存储统一类型的数据,都可以指定成同一分区。分区名默认就是缓存的前缀
 * @param category
 * key 常规字符串要加单引号
 */
//@Caching(evict = {
//        @CacheEvict(value = {"category"},key ="'getLevel1Categorys'" ),
//        @CacheEvict(value = {"category"},key ="'getCatalogJson'" )
//})
@CacheEvict(value = "category",allEntries = true)
@Transactional  //添加事务
@Override
public void updateCascade(CategoryEntity category) {
    //1.先更新自己表中的数据
    this.updateById(category);
    categoryBrandRelationService.updateCategory(category.getCatId(), category.getName());
}
4.自定义缓存配置类
/**
* @description 缓存配置类
* @Author leslie
* @Date 2021/8/6
*/
@EnableConfigurationProperties(CacheProperties.class)
@Configuration
@EnableCaching //开启缓存
public class MyCacheConfig {
// @Autowired
// CacheProperties cacheProperties;
/**
* 配置文件中的东西没有用上
*
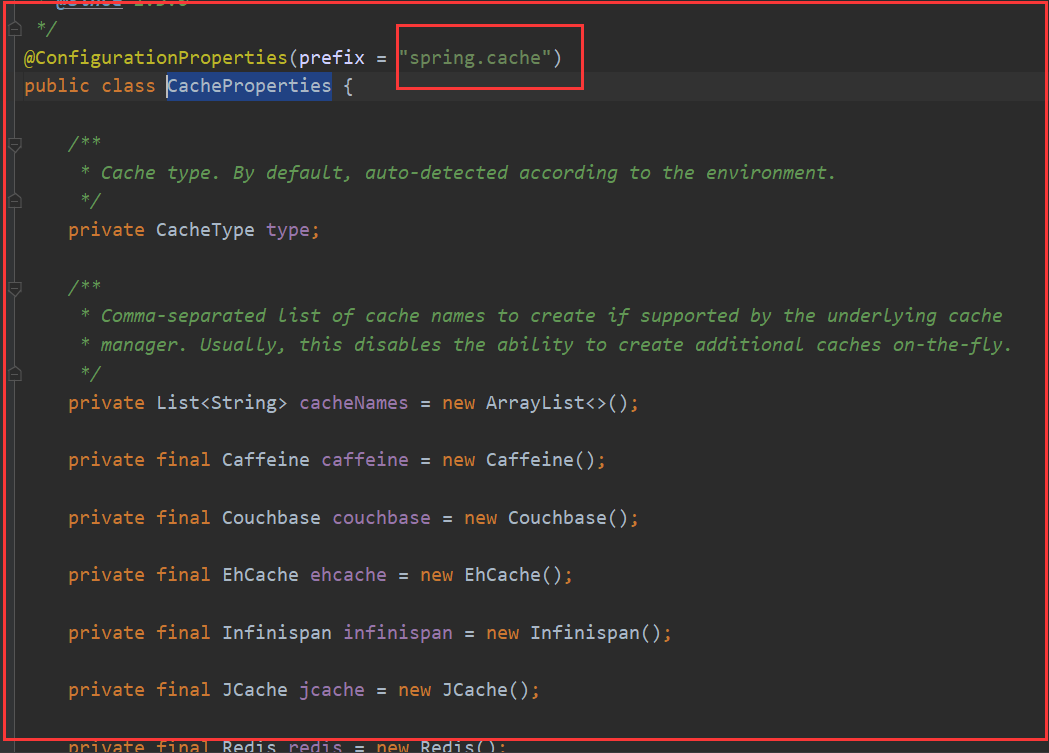
* 1、原来和配置文件绑定的配置类是这样的
* @ConfigurationProperties(prefix = "spring.cache")
* public class CacheProperties {
* 2、要让他生效
* @EnableConfigurationProperties(CacheProperties.class)
* @return
*/
@Bean
RedisCacheConfiguration redisCacheConfiguration(CacheProperties cacheProperties){
RedisCacheConfiguration config = RedisCacheConfiguration.defaultCacheConfig();
// key的序列化机制
config = config.serializeKeysWith(
RedisSerializationContext.SerializationPair.fromSerializer(new StringRedisSerializer()
));
// value的序列化机制
config = config.serializeValuesWith(
RedisSerializationContext.SerializationPair.fromSerializer(new GenericJackson2JsonRedisSerializer())
);
CacheProperties.Redis redisProperties = cacheProperties.getRedis();
// 将配置文件中的所有配置都生效
if (redisProperties.getTimeToLive() != null) {
config = config.entryTtl(redisProperties.getTimeToLive());
}
if (redisProperties.getKeyPrefix() != null) {
config = config.prefixCacheNameWith(redisProperties.getKeyPrefix());
}
if (!redisProperties.isCacheNullValues()) {
config = config.disableCachingNullValues();
}
if (!redisProperties.isUseKeyPrefix()) {
config = config.disableKeyPrefix();
}
return config;
}
}
相关配置类
CacheAutoConfiguration
CacheProperties
十、常见问题bug
1.产生堆外内存溢出:OutOfDirectMemoryError
产生堆外内存溢出:OutOfDirectMemoryError
1)、SpringBoot2.0以后默认使用lettuce作为操作Redis的客户端。它使用netty进行网络通信
2)、lettuce的bug导致netty堆外内存溢出-Xmx300m;netty如果没有指定堆外内存,默认使用-Xmx300m可以通过-Dio.netty.maxDirectMemory进行设置
解决方案:不能使用-Dio.netty.maxDirectMemory只去调大堆外内存
1)、升级lettuce客户端。2)、切换使用jedis
redisTemplate:
lettuce、jedis操作redis的底层客户端。Spring再次封装redisTemplate
十一、Redis缓存过期淘汰策略
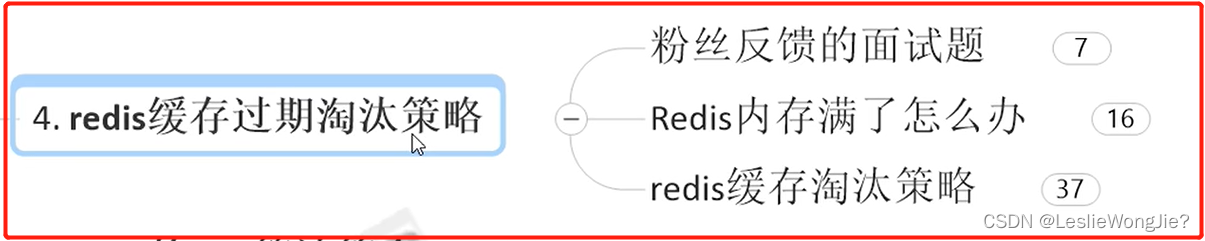
1.面试题

2.Redis内存满了怎么办
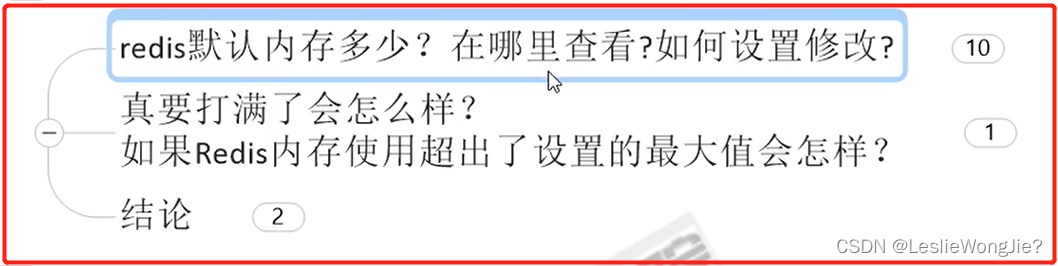
1.Redis默认内存多少?在哪里查看?如何设置?
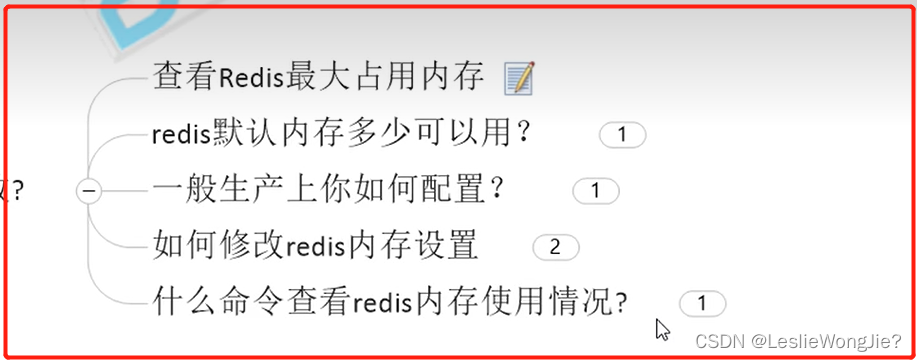
①:查看Redis最大占用内存

②:Redis默认内存多少可以用?

③:一般生产上你如何配置?

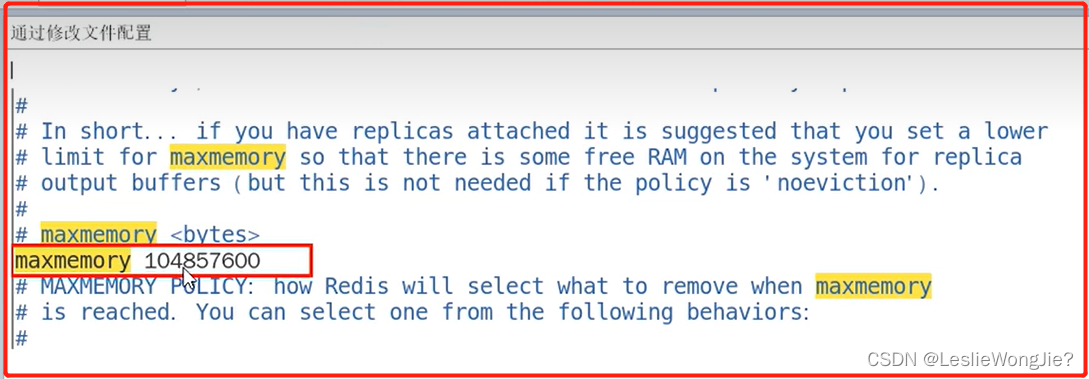
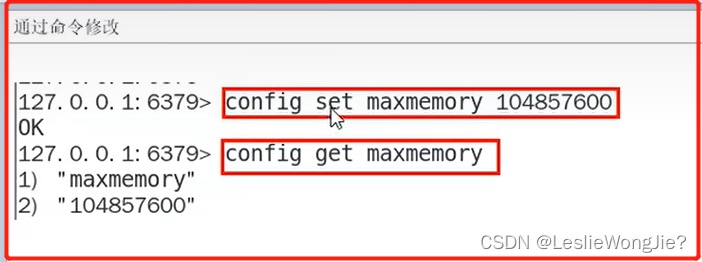
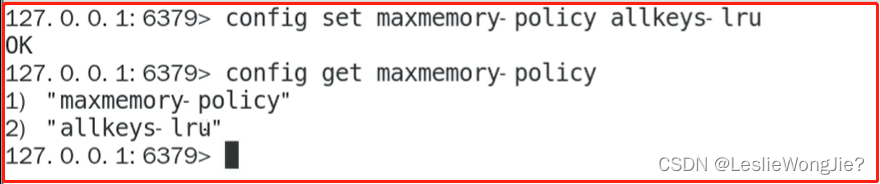
④:如何修改Redis内存设置
⑤:什么命令查看Redis内存使用情况?

2.真要打满了怎么样?如果Redis内存使用超出了设置的最大值会怎样?


3.Redis缓存淘汰策略
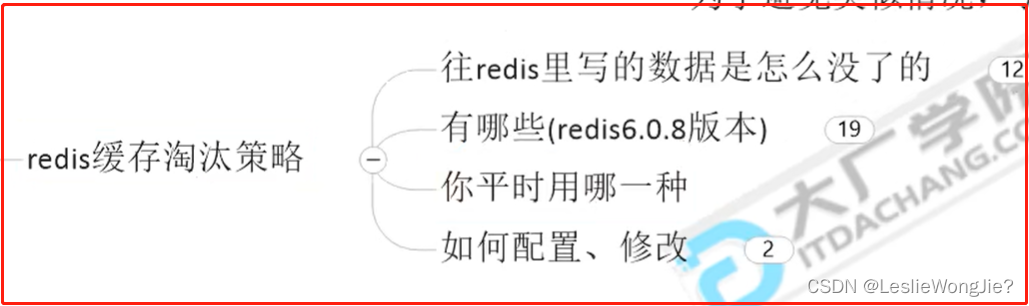
1.往redis里写的数据是怎么没了的
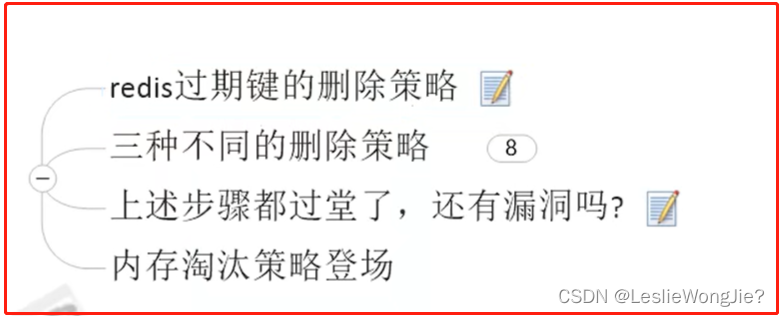
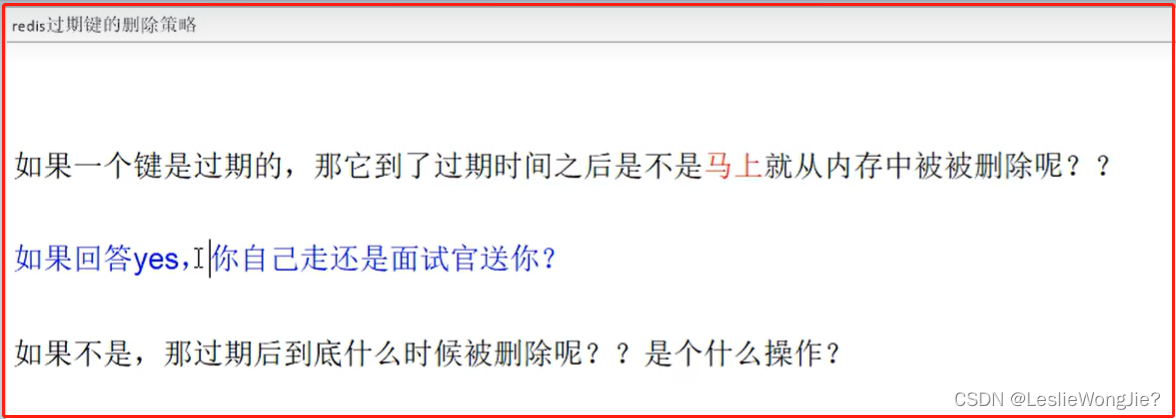
①:redis过期键的删除策略
②:三种不同的删除策略

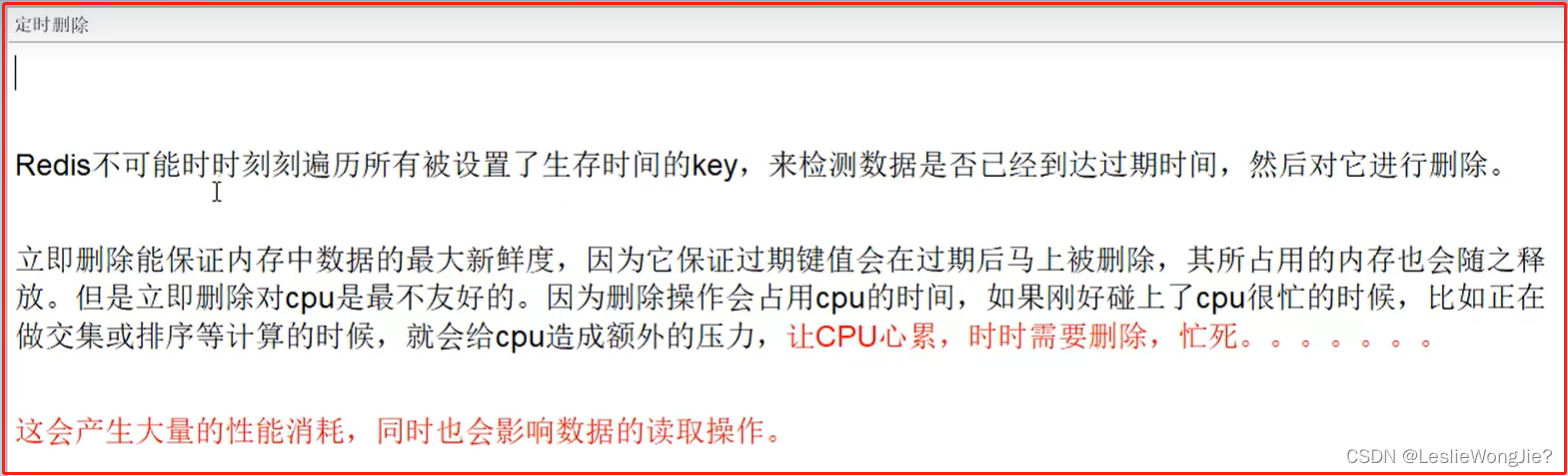
Ⅰ、定时删除

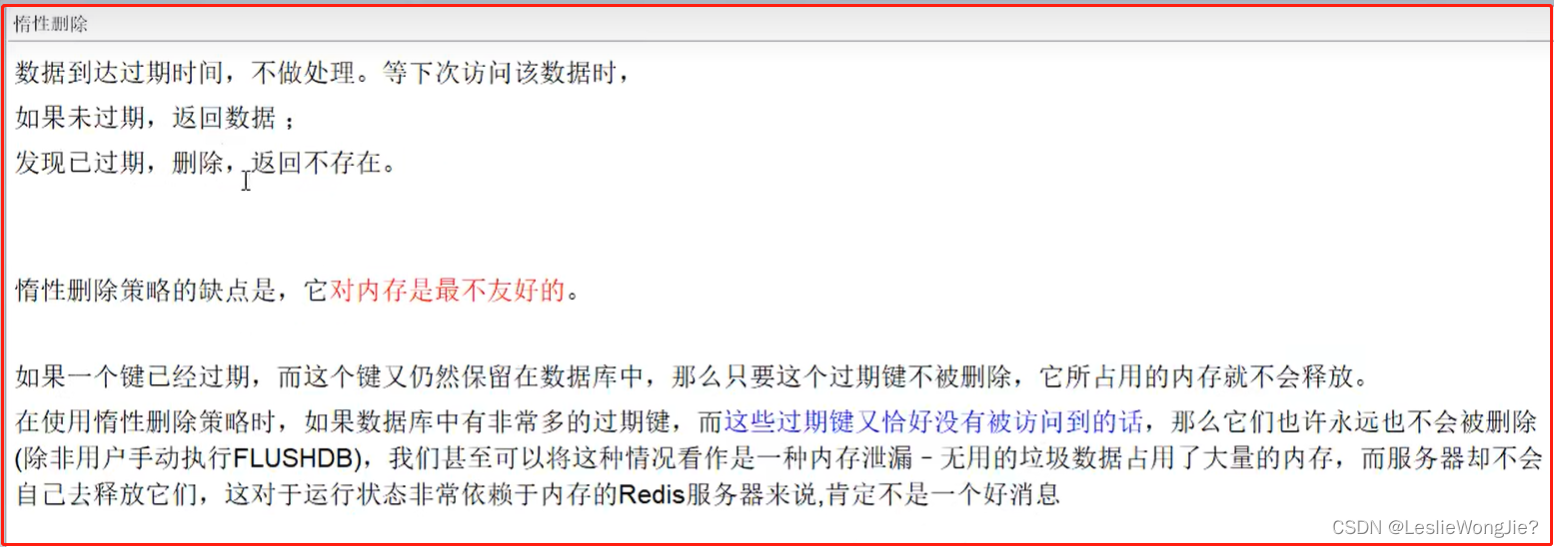
Ⅱ、惰性删除

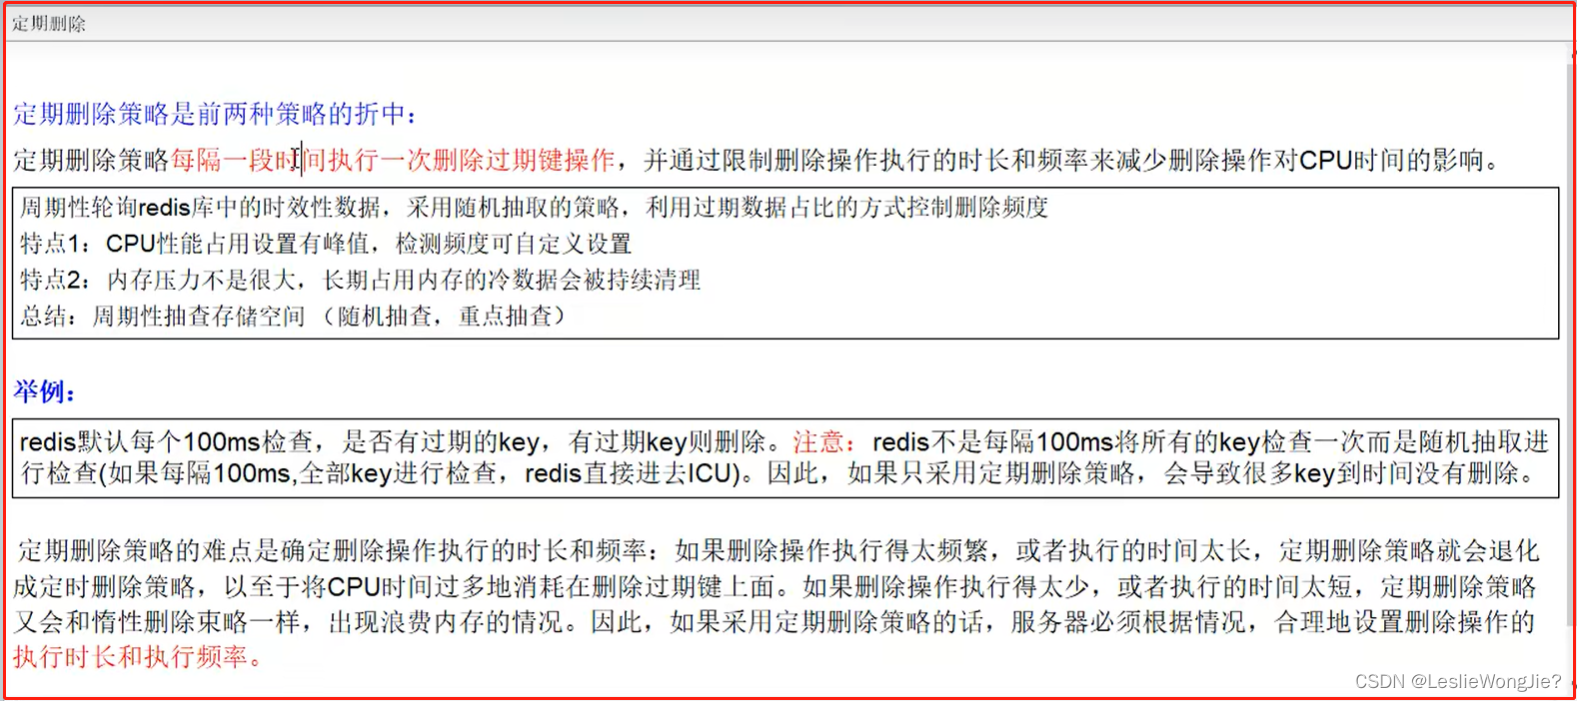
Ⅲ、定期删除


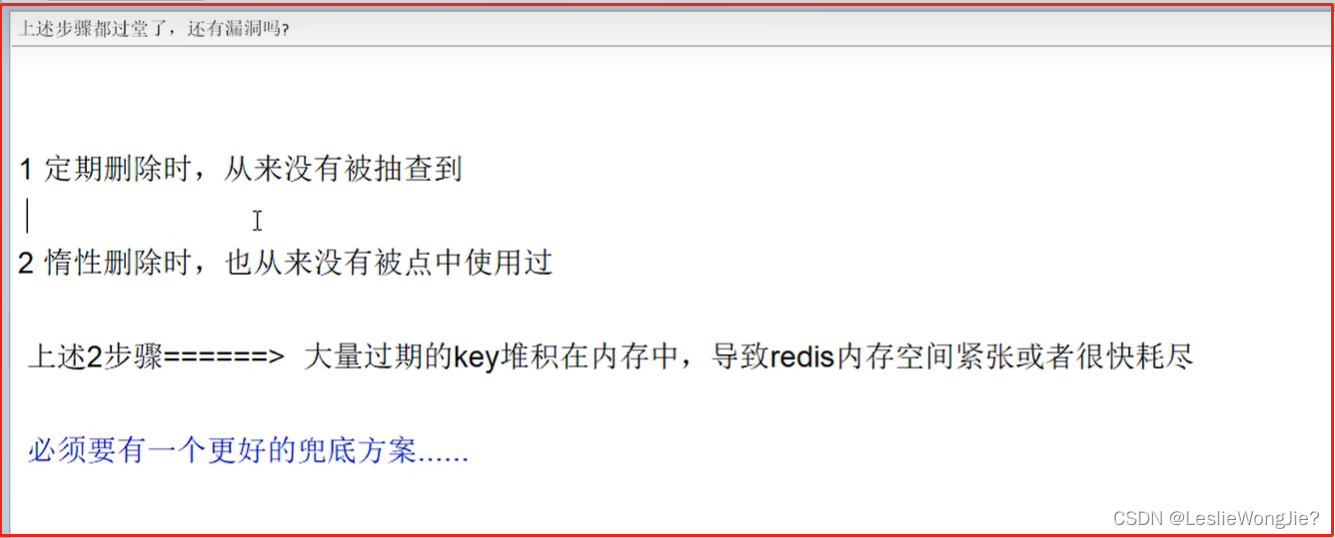
③:上述步骤都过堂了,还有漏洞吗?
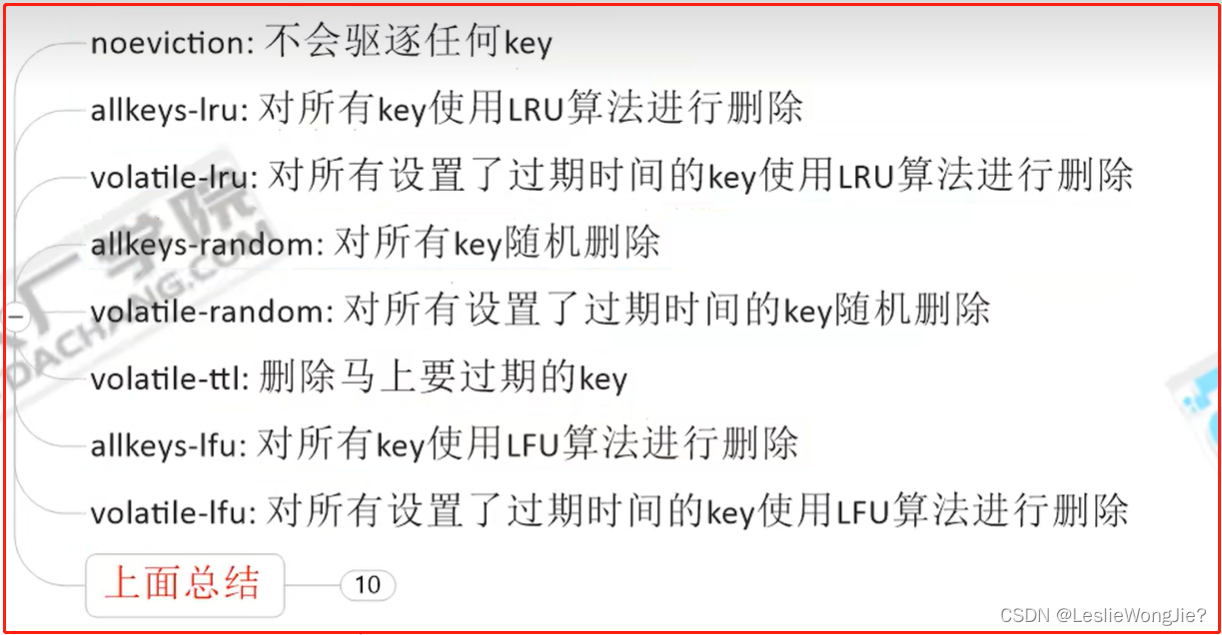
④:内存淘汰策略登场
2.有那些(redis6.0.8版本)
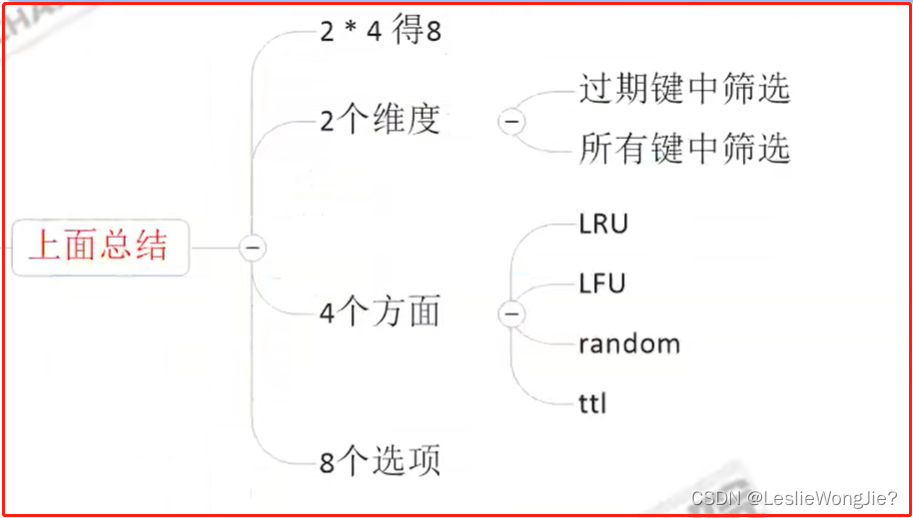
3.你平时用哪一种

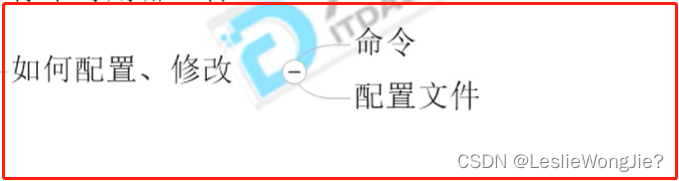
4.如何配置、修改
4.Redis的LRU算法简介
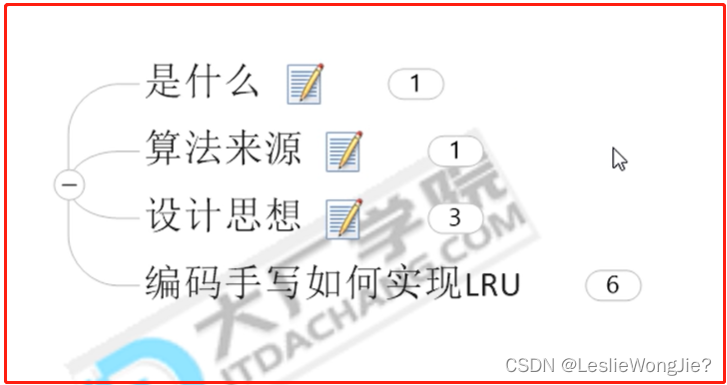
1.是什么
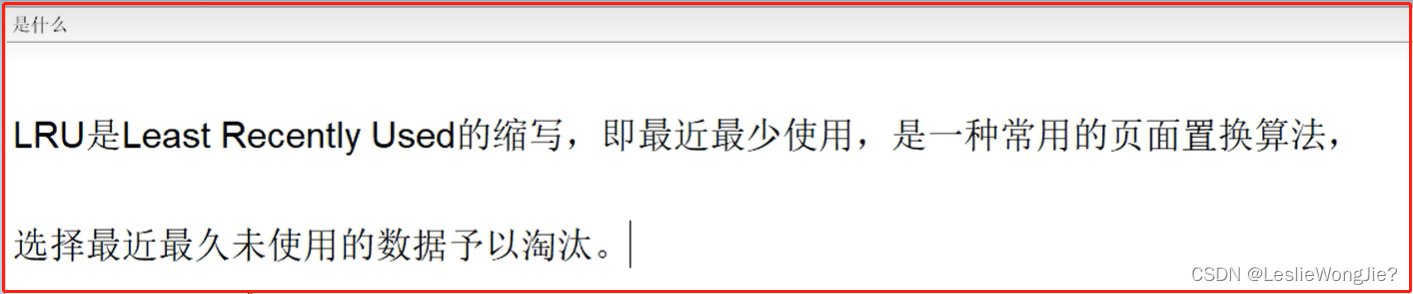
2.算法来源

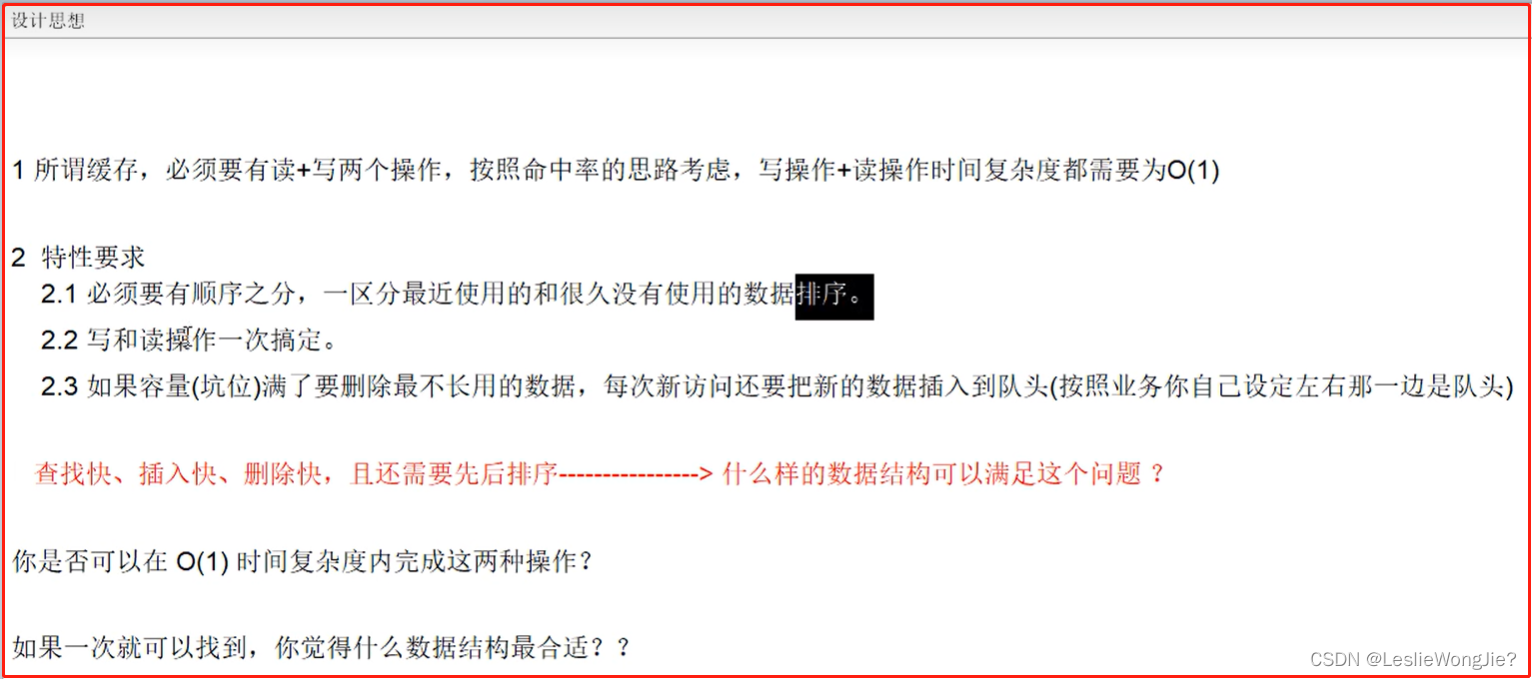
3.设计思想

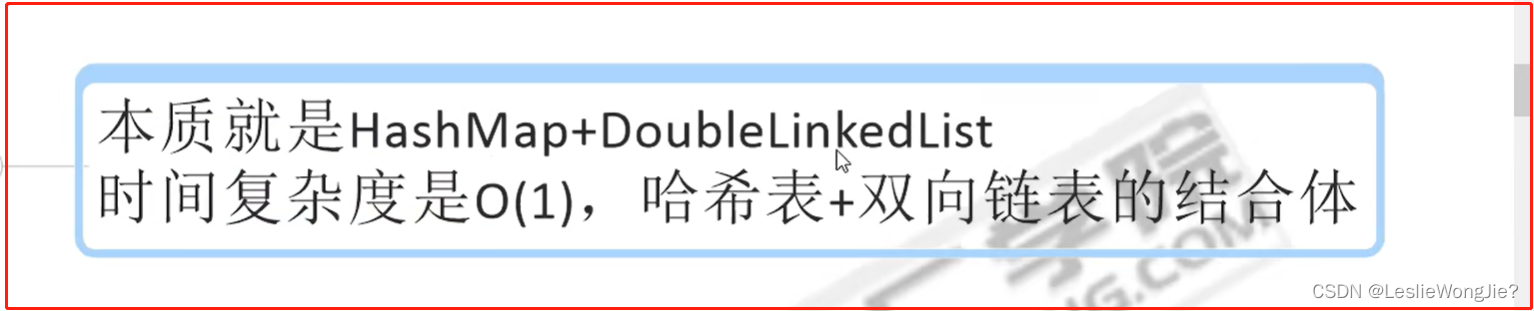
4.编码手写如何实现LRU
public class LRUCacheDemo<K,V> extends LinkedHashMap<K,V> {
private int capacity;//缓存坑位
/**
* accessOrder the ordering mode -
* <tt>true</tt> for access-order 访问顺序
* <tt>false</tt> for insertion-order 插入顺序
* @param capacity
*/
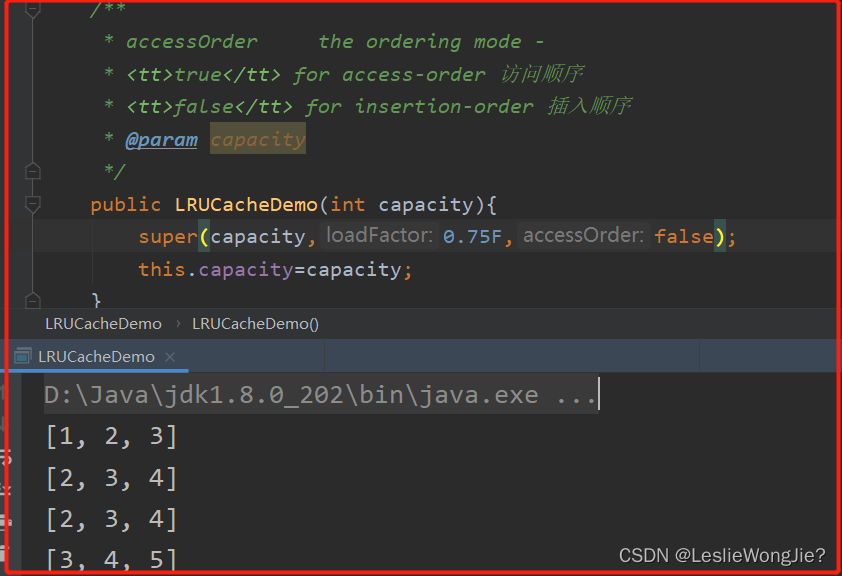
public LRUCacheDemo(int capacity){
super(capacity,0.75F,true);
this.capacity=capacity;
}
@Override
protected boolean removeEldestEntry(Map.Entry<K, V> eldest) {
return super.size()>capacity;
}
public static void main(String[] args) {
LRUCacheDemo lruCacheDemo=new LRUCacheDemo(3);
lruCacheDemo.put(1,"a");
lruCacheDemo.put(2,"b");
lruCacheDemo.put(3,"c");
System.out.println(lruCacheDemo.keySet());
lruCacheDemo.put(4,"d");
System.out.println(lruCacheDemo.keySet());
lruCacheDemo.put(3,"c");
lruCacheDemo.put(3,"c");
lruCacheDemo.put(3,"c");
System.out.println(lruCacheDemo.keySet());
lruCacheDemo.put(5,"d");
System.out.println(lruCacheDemo.keySet());
}
}
[1, 2, 3]
[2, 3, 4]
[2, 4, 3]
[4, 3, 5]
public class LRUCacheDemo {
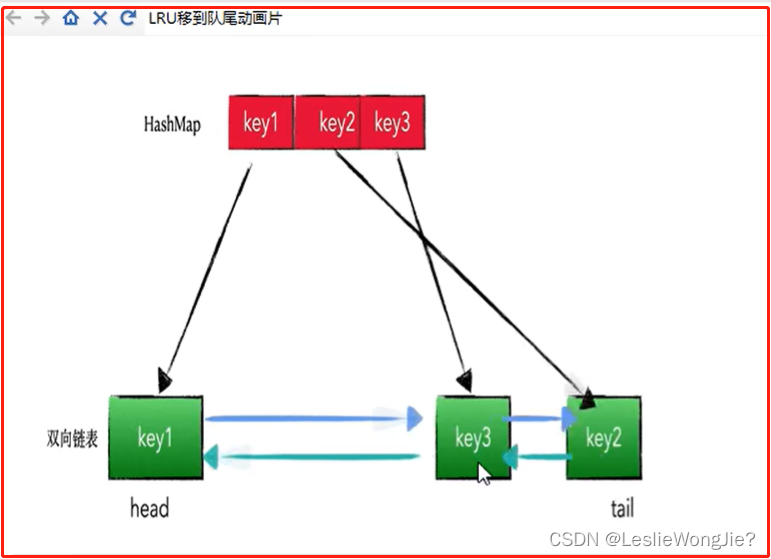
Map<Integer, Node<Integer, Integer>> map;
//map负责查找,构建一个虚拟的双向链表,它里面安装的就是一个个Node节点,作为数据载体
DoubleLinkedList<Integer, Integer> doubleLinkedList;
private int cacheSize;
public LRUCacheDemo(int cacheSize) {
this.cacheSize = cacheSize;//坑位
//map = new HashMap<>();//查找
map = new LinkedHashMap<>();
doubleLinkedList = new DoubleLinkedList<>();
}
public static void main(String[] args) {
LRUCacheDemo lruCacheDemo = new LRUCacheDemo(3);
lruCacheDemo.put(1, 1);
lruCacheDemo.put(2, 2);
lruCacheDemo.put(3, 3);
System.out.println(lruCacheDemo.map.keySet());
lruCacheDemo.put(4, 4);
System.out.println(lruCacheDemo.map.keySet());
lruCacheDemo.put(4, 4);
System.out.println(lruCacheDemo.map.keySet());
lruCacheDemo.put(3, 3);
System.out.println(lruCacheDemo.map.keySet());
lruCacheDemo.put(5, 5);
System.out.println(lruCacheDemo.map.keySet());
}
public int get(int key) {
if (!map.containsKey(key)) {
return -1;
}
Node<Integer, Integer> node = map.get(key);
doubleLinkedList.removeNode(node);
doubleLinkedList.addHead(node);
return node.value;
}
//saveOrUpdate method
public void put(int key, int value) {
if (map.containsKey(key)) {//update
Node<Integer, Integer> node = map.get(key);
node.value = value;
//map.put(key, node);
map.remove(key);
doubleLinkedList.removeNode(node);
doubleLinkedList.addHead(node);
map.put(key, node);
} else {
if (map.size() == cacheSize) {//坑我满了
Node<Integer, Integer> lastNode = doubleLinkedList.getLast();
map.remove(lastNode.key);
doubleLinkedList.removeNode(lastNode);
}
//才是新增
Node<Integer, Integer> newNode = new Node<>(key, value);
map.put(key, newNode);
doubleLinkedList.addHead(newNode);
}
}
//1.构建一个Node节点,作为数据载体
class Node<K, V> {
K key;
V value;
Node<K, V> prev;
Node<K, V> next;
public Node() {
this.prev = this.next = null;
}
public Node(K key, V value) {
this.key = key;
this.value = value;
this.prev = this.next = null;
}
}
//2.构造一个双向队列,里面安装的就是我们的Node
class DoubleLinkedList<K, V> {
Node<K, V> head;
Node<K, V> tail;
//2.1构造方法
public DoubleLinkedList() {
head = new Node<>();
tail = new Node<>();
head.next = tail;
tail.prev = head;
}
//2.2添加头
public void addHead(Node<K, V> node) {
node.next = head.next;
node.prev = head;
head.next.prev = node;
head.next = node;
}
//2.3删除节点
public void removeNode(Node<K, V> node) {
node.next.prev = node.prev;
node.prev.next = node.next;
node.prev = null;
node.next = null;
}
//2.4获得最后一个节点
public Node getLast() {
return tail.prev;
}
}
}
[1, 2, 3]
[2, 3, 4]
[2, 3, 4]
[2, 4, 3]
[4, 3, 5]
public class LRUCacheDemo {
    Map<Integer, Node<Integer, Integer>> map;

    //map负责查找,构建一个虚拟的双向链表,它里面安装的就是一个个Node节点,作为数据载体
    DoubleLinkedList<Integer, Integer> doubleLinkedList;
    private int cacheSize;

    public LRUCacheDemo(int cacheSize) {
        this.cacheSize = cacheSize;//坑位
        map = new HashMap<>();//查找
        doubleLinkedList = new DoubleLinkedList<>();
    }

    public static void main(String[] args) {
        LRUCacheDemo lruCacheDemo = new LRUCacheDemo(3);
        lruCacheDemo.put(1, 1);
        lruCacheDemo.put(2, 2);
        lruCacheDemo.put(3, 3);
        System.out.println(lruCacheDemo.map.keySet());

        lruCacheDemo.put(4, 4);
        System.out.println(lruCacheDemo.map.keySet());
        lruCacheDemo.put(4, 4);
        System.out.println(lruCacheDemo.map.keySet());

        lruCacheDemo.put(3, 3);
        System.out.println(lruCacheDemo.map.keySet());

        lruCacheDemo.put(5, 5);
        System.out.println(lruCacheDemo.map.keySet());

    }

    public int get(int key) {
        if (!map.containsKey(key)) {
            return -1;
        }
        Node<Integer, Integer> node = map.get(key);
        doubleLinkedList.removeNode(node);
        doubleLinkedList.addHead(node);
        return node.value;
    }

    //saveOrUpdate method
    public void put(int key, int value) {
        if (map.containsKey(key)) {//update
            Node<Integer, Integer> node = map.get(key);
            node.value = value;
            map.put(key, node);
            doubleLinkedList.removeNode(node);
            doubleLinkedList.addHead(node);
        } else {
            if (map.size() == cacheSize) {//坑我满了
                Node<Integer, Integer> lastNode = doubleLinkedList.getLast();
                map.remove(lastNode.key);
                doubleLinkedList.removeNode(lastNode);
            }
            //才是新增
            Node<Integer, Integer> newNode = new Node<>(key, value);
            map.put(key, newNode);
            doubleLinkedList.addHead(newNode);
        }
    }

    //1.构建一个Node节点,作为数据载体
    class Node<K, V> {
        K key;
        V value;
        Node<K, V> prev;
        Node<K, V> next;

        public Node() {
            this.prev = this.next = null;
        }

        public Node(K key, V value) {
            this.key = key;
            this.value = value;
            this.prev = this.next = null;
        }
    }

    //2.构造一个双向队列,里面安装的就是我们的Node
    class DoubleLinkedList<K, V> {
        Node<K, V> head;
        Node<K, V> tail;

        //2.1构造方法
        public DoubleLinkedList() {
            head = new Node<>();
            tail = new Node<>();
            head.next = tail;
            tail.prev = head;
        }

        //2.2添加头
        public void addHead(Node<K, V> node) {
            node.next = head.next;
            node.prev = head;
            head.next.prev = node;
            head.next = node;
        }

        //2.3删除节点
        public void removeNode(Node<K, V> node) {
            node.next.prev = node.prev;
            node.prev.next = node.next;
            node.prev = null;
            node.next = null;
        }

        //2.4获得最后一个节点
        public Node getLast() {
            return tail.prev;
        }
    }
}
[1, 2, 3]
[2, 3, 4]
[2, 3, 4]
[2, 3, 4]
[3, 4, 5]


 774
774


 被折叠的 条评论
为什么被折叠?
被折叠的 条评论
为什么被折叠?
 到【灌水乐园】发言


