


php相关部署
php源码编译
1.编译安装php
解压php
yum install bzip2 -y
tar  jxf php-7.4.12.tar.bz2


编译php
[root@vm1 ~]# cd php-7.4.12/
[root@vm1 php-7.4.12]#  ./configure --prefix=/usr/local/lnmp/php --with-config-file-path=/usr/local/lnmp/php/etc --enable-fpm --with-fpm-user=nginx --with-fpm-group=nginx  --with-curl --with-iconv --with-mhash --with-zlib --with-openssl --enable-mysqlnd --with-mysqli --with-pdo-mysql --disable-debug --enable-sockets --enable-soap --enable-inline-optimization --enable-xml --enable-ftp --enable-gd --enable-exif --enable-mbstring  --enable-bcmath --with-fpm-systemd
   //在这里我添加了一些模块进行编译
[root@vm1 php-7.4.12]# yum install libxml2-devel.x86_64 y
[root@vm1 php-7.4.12]# yum install sqlite-devel.x86_64 -y
[root@vm1 php-7.4.12]# yum install libcurl-devel.x86_64  -y
[root@vm1 php-7.4.12]# yum install -y systemd-devel -y
[root@vm1 php-7.4.12]# yum install libpng-devel.x86_64 -y
[root@vm1 php-7.4.12]# yum intstall oniguruma -y   //会发现安装失败,因为软件仓库中没有此软件。
[root@vm1 php-7.4.12]# yum install oniguruma-6.8.2-1.el7.x86_64.rpm -y
[root@vm1 php-7.4.12]# yum install oniguruma-devel-6.8.2-1.el7.x86_64.rpm -y

[root@vm1 php-7.4.12]# ./configure
[root@vm1 php-7.4.12]# make
[root@vm1 php-7.4.12]# make install
在编译过程中报错会提醒哪个依赖没有安装,根据提示进行安装后再次编译即可,在根据提示安装过程中,可双击Tab健,得到提示。


配置成功如图

make成功
 make install 成功

2.修改php-fpm配置文件
修改配置文件
[root@vm1 etc]# pwd
/usr/local/lnmp/php/etc
[root@vm1 etc]# cp php-fpm.conf.default php-fpm.conf
[root@vm1 etc]# vim php-fpm.conf


拷贝php-fpm配置文件
[root@vm1 php-7.4.12]# cp php.ini-production /usr/local/lnmp/php/etc/php.ini
[root@vm1 php-7.4.12]# cp sapi/fpm/php-fpm.service /usr/lib/systemd/system/
[root@vm1 php-7.4.12]# cp sapi/fpm/php-fpm.conf /usr/local/lnmp/php/etc/
cp: overwrite ‘/usr/local/lnmp/php/etc/php-fpm.conf’?
[root@vm1 php-7.4.12]# cp sapi/fpm/www.conf /usr/local/lnmp/php/etc/php-fpm.d/
##设置时区
[root@vm1 etc]# pwd
/usr/local/lnmp/php/etc
[root@vm1 etc]# vim php.ini
## 默认php-fpm启动时只读挂载/usr目录
[root@vm1 etc]# cd /usr/lib/systemd/system/
[root@vm1 system]# ls
[root@vm1 system]# vim php-fpm.service
root@vm1 system]# systemctl daemon-reload  //刷新服务列表
[root@vm1 system]# systemctl enable --now php-fpm.service   //启动服务
Created symlink from /etc/systemd/system/multi-user.target.wants/php-fpm.service to /usr/lib/systemd/system/php-fpm.service.


nginx结合php-fpm
1.修改配置文件
[root@vm1 conf]# pwd
/usr/local/nginx/conf
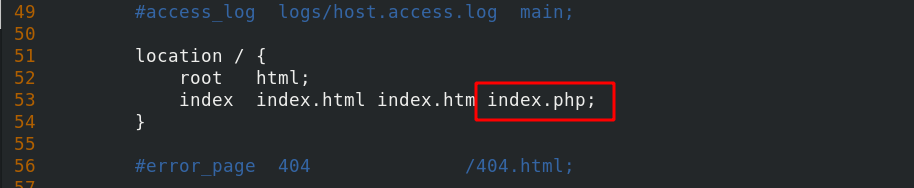
[root@vm1 conf]# vim nginx.conf
[root@vm1 conf]# nginx -s reload

2.编写测试页
[root@vm1 html]# pwd
/usr/local/nginx/html
[root@vm1 html]# vim index.php
  1 <?php
  2 phpinfo()
  3 ?>
[root@vm1 html]# nginx -s reload
浏览器搜索192.168.1.1/index.php

3.添加环境变量
vim .bash_profile
PATH=
P
A
T
H
:
PATH:
PATH:HOME/bin:/usr/local/php/bin
#php增加memcache模块将php的bin目录路径添加到~./bash_profile中,为了方便调用
source .bash_profile
php添加memcache功能模块

1 .添加环境变量
[root@vm1 ~]# vim .bash_profile

 PATH=$PATH:$HOME/bin:/usr/local/lnmp/php/bin
#php增加memcache模块将php的bin目录路径添加到~./bash_profile中,为了方便调用
[root@vm1 ~]# source .bash_profile
2. 安装memcache模块
[root@vm1 ~]# tar zxf memcache-4.0.5.2.tgz
[root@vm1 ~]# cd memcache-4.0.5.2/
[root@vm1 memcache-4.0.5.2]# phpize
[root@vm1 memcache-4.0.5.2]# ./configure
[root@vm1 memcache-4.0.5.2]# make
配置完成成功
 编译成功
编译成功
 安装成功
安装成功

3.在php中添加memcache模块
[root@vm1 etc]# pwd
/usr/local/lnmp/php/etc
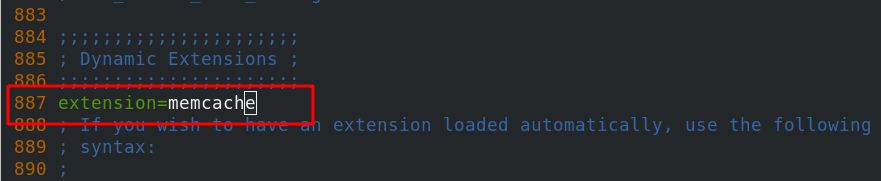
[root@vm1 etc]# vim php.ini
887 extension=memcache
[root@vm1 etc]# systemctl reload php-fpm.service
[root@vm1 etc]# php -m | grep memcache ##出现memcache表示添加成功
[root@vm1 etc]# systemctl reload php-fpm.service
4.构建nginx高速缓存
[root@vm1 ~]# yum install -y memcached
[root@vm1 ~]# systemctl start memcached.service
[root@vm1 ~]# systemctl status memcached.service
[root@vm1 ~]# cd memcache-4.0.5.2/
[root@vm1 memcache-4.0.5.2]# cp  memcache.php /usr/local/nginx/html/
[root@vm1 memcache-4.0.5.2]# cd /usr/local/nginx/html/
[root@vm1 html]# vim memcache.php   //具体修改配置如下图
[root@vm1 html]# nginx -s reload
[root@vm1 html]# systemctl start php-fpm.service
[root@vm1 html]# systemctl start memcached.service
 用刚设置的账户密码登陆

结果如图

构建nginx高速缓存
1.安装openresty
[root@vm1 ~]# tar zxf openresty-1.19.3.1.tar.gz
[root@vm1 ~]# cd openresty-1.19.3.1/
[root@vm1 openresty-1.19.3.1]# nginx -s stop
[root@vm1 openresty-1.19.3.1]# ./configure --with-http_ssl_module --with-http_stub_status_module --with-threads --with-file-aio
[root@vm1 openresty-1.19.3.1]# make
[root@vm1 openresty-1.19.3.1]# make install


2.修改配置文件
root@vm1 conf]# pwd
/usr/local/openresty/nginx/conf
[root@vm1 conf]# vim nginx.conf
[root@vm1 html]# cp /usr/local/nginx/html/memcache.php  .
[root@vm1 html]# cp /usr/local/nginx/html/index.php  .
[root@vm1 html]# /usr/local/openresty/nginx/sbin/nginx -t
[root@vm1 html]# /usr/local/openresty/nginx/sbin/nginx -s reload
nginx: [error] invalid PID number "" in "/usr/local/openresty/nginx/logs/nginx.pid"
[root@vm1 html]# /usr/local/openresty/nginx/sbin/nginx -c /usr/local/openresty/nginx/conf/nginx.conf
[root@vm1 html]# /usr/local/openresty/nginx/sbin/nginx -s reload
[root@vm1 conf]# vim nginx.conf
[root@vm1 conf]# /usr/local/openresty/nginx/sbin/nginx -t
[root@vm1 conf]# /usr/local/openresty/nginx/sbin/nginx -s reload


3.在真机进行压力测试
ab -c10 -n 5000 http://192.168.1.1/example.php
传输速度快,且没有报错
 ab -c10 -n 5000 http://192.168.1.1/index.php
传输量大幅度提升


 1187
1187


 被折叠的 条评论
为什么被折叠?
被折叠的 条评论
为什么被折叠?
 到【灌水乐园】发言


