


一、Redux Toolkit概念了解
`@reduxjs/toolkit`是Redux官方为了简化和提高开发体验而开发的一个工具包。它为使用Redux构建应用程序提供了一组常用的工具和实用程序,旨在简化开发流程并减少样板代码。通过`@reduxjs/toolkit`,您可以更快速地编写Redux代码,同时仍然享受到完整的Redux功能。
Redux Toolkit 最初是为了帮助解决有关 Redux 的三个常见问题而创建的:
"配置 Redux store 过于复杂"

"我必须添加很多软件包才能开始使用 Redux"

"Redux 有太多样板代码"
Redux Toolkit 提供了以下主要功能:
1. 集成了Redux常用的工具:`@reduxjs/toolkit`内置了常用的Redux工具,例如`createStore`、`createReducer`、`createAction`等。这些工具帮助您更方便地创建和组织Redux store、reducers以及actions。

2. 内置不可变性更新:`@reduxjs/toolkit`使用了`immer`库,它允许您以一种可变的方式来更新Redux状态。您可以直接修改状态对象,而`immer`会自动处理不可变性更新。这样,您可以省去手动编写不可变性更新逻辑的麻烦。

3. 简化的Redux配置:`@reduxjs/toolkit`通过使用`configureStore`函数来简化Redux的配置。它为您处理了一些常见的设置,例如中间件、持久化等。

4. 内置了Redux DevTools集成:`@reduxjs/toolkit`自动为您启用Redux DevTools的集成,使您可以轻松地在开发工具中查看和调试Redux store的状态和操作。
二、核心API
configureStore() :
configureStore():创建 Store。用于替代 Redux 的 createStore() 方法。
接收一个对象作为参数,包含以下内容:
1.reducer:对象类型。可以接收多个 reducer 函数。
原有的 combineReducers() 合并函数就不需要了。
2.middleware:对象类型。可以接收多个中间件。
默认已经集成了 redux-thunk 和 redux-devtool 中间件。
devTools:布尔值类型。是否开启 devTools 工具,默认为 true。
createSlice():
createSlice():创建一个 slice 片段。一个 slice 片段其实是 Action 和 Reducer 的集合。createSlice() 接收一个对象作为参数,包含以下内容:
1.name:字符串类型。标记 slice。
作为 action.type 的前缀,在使用的时候默认使用 name/actionName,解决了 Action 中的 type 可能会同名的情况。在 Redux DevTools 调试工具中可以看到。
2.initialState:对象类型。State 的初始值。
3.reducers:对象类型,相当于之前的 Reducer 函数。
对象中可以添加任意多个函数,每一个函数就相当于之前 Reducer 函数中的一个 case 语句。会接收到 State 和 Action 作为其参数(Action 有两个属性:type 和 payload,dispatch 派发 Action 时传入的参数就会作为 payload),直接修改 State 中对应的值即可。
Redux Toolkit 底层使用了 immerjs 库,因此可以直接使用赋值的方式改变 State,不再需要每一次都返回一个新的 State。
immerjs 底层是使用了 proxy 来对原状态进行了拦截,生成了草稿状态,在草稿状态上进行读写操作后,返回最终的状态。也就实现了既保证了原状态的不可变性,也保证了返回的是一个不同引用地址的新状态。
4.extraReducers:对象类型或者函数类型。可以让 slice 处理在别处定义的 Action, 包括由 createAsyncThunk() 或其他 slice 生成的 Action。
createAsyncThunk():
createAsyncThunk():创建一个异步 Action。
接收两个参数:第一个参数是一个表示类型的字符串,用于标识这个异步 Action,在 Redux DevTools 调试工具中可以看到;第二个参数是一个函数,可以在其中进行异步操作,返回的数据会被传入到 createSlice() 的 extraReducers 中函数的 action.payload 参数中。
createAsyncThunk() 方法触发的时候会有三种状态:pending(进行中)、fulfilled(成功)、rejected(失败),可以在 createSlice() 的 extraReducers 中监听结果。
三、Redux Toolkit 使用
1、安装 react - redux 和 @reduxjs/toolkit
# NPM
npm install @reduxjs/toolkit  react-redux

# Yarn
yarn add @reduxjs/toolkit  react-redux
2、创建 store
文件路径示例:
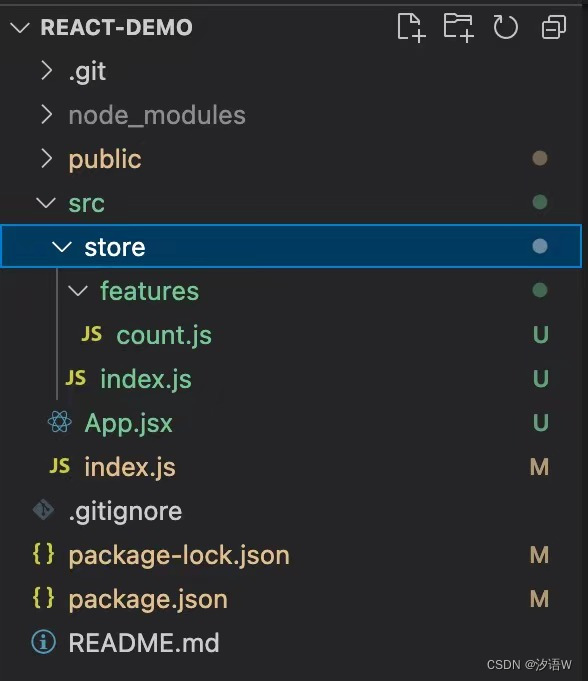
文件路径:src/store/index.js
// 引入 configureStore 方法
import {configureStore} from '@reduxjs/toolkit'
// 引入各个 reducer 切片
import countReducer from './features/count'

// 创建 store 用来创建store对象,需要一个配置对象作为参数
const store = configureStore({
  // 将导出的 slice 中的 reducer 传入,合并多个slice切片
  reducer: {
    count: countReducer,
  },
})

// 导出 store
export default store;
3、根组件配置 store
文件路径:项目入口 index.js 文件
创建 store 后,便可以在 React 组件中使用它。 在 src/index.js 中引入我们刚刚创建的 store , 通过 React-Redux 的 <Provider>将 <App> 包裹起来,并将 store 作为 prop 传入。
import ReactDOM from 'react-dom/client'
// 从 react-redux 中引入 Provider
import {Provider} from 'react-redux'
// 引入 store
import store from './store'

import App from './App'

const root = ReactDOM.createRoot(document.getElementById('root'))
root.render(
  // 使用 <Provider> 包裹根组件,将 Store 作为属性赋值给 <Provider>
  <Provider store={store}>
    <App />
  </Provider>
)
4、createSlice 创建 reducer 的切片
createSlice() 的返回值是一个对象,包含以下属性:
reducer:当前 slice 片段中的所有 Reducer。
actions:当前 slice 片段中的所有 Action。
文件路径: store/feature/count.js
// 引入 createSlice
import {createSlice, createAsyncThunk} from "@reduxjs/toolkit";
import axios from "axios";

// 通过 createAsyncThunk 创建一个异步的 Action 并导出
export const getAsyncCountAction = createAsyncThunk('getBannerAction', async () => {
  // 执行异步操作
  const res = await axios.get('http://123.207.32.32:8000/home/multidata')
  // 返回的数据会被传入到 extraReducers 中函数的 action.payload 参数中
  return res.data.data.banner.list.length
})

// 创建 slice。每一个 slice 里都包含了 reducer 和 actions,可以实现模块化的封装
const slice = createSlice({
  // 标记 slice,作为 action.type 的前缀
  name: 'count',
  // state 的初始值
  initialState: {
    count: 0,
  },
  // 相当于之前的 reducer 函数
  reducers: {
    // 一个函数就相当于之前的 reducer 函数中的一个 case 语句
    // 相当于既定义了组件中 dispatch 使用的同步 Action(函数名就相当于 Action 的类型),也定义了 Reducer 更新状态函数(函数体就相当于 Reducer 更新 State)
    increaseCount(state, action) {
      // 可以直接使用赋值的方式修改 State,不再需要每一次都返回一个新的 State
      state.count += action.payload
    },
    decreaseCount(state, action) {
      state.count -= action.payload
    },
  },
  // extraReducers 可以让 slice 处理在别处定义的 Action,包括由 createAsyncThunk 创建的异步的 Action或其他 slice 生成的 Action
  extraReducers: {
    [getAsyncCountAction.pending](state, action) {
      console.log('getAsyncCountAction.pending')
    },
    // 监听 createAsyncThunk 创建的异步 Action 的结果,修改 State 中指定的数据
    [getAsyncCountAction.fulfilled](state, action) {
      console.log('getAsyncCountAction.fulfilled')
      state.count = action.payload
    },
    [getAsyncCountAction.rejected](state, action) {
      console.log('getAsyncCountAction.rejected')
    },
  },
// extraReducers 还有另外一种写法,可以是一个函数,接收一个 builder 作为参数,可以给 builder 添加 case 来监听异步操作的结果
  extraReducers: builder => {
    builder
      .addCase(getAsyncCountAction.pending, (state, action) => {
        console.log('getAsyncCountAction.pending')
      })
      .addCase(getAsyncCountAction.fulfilled, (state, action) => {
        console.log('getAsyncCountAction.fulfilled')
        state.count = action.payload
      })
  },

// 导出 slice 片段中的 reducer,以供创建 store 时使用
export default slice.reducer

// 导出 slice 片段中的 action,以供组件中 dispatch 时使用
export const {increaseCount, decreaseCount} = slice.actions
5、页面使用
useDispatch() 用来获取派发器对象
useSelector() 用来加载 state 中的数据
import React from 'react'
import { useDispatch, useSelector } from 'react-redux'
import { increaseCount } from '../../store/features/count'

export default function ReduxTest() {
    const { count } = useSelector(state => state.SetInitState);
    const dispatch = useDispatch();

    // 改变count状态
    const clickCount = () => {
        dispatch(increaseCount());
    }
    return (
        <div>
            <div style={{ background: "white" }}>
                <p>ReduxTest页面Redux-Count:{count}</p>
            </div>
            <br />
            <p><button onClick={clickCount}>ReduxTest组件,点击count+1</button></p>
        </div>

    )
}
四、redux-persist 持久化储存(选学)
在实际开发中,如果用户刷新了网页,那么我们通过 redux 存储的全局数据就会丢失,比如登录信息。可以通过 localStorage 将信息存储到本地,需要自己添加逻辑(了解)。
通过 redux-persist 实现持久化储存,使用过程:
1、 安装
npm install redux-persist2、配置 store
文件路径:src/store/index.js
import { configureStore } from '@reduxjs/toolkit'
import { combineReducers } from 'redux'
// 配置数据的持久化效果
import { persistStore, persistReducer} from 'redux-persist'
// 导入需要配置的数据源,可选storage、cookie、session等
import storage from 'redux-persist/lib/storage'
// import storageSession from 'redux-persist/lib/storage/session'
import count from '@/store/feature/count'
import menuReducer from '@/store/slicers/menuSlice'

// 合并多个模块
const reducers = combineReducers({
	user: count,
	menu: menuReducer
})

// 配置持久化设置
const persistConfig = {
    key: 'root',
    storage, // 持久化存储引擎
    // 可选的配置项,如白名单、黑名单等 选其一
    // blacklist: ['不想缓存的状态的名字'],
    // whitelist: ['想要缓存状态的名字']
}

// 创建持久化的配置persist的信息
const persistedReducer = persistReducer(persistConfig, reducers)

// 创建存储对象并且抛出对象
export const store = configureStore({
	reducer: persistedReducer
})

// 使用persistStore包裹并抛出
export const persistor = persistStore(store)
3、index.js入口文件中配置
在入口文件中使用 PersistGate 包裹根组件,这将延迟渲染 app 视图直到持久化状态取回并保存到 redux 中。
将 store 提供给应用程序,persistor对象提供给根组件
import ReactDOM from 'react-dom/client'
import App from './App'
import { Provider } from 'react-redux'
// 导入redux中对应抛出的store对象和persistor对象
import { store, persistor } from '@/store'
// 如果使用React,则使用 PersistGate 包裹根组建
import { PersistGate } from 'redux-persist/lib/integration/react'

const root = ReactDOM.createRoot(document.getElementById('root'))
root.render(
    <Provider store={store}>
    	<PersistGate loading={null} persistor={persistor}>
    		<App />
    	</PersistGate>
    </Provider>
)


 946
946


 被折叠的 条评论
为什么被折叠?
被折叠的 条评论
为什么被折叠?
 到【灌水乐园】发言


