


webpack打包的流程实际上是根据文件间的依赖关系对其进行静态分析,然后将这些模块按指定规则生成静态资源,webpack会将这些关系整理成一个依赖关系图(dependency graph),整理完成后再根据整个依赖关系图来生成文件,所以我们可以大致的将整个打包流程分为4步
- 根据入口文件,分析依赖
- 逐级分析,确定用到的所有模块
- 将这些模块以及他们之间的关系生成一个依赖关系图
- 依据这个依赖关系图生成文件
为了完成这几个步骤,我们需要
- 一个帮助我们分析单个模块的module analyzer的函数
- 一个帮助我们生成dependency graph的函数
- 一个帮助我们根据dependency graph生成代码的函数
确定了需求,我们就可以着手来实现了
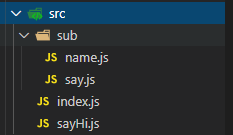
首先新建一个项目
我的项目路径如下
// index.js
import sayHi from './sayHi.js'
sayHi()

// sayHi.js
import {name} from './sub/name.js'
import say from './sub/say.js'
export default function(){
    say(`hi ${name}`)
}

// name.js
export const name = 'xz'

// say.js
export default function(message){
    console.log(message)
}
module analyzer
module analyzer负责帮我们分析模块依赖并将该模块的代码转换成浏览器可执行的代码,我们需要用到babel来帮助我们进行分析
const path = require("path");
const fs = require("fs");
// babel parser 用于生成抽象语法树
const parser = require("@babel/parser");
// babel core 用于将代码转换为浏览器可以运行的格式
const core = require("@babel/core");

// 分析模块依赖并将该模块的代码转换成浏览器可执行的代码
const analyzeModule = (filepath) => {
  // 读取代码内容
  const content = fs.readFileSync(filepath, "utf-8");
  // 根据代码内容生成抽象语法树
  const ast = parser.parse(content, {
  	// es module引入需要加上sourceType: "module"
    sourceType: "module",
  });
  // 遍历代码部分,找到所有引入语句
  const dependencies = {};
  ast.program.body.forEach((item) => {
    // 将所有引用语句整理
    if (item.type == "ImportDeclaration") {
      const dirname = path.dirname(filepath);
      // 将路径转换为相对于文件根目录的相对路径
      const newFilePath = "./" + path.join(dirname, item.source.value);
      // dependencies以键值对的格式同时记录了相对于引用文件的路径以及相对于文件根目录的相对路径,后面需要用到
      dependencies[item.source.value] = newFilePath;
      // dependencies: { './sayHi.js': './src/sayHi.js' }
    }
  });
  // 将代码转换成浏览器可以运行的代码
  const { code } = core.transformFromAst(ast, null, {
    // 需要使用babel/preset-env
    presets: ["@babel/preset-env"],
  });
  // 返回关于这个文件的依赖以及转换后的代码
  return {
    file: filepath,
    dependencies,
    code,
  };
};
dependency graph
完成了模块分析部分的代码,现在就需要来生成整个依赖图谱了,要根据入口文件递归找到所有用到的模块
// 根据入口文件生成依赖图谱
const createDependenciesGraph = (entry) => {
  // 将入口文件生成的模块分析结果放到graph中,遍历graph
  const graph = [analyzeModule(entry)];
  for (let i = 0; i < graph.length; i++) {
    // 如果有dependencies,遍历dependencies
    if (graph[i].dependencies) {
      for (let key in graph[i].dependencies) {
        // 通过analyzeModule分析每个dependencies,然后将分析结果添加至graph中
        graph.push(analyzeModule(graph[i].dependencies[key]));
      }
    }
  }
  // 此时的graph是数组格式的依赖图谱,为了方便使用将其转换为对象形式
  const dependenciesGraph = {};
  graph.forEach((item) => {
    dependenciesGraph[item.file] = {
      dependencies: item.dependencies,
      code: item.code,
    };
  });
  /*
  数据格式如下:
{
  './src/index.js': {
    dependencies: { './sayHi.js': './src\\sayHi.js' },
    code: 代码
  },
  './src/sayHi.js':{
    dependencies: {
 		'./sub/name.js': './src/sub/name.js',
      	'./sub/say.js': './src/sub/say.js'
	},
    code: 代码
  },
  ....
}
  */
  return dependenciesGraph;
};
generate code
完成了依赖图谱,这时候就需要来将依赖图谱整理为代码了
要让代码运行起来,首先要看看生成的代码是什么样子的
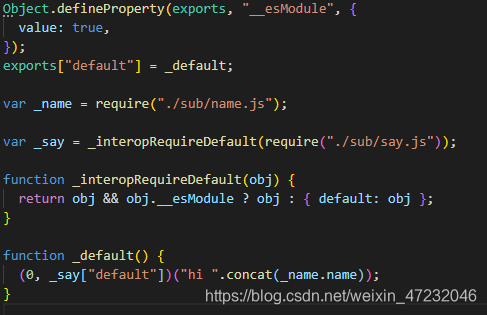
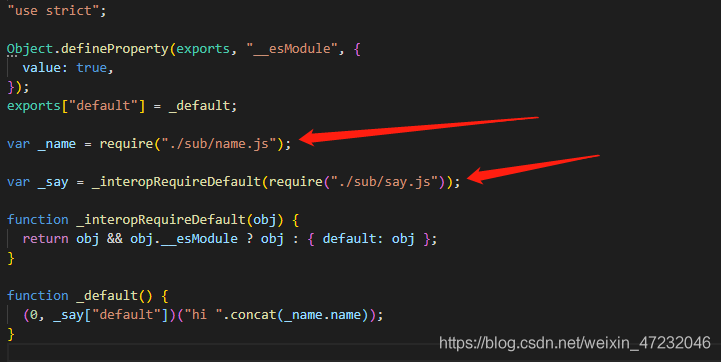
这是sayHi.js生成之后的文件
他用到了一个exports对象以及一个require方法
exports用于将自身的内容导出,require用于引入其他的依赖文件
而生成的代码本身并没有提供这2个东西,所以我们需要自己完善
内部的逻辑比较复杂,我们一步一步来
首先,我们先根据入口生成依赖图谱,然后使用一个闭包的环境来执行代码,将这个依赖图谱传入,要注意因为我们是用字符串来拼接一段代码,所以传的时候要做一下转换
// 根据依赖图谱生成代码
const generateCode = (entry) => {
  const dependenciesGraph = createDependenciesGraph(entry);
  return `
    (function(dependenciesGraph){

    }(${JSON.stringify(dependenciesGraph)}))
  `;
};
然后我们来补充require方法
require方法根据对应的模块,来用eval执行对应的代码,要注意执行代码时也要放在一个闭包环境中
// 根据依赖图谱生成代码
const generateCode = (entry) => {
  const dependenciesGraph = createDependenciesGraph(entry);
  return `
    (function(dependenciesGraph){
		function require(module){
		  (function(code){
            eval(code);
          }(dependenciesGraph[module].code))
		}
        require('${entry}')
    }(${JSON.stringify(dependenciesGraph)}))
  `;
};
这时候由于生成的代码内部使用的路径并不是相对于根目录的路径,而我们的依赖图谱中的每项的key是相对于根目录的路径,所以会导致无法找到对应的代码
对此我们需要用一个新的require方法,这个require方法实际就是通过这个相对路径,找到相对于根目录的路径,然后执行require方法,将这个方法作为实参传入,函数内部通过形参require接受,这样内部调用require,实际上就是调用的这个新的require方法
// 根据依赖图谱生成代码
const generateCode = (entry) => {
  const dependenciesGraph = createDependenciesGraph(entry);
  return `
    (function(dependenciesGraph){
        function require (module){
          // 新的require方法,用于路径转换
          function localRequire(relativePath){
            return require(dependenciesGraph[module].dependencies[relativePath])
          };
          (function(require,code){
            eval(code);
          }(localRequire,dependenciesGraph[module].code))
          // 将方法传入,替换函数内部的require
        }
        require('${entry}')
    }(${JSON.stringify(dependenciesGraph)}))
  `;
};
至此require部分我们已经完成,还需要补充一个exports对象,这个exports对象直接是空对象即可,生成的代码会自动向里面添加一些属性,然后return这个exports对象即可
const generateCode = (entry) => {
  const dependenciesGraph = createDependenciesGraph(entry);
  return `
    (function(dependenciesGraph){
        function require (module){
          function localRequire(relativePath){
            return require(dependenciesGraph[module].dependencies[relativePath])
          };
          var exports = {};
          (function(require,exports,code){
            eval(code);
          }(localRequire,exports,dependenciesGraph[module].code))
          return exports
        }
        require('${entry}')
    }(${JSON.stringify(dependenciesGraph)}))
  `;
};
至此生成代码部分的逻辑完成,我们可以将它生成一个js文件
fs.mkdirSync(path.join(__dirname, "dist"));
const code = generateCode("./src/index.js");
const filePath = path.join(__dirname, "dist", "index.js");
fs.writeFileSync(filePath, code, "utf-8");
通过node执行该文件,得到生成后的代码如下

将代码复制到console直接运行,可以看到代码正确执行

至此,我们完成了一个十分简易的bundler,和webpack的差距还是非常大的,但我们可以通过这个简单的bundler,了解webpack运行的一些原理
不过如果想要更深入的了解webpack或者编写loader和plugins的话可能就需要阅读webpack的源码,对内在的原理进行更深层次的了解
不过对于使用者来说,webpack是一个强大的工具,我们可以通过他的配置,快速的达成我们想要的一些目的。并且它架构设计合理,扩展性高,通过社区弥补了大量功能,所以使它成为目前前端工程化的最佳选择,能适用于各种开发场景,是一个非常值得我们学习的前端工具


 767
767


 被折叠的 条评论
为什么被折叠?
被折叠的 条评论
为什么被折叠?
 到【灌水乐园】发言


