


目录
前端环境
编码工具: VSCode
依赖管理:NPM
项目构建: Vuecli
NPM的全称是Node Package Manager,是一个NodeJS包管理和分发工具,已经成为了非官方的发布Node模块(包)的标准。2020年3月17日,Github宣布收购npm,GitHub现在已经保证npm将永远免费。
依赖管理NPM安装配置
NPM官网
https://nodejs.org/en/download/

下载安装完成后
验证 Node.js 是否已成功安装
node -v

在nodejs安装目录创建node_global和node_cache文件夹

cmd命令,依次输入:
npm config set prefix "D:\Nodejs\node_global"
npm config set cache "D:\Nodejs\node_cache"
npm config set prefix “D:\Nodejs\node_global”:将 Node.js 全局安装包的安装路径设置为 “D:\Nodejs\node_global”。在使用 npm install -g 命令全局安装 Node.js 模块时,将会将模块安装到指定的目录中。
npm config set cache “D:\Nodejs\node_cache”:将 Node.js 模块缓存路径设置为 “D:\Nodejs\node_cache”。在使用 npm install 命令安装 Node.js 模块时,将会将模块缓存到指定的目录中。
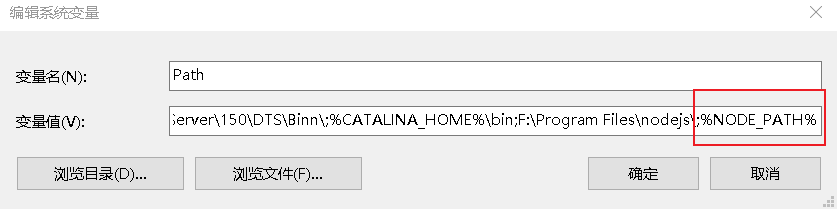
修改系统环境变量

F:\Program Files\nodejs\node_global

NODE_PATH
F:\Program Files\nodejs\node_modules

使用npm install express -g全局安装 Express 模块

说明文件权限不够,允许完全控制得以解决

更改 npm 的默认源为淘宝源
npm config set registry https://registry.npm.taobao.org
恢复默认的 npm 官方源
npm config set registry https://registry.npmjs.org
![]()
查看当前npm 源的 URL

使用淘宝源全局安装 cnpm。cnpm 是一个基于 npm 的淘宝定制版,可以在国内更快地安装 Node.js 包
npm install -g cnpm --registry=https://registry.npm.taobao.org


创建Vue项目
npm init vue@latest

安装依赖npm install

VITE v5.0.11 ready in 479 ms
➜ Local: http://localhost:5173/
➜ Network: use --host to expose
➜ press h + enter to show help
模板语法
文本插值{{ }}
最基本的数据绑定形式是文本插值,“Mustache”语法
支持三元表达式
<template>

    <p>{{ msg }}</p>

</template>

<script>

export default{

    data(){

        return{

            msg:"123"

        }

    }

}

</script>
v-html
插入HTML,使用v-html,而{{ }}只是插入纯文本
<template>

    <p>{{ msg }}</p>

    <p>{{ ok ? 'yes':'no' }}</p>

    <p><span v-html="insertHtml"></span></p>

</template>


<script>


export default{

    data(){

        return{

            msg:"123",

            ok:true,

            insertHtml:"<a href='https://www.baidu.com'></a>"

        }

    }

}

</script>
属性绑定
{{ }}不能在attributes中使用,绑定arrtibute需要使用v-bind, v-bind的缩写:className
v-bind将元素的attribute与组件的dynamicld属性保持一致。如果绑定的值是null遇undefined,则将attribute从渲染的元素上移除

<template>
    <div v-bind:class="divColour">
        123
    </div>
</template>

<script>

export default{
    data(){
        return{
            divColour:"Colourclass"
        }
    }
}

</script>
v-bind简写
<template>
    <div :class="divColour">
        123
    </div>
</template>

<script>

export default{

    data(){

        return{

            divColour:"Colourclass"
        }
    }
}
条件渲染
v-if 、v-else-if 、v-else
<template>

    <!-- <div v-if="no">看不见</div>

    <div v-if="ok">看得见</div>
    <div v-else>123</div> -->

    <div v-if="no">1</div>
    <div v-else-if="ok">2</div>
    <div v-else>3</div>
</template>

<script>
export default{
    data(){
        return{
            ok:true,
            no:false
        }
    }
}

</script>
v-show
<div v-show="true">666</div>
相同点:v-if与v-show都可以动态控制dom元素显示隐藏
不同点:v-if显示隐藏是将dom元素整个添加或删除,而v-show隐藏则是为该元素添加css--display:none,dom元素还在。
v-if是惰性的,也是真实的按条件渲染,应为它确保了在切换时,条件区块内的事件监听器和子组件都会被销毁与重建。条件区块只有条件首次变为true时才被渲染。
v-show元素无论初始条件如何,始终会被渲染,只有CSS的display属性会被切换
v-if有更高的切换开销,而v-show有更高的初始化渲染开销。
v-if应用场景更适合初始化,只渲染一次
v-show应用场景更适合频繁的切换
列表渲染v-for
    <div>
        <p v-for="name in names">{{ name }}</p>
    </div>
Index,数组下标
    <div>
        <p v-for="(name,index) in names">{{ index }} : {{ name }}</p>
    </div>
可以使用of代替in,of更接近javaScript迭代器语法
    <div>
        <p v-for="(name,index) of names">{{ index }} : {{ name }}</p>
     </div>


    <div>
        <p v-for="(value,key,index) of user"> {{ key }}  :{{ value }} : {{ index }} </p>
    </div>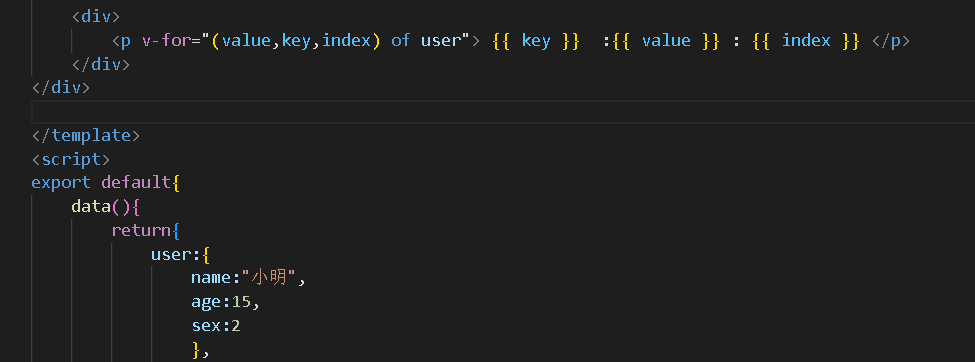
状态管理
Vue默认通过“就地更新”策略来更新通过v-for渲染的元素列表。当数据项的顺序改变时,Vue就地更新每一个元素,不会移动位置,确保元素在原本的指定位置上。
为给Vue一个提示,以便可以跟踪每个节点的标识,从而重用和重新排序现有元素,需为每个元素提供唯一的attribute(key)
v-for中添加key是通过v-bind绑定特殊attribute
推荐在任何时候为v-for提供唯一的attribute(key)
实际场景中不推荐使用index作为key,使用数据源中的唯一值,如数据库表中的唯一ID
<div>

        <p v-for="(value,key,index) of user" :key="index"> {{ key }}  :{{ value }} : {{ index }} </p>

    </div>
事件
用法:v-on:click=”handler” 或 @click=”handler”
事件
- 内联事件:事件被触发执行的内联javaScript语句(类似onclick)
- 方法事件:指组件上指定的方法的属性名或路径
内联事件处理
内联事件通常用于简单场景
<button @click="count++">+1</button>
<p>{{ count }}</p>

方法事件处理
推荐使用
<button @click="addCount">+1</button>
    <p>{{ count }}</p>

methods:{
        addCount(){

            this.count +=1;
        }
    },
事件传参
<input type="text" v-model="message">

    <button @click="addCount(message.$event)">+1</button>

    <p>{{ message }}</p>

 methods:{

        //event对对象

        addCount(msg,e){

            console.log(msg);

            //e.target.innerHTML ="+"+this.count

            this.count +=1;
        }
    },
事件修饰符
处理事件时经常调用event.stopPropagation()或event.preventDefault()。
Vue为v-on提供了常用的修饰符
.stop .privent .once .enter等
.privent阻止触发
<a @click.prevent="clickhandle" href="https://www.baidu.com/">baidu</a>.stop 阻止冒泡事件
<div @click="clickhandle">

        <p @click.stop="addCount('P')">冒泡</p>

    </div>
以下类推
.once只执行一次
.enter回车触发
…
数组变化监听
变更方法
Vue能够侦听响应式数组的变更方法,并在它们被调用时触发相关的更新。
以下方法引起UI自动更新
Push()、pop()、shift()、unshift()、sort()、reverse()
<button @click="addname">add name</button>

    <ul>

        <li v-for="(name,index) of names" :key="index">{{ name }}</li>

    </ul>
methods:{
addname(){
//pushu()方法引起UI自动更新
//this.names.push("小明");
//concat()不会引起UI自动更新
this.names = this.names.concat(["小王"])
},计算属性
计算属性: 计算属性值基于响应式依赖缓存。一个计算属性仅会在响应式依赖更新时才重新计算
方法:方法调用总会重新渲染发生时执行函数
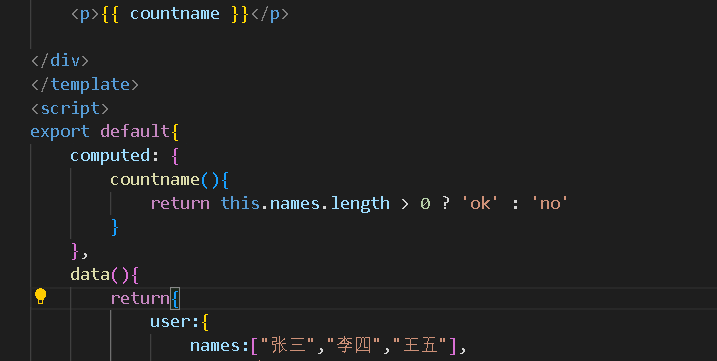
<p>{{ countname }}
    {{ getcountnames() }}
</p>

computed: {
        countname(){
            return this.names.length > 0 ? 'ok' : 'no'
        }
    },
methods:{

        countname(){

            return this.names.length > 0 ? 'ok' : 'no'

        },
Class绑定
Vue为class的v-vind提供了功能增强
单个calss绑定
<template>

    <p :class="{'active':isActive}">class</p>


</template>


<script>

export default{

    data(){

        return{

            isActive:true

        }

    }

}


</script>


<style>

.active{

    color: burlywood;

    font-size: 35px;

}

</style>
多calss对象绑定
<template>
    <p :class="classObject">class</p>
</template>


<script>
export default{
    data(){
        return{
            classObject:{
                active:true,
                active2:true
            }
        }
    }
}


</script>
<style>
.active{
    color: burlywood;
    font-size: 35px;
}

.active2{
    background-color: rgb(170, 222, 135);
}

</style>
Class数组绑定
<template>
    <p :class="classObject">class</p>
    <p :class="[arractive,arractive2]">class数组</p>
</template>

<script>
export default{
    data(){
        return{
            classObject:{
                active:true,
                active2:true
            },
            arractive:"active",
            arractive2:"active2"
        }
    }
}


</script>
<style>
.active{
    color: burlywood;
    font-size: 35px;
}

.active2{
    background-color: rgb(170, 222, 135);
}
</style>
Style绑定
对象绑定
<p :style="{color:activeColoe,fontSize: fontSize}">style</p>
<p :style="styleObject">style2</p>
侦听器
侦听页面响应式数据的变化
<template>
    <p>{{ message }}</p>
    <button @click="updata">点击</button>
</template>
<script>
export default{

    data(){
        return{
            message:"hello"
        }
    },
    methods:{
        updata(){
            this.message="word"
        }
    },
    watch:{
        message(newValue,oldValue){
            console.log(newValue+":"+oldValue)
        }
    }
}
</script>
v-model表单的输入绑定
v-model修饰符常用 .lazy .number .trim
.lazy 懒惰的 输入完在显示
.number 只接受输入的值为数字
.trim 去掉前后空格
<template>

<form>

    <input type="text" v-model="msg">
    <input type="text" v-model.lazy="msg">
    <input type="text" v-model.number="msg">
    <p>{{ msg }}</p>
  <!-- v-model修饰符常用 .lazy .number .trim
    .lazy 懒惰的  输入完在显示
    .number 只接受输入的值为数字
    .trim 去掉前后空格

-->

</form>
</template>
<script>

export default{
    data(){
        return{
            msg:""
        }
    }
}

</script>
模板引用
使用ref 属性,挂载结束后引用会暴露在$refs.
<template>

<div class="container" ref="container">{{ container }}</div>

<button @click="getinfo">获取数据</button>

</template>


<script>

export default{

    methods:{

        getinfo(){

            console.log(this.$refs.container)

        }

    },

    data(){

        return{

            container:"demo"

        }

    }

}


</script>
console.log(this.$refs.container.innerHTML="test")

<template>
    <input type="text" ref="name">
    <button @click="getinfo">获取数据</button>
<div class="container" ref="container">{{ container }}</div>
</template>

<script>
export default{
    methods:{
        getinfo(){
            this.$refs.container.innerHTML= this.$refs.name.value
        }

    },

    data(){
        return{
            container:"demo",
            name:""
        }
    }
}


</script>
Vue组件
组件的优点:可复用性
组件构成
<template>

</template>

<script>

export default{


}

</script>

<style>

</style>
组件引入

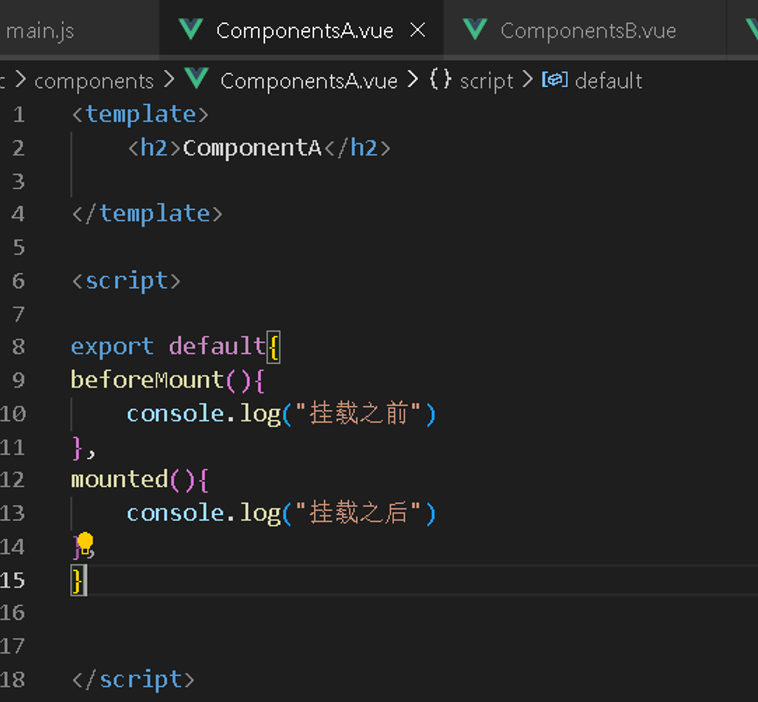
组件的生命周期钩子
每个 Vue 组件实例在创建时都需要经历一系列的初始化步骤,比如设置好数据侦听,编译模板,挂载实例到 DOM,以及在数据改变时更新 DOM。在此过程中,它也会运行被称为生命周期钩子的函数,让开发者有机会在特定阶段运行自己的代码。
创建期:beforeCreate、created
挂载期:beforeMount 、mounted
更新期:beforeUpdate、updated
销毁期:beforeUnmount 、unmountd
<script>
export default{
beforeCreate(){
    console.log("创建之前")
},
created(){
    console.log("创建之后")

},
beforeMount(){
    console.log("挂载之前")
},

mounted(){
    console.log("挂载之后")
},

beforeUpdate(){
    console.log("更新之前")
},

updated(){
    console.log("更新之后")
},

beforeUnmount(){
    console.log("销毁之前")
},

unmountd(){
    console.log("销毁之后")
}
}
</script>
组件嵌套关系

组件允许将ui划分为独立的、可重用的部分,并且可以对每个部分进行单独的思考。在实际项目中,组件是层层嵌套的树形结构,每个组件内封装自定义内容与逻辑。
取消main.css依赖


Article.vue
<template>
    <H3>Article</H3>
</template>

<style scoped>
h3{

    width: 80%;

    margin: 0 auto;

    text-align: center;

    line-height: 100px;

    box-sizing: border-box;

    margin-top: 25px;

    background: #bdbaba;
}

</style>
Item.vue
<template>
    <H3>Item</H3>
</template>

<style scoped>

h3{

    width: 80%;
    margin: 0 auto;
    text-align: center;
    line-height: 100px;
    box-sizing: border-box;
    margin-top: 25px;
    background: #bdbaba;
}

</style>
Hrader.vue
<template>
    <H3>Header</H3>
</template>

<style scoped>

h3{

    width: 100%;
    height: 100px;
    border: 5px solid #999;
    text-align: center;
    line-height: 100px;
    box-sizing: border-box;

}
</style>
Main.vue
<template>

    <div class="main">
        <H3>Main</H3>
        <Article/>
        <Article/>
        <Article/>
    </div>

</template>

<script>

import Article from "./article.vue"
export default{
    components:{
        Article
    }
}

</script>

<style scoped>

.main{
    float: right;
    width: 85%;
    height: 500px;
    border: 5px solid #999;
    box-sizing: border-box;
    text-align: center;
}

</style>
Aside.vue
<template>

    <div class="aside">
        <H3>Aside</H3>
        <Item/>
        <Item/>
        <Item/>
    </div>

</template>


<script>
import Item from './Item.vue';
export default{
    components:{
        Item
    }

}


</script>

<style scoped>

.aside{
    float: left;
    width: 14%;
    height: 500px;
    border: 5px solid #999;
    box-sizing: border-box;
    text-align: center;
}

</style>
效果

组件注册
局部注册(建议使用)
在一个组件中进行注册

全局注册
在main.js中全局注册
全局注册很方便,但是在全局注册中,没有被使用的组件无法在生成打包的时候被自动移除(“tree-shaking”),依然出现在打包后的js文件中。
在项目嵌套较多的时候,全局注册的依赖关系不明确,可能影响应用长期维护性。

组件数据传递props
组件之间是可以传递数据,而传递数据的解决方案是props,注:props传递数据只能父级传递子级。
组件传递的数据类型:数字、对象、数字等。任何类型的值都可以作为props的值传递
组件间传递数据应用场景: 父传子

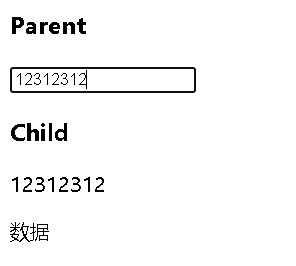
Parent.vue
<template>
    <h3>Parent</h3>
    <input v-model="msg">
    <Child :title="msg" test="数据"/>
</template>


<script>
import Child from './Child.vue';
export default{
    data(){
        return{
            msg:""
        }
    },

    components:{
        Child
    }
}

</script>
Child.vue
<template>

    <h3>Child</h3>
    <p> {{ title }} </p>
    <p>{{ test }}</p>

</template>


<script>
export default{
    data(){
        return{

        }

    },

    //接收数据
    props:["title","test"]
}

</script>
传递效果
传递数组,对象
Parent.vue
<template>

    <h3>Parent</h3>
    <input v-model="msg">
    <Child :title="msg" test="数据" :names="names" :user="user" :number1="number1"/>
</template>


<script>
import Child from './Child.vue';
export default{
    data(){
        return{
            msg:"",
            names:["张三","李四","王五"],
            user:{
                name:"张三",
                age:20
            },
            number1:123
        }

    },

    components:{
        Child
    }
}

</script>
Child.vue
<template>

    <h3>Child</h3>
    <p> {{ title }} </p>
    <p>{{ test }}</p>
    <p v-for="(name,index) of names" :key="index">{{ index }} : {{ name }}</p>
    <p>{{ user.name }} {{ user.age }}</p>
</template>


<script>
export default{
    data(){
        return{

        }
    },

    //接收数据
    props:["title","test","names","user"]

}

</script>
传递对象

类型验证
<template>

    <h3>Child</h3>
    <p> {{ title }} </p>
    <p>{{ test }}</p>
    <p v-for="(name,index) of names" :key="index">{{ index }} : {{ name }}</p>
    <p>{{ user.name }} {{ user.age }}</p>

</template>


<script>
export default{
    data(){
        return{
        }

    },

    //接收数据

    props:{
        title:{
            type:[String,Number,Array,Object]
        },

        names:{
            type:Array

        },

        user:{
            type:Object,
            //必选项
            required:true

        },

        test:{
            type:String

        },

        number:{
            type:Number,
            default:0

        }

    }

}
</script>
Props实现子传父

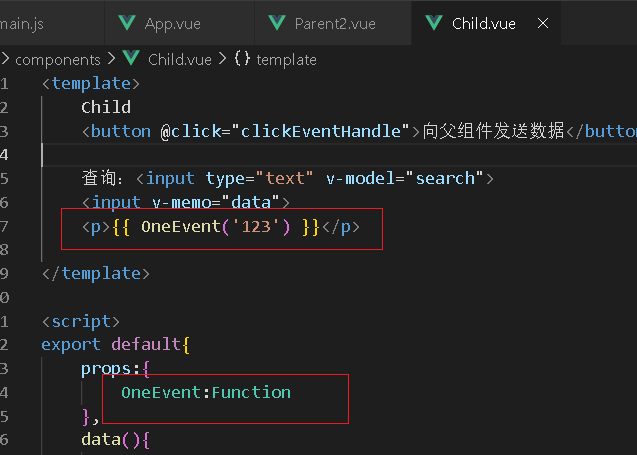
组件数据传递$emit
组件模板表达式中,可以使用$emit方法触发自定义事件
组件间传递数据应用场景:子传父
Child.vue
<template>

    Child
    <button @click="clickEventHandle">向父组件发送数据</button>

</template>

<script>
export default{

    data(){
        return{
            msg:"传递数据"
        }

    },


    methods:{
        clickEventHandle(){
            this.$emit("eventDemo",this.msg)
        }

}

}

</script>
Parent2.vue
<template>
<Child @eventDemo="getHandle"/>
</template>
<script>
import Child from "./Child.vue"
export default {
    components:{
        Child
    },

    methods:{
        getHandle(data){
            console.log(data)
        }
    }
}

</script>
组件+v-model

查询:<input type="text" v-model="search">
watch:{
        search(newValue,oldValue){
            this.$emit("searchEvent",newValue)
        }
    },
透传
透传attribute指的是传递给一个组件,没有被该组件声明为props或emits的arrtibute或者v-on事件监听器。最常见的例子就是class、id、style。
一个组件以单个元素为根做渲染时,透传的attribute会自动被添加到根元素上
App.vue

Attr.vue
<template>
    <h2>透传属性测试</h2>
</template>

<style>
.colorDemo{
    color: aqua;
}
</style>
效果 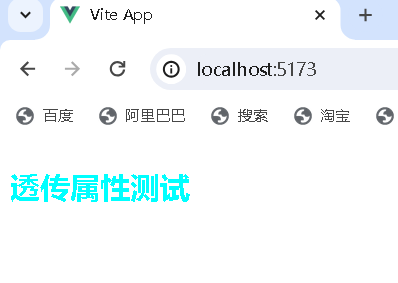
禁用透传attribute
export default{
inheritAttrs:false
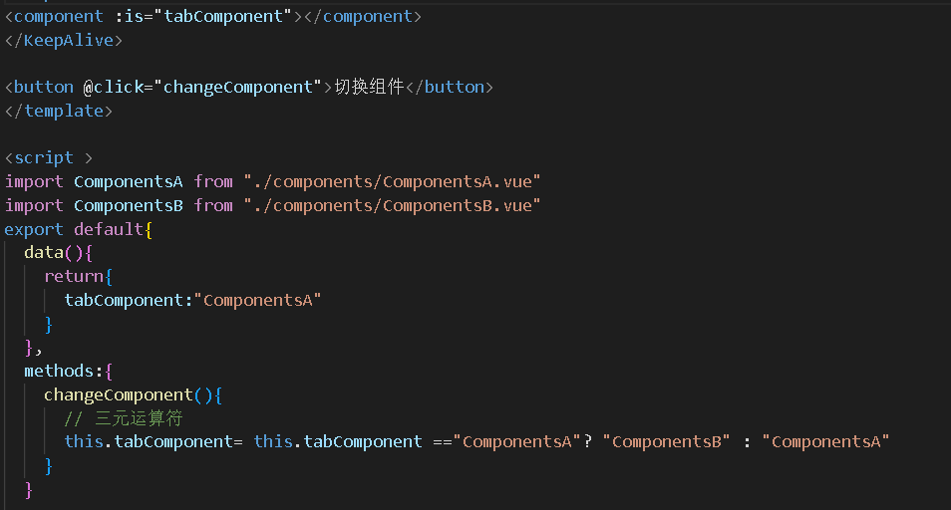
}动态组件

<template>
<component :is="tabComponent"></component>
<button @click="changeComponent">切换组件</button>
</template>

<script >
import ComponentsA from "./components/ComponentsA.vue"
import ComponentsB from "./components/ComponentsB.vue"
export default{
  data(){
    return{
      tabComponent:"ComponentsA"

    }
  },
  methods:{
    changeComponent(){
      // 三元运算符
      this.tabComponent= this.tabComponent =="ComponentsA"? "ComponentsB" : "ComponentsA"
    }
  }
当使用<component :is="tabComponent"></component>在多个组件间切换时,被切换掉的组件会被卸载。可以通过<keep-alive>组件前置被切换掉的组件依然保持“存活状态”

<KeepAlive>
<component :is="tabComponent"></component>
</KeepAlive>
异步组件
Vue提供了defineAsyncComponent实现异步组件功能。
import ComponentsA from "./components/ComponentsA.vue"
//异步加载组件
const ComponentsB =defineAsyncComponent(()=>
  import("./components/ComponentsB.vue")
).catch(function(error){
  console.log(error);
})

异步组件的优势
1.减少应用程序的初始加载时间
异步组件只有在需要使用该组件时才会进行加载,可以减少应用程序的初始加载时间,提高用户体验。
2.提高应用程序的性能
异步组件可以将组件的加载和渲染分开进行,可以提高应用程序的性能,避免不必要的渲染。
3.优化代码的可维护性
异步组件可以将组件按需加载,可以优化代码的可维护性,减少代码的复杂度。
异步组件的注意事项
1.异步组件的加载时间
异步组件是按需加载的,因此在使用异步组件时,需要考虑组件的加载时间。如果组件的加载时间过长,会对应用程序的性能和用户体验产生影响。
2.异步组件的错误处理
在使用异步组件时,需要对组件加载过程进行错误处理,避免出现错误导致应用程序无法运行。可以通过 catch() 方法来捕获异步加载组件时的错误。
Slots插槽
插槽 slot 通常用于两个父子组件之间,最常见的应用就是使用一些 UI 组件库中的弹窗组件时,弹窗组件的内容是可以自定义,这就是使用了插槽的原理。

SlotsDemo.vue
<template>
    <slots></slots>
</template>


<script>
export default{

}

</script>
<slot>元素是一个插槽出口(slot outlet),表示父类提供的插槽内容渲染的位置

插槽的作用域
插槽内容可以访问父组件的数据作用域,插槽的内容本身就是在父组件模板中定义

默认值
在父组件没有传递数值的情况下显示
<template>

    <slots>默认值</slots>

</template>
具名插槽
给插槽提供名字
App.vue
<SlotsDemo>
    <template v-slot:h1>
      <h2>标题</h2>
    </template>


    <template v-slot:h2>
      <p>{{msg}}</p>
    </template>
  </SlotsDemo>
SlotsDemo.vue
<template>
    <slot name="h1">默认值</slot>
    <slot name="h2">默认值</slot>
</template>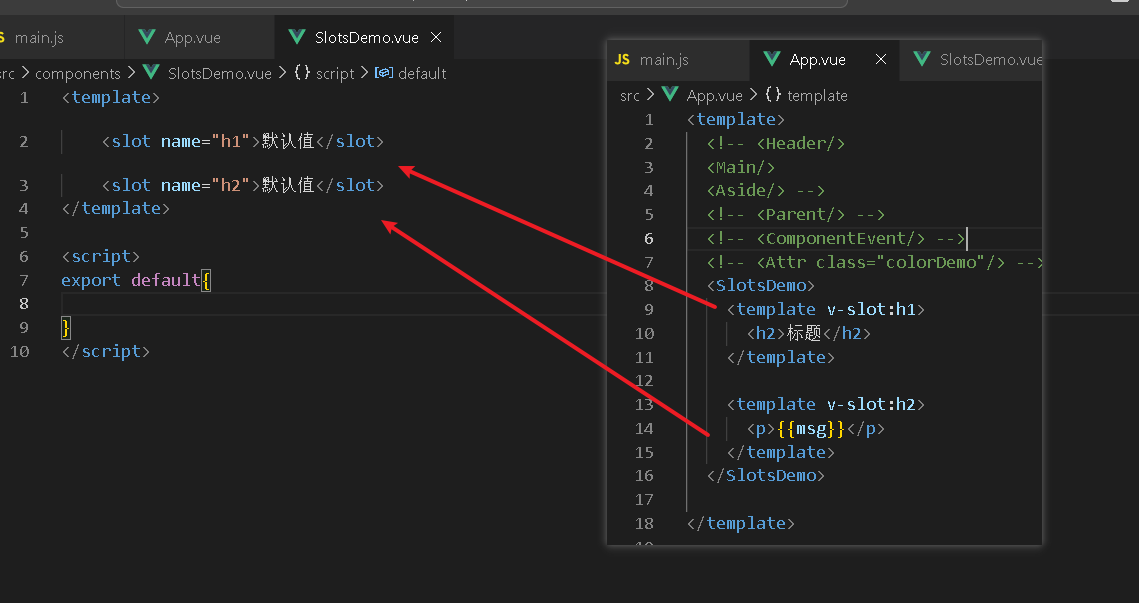
v-slot简写#
<template #h1>
      <h2>标题</h2>
    </template>


    <template #h2>
      <p>{{msg}}</p>
  </template>
插槽数据传递
插槽的内容可能同时获取给父组件作用域和子组件作用域的数据,可以类似props,在插槽的出库是传递arrtibutes
将子组件的数据传递给父组件
子组件
<template>
    <slot  :childmsg="childmsg"></slot>
</template>


<script>

export default{
        data(){
            return{
                childmsg:"child"
            }
        }

}

</script>
父组件

 <SlotsDemo v-slot="slotProps">
{{ slotProps.childmsg }}+{{ msg }}
  </SlotsDemo>
具名+插槽数据传递
子组件
<template>
    <slot name="h1">默认值</slot>
    <slot name="h2" :childmsg="childmsg"></slot>
</template>
父组件
<SlotsDemo >
    <template #h1>
      <h2>标题</h2>
    </template>
    <template #h2="slotProps">
      <p> {{ slotProps.childmsg }}+ {{msg}}</p>
    </template>
  </SlotsDemo>


 567
567


 被折叠的 条评论
为什么被折叠?
被折叠的 条评论
为什么被折叠?
 到【灌水乐园】发言


