


Spring学习笔记目录
使用配置数据源的项目继续练习
思路
让SpringJunit负责创建Spring容器,但是需要将配置文件的名称告诉它。
将需要进行测试Bean直接在测试类中进行注入。
集成步骤
①导入spring集成Junit的坐标
②使用@Runwith注解替换原来的运行(现在测试要由spring找到test进行测试)
③使用@ContextConfiguration指定配置文件或配置类(指定配置文件是谁)
④使用@Autowired注入需要测试的对象
⑤创建测试方法进行测试
代码示例
目录结构:

导入坐标
<!--此处需要注意的是,spring5 及以上版本要求junit 的版本必须是4.12 及以上-->
        <dependency>
            <groupId>org.springframework</groupId>
            <artifactId>spring-test</artifactId>
            <version>5.0.5 RELEASE</version>
        </dependency>
        <dependency>
            <groupId>junit</groupId>
            <artifactId>junit</artifactId>
            <version>4.12</version>
            <scope>test</scope>
        </dependency>
新建类SpringJunitTest.java:
package com.test;

import com.stu.service.dao.UserService;
import org.junit.Test;
import org.junit.runner.RunWith;
import org.springframework.beans.factory.annotation.Autowired;
import org.springframework.test.context.ContextConfiguration;
import org.springframework.test.context.junit4.SpringJUnit4ClassRunner;

/**
 * @version:
 * @author: 零乘一
 * @description: 类的简介
 * @date: 2021/10/4 14:50
 **/
@RunWith(SpringJUnit4ClassRunner.class)//②使用spring创建测试对象
@ContextConfiguration("classpath:applicationContext.xml")//③指定配置文件
//@ContextConfiguration(value = "classpath:applicationContext.xml")//指定配置文件,只是value通常被省略了
public class SpringJunitTest {
    @Autowired//④注入需要测试的对象
    private UserService userService;

    @Test//⑤创建测试方法
    public void test(){
        userService.save();
    }
}
运行结果
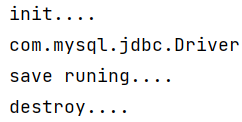
能够正常打印出结果说明由spring创建Test对象配置已成功。
使用全注解的配置文件
package com.test;

import com.stu.config.SpringConfiguration;
import com.stu.service.dao.UserService;
import org.junit.Test;
import org.junit.runner.RunWith;
import org.springframework.beans.factory.annotation.Autowired;
import org.springframework.test.context.ContextConfiguration;
import org.springframework.test.context.junit4.SpringJUnit4ClassRunner;

/**
 * @version:
 * @author: 零乘一
 * @description: 类的简介
 * @date: 2021/10/4 14:50
 **/
@RunWith(SpringJUnit4ClassRunner.class)//②使用spring创建测试对象
//@ContextConfiguration(value = "classpath:applicationContext.xml")//③指定配置文件,只是value通常被省略了
@ContextConfiguration(classes = {SpringConfiguration.class})//全注解开发的指定配置文件
public class SpringJunitTest {
    @Autowired//④注入需要测试的对象
    private UserService userService;

    @Test//⑤创建测试方法
    public void test(){
        userService.save();
    }
}
运行结果
说明使用全注解的配置文件的方式也成功了。


 885
885


 被折叠的 条评论
为什么被折叠?
被折叠的 条评论
为什么被折叠?
 到【灌水乐园】发言


