


此笔记内容为狂神说SpringBoot整合ElasticSearch部分
目录
③编写 application.preperties配置文件
一、SpringBoot整合
1、创建工程
创建一个springboot项目
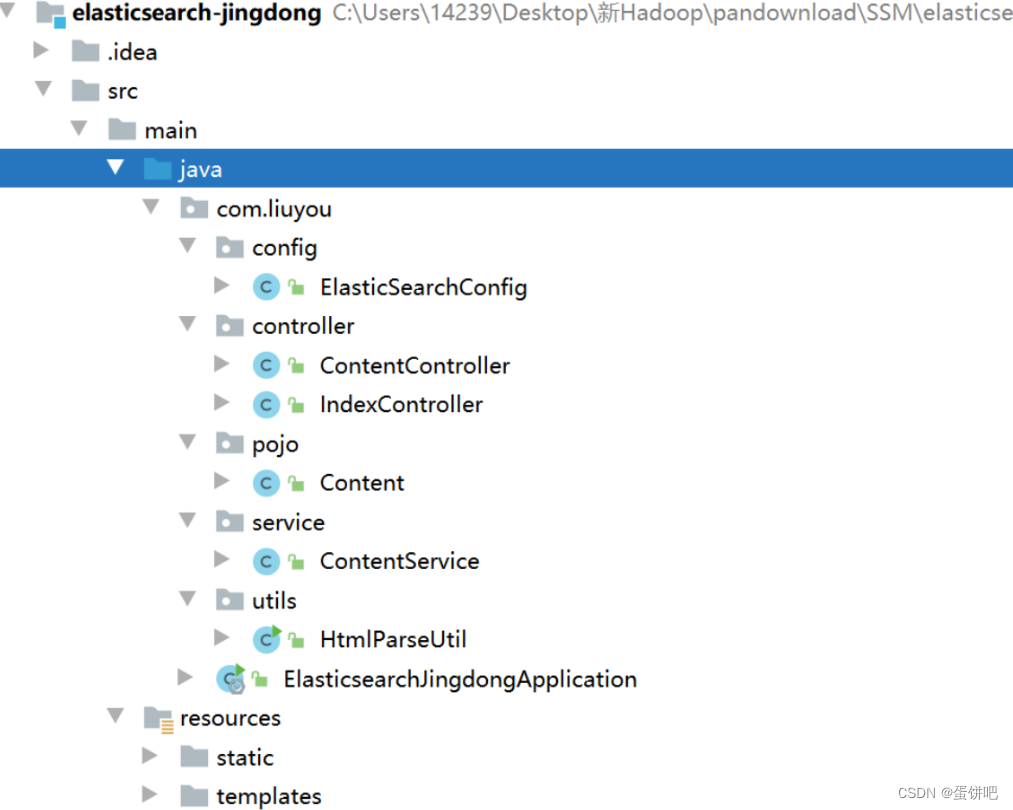
目录结构

2、导入依赖
注意依赖版本和安装的版本一致
<properties>
    <java.version>1.8</java.version>
    <!-- 统一版本 -->
    <elasticsearch.version>7.6.1</elasticsearch.version>
</properties>
导入elasticsearch依赖
<dependency>
    <groupId>org.springframework.boot</groupId>
    <artifactId>spring-boot-starter-data-elasticsearch</artifactId>
</dependency>
提前导入fastjson、lombok
<dependency>
    <groupId>com.alibaba</groupId>
    <artifactId>fastjson</artifactId>
    <version>1.2.70</version>
</dependency>
<!-- lombok需要安装插件 -->
<dependency>
    <groupId>org.projectlombok</groupId>
    <artifactId>lombok</artifactId>
    <optional>true</optional>
</dependency>
3、创建并编写配置类
@Configuration
public class ElasticSearchConfig {
    // 注册 rest高级客户端
    @Bean
    public RestHighLevelClient restHighLevelClient(){
        RestHighLevelClient client = new RestHighLevelClient(
                RestClient.builder(
                        new HttpHost("127.0.0.1",9200,"http")
                )
        );
        return client;
    }
}
4、创建并编写实体类
@Data
@NoArgsConstructor
@AllArgsConstructor
public class User implements Serializable {
    private static final long serialVersionUID = -3843548915035470817L;
    private String name;
    private Integer age;
}
5、测试
所有测试均在 SpringbootElasticsearchApplicationTests中编写
注入 RestHighLevelClient
@Autowired
public RestHighLevelClient restHighLevelClient;
索引的操作
1、索引的创建
// 测试索引的创建, Request PUT liuyou_index
@Test
public void testCreateIndex() throws IOException {
    CreateIndexRequest request = new CreateIndexRequest("liuyou_index");
    CreateIndexResponse response = restHighLevelClient.indices().create(request, RequestOptions.DEFAULT);
    System.out.println(response.isAcknowledged());// 查看是否创建成功
    System.out.println(response);// 查看返回对象
    restHighLevelClient.close();
}
2、索引的获取,并判断其是否存在
// 测试获取索引,并判断其是否存在
@Test
public void testIndexIsExists() throws IOException {
    GetIndexRequest request = new GetIndexRequest("index");
    boolean exists = restHighLevelClient.indices().exists(request, RequestOptions.DEFAULT);
    System.out.println(exists);// 索引是否存在
    restHighLevelClient.close();
}
3、索引的删除
// 测试索引删除
@Test
public void testDeleteIndex() throws IOException {
    DeleteIndexRequest request = new DeleteIndexRequest("liuyou_index");
    AcknowledgedResponse response = restHighLevelClient.indices().delete(request, RequestOptions.DEFAULT);
    System.out.println(response.isAcknowledged());// 是否删除成功
    restHighLevelClient.close();
}
文档的操作
1、文档的添加
// 测试添加文档(先创建一个User实体类,添加fastjson依赖)
@Test
public void testAddDocument() throws IOException {
    // 创建一个User对象
    User liuyou = new User("liuyou", 18);
    // 创建请求
    IndexRequest request = new IndexRequest("liuyou_index");
    // 制定规则 PUT /liuyou_index/_doc/1
    request.id("1");// 设置文档ID
    request.timeout(TimeValue.timeValueMillis(1000));// request.timeout("1s")
    // 将我们的数据放入请求中
    request.source(JSON.toJSONString(liuyou), XContentType.JSON);
    // 客户端发送请求,获取响应的结果
    IndexResponse response = restHighLevelClient.index(request, RequestOptions.DEFAULT);
    System.out.println(response.status());// 获取建立索引的状态信息 CREATED
    System.out.println(response);// 查看返回内容 IndexResponse[index=liuyou_index,type=_doc,id=1,version=1,result=created,seqNo=0,primaryTerm=1,shards={"total":2,"successful":1,"failed":0}]
}
2、文档信息的获取
// 测试获得文档信息
@Test
public void testGetDocument() throws IOException {
    GetRequest request = new GetRequest("liuyou_index","1");
    GetResponse response = restHighLevelClient.get(request, RequestOptions.DEFAULT);
    System.out.println(response.getSourceAsString());// 打印文档内容
    System.out.println(request);// 返回的全部内容和命令是一样的
    restHighLevelClient.close();
}
3、文档的获取,并判断其是否存在
// 获取文档,判断是否存在 get /liuyou_index/_doc/1
@Test
public void testDocumentIsExists() throws IOException {
    GetRequest request = new GetRequest("liuyou_index", "1");
    // 不获取返回的 _source的上下文了
    request.fetchSourceContext(new FetchSourceContext(false));
    request.storedFields("_none_");
    boolean exists = restHighLevelClient.exists(request, RequestOptions.DEFAULT);
    System.out.println(exists);
}
4、文档的更新
// 测试更新文档内容
@Test
public void testUpdateDocument() throws IOException {
    UpdateRequest request = new UpdateRequest("liuyou_index", "1");
    User user = new User("lmk",11);
    request.doc(JSON.toJSONString(user),XContentType.JSON);
    UpdateResponse response = restHighLevelClient.update(request, RequestOptions.DEFAULT);
    System.out.println(response.status()); // OK
    restHighLevelClient.close();
}
5、文档的删除
// 测试删除文档
@Test
public void testDeleteDocument() throws IOException {
    DeleteRequest request = new DeleteRequest("liuyou_index", "1");
    request.timeout("1s");
    DeleteResponse response = restHighLevelClient.delete(request, RequestOptions.DEFAULT);
    System.out.println(response.status());// OK
}
6、文档的查询
// 查询
// SearchRequest 搜索请求
// SearchSourceBuilder 条件构造
// HighlightBuilder 高亮
// TermQueryBuilder 精确查询
// MatchAllQueryBuilder
// xxxQueryBuilder ...
@Test
public void testSearch() throws IOException {
    // 1.创建查询请求对象
    SearchRequest searchRequest = new SearchRequest();
    // 2.构建搜索条件
    SearchSourceBuilder searchSourceBuilder = new SearchSourceBuilder();
    // (1)查询条件 使用QueryBuilders工具类创建
    // 精确查询
    TermQueryBuilder termQueryBuilder = QueryBuilders.termQuery("name", "liuyou");
    //        // 匹配查询
    //        MatchAllQueryBuilder matchAllQueryBuilder = QueryBuilders.matchAllQuery();
    // (2)其他<可有可无>:(可以参考 SearchSourceBuilder 的字段部分)
    // 设置高亮
    searchSourceBuilder.highlighter(new HighlightBuilder());
    //        // 分页
    //        searchSourceBuilder.from();
    //        searchSourceBuilder.size();
    searchSourceBuilder.timeout(new TimeValue(60, TimeUnit.SECONDS));
    // (3)条件投入
    searchSourceBuilder.query(termQueryBuilder);
    // 3.添加条件到请求
    searchRequest.source(searchSourceBuilder);
    // 4.客户端查询请求
    SearchResponse search = restHighLevelClient.search(searchRequest, RequestOptions.DEFAULT);
    // 5.查看返回结果
    SearchHits hits = search.getHits();
    System.out.println(JSON.toJSONString(hits));
    System.out.println("=======================");
    for (SearchHit documentFields : hits.getHits()) {
        System.out.println(documentFields.getSourceAsMap());
    }
}
前面的操作都无法批量添加数据
// 上面的这些api无法批量增加数据(只会保留最后一个source)
@Test
public void test() throws IOException {
    IndexRequest request = new IndexRequest("bulk");// 没有id会自动生成一个随机ID
    request.source(JSON.toJSONString(new User("liu",1)),XContentType.JSON);
    request.source(JSON.toJSONString(new User("min",2)),XContentType.JSON);
    request.source(JSON.toJSONString(new User("kai",3)),XContentType.JSON);
    IndexResponse index = restHighLevelClient.index(request, RequestOptions.DEFAULT);
    System.out.println(index.status());// created
}
7、批量添加数据
// 特殊的,真的项目一般会 批量插入数据
@Test
public void testBulk() throws IOException {
    BulkRequest bulkRequest = new BulkRequest();
    bulkRequest.timeout("10s");
    ArrayList<User> users = new ArrayList<>();
    users.add(new User("liuyou-1",1));
    users.add(new User("liuyou-2",2));
    users.add(new User("liuyou-3",3));
    users.add(new User("liuyou-4",4));
    users.add(new User("liuyou-5",5));
    users.add(new User("liuyou-6",6));
    // 批量请求处理
    for (int i = 0; i < users.size(); i++) {
        bulkRequest.add(
                // 这里是数据信息
                new IndexRequest("bulk")
                        .id(""+(i + 1)) // 没有设置id 会自定生成一个随机id
                        .source(JSON.toJSONString(users.get(i)),XContentType.JSON)
        );
    }
    BulkResponse bulk = restHighLevelClient.bulk(bulkRequest, RequestOptions.DEFAULT);
    System.out.println(bulk.status());// ok
}
二、ElasticSearch实战
防京东商城搜索(高亮)
1、工程创建(springboot)
创建一个springboot工程
2、基本编码
①导入依赖
<properties>
    <java.version>1.8</java.version>
    <elasticsearch.version>7.6.1</elasticsearch.version>
</properties>
<dependencies>
    <!-- jsoup解析页面 -->
    <!-- 解析网页 爬视频可 研究tiko -->
    <dependency>
        <groupId>org.jsoup</groupId>
        <artifactId>jsoup</artifactId>
        <version>1.10.2</version>
    </dependency>
    <!-- fastjson -->
    <dependency>
        <groupId>com.alibaba</groupId>
        <artifactId>fastjson</artifactId>
        <version>1.2.70</version>
    </dependency>
    <!-- ElasticSearch -->
    <dependency>
        <groupId>org.springframework.boot</groupId>
        <artifactId>spring-boot-starter-data-elasticsearch</artifactId>
    </dependency>
    <!-- thymeleaf -->
    <dependency>
        <groupId>org.springframework.boot</groupId>
        <artifactId>spring-boot-starter-thymeleaf</artifactId>
    </dependency>
    <!-- web -->
    <dependency>
        <groupId>org.springframework.boot</groupId>
        <artifactId>spring-boot-starter-web</artifactId>
    </dependency>
    <!-- devtools热部署 -->
    <dependency>
        <groupId>org.springframework.boot</groupId>
        <artifactId>spring-boot-devtools</artifactId>
        <scope>runtime</scope>
        <optional>true</optional>
    </dependency>
    <!--  -->
    <dependency>
        <groupId>org.springframework.boot</groupId>
        <artifactId>spring-boot-configuration-processor</artifactId>
        <optional>true</optional>
    </dependency>
    <!-- lombok 需要安装插件 -->
    <dependency>
        <groupId>org.projectlombok</groupId>
        <artifactId>lombok</artifactId>
        <optional>true</optional>
    </dependency>
    <!-- test -->
    <dependency>
        <groupId>org.springframework.boot</groupId>
        <artifactId>spring-boot-starter-test</artifactId>
        <scope>test</scope>
    </dependency>
</dependencies>
②导入前端素材
导入statis和templates里的文件
链接:百度网盘 请输入提取码
提取码:qk8p
③编写 application.preperties配置文件
# 更改端口,防止冲突
server.port=9999
# 关闭thymeleaf缓存
spring.thymeleaf.cache=false
④测试controller和view
@Controller
public class IndexController {
    @GetMapping({"/","index"})
    public String index(){
        return "index";
    }
}
访问 localhost:9999
到这里可以先去编写爬虫,编写之后,回到这里
⑤编写Config
@Configuration
public class ElasticSearchConfig {
    @Bean
    public RestHighLevelClient restHighLevelClient(){
        RestHighLevelClient client = new RestHighLevelClient(
                RestClient.builder(
                        new HttpHost("127.0.0.1",9200,"http")
                )
        );
        return client;
    }
}
⑥编写service
因为是爬取的数据,那么就不走Dao,以下编写都不会编写接口,开发中必须严格要求编写
ContentService
@Service
public class ContentService {
    @Autowired
    private RestHighLevelClient restHighLevelClient;
    // 1、解析数据放入 es 索引中
    public Boolean parseContent(String keyword) throws IOException {
        // 获取内容
        List<Content> contents = HtmlParseUtil.parseJD(keyword);
        // 内容放入 es 中
        BulkRequest bulkRequest = new BulkRequest();
        bulkRequest.timeout("2m"); // 可更具实际业务是指
        for (int i = 0; i < contents.size(); i++) {
            bulkRequest.add(
                    new IndexRequest("jd_goods")
                            .id(""+(i+1))
                            .source(JSON.toJSONString(contents.get(i)), XContentType.JSON)
            );
        }
        BulkResponse bulk = restHighLevelClient.bulk(bulkRequest, RequestOptions.DEFAULT);
        restHighLevelClient.close();
        return !bulk.hasFailures();
    }
        // 2、根据keyword分页查询结果
    public List<Map<String, Object>> search(String keyword, Integer pageIndex, Integer pageSize) throws IOException {
        if (pageIndex < 0){
            pageIndex = 0;
        }
        SearchRequest jd_goods = new SearchRequest("jd_goods");
        // 创建搜索源建造者对象
        SearchSourceBuilder searchSourceBuilder = new SearchSourceBuilder();
        // 条件采用:精确查询 通过keyword查字段name
        TermQueryBuilder termQueryBuilder = QueryBuilders.termQuery("name", keyword);
        searchSourceBuilder.query(termQueryBuilder);
        searchSourceBuilder.timeout(new TimeValue(60, TimeUnit.SECONDS));// 60s
        // 分页
        searchSourceBuilder.from(pageIndex);
        searchSourceBuilder.size(pageSize);
        // 高亮
        // ....
        // 搜索源放入搜索请求中
        jd_goods.source(searchSourceBuilder);
        // 执行查询,返回结果
        SearchResponse searchResponse = restHighLevelClient.search(jd_goods, RequestOptions.DEFAULT);
        restHighLevelClient.close();
        // 解析结果
        SearchHits hits = searchResponse.getHits();
        List<Map<String,Object>> results = new ArrayList<>();
        for (SearchHit documentFields : hits.getHits()) {
            Map<String, Object> sourceAsMap = documentFields.getSourceAsMap();
            results.add(sourceAsMap);
        }
        // 返回查询的结果
        return results;
    }
}
⑦编写controller
@Controller
public class ContentController {
    @Autowired
    private ContentService contentService;
    @ResponseBody
    @GetMapping("/parse/{keyword}")
    public Boolean parse(@PathVariable("keyword") String keyword) throws IOException {
        return contentService.parseContent(keyword);
    }
    @ResponseBody
    @GetMapping("/search/{keyword}/{pageIndex}/{pageSize}")
    public List<Map<String, Object>> parse(@PathVariable("keyword") String keyword,
                                           @PathVariable("pageIndex") Integer pageIndex,
                                           @PathVariable("pageSize") Integer pageSize) throws IOException {
        return contentService.search(keyword,pageIndex,pageSize);
    }
}
⑧测试结果
1、解析数据放入 es 索引中

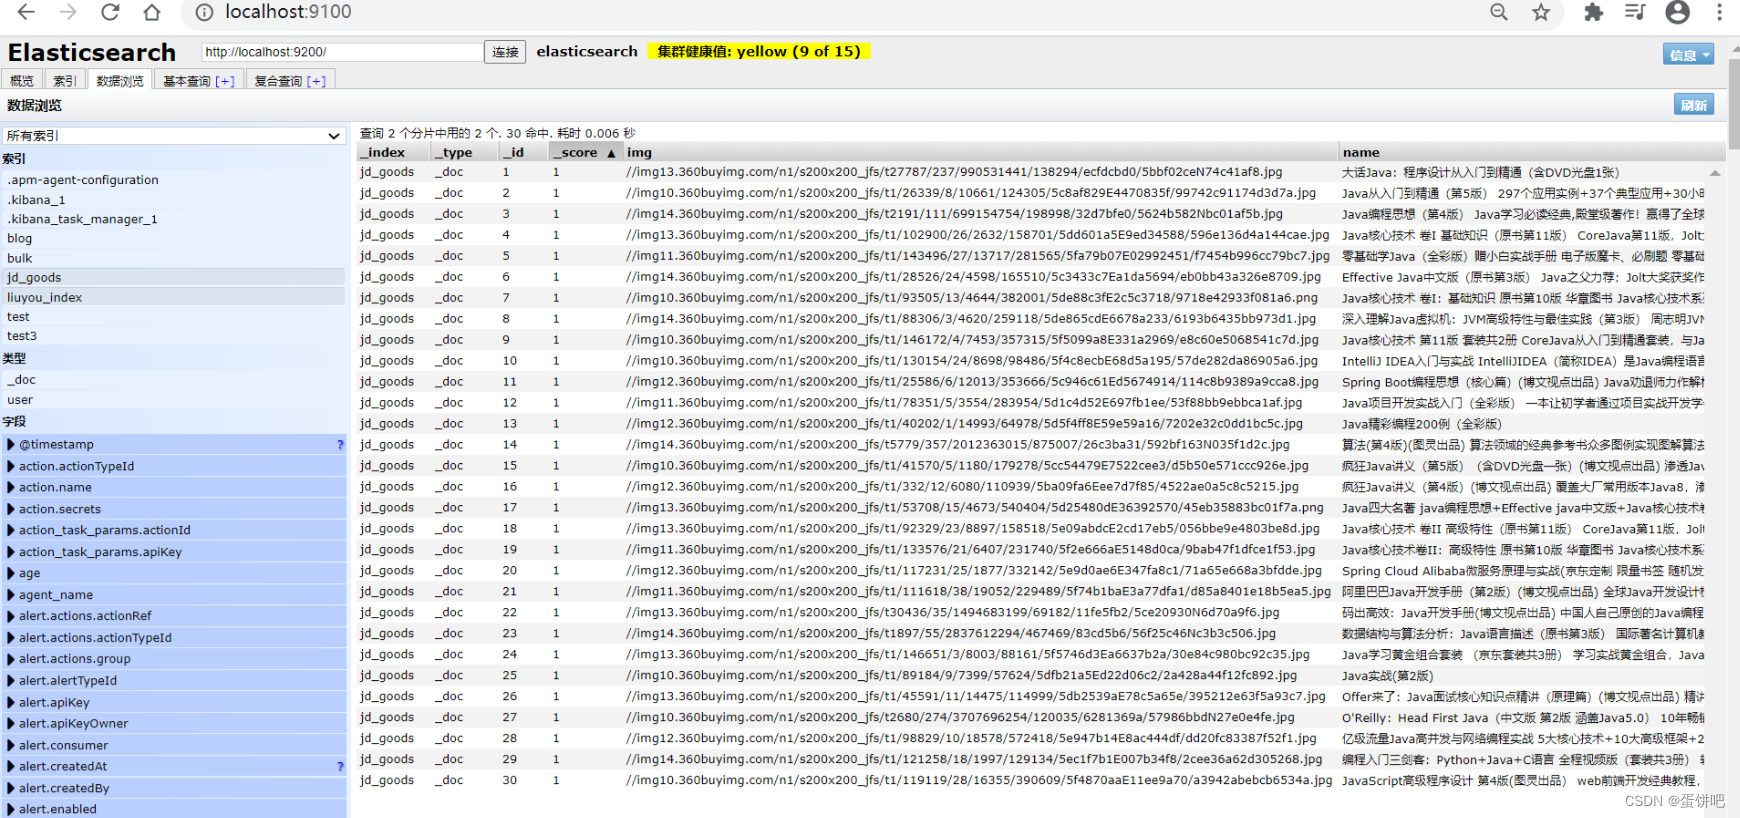
根据keyword分页查询结果
3、爬虫(jsoup)
数据获取:数据库、消息队列、爬虫、…
①搜索京东搜索页面,并分析页面
页面如下
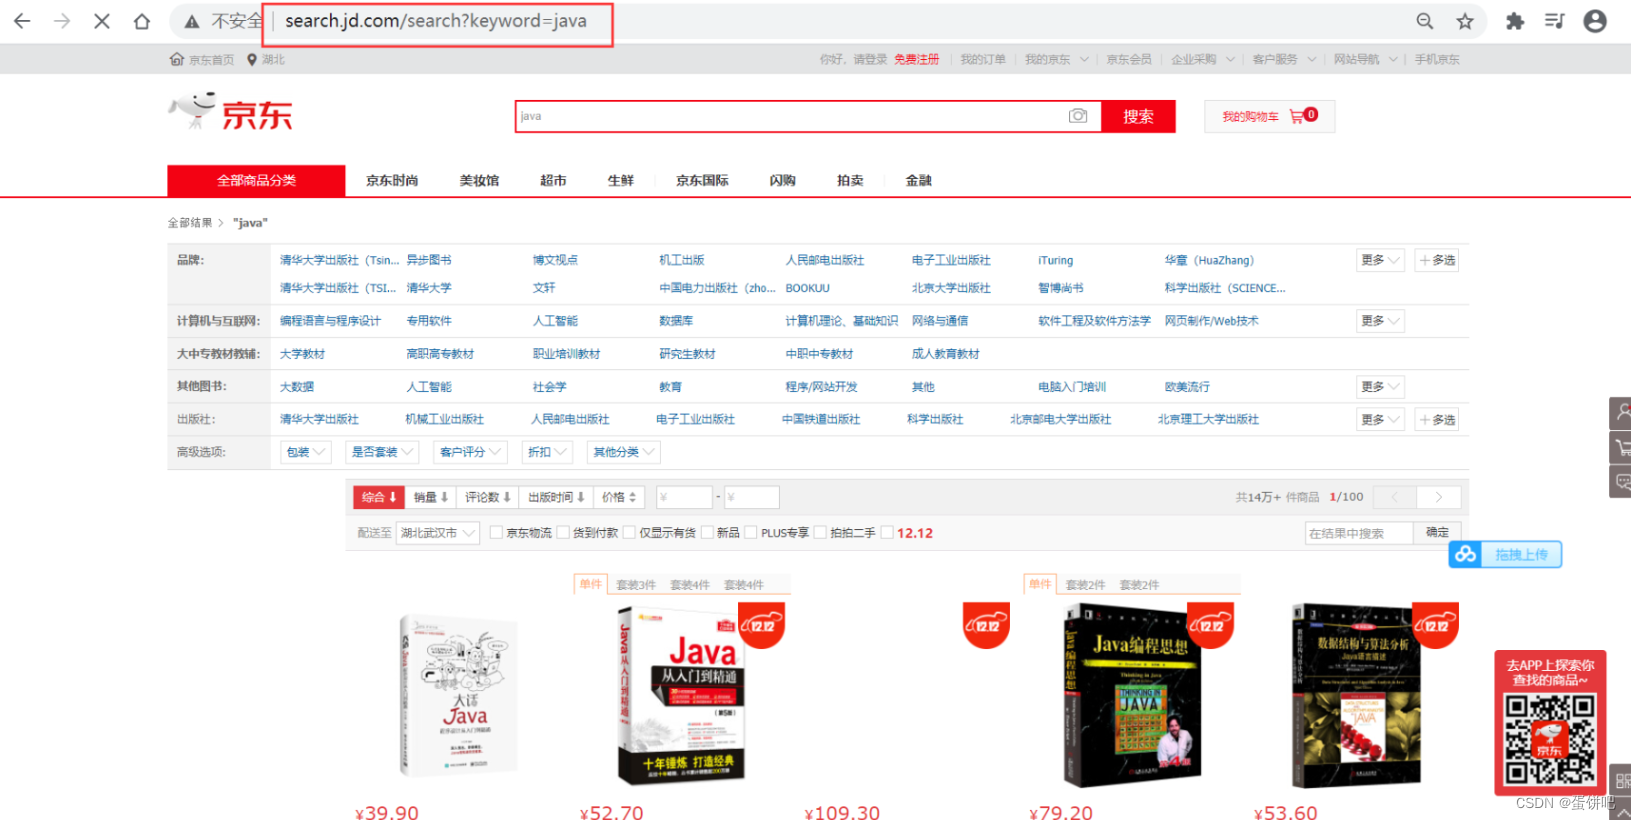
审查页面元素
页面列表id:J_goodsList

目标元素:img、price、name

②爬取数据(获取请求返回的页面信息,筛选出可用的)
创建HtmlParseUtil,并简单编写
public class HtmlParseUtil {
    public static void main(String[] args) throws IOException {
        /// 使用前需要联网
        // 请求url
        String url = "http://search.jd.com/search?keyword=java";
        // 1.解析网页(jsoup 解析返回的对象是浏览器Document对象)
        Document document = Jsoup.parse(new URL(url), 30000);
        // 使用document可以使用在js对document的所有操作
        // 2.获取元素(通过id)
        Element j_goodsList = document.getElementById("J_goodsList");
        // 3.获取J_goodsList ul 每一个 li
        Elements lis = j_goodsList.getElementsByTag("li");
        // 4.获取li下的 img、price、name
        for (Element li : lis) {
            String img = li.getElementsByTag("img").eq(0).attr("src");// 获取li下 第一张图片
            String name = li.getElementsByClass("p-name").eq(0).text();
            String price = li.getElementsByClass("p-price").eq(0).text();
            System.out.println("=======================");
            System.out.println("img : " + img);
            System.out.println("name : " + name);
            System.out.println("price : " + price);
        }
    }
}
运行结果
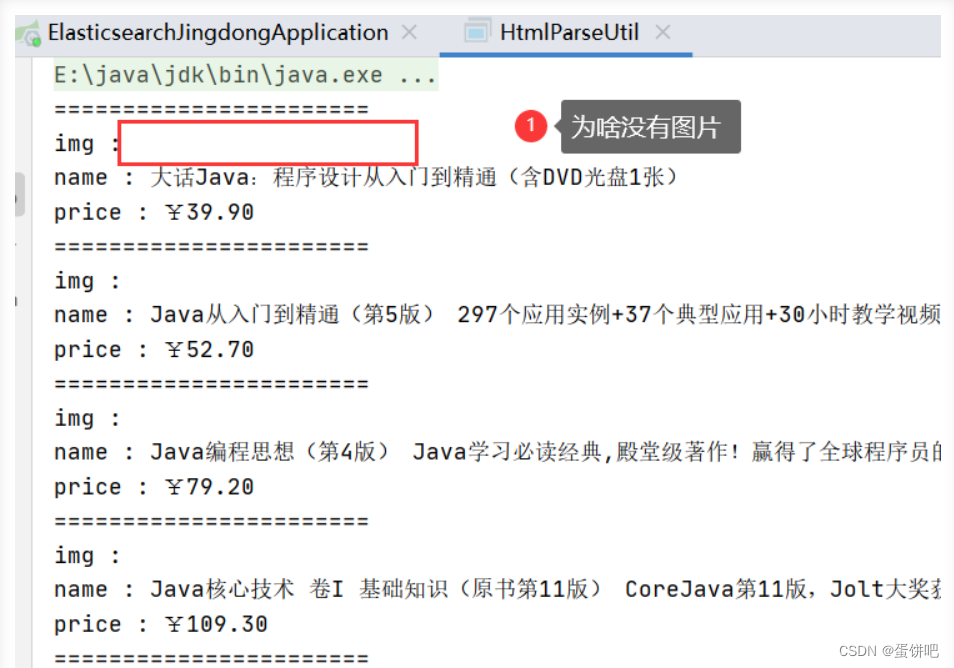
一般图片特别多的网站,所有的图片都是通过延迟加载的
// 打印标签内容
Elements lis = j_goodsList.getElementsByTag("li");
System.out.println(lis);
打印所有li标签,发现img标签中并没有属性src的设置,只是data-lazy-ing设置图片加载的地址

创建HtmlParseUtil、改写
-
更改图片获取属性为
data-lazy-img -
与实体类结合,实体类如下
@Data
@AllArgsConstructor
@NoArgsConstructor
public class Content implements Serializable {
    private static final long serialVersionUID = -8049497962627482693L;
    private String name;
    private String img;
    private String price;
}-
封装为方法
public class HtmlParseUtil {
    public static void main(String[] args) throws IOException {
        System.out.println(parseJD("java"));
    }
    public static List<Content> parseJD(String keyword) throws IOException {
        /// 使用前需要联网
        // 请求url
        String url = "http://search.jd.com/search?keyword=" + keyword;
        // 1.解析网页(jsoup 解析返回的对象是浏览器Document对象)
        Document document = Jsoup.parse(new URL(url), 30000);
        // 使用document可以使用在js对document的所有操作
        // 2.获取元素(通过id)
        Element j_goodsList = document.getElementById("J_goodsList");
        // 3.获取J_goodsList ul 每一个 li
        Elements lis = j_goodsList.getElementsByTag("li");
//        System.out.println(lis);
        // 4.获取li下的 img、price、name
        // list存储所有li下的内容
        List<Content> contents = new ArrayList<Content>();
        for (Element li : lis) {
            // 由于网站图片使用懒加载,将src属性替换为data-lazy-img
            String img = li.getElementsByTag("img").eq(0).attr("data-lazy-img");// 获取li下 第一张图片
            String name = li.getElementsByClass("p-name").eq(0).text();
            String price = li.getElementsByClass("p-price").eq(0).text();
            // 封装为对象
            Content content = new Content(name,img,price);
            // 添加到list中
            contents.add(content);
        }
//        System.out.println(contents);
        // 5.返回 list
        return contents;
    }
}
结果展示

4、搜索高亮
在3、的基础上添加内容
①ContentService
// 3、 在2的基础上进行高亮查询
public List<Map<String, Object>> highlightSearch(String keyword, Integer pageIndex, Integer pageSize) throws IOException {
    SearchRequest searchRequest = new SearchRequest("jd_goods");
    SearchSourceBuilder searchSourceBuilder = new SearchSourceBuilder();
    // 精确查询,添加查询条件
    TermQueryBuilder termQueryBuilder = QueryBuilders.termQuery("name", keyword);
    searchSourceBuilder.timeout(new TimeValue(60, TimeUnit.SECONDS));
    searchSourceBuilder.query(termQueryBuilder);
    // 分页
    searchSourceBuilder.from(pageIndex);
    searchSourceBuilder.size(pageSize);
    // 高亮 =========
    HighlightBuilder highlightBuilder = new HighlightBuilder();
    highlightBuilder.field("name");
    highlightBuilder.preTags("<span style='color:red'>");
    highlightBuilder.postTags("</span>");
    searchSourceBuilder.highlighter(highlightBuilder);
    // 执行查询
    searchRequest.source(searchSourceBuilder);
    SearchResponse searchResponse = restHighLevelClient.search(searchRequest, RequestOptions.DEFAULT);
    // 解析结果 ==========
    SearchHits hits = searchResponse.getHits();
    List<Map<String, Object>> results = new ArrayList<>();
    for (SearchHit documentFields : hits.getHits()) {
        // 使用新的字段值(高亮),覆盖旧的字段值
        Map<String, Object> sourceAsMap = documentFields.getSourceAsMap();
        // 高亮字段
        Map<String, HighlightField> highlightFields = documentFields.getHighlightFields();
        HighlightField name = highlightFields.get("name");
        // 替换
        if (name != null){
            Text[] fragments = name.fragments();
            StringBuilder new_name = new StringBuilder();
            for (Text text : fragments) {
                new_name.append(text);
            }
            sourceAsMap.put("name",new_name.toString());
        }
        results.add(sourceAsMap);
    }
    return results;
}
②ContentController
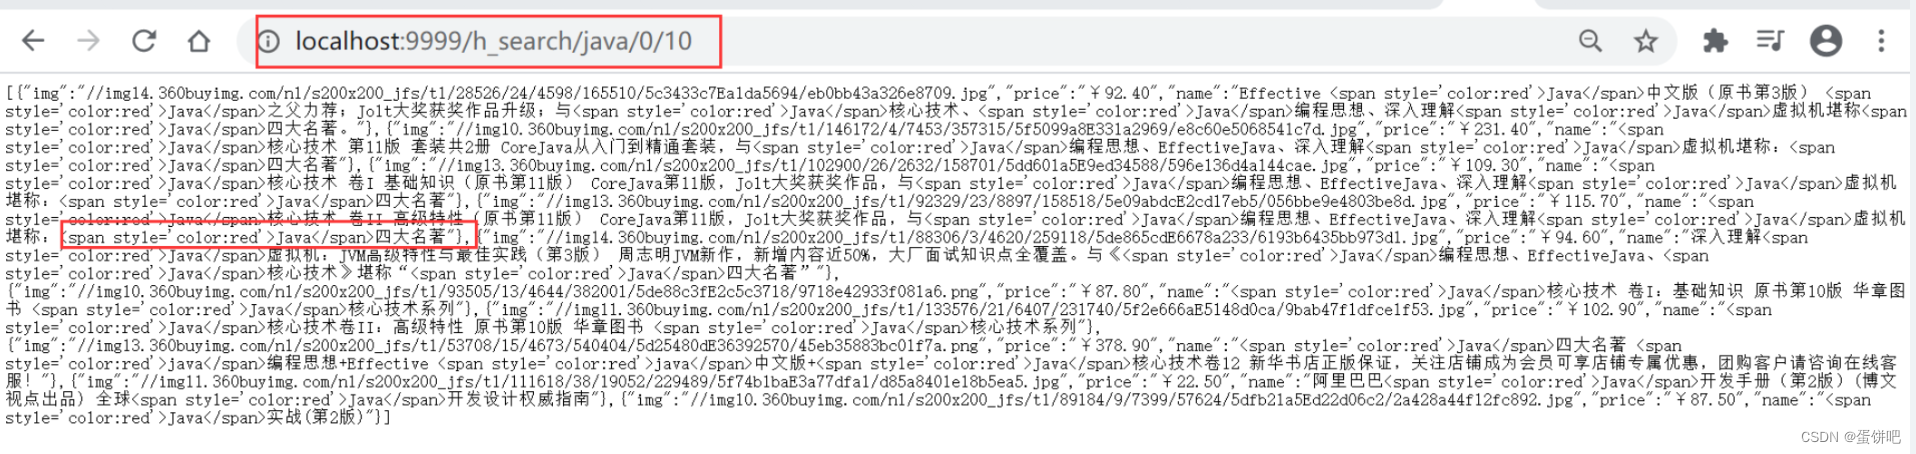
@ResponseBody
@GetMapping("/h_search/{keyword}/{pageIndex}/{pageSize}")
public List<Map<String, Object>> highlightParse(@PathVariable("keyword") String keyword,
@PathVariable("pageIndex") Integer pageIndex,
@PathVariable("pageSize") Integer pageSize) throws IOException {
return contentService.highlightSearch(keyword,pageIndex,pageSize);
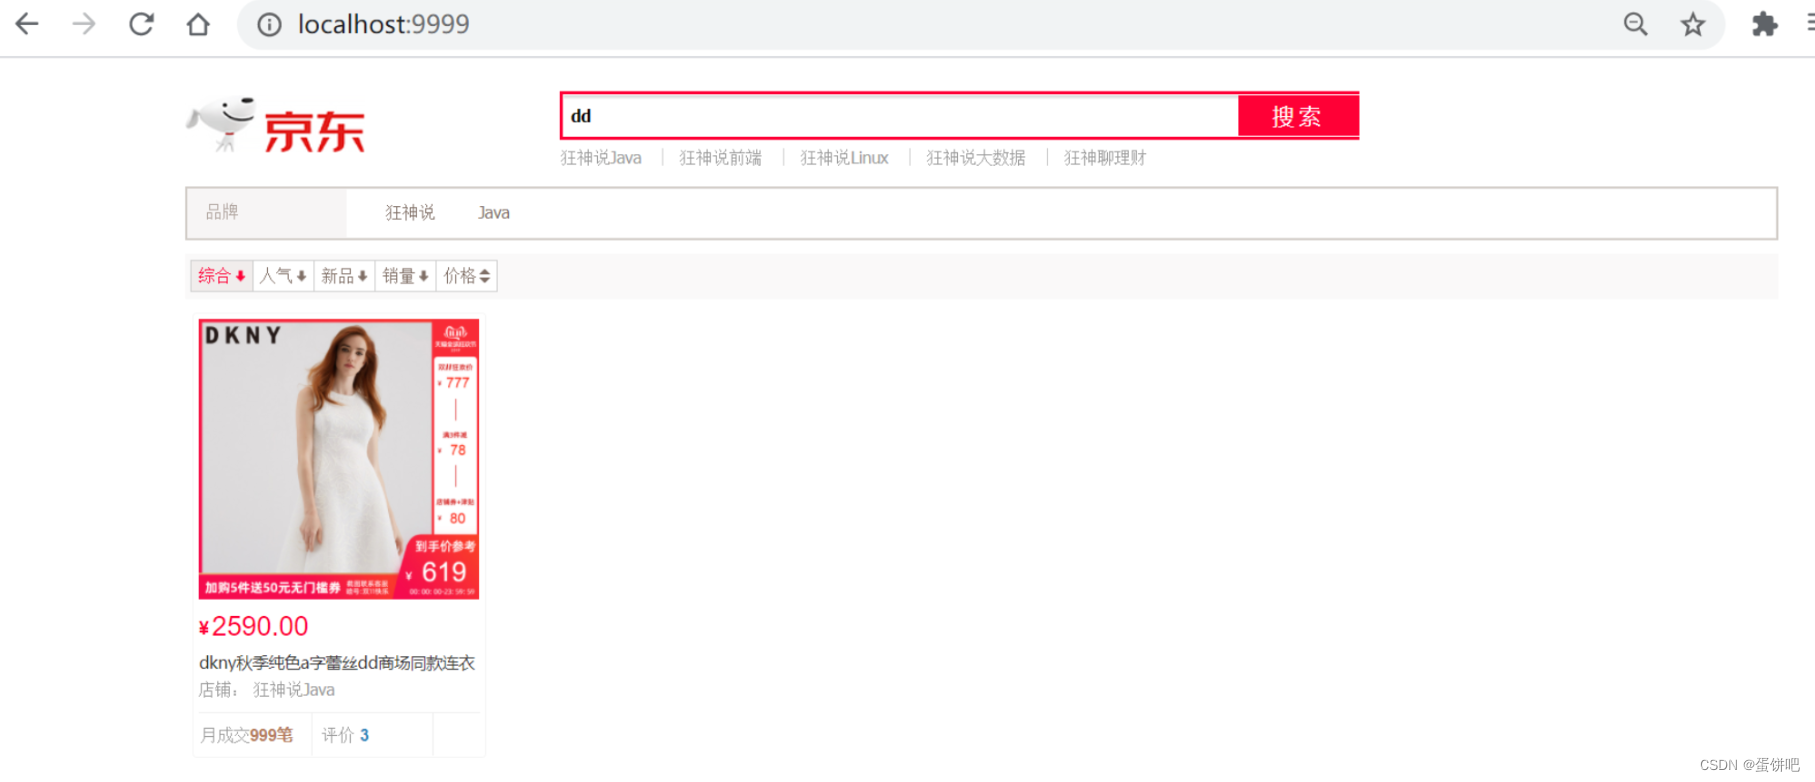
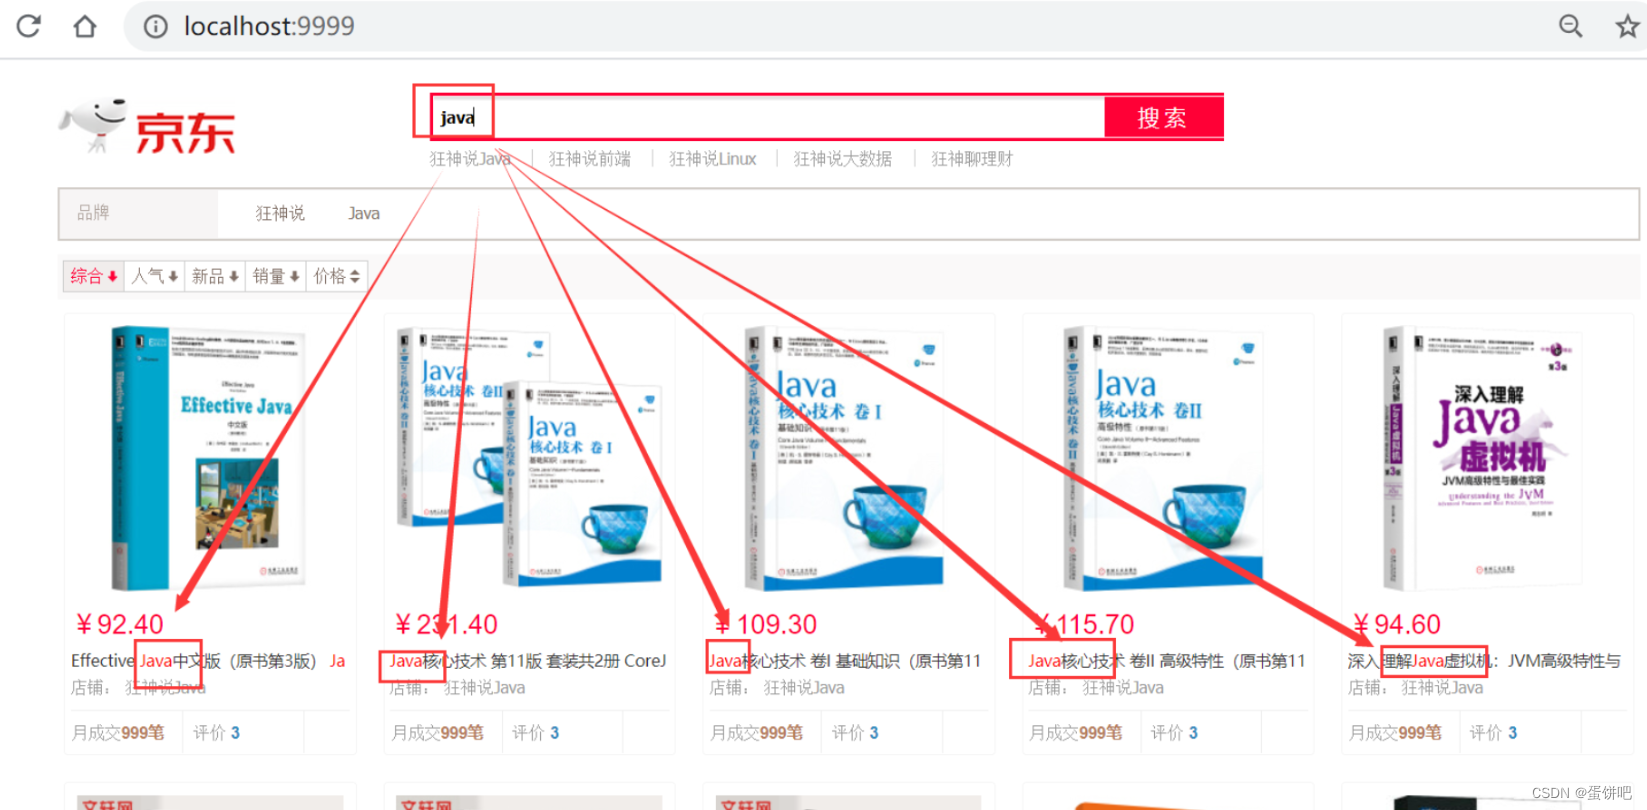
}③结果展示
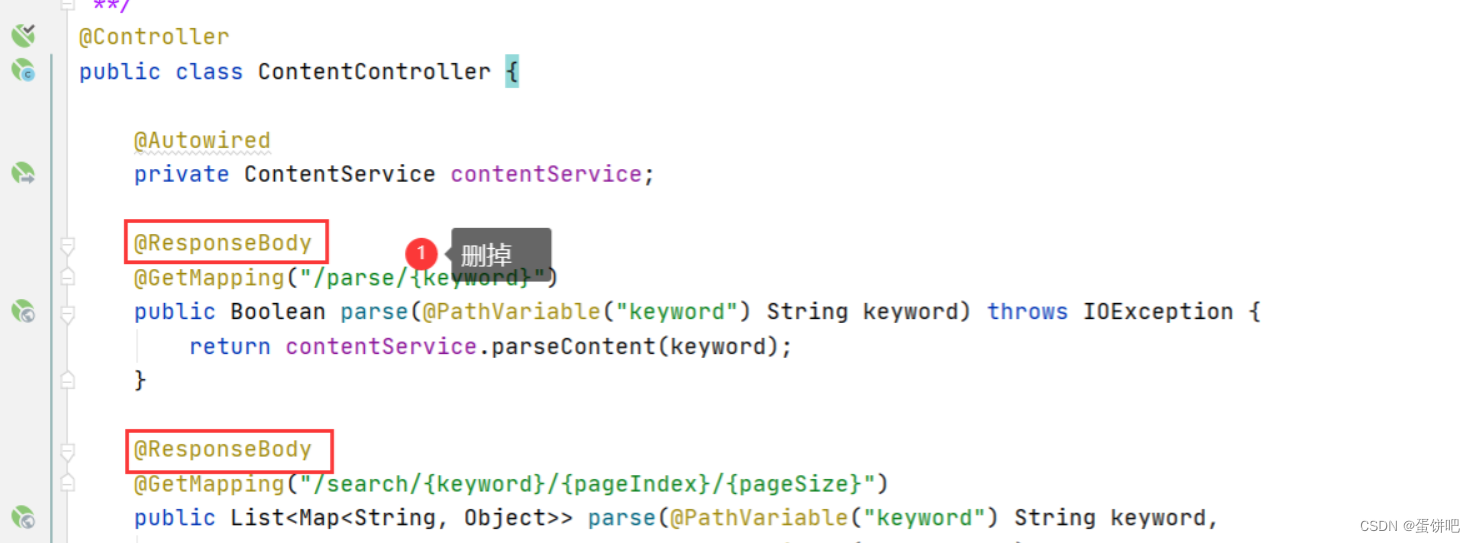
5、前后端分离(简单使用Vue)
删除Controller 方法上的 @ResponseBody注解
①下载并引入Vue.min.js和axios.js
如果安装了nodejs,可以按如下步骤,没有的素材里有
打开电脑cmd命令窗口,执行以下命令
npm init
npm install vue
npm install axios

没有axios和vue文件的网上下载一个就行,然后复制到项目里

②修改静态页面
引入js
<script th:src="@{/js/vue.min.js}"></script>
<script th:src="@{/js/axios.min.js}"></script>
修改后的index.html
<!DOCTYPE html>
<html xmlns:th="http://www.thymeleaf.org">
<head>
    <meta charset="utf-8"/>
    <title>狂神说Java-ES仿京东实战</title>
    <link rel="stylesheet" th:href="@{/css/style.css}"/>
    <script th:src="@{/js/jquery.min.js}"></script>
</head>
<body class="pg">
<div class="page">
    <div id="app" class=" mallist tmall- page-not-market ">
        <!-- 头部搜索 -->
        <div id="header" class=" header-list-app">
            <div class="headerLayout">
                <div class="headerCon ">
                    <!-- Logo-->
                    <h1 id="mallLogo">
                        <img th:src="@{/images/jdlogo.png}" alt="">
                    </h1>
                    <div class="header-extra">
                        <!--搜索-->
                        <div id="mallSearch" class="mall-search">
                            <form name="searchTop" class="mallSearch-form clearfix">
                                <fieldset>
                                    <legend>天猫搜索</legend>
                                    <div class="mallSearch-input clearfix">
                                        <div class="s-combobox" id="s-combobox-685">
                                            <div class="s-combobox-input-wrap">
                                                <input v-model="keyword"  type="text" autocomplete="off" id="mq"
                                                       class="s-combobox-input"  aria-haspopup="true">
                                            </div>
                                        </div>
                                        <button type="submit" @click.prevent="searchKey" id="searchbtn">搜索</button>
                                    </div>
                                </fieldset>
                            </form>
                            <ul class="relKeyTop">
                                <li><a>狂神说Java</a></li>
                                <li><a>狂神说前端</a></li>
                                <li><a>狂神说Linux</a></li>
                                <li><a>狂神说大数据</a></li>
                                <li><a>狂神聊理财</a></li>
                            </ul>
                        </div>
                    </div>
                </div>
            </div>
        </div>
        <!-- 商品详情页面 -->
        <div id="content">
            <div class="main">
                <!-- 品牌分类 -->
                <form class="navAttrsForm">
                    <div class="attrs j_NavAttrs" style="display:block">
                        <div class="brandAttr j_nav_brand">
                            <div class="j_Brand attr">
                                <div class="attrKey">
                                    品牌
                                </div>
                                <div class="attrValues">
                                    <ul class="av-collapse row-2">
                                        <li><a href="#"> 狂神说 </a></li>
                                        <li><a href="#"> Java </a></li>
                                    </ul>
                                </div>
                            </div>
                        </div>
                    </div>
                </form>
                <!-- 排序规则 -->
                <div class="filter clearfix">
                    <a class="fSort fSort-cur">综合<i class="f-ico-arrow-d"></i></a>
                    <a class="fSort">人气<i class="f-ico-arrow-d"></i></a>
                    <a class="fSort">新品<i class="f-ico-arrow-d"></i></a>
                    <a class="fSort">销量<i class="f-ico-arrow-d"></i></a>
                    <a class="fSort">价格<i class="f-ico-triangle-mt"></i><i class="f-ico-triangle-mb"></i></a>
                </div>
                <!-- 商品详情 -->
                <div class="view grid-nosku" >
                    <div class="product" v-for="result in results">
                        <div class="product-iWrap">
                            <!--商品封面-->
                            <div class="productImg-wrap">
                                <a class="productImg">
                                    <img :src="result.img">
                                </a>
                            </div>
                            <!--价格-->
                            <p class="productPrice">
                                <em v-text="result.price"></em>
                            </p>
                            <!--标题-->
                            <p class="productTitle">
                                <a v-html="result.name"></a>
                            </p>
                            <!-- 店铺名 -->
                            <div class="productShop">
                                <span>店铺: 狂神说Java </span>
                            </div>
                            <!-- 成交信息 -->
                            <p class="productStatus">
                                <span>月成交<em>999笔</em></span>
                                <span>评价 <a>3</a></span>
                            </p>
                        </div>
                    </div>
                </div>
            </div>
        </div>
    </div>
</div>
<script th:src="@{/js/vue.min.js}"></script>
<script th:src="@{/js/axios.min.js}"></script>
<script>
    new Vue({
        el:"#app",
        data:{
            "keyword": '', // 搜索的关键字
            "results":[] // 后端返回的结果
        },
        methods:{
            searchKey(){
                var keyword = this.keyword;
                console.log(keyword);
                axios.get('h_search/'+keyword+'/0/20').then(response=>{
                    console.log(response.data);
                    this.results=response.data;
                })
            }
        }
    });
</script>
</body>
</html>
测试
使用term(精确查询)时遇到的问题
字段值必须是一个词(索引中存在的词),才能匹配
问题:中文字符串,term查询时无法查询到数据(比如,“编程”两字在文档中存在,但是搜索不到)
原因:索引为配置中文分词器(默认使用standard,即所有中文字符串都会被切分为单个中文汉字作为单词),所以没有超过1个汉字的词,也就无法匹配,进而查不到数据
解决:创建索引时配置中文分词器,如
PUT example
{
  "mappings": {
    "properties": {
      "name":{
        "type": "text",
        "analyzer": "ik_max_word"  // ik分词器
      }
    }
  }
}
查询的英文字符只能是小写,大写都无效
查询时英文单词必须是完整的
最后附上我自己用的依赖
<dependencies>
<dependency>
<groupId>org.elasticsearch</groupId>
<artifactId>elasticsearch</artifactId>
<version>7.8.0</version>
</dependency>
<!-- elasticsearch 的客户端 -->
<dependency>
<groupId>org.elasticsearch.client</groupId>
<artifactId>elasticsearch-rest-high-level-client</artifactId>
<version>7.8.0</version>
</dependency>
<!-- elasticsearch 依赖 2.x 的 log4j -->
<dependency>
<groupId>org.apache.logging.log4j</groupId>
<artifactId>log4j-api</artifactId>
<version>2.8.2</version>
</dependency>
<dependency>
<groupId>org.apache.logging.log4j</groupId>
<artifactId>log4j-core</artifactId>
<version>2.8.2</version>
</dependency>
<dependency>
<groupId>com.fasterxml.jackson.core</groupId>
<artifactId>jackson-databind</artifactId>
<version>2.9.9</version>
</dependency>
<!-- junit 单元测试 -->
<dependency>
<groupId>junit</groupId>
<artifactId>junit</artifactId>
<version>4.12</version>
</dependency>
</dependencies>
结束!


 2131
2131


 被折叠的 条评论
为什么被折叠?
被折叠的 条评论
为什么被折叠?
 到【灌水乐园】发言


