


-
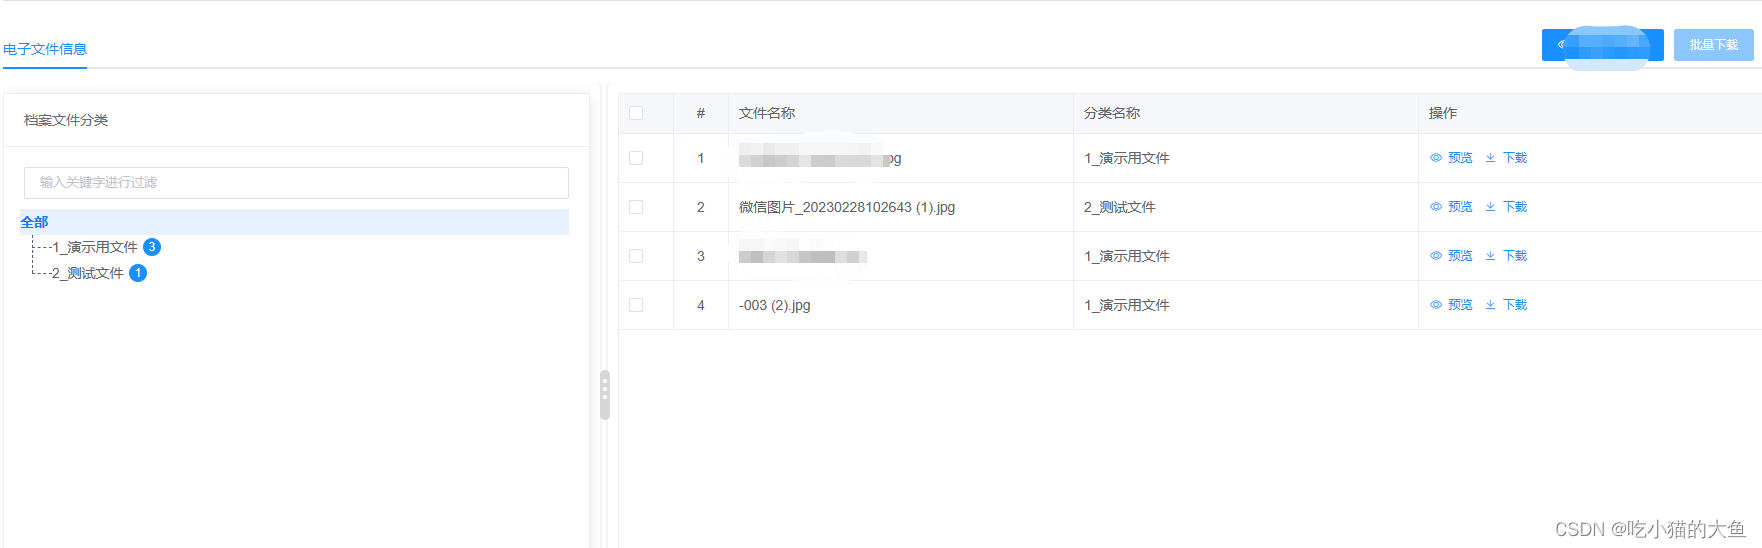
效果
(1)拖动前

(2)拖动后
-
主要代码
<template>
	<el-row class="contnet" :gutter="20">
		// 1. 左侧树
		<el-col id="left-tree" class="left-tree" :offset="0" :span="6">
			// 目录树(不是该文章的主要解析项,不多介绍)
			<Tree :height="$baseTableHeight(1) - 50"/>
			// 2. 中间拖动栏
			<div id="resize" class="resize" title="收缩侧边栏">⋮</div>
		</el-col>
		// 3. 右侧内容
		<el-col id="right-content" class="right-content" :offset="0" :span="18">
			<el-table ref="table" border :data="list" :height="$baseTableHeight(1)" row-key="id" style="width: 100%">
				<el-table-column type="selection" width="55" />
              	<el-table-column align="center" label="#" width="55">
                	<template #default="{ $index }">
                  		{{ $index + 1 }}
                	</template>
                </el-table-column>
                <el-table-column label="文件名称" prop="originalName" />
			</el-table>
		</el-col>
	</el-row>
</template>

<script>
  import TreeVue from '@/component/Tree.vue'
  export default {
    components: { TreeVue },
    data() {
      return {
        list: [],
      }
    },
    mounted() {
      this.dragControllerDiv()
    },
    methods:{
    	dragControllerDiv() {
       		let left = document.getElementById('left-tree')
        	let line = document.getElementById('resize')
        	let right = document.getElementById('right-content')
        	// 鼠标按下事件
        	line.onmousedown = function (e) {
          	let startX = e.clientX
          	line.left = line.offsetLeft
          	// 鼠标拖动事件
          	document.onmousemove = function (e) {
            	let moveLen = line.left + (e.clientX - startX)
            	if (
              	moveLen >= document.body.clientWidth * 0.1 &&
              	moveLen <= document.body.clientWidth * 0.4
            	) {
              	line.style.left = moveLen + 'px'
              	left.style.width = moveLen + 'px'
              	right.style.width = document.body.clientWidth - moveLen + 'px'
            	}
          	}
          		document.onmouseup = function () {
           		document.onmousemove = null
            	document.onmouseup = null
          		}
        	}
      	},
    }
  }
</script>

<style lang="scss" scoped>
.contnet {
  display: flex;
}
.left-tree {
  position: relative;
  width: 500px;
  height: 100%; // 如果存在box-sizing,此处设置就会用会影响,可以先去掉看看效果
  background: #fff;
  box-shadow: 0 0 2px 2px rgba(0, 0, 0, 0.050980392156862744);
  border-radius: 4px;
  vertical-align: top;
  display: inline-block;
  box-sizing: border-box;
  -ms-flex-negative: 0;
  flex-shrink: 0;
  padding: 10px 0 0 10px;
  margin-right: 8px;
}
.resize {
  cursor: col-resize;
  position: absolute;
  top: 45%;
  right: -8px;
  background-color: #d6d6d6;
  border-radius: 5px;
  margin-top: -10px;
  width: 10px;
  height: 50px;
  background-size: cover;
  background-position: 50%;
  font-size: 32px;
  color: #fff;
}
.right-content {
  display: inline-block;
  width: calc(100% - 510px);
  height: 100%;
  background: #fff;
  -webkit-box-shadow: 0 0 2px 2px rgba(0, 0, 0, 0.050980392156862744);
  box-shadow: 0 0 2px 2px rgba(0, 0, 0, 0.050980392156862744);
  border-radius: 4px;
  -webkit-box-sizing: border-box;
  box-sizing: border-box;
  padding: 10px;
  vertical-align: top;
  overflow: auto;
}
</style>
- 阐述
(1).content{ display:flex;} 一定要有,否则在拖拽时会出现换行的情况
(2)resize 要相对于父级绝对定位 - 去掉el-table 底部边框
  .el-table::before {
    height: 0px;
  }
- box-sizing盒模型
(1)content-box 标准盒模型
(2)border-box 怪异盒模型


 499
499


 被折叠的 条评论
为什么被折叠?
被折叠的 条评论
为什么被折叠?
 到【灌水乐园】发言


