


什么是SSM?
SSM全称是Spring+SpringMVC+MyBatis。
SSM框架集由Spring、MyBatis两个开源框架整合而成(SpringMVC是Spring中的部分内容)。常作为数据源较简单的web项目的框架。Spring MVC 负责实现 MVC 设计模式,MyBatis 负责数据持久层,Spring 负责管理 Spring MVC 和 MyBatis 相关对象的创建和依赖注入。

1、Spring
Spring就像是整个项目中装配bean的大工厂,在配置文件中可以指定使用特定的参数去调用实体类的构造方法来实例化对象。也可以称之为项目中的粘合剂。
Spring的核心思想是IoC(控制反转),即不再需要程序员去显式地new一个对象,而是让Spring框架帮你来完成这一切。
2、SpringMVC
SpringMVC在项目中拦截用户请求,它的核心Servlet即DispatcherServlet承担中介或是前台这样的职责,将用户请求通过HandlerMapping去匹配Controller,Controller就是具体对应请求所执行的操作。SpringMVC相当于SSH框架中struts。
3、mybatis
mybatis是对jdbc的封装,它让数据库底层操作变的透明。
mybatis的操作都是围绕一个sqlSessionFactory实例展开的。mybatis通过配置文件关联到各实体类的Mapper文件,Mapper文件中配置了每个类对数据库所需进行的sql语句映射。在每次与数据库交互时,通过sqlSessionFactory拿到一个sqlSession,再执行sql命令。
代码实现
1、创建 Maven 工程,pom.xml
<dependencies>
    <!-- SpringMVC -->
    <dependency>
      <groupId>org.springframework</groupId>
      <artifactId>spring-webmvc</artifactId>
      <version>5.2.6.RELEASE</version>
    </dependency>

    <!-- Spring JDBC -->
    <dependency>
      <groupId>org.springframework</groupId>
      <artifactId>spring-jdbc</artifactId>
      <version>5.2.15.RELEASE</version>
    </dependency>

    <!-- Spring AOP -->
    <dependency>
      <groupId>org.springframework</groupId>
      <artifactId>spring-aop</artifactId>
      <version>5.2.15.RELEASE</version>
    </dependency>
    <dependency>
      <groupId>org.springframework</groupId>
      <artifactId>spring-aspects</artifactId>
      <version>5.2.15.RELEASE</version>
    </dependency>

    <!-- MyBatis -->
    <dependency>
      <groupId>org.mybatis</groupId>
      <artifactId>mybatis</artifactId>
      <version>3.5.7</version>
    </dependency>

    <!-- MyBatis整合Spring -->
    <dependency>
      <groupId>org.mybatis</groupId>
      <artifactId>mybatis-spring</artifactId>
      <version>2.0.1</version>
    </dependency>

    <!-- MySQL驱动 -->
    <dependency>
      <groupId>mysql</groupId>
      <artifactId>mysql-connector-java</artifactId>
      <version>8.0.11</version>
    </dependency>

    <!-- C3P0 -->
    <dependency>
      <groupId>com.mchange</groupId>
      <artifactId>c3p0</artifactId>
      <version>0.9.5.2</version>
    </dependency>

    <!-- JSTL -->
    <dependency>
      <groupId>jstl</groupId>
      <artifactId>jstl</artifactId>
      <version>1.2</version>
    </dependency>

    <!-- ServletAPI -->
    <dependency>
      <groupId>javax.servlet</groupId>
      <artifactId>javax.servlet-api</artifactId>
      <version>3.1.0</version>
    </dependency>

    <dependency>
      <groupId>org.projectlombok</groupId>
      <artifactId>lombok</artifactId>
      <version>1.18.6</version>
      <scope>provided</scope>
    </dependency>
  </dependencies>
2、在web.xml 中配置 SpringMVC、Spring、字符编码过滤器、加载静态资源。
<!DOCTYPE web-app PUBLIC
 "-//Sun Microsystems, Inc.//DTD Web Application 2.3//EN"
 "http://java.sun.com/dtd/web-app_2_3.dtd" >

<web-app>
  <display-name>Archetype Created Web Application</display-name>
  <!-- 启动Spring -->
  <context-param>
    <param-name>contextConfigLocation</param-name>
    <param-value>classpath:spring.xml</param-value>
  </context-param>

    <!-- ContextLoaderListener它的作用是启动web容器,(加载配置文件)自动装配applicationContext.xml配置信息 -->
  <listener>
    <listener-class>org.springframework.web.context.ContextLoaderListener</listener-class>
  </listener>

  <!-- Spring MVC -->
  <servlet>
    <servlet-name>dispatcherServlet</servlet-name>
    <servlet-class>org.springframework.web.servlet.DispatcherServlet</servlet-class>
    <init-param>
      <param-name>contextConfigLocation</param-name>
      <param-value>classpath:springmvc.xml</param-value>
    </init-param>
  </servlet>

  <servlet-mapping>
    <servlet-name>dispatcherServlet</servlet-name>
    <url-pattern>/</url-pattern>
  </servlet-mapping>

  <!-- 字符编码过滤器 -->
  <filter>
    <filter-name>characterEncodingFilter</filter-name>
    <filter-class>org.springframework.web.filter.CharacterEncodingFilter</filter-class>
    <init-param>
      <param-name>encoding</param-name>
      <param-value>UTF-8</param-value>
    </init-param>
  </filter>

  <filter-mapping>
    <filter-name>characterEncodingFilter</filter-name>
    <url-pattern>/*</url-pattern>
  </filter-mapping>

  <!-- 加载静态资源 -->
  <servlet-mapping>
    <servlet-name>default</servlet-name>
    <url-pattern>*.js</url-pattern>
  </servlet-mapping>
  <servlet-mapping>
    <servlet-name>default</servlet-name>
    <url-pattern>*.css</url-pattern>
  </servlet-mapping>
  <servlet-mapping>
    <servlet-name>default</servlet-name>
    <url-pattern>*.jpg</url-pattern>
  </servlet-mapping>
</web-app>
/和/*区别
其实/和/*都可以匹配所有的请求资源,但其匹配的优先顺序是不同的。/在所有的匹配路径中,优先级最低,即当别的路径都无法匹配时,/所匹配的缺省Servlet才会进行相应的请求资源处理。而 /星号 匹配的优先级是高于/路径和星号.后缀的路径的(如星号.action,星号.jsp等路径)。
3、在 spring.xml 中配置 MyBatis 和 Spring 的整合。
<?xml version="1.0" encoding="UTF-8"?>
<beans xmlns="http://www.springframework.org/schema/beans"
xmlns:xsi="http://www.w3.org/2001/XMLSchema-instance"
xmlns:context="http://www.springframework.org/schema/context"
xmlns:p="http://www.springframework.org/schema/p"
xsi:schemaLocation="http://www.springframework.org/schema/beans http://www.springframework.org/schema/beans/spring-beans-3.2.xsd
http://www.springframework.org/schema/context http://www.springframework.org/schema/context/spring-context-4.3.xsd
">
<!-- 整合MyBatis -->
<bean id="dataSource" class="com.mchange.v2.c3p0.ComboPooledDataSource">
<property name="user" value="root"></property>
<property name="password" value="5846028"></property>
<property name="jdbcUrl" value="jdbc:mysql://localhost:3306/test?serverTimezone=GMT&useUnicode=true&characterEncoding=UTF-8"></property>
<property name="driverClass" value="com.mysql.cj.jdbc.Driver"></property>
<property name="initialPoolSize" value="5"></property>
<property name="maxPoolSize" value="10"></property>
</bean>
<!-- 配置MyBatis SqlSessionFactory -->
<bean id="sqlSessionFactory" class="org.mybatis.spring.SqlSessionFactoryBean">
<property name="dataSource" ref="dataSource"></property>
<property name="mapperLocations" value="classpath:com/chen/repository/*.xml"></property>
<property name="configLocation" value="classpath:config.xml"></property>
</bean>
<!-- 扫描自定义的Mapper接口 -->
<bean class="org.mybatis.spring.mapper.MapperScannerConfigurer">
<property name="basePackage" value="com.chen.repository"></property>
</bean>
</beans>
4、config.xml (MyBatis配置)配置一些 MyBatis 辅助信息,比如打印 SQL、指定包名 等。
<?xml version="1.0" encoding="UTF-8"?>
<!DOCTYPE configuration PUBLIC "-//mybatis.org//DTD Config 3.0//EN" "http://mybatis.org/dtd/mybatis-3-config.dtd">
<configuration>
    <settings>
        <!-- 打印SQL-->
        <setting name="logImpl" value="STDOUT_LOGGING" />
    </settings>

    <typeAliases>
        <!-- 指定一个包名,MyBatis会在包名下搜索需要的JavaBean-->
        <package name="com.chen.entity"/>
    </typeAliases>

</configuration>
5、配置 springmvc.xml
<?xml version="1.0" encoding="UTF-8"?>
<beans xmlns="http://www.springframework.org/schema/beans"
       xmlns:xsi="http://www.w3.org/2001/XMLSchema-instance"
       xmlns:context="http://www.springframework.org/schema/context"
       xmlns:mvc="http://www.springframework.org/schema/mvc"
       xsi:schemaLocation="http://www.springframework.org/schema/beans http://www.springframework.org/schema/beans/spring-beans-3.0.xsd
        http://www.springframework.org/schema/context http://www.springframework.org/schema/context/spring-context-3.0.xsd
        http://www.springframework.org/schema/mvc http://www.springframework.org/schema/mvc/spring-mvc-3.2.xsd">

    <!-- 启动注解驱动 -->
    <mvc:annotation-driven></mvc:annotation-driven>

    <!-- 扫描业务代码 -->
    <context:component-scan base-package="com.chen"></context:component-scan>

    <!-- 配置视图解析器 -->
    <bean class="org.springframework.web.servlet.view.InternalResourceViewResolver">
        <property name="prefix" value="/"></property>
        <property name="suffix" value=".jsp"></property>
    </bean>

</beans>
6、编写代码
- 实体层
@Data
public class People {

    private long id;
    private String name;
    private Double money;
}
- repository层
public interface PeopleRepository {

    public List<People> findAll();
}
PeopleRepository.xml
<?xml version="1.0" encoding="UTF-8" ?>
<!DOCTYPE mapper PUBLIC "-//mybatis.org//DTD Mapper 3.0//EN" "http://mybatis.org/dtd/mybatis-3-mapper.dtd">
<mapper namespace="com.chen.repository.PeopleRepository">
    <select id="findAll" resultType="People">
        select * from people
    </select>
</mapper>
- service层
接口
public interface PeopleService {

    public List<People> findAll();
}
实现类
@Service
public class PeopleServiceImpl implements PeopleService {

    @Autowired
    private PeopleRepository peopleRepository;

    @Override
    public List<People> findAll() {
        return peopleRepository.findAll();
    }
}
- 控制层
@Controller
@RequestMapping("/people")
public class PeopleHandle {

    @Autowired
    private PeopleService peopleService;

    @GetMapping("/findAll")
    public ModelAndView findAll(){
        ModelAndView modelAndView = new ModelAndView();
        modelAndView.setViewName("index");
        modelAndView.addObject("list",peopleService.findAll());
        return modelAndView;
    }
}
index.jsp
<%@ page contentType="text/html;charset=UTF-8" language="java" %>
<%@page isELIgnored="false" %>
<%@taglib prefix="c" uri="http://java.sun.com/jsp/jstl/core" %>
<html>
<head>
<title>Title</title>
</head>
<body>
<c:forEach items="${list}" var="people">
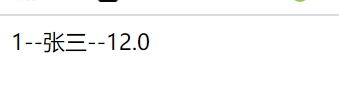
${people.id}--${people.name}--${people.money} </br>
</c:forEach>
</body>
</html>
运行结果:
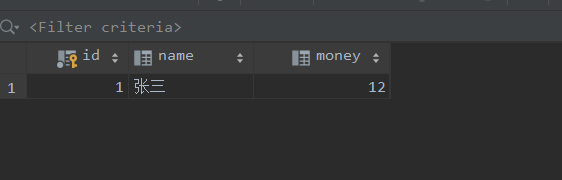
数据库我就写了一条数据:
代码布局:


 726
726


 被折叠的 条评论
为什么被折叠?
被折叠的 条评论
为什么被折叠?
 到【灌水乐园】发言


