


SpringBoot对静态资源的映射规则
如果我们需用给web项目中添加css/js/html文件的话,我们会发现此时没有webapp目录。

由于springboot是以jar包的方式打包程序的因此是没有webapp目录的。
那么我们的css/js/html文件要保存在什么地方啊???
我们要了解一个Java类“WebMvcAuotConfiguration”,因为与web开发相关的自动配置都是由这个类完成的。
spring-boot-autoconfigure-2.4.0.jar---》META-INF--》spring.factories
org.springframework.boot.autoconfigure.web.servlet.WebMvcAutoConfiguration
@Override
public void addResourceHandlers(ResourceHandlerRegistry registry) {
   if (!this.resourceProperties.isAddMappings()) {
      logger.debug("Default resource handling disabled");
      return;
   }
   Duration cachePeriod = this.resourceProperties.getCache().getPeriod();
   CacheControl cacheControl = this.resourceProperties.getCache().getCachecontrol().toHttpCacheControl();
   if (!registry.hasMappingForPattern("/webjars/**")) {
      customizeResourceHandlerRegistration(registry.addResourceHandler("/webjars/**")
            .addResourceLocations("classpath:/META-INF/resources/webjars/")
            .setCachePeriod(getSeconds(cachePeriod)).setCacheControl(cacheControl)
            .setUseLastModified(this.resourceProperties.getCache().isUseLastModified()));
   }
   String staticPathPattern = this.mvcProperties.getStaticPathPattern();
   if (!registry.hasMappingForPattern(staticPathPattern)) {
      customizeResourceHandlerRegistration(registry.addResourceHandler(staticPathPattern)
            .addResourceLocations(getResourceLocations(this.resourceProperties.getStaticLocations()))
            .setCachePeriod(getSeconds(cachePeriod)).setCacheControl(cacheControl)
            .setUseLastModified(this.resourceProperties.getCache().isUseLastModified()));
   }
}
WebProperties.java
private static final String[] CLASSPATH_RESOURCE_LOCATIONS =
{ "classpath:/META-INF/resources/",
 "classpath:/resources/",
"classpath:/static/",
 "classpath:/public/" };
1.静态资源的保存位置所有“/webjars/**”
webjars:将需要使用的静态资源打成jar包,我们如果需要就将整个jar导入值本项目就可以使用了。
静态资源打成jar包查看位置:
https://www.webjars.org/

以JQuery为例来使用一下webjars方式
1.在pom.xml文件中导入JQuery的jar依赖
<!--导入jquery的jar包-->
<dependency>
    <groupId>org.webjars</groupId>
    <artifactId>jquery</artifactId>
    <version>3.5.1</version>
</dependency>
导人以后的结果

2.测试访问我们导入的jquery文件
启动服务,在浏览器的地址栏中直接访问jquery文件
http://localhost:8080/webjars/jquery/3.5.1/jquery.js

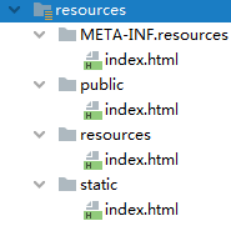
2.默认静态资源文件的位置
WebProperties.java
private static final String[] CLASSPATH_RESOURCE_LOCATIONS =
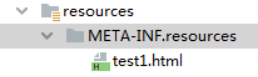
{ "classpath:/META-INF/resources/",
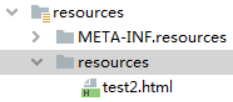
"classpath:/resources/",
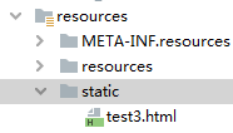
"classpath:/static/",
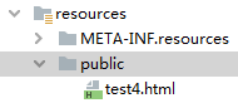
"classpath:/public/" };
1.“classpath:/META‐INF/resources/”,
[src/main/resources/META-INF/resources/]–运行之前需要打包一下
2.“classpath:/resources/”=== [src/main/resources/resources]
3.”classpath:/static/”==== [src/main/resources/static]
4.“classpath:/public/”== [src/main/resources/public]
3)欢迎页; 静态资源文件夹下的所有index.html页面;
4)页面图标; 静态资源文件夹下的所有favicon.ico 图标;

可以在application.properties中配置修改静态资源文件夹路径。
@ConfigurationProperties(prefix = "spring.web.resources", ignoreUnknownFields = false)
public class ResourceProperties implements ResourceLoaderAware {
//可以设置和静态资源有关的参数,缓存时间等
application.properties
spring.web.resources.static-locations=classpath:/test/,classpath:/hello/
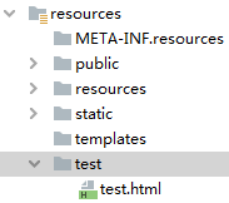
http://localhost:8080/test.html
模板引擎
由于springboot是以jar包的方式打包程序的,而不是web项目,再者在springboot中我们用的是嵌入式的tomcat服务器,因此springboot项目是不支持动态页面的运行,所以如果我们都将页面处理成静态页面的话,那么到时候见加载数据的时候就需要大量的js来向后台请求数据回填到静态页面上,这样的话就会比较麻烦。所用springboot才为我们提供了模板引擎。
常见的模板引擎有JSP、Velocity、Freemarker、Thymeleaf

SpringBoot为我们推荐Thymeleaf模板引擎;因为他语法更简单,功能更强大。
3.Thymeleaf模板引擎的使用:
1.引入Thymeleaf模板引擎的依赖包【启动器】
<dependency>
   <groupId>org.springframework.boot</groupId>
   <artifactId>spring-boot-starter-thymeleaf</artifactId>
</dependency>
2.使用Thymeleaf
先看看自动配置
public class ThymeleafProperties {
    private static final Charset DEFAULT_ENCODING;
    public static final String DEFAULT_PREFIX = "classpath:/templates/";
    public static final String DEFAULT_SUFFIX = ".html";
    private boolean checkTemplate = true;
    private boolean checkTemplateLocation = true;
    private String prefix = "classpath:/templates/"; //模板的位置
    private String suffix = ".html"; //静态页面的类型
    private String mode = "HTML";
只要我们把HTML页面放在classpath:/templates/,thymeleaf就能自动渲染;
3.创建控制器
package com.wangxing.springboot.controller;
import org.springframework.stereotype.Controller;
import org.springframework.ui.Model;
import org.springframework.web.bind.annotation.RequestMapping;
import java.util.Map;
@Controller
public class HelloController {
    @RequestMapping(value = "/testHello1")
    public  String  testHello1(Map<String,Object> map){
        map.put("id",1001);
        map.put("name","张三");
        map.put("age",23);
        map.put("address","西安");
        return "test1";
    }

    @RequestMapping(value = "/testHello2")
    public  String  testHello2(Model model){
        model.addAttribute("id",1001);
        model.addAttribute("name","张三");
        model.addAttribute("age",23);
        model.addAttribute("address","西安");
        return "test1";
    }
}
注意:传递给页面是数据值是通过请求处理方法中的参数设置的,
请求处理方法中的参数的类型:
1.Map<String,Object> map
2.Model model
4.创建模板页面,模板页面默认是”.html”
<!DOCTYPE html>
<html lang="en"  xmlns:th="http://www.thymeleaf.org">
<head>
    <meta charset="UTF-8">
    <title>Title</title>
</head>
<body>
    <ul>
        <li><h1 th:text="${id}"></h1></li>
        <li><h1 th:text="${name}"></h1></li>
        <li><h1 th:text="${age}"></h1></li>
        <li><h1 th:text="${address}"></h1></li>
    </ul>
</body>
</html>
xmlns:th=“http://www.thymeleaf.org”–给html页面引入thymeleaf命名空间,引入thymeleaf命名空间我们就可以在html页面中使用thymeleaf语法,显示动态数据。
thymeleaf语法

th:任意html属性;来替换原生html的属性的值
<span id="span1"></span>
<span th:id="${id}"></span>
例如:
<h1 th:text="${address}"></h1>
th:text—控制h1元素的text属性值,text属性值就是html元素的文本内容
thymeleaf表达式
#{...}:国际化消息
${…}:变量取值
*{…}:当前对象/变量取值
@{…}:url表达式
~{…}:片段引用
判断/遍历:
th:if ---th:if=”${id}==1001”
th:unless
th:each --th:each=”user:${users}”  --- th:text=”${user}”
th:switch、th:case
测试th:if / th:each
@RequestMapping(value = "/testHello3")
public  String  testHello3(Model model){
    List<UserBean> userBeanList=new ArrayList<UserBean>();
    for(int i=1;i<=10;i++){
        UserBean  userBean=new UserBean();
        userBean.setUserid(1000+i);
        userBean.setUsername("zhangsan_"+i);
        userBean.setUserage(20+i);
        userBean.setUseraddress("address_"+i);
        userBeanList.add(userBean);
    }
    model.addAttribute("userlist",userBeanList);
    return "test2";
}
<!DOCTYPE html>
<html lang="en"  xmlns:th="http://www.thymeleaf.org">
<head>
    <meta charset="UTF-8">
    <title>Title</title>
</head>
<body>
   <table border="1px">
       <tr align="center">
           <td colspan="4"><h1>用户信息表</h1></td>
       </tr>
       <tr th:if="${userlist.size()} != 0" th:each="user:${userlist}">
           <td th:text="${user.userid}"></td>
           <td th:text="${user.username}"></td>
           <td th:text="${user.userage}"></td>
           <td th:text="${user.useraddress}"></td>
       </tr>
       <tr th:if="${userlist.size()} == 0">
           <td colspan="4">没有用户记录!!!</td>
       </tr>
   </table>
</body>
</html>


 718
718


 被折叠的 条评论
为什么被折叠?
被折叠的 条评论
为什么被折叠?
 到【灌水乐园】发言


