


本文讲述的最佳实践是从日常业务中总结而出的,不一定适合所有项目。毕竟每个公司或个人的项目不同,最佳实践也会有所不同。但是可以从这篇文章借鉴吸收一点有用的东西,有问题的地方也欢迎大家积极吐槽指正。
为了避免出现 我这明明可以,你那怎么不行 的尴尬情况,这里列一下文章涉及到依赖的版本号。
├── webpack           5.39.1
├── webpack-cli       4.7.2
├── node              12.8.0
├── npm               6.10.2
复制代码
正文
初始化项目
1. mkdir test-app && cd test-app
2. npm init
复制代码
首先添加一个入口文件 /src/index.js 和 webpack 配置文件 webpack.config.js,现在我们的目录结构如下
test-app
    ├── src
    |    └── index.js
    ├── package.json
    ├── webpack.config.js
复制代码
安装 webpack
npm install webpack webpack-cli -D
复制代码
开始搞事情
在 src/index.js 中随便写点东西
class Test {
  constructor() {
    document.writeTest('hello world')
  }
}

new Test()
复制代码
先来打个包看看啥效果, 执行命令 npx webpack

等待一段时间后,看到目录有了变化, 新增了一个 dist 目录,月經剛完容易受孕嗎该目录下有一个 main.js 文件
test-app
  + ├── dist
  + |    └── main.js
    ├── src
    |    └── index.js
    ├── package.json
    ├── webpack.config.js
复制代码
让我们来看看 main.js 里有点啥
new class{constructor(){document.writeTest("hello world")}};
复制代码这玩意都不用试,稻壳阅读器肯定不得行啊,得将 js 代码转成 es5 才行。首先安装下babel-loader及几个相关的依赖
配置 babel
- babel-loader
- @babel/core
- @babel/preset-env
- @babel/plugin-transform-runtime
- @babel/plugin-proposal-decorators
- @babel/plugin-proposal-class-properties
- @babel/plugin-proposal-private-methods
- @babel/runtime
- @babel/runtime-corejs3
npm install babel-loader @babel/core @babel/preset-env @babel/plugin-transform-runtime  @babel/plugin-proposal-decorators  @babel/plugin-proposal-class-properties @babel/plugin-proposal-private-methods -D
npm install @babel/runtime @babel/runtime-corejs3 -s
复制代码
修改 webpack.config.js 文件, 添加 babel-loader 配置
const path = require('path');

module.exports = {
  entry: './src/index.js',
  output: {
    path: path.resolve(__dirname, 'dist'),
    filename: 'bundle.[contenthash:8].js',
  },
  module: {
    rules: [
      {
        test: /\.(jsx|js)$/,
        use: 'babel-loader',
        exclude: /node_modules/,
      },
    ]
  }
}
复制代码
根目录下添加相应的 .babelrc 配置文件
{
    "presets": ["@babel/preset-env"],
    "plugins": [
        ["@babel/plugin-transform-runtime", {"corejs": 3}],
        ["@babel/plugin-proposal-decorators", { "legacy": true }],
        ["@babel/plugin-proposal-class-properties", { "loose": true }],
        ["@babel/plugin-proposal-private-methods", { "loose": true }]
    ]
}
复制代码
再次执行命令 npx webpack 来打个包。完成后查看目录结构
test-app
    ├── dist
  + |    ├── bundle.b8ba1739.js
    |    ├── main.js
    ├── src
    |    └── index.js
  + ├── .babelrc
    ├── package.json
    ├── webpack.config.js
复制代码
查看构建后的 bundle.b8ba1739.js 文件
(()=>{"use strict";new function n(){!function(n,t){if(!(n instanceof t))throw new TypeError("Cannot call a class as a function")}(this,n),document.writeTest("hello world")}})();
复制代码
构建产物看着没什么问题了,接下来看下在浏览器中的实际效果。要看效果,肯定离不开 html 文件。
浏览器中观看效果
作为一个伸手党直接从社区嫖来一个插件 html-webpack-plugin,这个插件的作用是将打包产物引入到我们提前准备好的模板 .html 文件中,我们访问这个文件就能直观的看到效果了
先来安装下插件
npm install html-webpack-plugin -D
复制代码
接着创建一个 public 目录, 用来存放静态资源。新增一个 index.html 模板,放在 public 目录下
test-app
    ├── dist
    |    ├── bundle.b8ba1739.js
    |    ├── main.js
    ├── src
    |    └── index.js
  + ├── public
  + |    └── index.html
    ├── .babelrc
    ├── package.json
    ├── webpack.config.js
复制代码
在 webpack.config.js 中配置 html-webpack-plugin
// 省略 ...
const HtmlWebpackPlugin = require('html-webpack-plugin');

module.exports = {
  // 省略 ...
  plugins: [
    new HtmlWebpackPlugin({
      template: path.resolve(__dirname, './public/index.html'),
      inject: 'body',
      scriptLoading: 'blocking',
    }),
  ]
}
复制代码
再次执行命令 npx webpack 来打个包。打完包发现 dist 目录下多了一个 index.html 文件。浏览器中打开 index.html 看看对不对
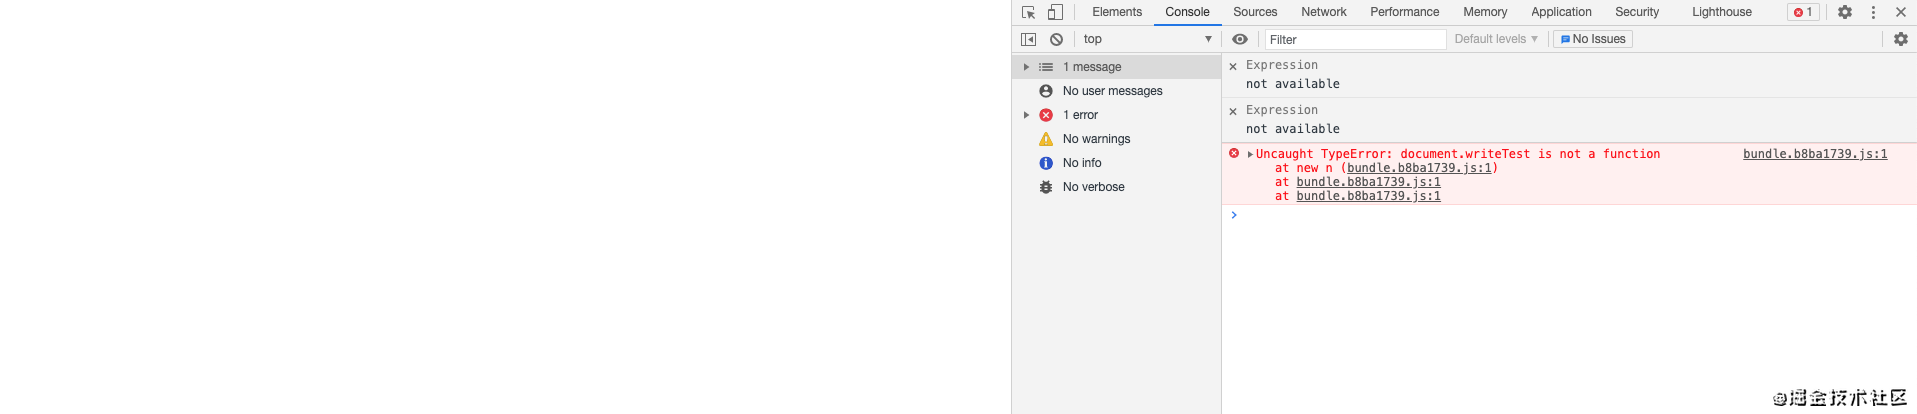
作为一个 api 工程师,连 api 都能记错。

修改下 src/index.js 代码
class Test {
  constructor() {
    document.write('hello world')
  }
}

new Test()
复制代码
再次执行命令 npx webpack 来打个包。老步骤,先检查下打包产物对不对
test-app
    ├── dist
    |    ├── bundle.b8ba1739.js
 +  |    ├── bundle.dc044571.js
    |    ├── index.html
    |    ├── main.js
    ├── src
    |    └── index.js
    ├── public
    |    └── index.html
    ├── .babelrc
    ├── package.json
    ├── webpack.config.js
复制代码
看样子应该没错,代码修改了,打包后多了个
 最低0.47元/天 解锁文章


 3044
3044


 被折叠的 条评论
为什么被折叠?
被折叠的 条评论
为什么被折叠?
 到【灌水乐园】发言


