


前言:通常情况下,一个项目会有开发环境、内网环境、测试环境、生产环境等多个环境,通过请求不同的服务器来获取数据,如果可不修改代码,通过执行不同命令就能着急部署不同环境,我们的效率会得到很大提升。
实现:
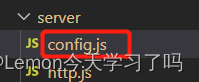
一、配置多个服务器端请求地址
- 在serve文件夹(随便取名)下新建一个config.js文件;
- 在config.js中不同服务的地址都配置出来;
const getServerApi = () => {
    let info = {};
    // 当node内置的环境变量 process.env.NODE_ENV存在时进入
    switch (process.env.NODE_ENV) {
        case 'test1': //开发环境
            info.baseUrl = '192.168.xx.xx:1001/test1';  //基础地址
            info.portalUrl = '139.xxx.xx.xx:8091';      //登录地址
            break;
        case 'test2': //内网环境
            info.baseUrl = '192.168.xx.xx:1002/test2';
            info.portalUrl = '139.xxx.xx.xx:8091';
            break;
        case 'test3': //测试环境
            info.baseUrl = '192.168.xx.xx:1003/test3';
            info.portalUrl = '139.xxx.xx.xx:8091';
            break;
        case 'production': //生产环境
            info.baseUrl = '218.xx.xx.xxx:8090';
            info.portalUrl = '218.xx.xx.xxx:8088';
            break;
        default: //默认
            info.baseUrl = '192.168.xx.xx:1001/test1';
            info.portalUrl = '139.xxx.xx.xx:8091';
            break;
    }
    return info;
};

//默认导出基础地址和登录地址
export default {
    baseUrl: `//${getServerApi().baseUrl}`,
    portal: `//${getServerApi().portal}`,
};- 在封装了axios的http.js文件中使用相关地址;
import axios from 'axios';
import config from './config'   //引入配置的服务地址
const BASE_URI = config.baseUrl;    //使用基础路径
二、scp2自动化部署项目至服务器实现
- 安装scp2
npm install scp2 --save-dev- 安装cross-env:运行跨平台设置和使用环境变量(Node中的环境变量)的脚本;
npm i --save-dev cross-env cross-env
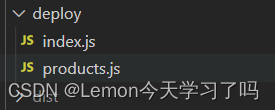
- 项目根目录下创建deploy文件夹,在deploy文件夹下创建index.js和products.js文件;
- 使用scp2库,创建自动化部署脚本。index.js文件内容如下:
//  deploy/index.js里面
const scpClient = require('scp2');
const ora = require('ora'); //一个优雅的终端微调器
const chalk = require('chalk'); //颜色插件
const server = require('./products');
const spinner = ora('正在发布到' + server.name + '服务器...');

var Client = require('ssh2').Client; //连接远程服务器
var conn = new Client();
conn.on('ready', function() {
    // rm 删除dist文件,\n 是换行 换行执行 重启nginx命令 我这里是用docker重启nginx
    conn.exec('cd ' + server.path + '\nrm -rf css img js fonts index.html', function(err, stream) {
        if (err) throw err;
        stream
            .on('close', function(code, signal) {
                // 在执行shell命令后,把开始上传部署项目代码放到这里面
                spinner.start();
                scpClient.scp(
                    './dist',
                    {
                        host: server.host,
                        port: server.port,
                        username: server.username,
                        password: server.password,
                        path: server.path,
                    },
                    function(err) {
                        spinner.stop();
                        if (err) {
                            console.log(chalk.red('发布失败.\n'));
                            throw err;
                        } else {
                            console.log(chalk.green('Success! 成功发布到' + server.name + '服务器! \n'));
                        }
                    }
                );
                conn.end();
            })
            .on('data', function(data) {
                console.log('STDOUT: ' + data);
            })
            .stderr.on('data', function(data) {
                console.log('STDERR: ' + data);
            });
    });
})
    .on('error', function(err) {
        console.log('xxx' + err);
    })
    .connect({
        host: server.host,
        port: server.port,
        username: server.username,
        password: server.password,
});- products.js文件内容如下:
/*
 *定义多个服务器账号 及 根据 SERVER_ID 导出当前环境服务器账号
 */
const SERVER_LIST = [{
        id: 'text1',
        name: '开发环境',
        host: '139.xx.xx.xxx',  // 服务器ip
        port: 22,   // 登录服务器端口,一般为22 或 21
        username: 'root',  // 登录服务器的账号
        password: 'xxxxxx',  // 登录服务器的账号
        path: '/usr/local/nginx/html/xxx'   // 项目上传到服务器的路径,要服务器上的绝对路径
    },
    {
        id: 'test2',
        name: '内网环境',
        host: '139.xxx.xxx.xxx',
        port: 22,
        username: 'root',
        password: 'xxxxxx',
        path: '/etc/nginx/html/test2/xxx'
    },
    {
        id: 'test3',
        name: '测试环境',
        host: '139.xxx.xxx.xxx',
        port: 22,
        username: 'root',
        password: 'xxxxxx',
        path: '/etc/nginx/html/test3/xxx'
    },
    {
        id: 'production',
        name: '生产环境',
        host: '218.xxx.xxx.xxx',
        port: 22,
        username: 'root',
        password: 'xxxxxx',
        path: '/etc/nginx/dist'
    },
];
/**
 *读取env环境变量
 */
const getServer = () => {
    return SERVER_LIST.find(item => {
        return item.id == process.env.NODE_ENV
    })
}

module.exports = getServer();- 配置 script 脚本,执行npm run deploy:test1则表示运行生产环境,其他环境根据对应的选择执行不同命令。
 "scripts": {
        "serve": "vue-cli-service serve",
        "build": "vue-cli-service build",
        "lint": "vue-cli-service lint",
        "deploy:test1": "cross-env NODE_ENV=test1 cnpm run build && cross-env NODE_ENV=test1 node ./deploy",
        "deploy:test2": "cross-env NODE_ENV=test2 cnpm run build && cross-env NODE_ENV=test2 node ./deploy",
        "deploy:test3": "cross-env NODE_ENV=test3 cnpm run build && cross-env NODE_ENV=test3 node ./deploy",
        "build:production": "cross-env NODE_ENV=production vue-cli-service build"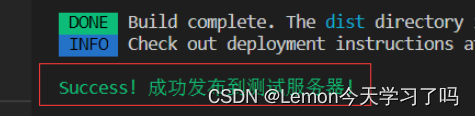
},- 测试是否生效:运行命令 npm run deploy:test2 部署到测试环境,如下提示则表示部署成功。


 564
564


 被折叠的 条评论
为什么被折叠?
被折叠的 条评论
为什么被折叠?
 到【灌水乐园】发言


