


1. 大纲
1. springboot整合redis。
2. redis使用场景
3. redis的常见面试题。
2. springboot整合redis。
Jedis集成了Redis的相关命令操作,它是Java语言操作Redis数据库的桥梁。Jedis客户端封装了Redis数据库的大量命令,因此具有许多Redis操作API。可以阅读《Jedis API 文档》。
Jedis 是 Redis 官方推荐的面向 Java 的操作 Redis 的客户端,而 RedisTemplate 是
SpringDataRedis 中对 JedisApi 的高度封装。
springboot整合redis时提供了两个模板工具类,StringRedisTemplate和RedisTemplate.
StringRedisTemplate 继承与 RedisTemplate,两者的数据是不相通的。StringRedisTemplate 只能管理 StringRedisTemplate 中的数据。
RedisTemplate 只能管理RedisTemplate 中的数据。
StringRedisTemplate 默认采用的是 string 的序列化策略,
RedisTemplate 默认采用的是 JDK 的序列化策略。必须指定序列化方式
StringRedisTemplate
(1) 引入相关的依赖
        <dependency>
            <groupId>org.springframework.boot</groupId>
            <artifactId>spring-boot-starter-data-redis</artifactId>
        </dependency>
(2)注入StringRedisTemplate该类对象
 @Autowired
 private StringRedisTemplate redisTemplate;
(3)使用StringRedisTemplate
该类把对每种数据类型的操作,单独封了相应的内部类。
package com.ykq.qy151redisspringboot;

import org.junit.jupiter.api.Test;
import org.springframework.beans.factory.annotation.Autowired;
import org.springframework.boot.test.context.SpringBootTest;
import org.springframework.data.redis.core.HashOperations;
import org.springframework.data.redis.core.StringRedisTemplate;
import org.springframework.data.redis.core.ValueOperations;

import java.util.HashMap;
import java.util.List;
import java.util.Map;
import java.util.Set;
import java.util.concurrent.TimeUnit;

@SpringBootTest
class Qy151RedisSpringbootApplicationTests {

    //里面所有的key还是value field它的类型必须都是String类型。
    //因为key和value获取field他们使用的都是String的序列化方式
    @Autowired
    private StringRedisTemplate redisTemplate;


    @Test
    public void test02(){
        //对hash类型的操作。
        HashOperations<String, Object, Object> forHash = redisTemplate.opsForHash();
        forHash.put("k1","name","张三");
        forHash.put("k1","age","15");
        Map<String,String> map=new HashMap<>();
        map.put("name","李四");
        map.put("age","25");
        forHash.putAll("k2",map);

        Object o = forHash.get("k1", "name");
        System.out.println(o);

        Set<Object> k1 = forHash.keys("k1");
        System.out.println(k1);
        List<Object> k11 = forHash.values("k1");
        System.out.println(k11);


        //获取k1对于的所有的field和value
        Map<Object, Object> k12 = forHash.entries("k1");
        System.out.println(k12);

    }

    @Test
    void contextLoads() {
        //删除指定的key
//        redisTemplate.delete();
        //查看所有的key
//        redisTemplate.keys()
        //是否存在指定的key
//         redisTemplate.hasKey()

        //对字符串数据类型的操作ValueOperations
        ValueOperations<String, String> forValue = redisTemplate.opsForValue();
        //存储字符串类型--key  value long unit  setex();
        forValue.set("k1","张三",30, TimeUnit.SECONDS);
        //等价于setnx  存入成功返回true,失败返回false
        Boolean absent = forValue.setIfAbsent("k11", "李四", 30, TimeUnit.SECONDS);
        System.out.println(absent);
        Integer append = forValue.append("k11", "真帅");
        String key = forValue.get("k11");


    }

}
RedisTemplate
package com.ykq.qy151redisspringboot;

import org.junit.jupiter.api.Test;
import org.springframework.beans.factory.annotation.Autowired;
import org.springframework.boot.test.context.SpringBootTest;
import org.springframework.data.redis.core.HashOperations;
import org.springframework.data.redis.core.RedisTemplate;
import org.springframework.data.redis.core.StringRedisTemplate;
import org.springframework.data.redis.core.ValueOperations;
import org.springframework.data.redis.serializer.GenericJackson2JsonRedisSerializer;
import org.springframework.data.redis.serializer.Jackson2JsonRedisSerializer;
import org.springframework.data.redis.serializer.StringRedisSerializer;

import java.util.HashMap;
import java.util.List;
import java.util.Map;
import java.util.Set;
import java.util.concurrent.TimeUnit;

@SpringBootTest
class Qy151RedisSpringbootApplicationTests02 {

     //当你存储的value类型为对象类型使用redisTemplate
    //存储的value类型为字符串。StringRedisTemplate  验证码
     @Autowired
     private RedisTemplate redisTemplate;

     @Test
     public void test01(){
         //必须认为指定序列化方式
         redisTemplate.setKeySerializer(new StringRedisSerializer());
         redisTemplate.setValueSerializer(new Jackson2JsonRedisSerializer<Object>(Object.class));

         //对String类型操作类
         ValueOperations forValue = redisTemplate.opsForValue();
         //redis中key和value都变成乱码了。
         //key和value都没有指定序列化方式,默认采用jdk的序列化方式。
         forValue.set("k1","张三");


         //value默认采用jdk,类必须实现序列化接口
         forValue.set("k2",new User(1,"刘德华",22));
     }

}
上面的RedisTemplate需要每次都指定key value以及field的序列化方式,能不能搞一个配置类,已经为RedisTemplate指定好序列化。以后再用就无需指定。
package com.ykq.qy151redisspringboot.config;

import com.fasterxml.jackson.annotation.JsonAutoDetect;
import com.fasterxml.jackson.annotation.PropertyAccessor;
import com.fasterxml.jackson.databind.ObjectMapper;
import org.springframework.context.annotation.Bean;
import org.springframework.context.annotation.Configuration;
import org.springframework.data.redis.connection.RedisConnectionFactory;
import org.springframework.data.redis.core.RedisTemplate;
import org.springframework.data.redis.serializer.Jackson2JsonRedisSerializer;
import org.springframework.data.redis.serializer.RedisSerializer;
import org.springframework.data.redis.serializer.StringRedisSerializer;


@Configuration
public class RedisConfig {

    @Bean
    public RedisTemplate<String, Object> redisTemplate(RedisConnectionFactory factory) {
        RedisTemplate<String, Object> template = new RedisTemplate<>();
        RedisSerializer<String> redisSerializer = new StringRedisSerializer();
        Jackson2JsonRedisSerializer jackson2JsonRedisSerializer = new Jackson2JsonRedisSerializer(Object.class);
        ObjectMapper om = new ObjectMapper();
        om.setVisibility(PropertyAccessor.ALL, JsonAutoDetect.Visibility.ANY);
        om.enableDefaultTyping(ObjectMapper.DefaultTyping.NON_FINAL);
        jackson2JsonRedisSerializer.setObjectMapper(om);
        template.setConnectionFactory(factory);
        //key序列化方式
        template.setKeySerializer(redisSerializer);
        //value序列化
        template.setValueSerializer(jackson2JsonRedisSerializer);
        //value hashmap序列化  filed value
        template.setHashValueSerializer(jackson2JsonRedisSerializer);
        template.setHashKeySerializer(redisSerializer);
        return template;
    }
}
3. redis的使用场景
3.1 作为缓存
(1)数据存储在内存中,数据查询速度快。可以分摊数据库压力。
![[外链图片转存失败,源站可能有防盗链机制,建议将图片保存下来直接上传(img-Rn8Zrthi-1659491913258)(assets/1659426481991.png)]](https://img-blog.csdnimg.cn/3ec71de5ec8546259419311edd0ca007.png)
(2)什么样的数据适合放入缓存
查询频率比较高,修改频率比较低。
安全系数低的数据
(3)使用redis作为缓存
package com.ykq.qy151redisspringboot.service;

import com.ykq.qy151redisspringboot.dao.DeptMapper;
import com.ykq.qy151redisspringboot.entity.Dept;
import org.springframework.beans.factory.annotation.Autowired;
import org.springframework.data.redis.core.RedisTemplate;
import org.springframework.data.redis.core.ValueOperations;
import org.springframework.stereotype.Service;
import org.springframework.transaction.annotation.Transactional;

import java.util.concurrent.TimeUnit;

@Service
public class DeptService {

    @Autowired
    private DeptMapper deptMapper;

    @Autowired
    private RedisTemplate redisTemplate;

    //业务代码
    public Dept findById(Integer id){
        ValueOperations forValue = redisTemplate.opsForValue();
        //查询缓存
        Object o = forValue.get("dept::" + id);
        //缓存命中
        if(o!=null){
            return (Dept) o;
        }
        Dept dept = deptMapper.selectById(id);
        if(dept!=null){
            //存入缓存中
            forValue.set("dept::"+id,dept,2, TimeUnit.HOURS);
        }
        return dept;
    }

    public int deleteById(Integer id){
        redisTemplate.delete("dept::"+id);
        int row = deptMapper.deleteById(id);
        return row;
    }

    public Dept insert(Dept dept){
        int insert = deptMapper.insert(dept);
        return dept;
    }

    public Dept update(Dept dept){
        ValueOperations forValue = redisTemplate.opsForValue();
        forValue.set("dept::"+dept.getId(),dept,2, TimeUnit.HOURS);
        int insert = deptMapper.updateById(dept);
        return dept;
    }
}
查看的缓存: 前部分代码相同@before通知,后部分代码也相同后置通知。 我们可以AOP完成缓存代码和业务代码分离。
spring框架它应该也能想到。–使用注解即可完成。解析该注解。
(1)把缓存的配置类加入
    @Bean
    public CacheManager cacheManager(RedisConnectionFactory factory) {
        RedisSerializer<String> redisSerializer = new StringRedisSerializer();
        Jackson2JsonRedisSerializer jackson2JsonRedisSerializer = new Jackson2JsonRedisSerializer(Object.class);
        //解决查询缓存转换异常的问题
        ObjectMapper om = new ObjectMapper();
        om.setVisibility(PropertyAccessor.ALL, JsonAutoDetect.Visibility.ANY);
        om.enableDefaultTyping(ObjectMapper.DefaultTyping.NON_FINAL);
        jackson2JsonRedisSerializer.setObjectMapper(om);
        // 配置序列化(解决乱码的问题),过期时间600秒
        RedisCacheConfiguration config = RedisCacheConfiguration.defaultCacheConfig()
                .entryTtl(Duration.ofSeconds(600)) //缓存过期10分钟 ---- 业务需求。
                .serializeKeysWith(RedisSerializationContext.SerializationPair.fromSerializer(redisSerializer))//设置key的序列化方式
                .serializeValuesWith(RedisSerializationContext.SerializationPair.fromSerializer(jackson2JsonRedisSerializer)) //设置value的序列化
                .disableCachingNullValues();
        RedisCacheManager cacheManager = RedisCacheManager.builder(factory)
                .cacheDefaults(config)
                .build();
        return cacheManager;
    }
(2)使用开启缓存注解
(3)使用注解
    //使用查询注解:cacheNames表示缓存的名称 key:唯一标志---dept::key
    //先从缓存中查看key为(cacheNames::key)是否存在,如果存在则不会执行方法体,如果不存在则执行方法体并把方法的返回值存入缓存中
    @Cacheable(cacheNames = {"dept"},key="#id")
    public Dept findById(Integer id){
        Dept dept = deptMapper.selectById(id);
        return dept;
    } //先删除缓存在执行方法体。
    @CacheEvict(cacheNames = {"dept"},key = "#id")
    public int deleteById(Integer id){
        int row = deptMapper.deleteById(id);
        return row;
    }

    //这个注释可以确保方法被执行,同时方法的返回值也被记录到缓存中,实现缓存与数据库的同步更新。
    @CachePut(cacheNames = "dept",key="#dept.id")
    public Dept update(Dept dept){
        int insert = deptMapper.updateById(dept);
        return dept;
    }
3.2 分布式锁
使用压测工具测试高并发下带来线程安全问题
![[外链图片转存失败,源站可能有防盗链机制,建议将图片保存下来直接上传(img-FVld06wF-1659491913259)(assets/1659431394965.png)]](https://img-blog.csdnimg.cn/defd1a7fb7e14ce6bd354b28d2e295ec.png)
我们看到同一个库存被使用了n次。以及数据库中库存为负数。 线程安全问题导致。
1. 解决方案: 使用 synchronized 或者lock锁
package com.ykq.distrinctlock.service.impl;

import com.ykq.distrinctlock.dao.ProductStockDao;
import com.ykq.distrinctlock.service.ProductStockService;
import org.springframework.beans.factory.annotation.Autowired;
import org.springframework.stereotype.Service;

@Service
public class ProductStockServiceImpl2 implements ProductStockService {
    @Autowired
    private ProductStockDao productStockDao;

    @Override
    public  String decreaseStock(Integer productId) {
              synchronized (this) {
                  //查看该商品的库存数量
                  Integer stock = productStockDao.findStockByProductId(productId);
                  if (stock > 0) {
                      //修改库存每次-1
                      productStockDao.updateStockByProductId(productId);
                      System.out.println("扣减成功!剩余库存数:" + (stock - 1));
                      return "success";
                  } else {
                      System.out.println("扣减失败!库存不足!");
                      return "fail";
                  }
              }

    }
}
使用synchronized 或者lock锁只适用与单机场景, 如果我们搭建了项目集群,那么该锁无效。
![[外链图片转存失败,源站可能有防盗链机制,建议将图片保存下来直接上传(img-2Fc7GWK8-1659491913260)(assets/1659431926323.png)]](https://img-blog.csdnimg.cn/c75dc841324f4b00b95f605f6968d7f2.png)
使用idea开集群项目
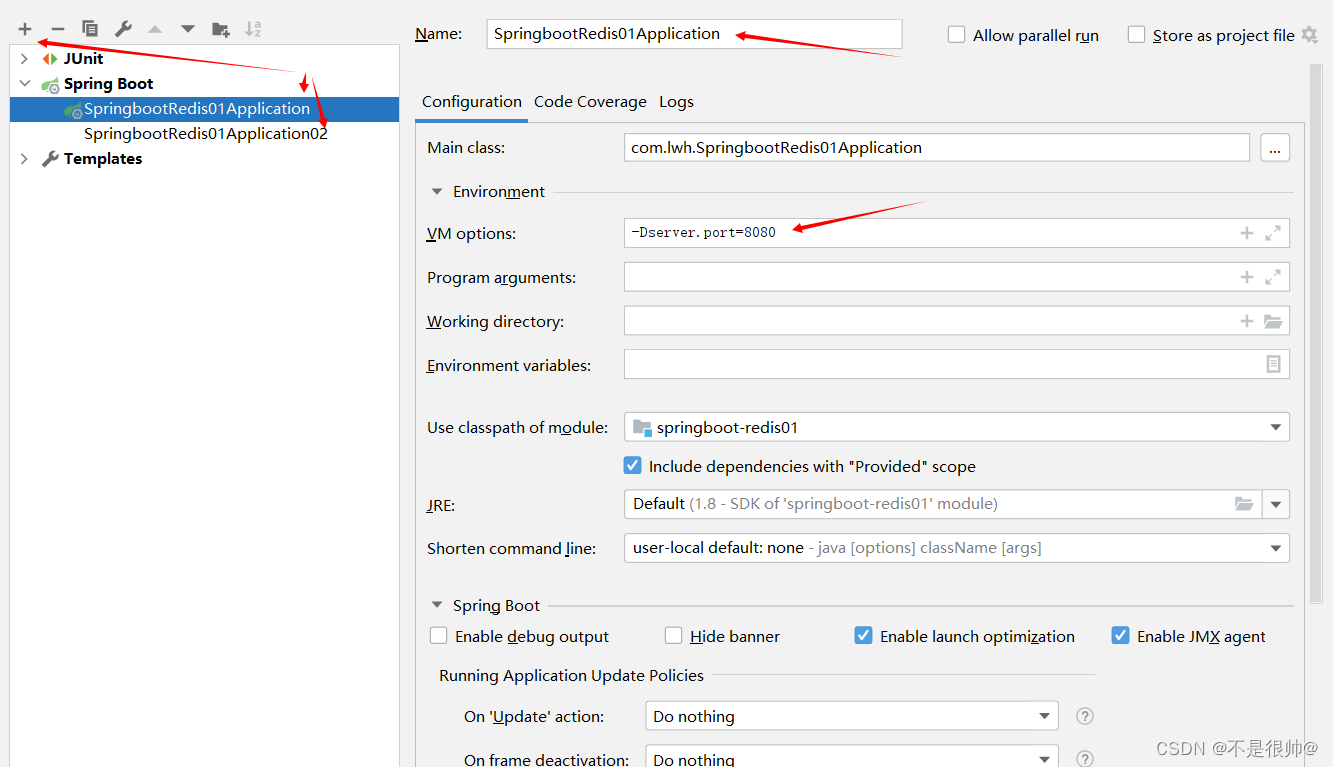
![[外链图片转存失败,源站可能有防盗链机制,建议将图片保存下来直接上传(img-LzMKC5ZL-1659491913260)(assets/1659432104530.png)]](https://img-blog.csdnimg.cn/1cb0162b02cf4ecc995c39620f6cccfd.png)
发现又出现: 重复数字以及库存为负数。
解决办法是用redis的分布式锁
![[外链图片转存失败,源站可能有防盗链机制,建议将图片保存下来直接上传(img-1ZNZqdNL-1659491913260)(assets/1659433857619.png)]](https://img-blog.csdnimg.cn/76da9d44bf08406cb74156ab846538ad.png)
3.2.1 分布式锁测试(springboot-redis01)
分布式锁的特点
首先,为了确保分布式锁可用,我们至少要确保锁的实现同时满足以下四个条件:1、互斥性:任意时刻,只能有一个客户端获取锁,不能同时有两个客户端获取到锁。
2、安全性:锁只能被持有该锁的客户端删除,不能由其它客户端删除。
3、死锁:获取锁的客户端因为某些原因(如down机等)而未能释放锁,其它客户端再也无法获取到该锁。
4、容错:当部分节点(redis节点等)down机时,客户端仍然能够获取锁和释放锁。
1、引入mybatisplus的依赖(简化开发)
        <dependency>
            <groupId>com.baomidou</groupId>
            <artifactId>mybatis-plus-boot-starter</artifactId>
            <version>3.4.2</version>
        </dependency>
<?xml version="1.0" encoding="UTF-8"?>
<!DOCTYPE mapper PUBLIC "-//mybatis.org//DTD Mapper 3.0//EN" "http://mybatis.org/dtd/mybatis-3-mapper.dtd">
<mapper namespace="com.lwh.mapper.StockMapper">
    <update id="updateStockByProductId">
        update stock set count =count -1  where id=#{productId}
    </update>
</mapper>
对应的mapper
@Mapper
public interface StockMapper extends BaseMapper<Stock> {
   int updateStockByProductId(int productId);
}
业务代码及测试
package com.lwh.controller;

import com.lwh.entity.Stock;
import com.lwh.mapper.StockMapper;
import org.springframework.beans.factory.annotation.Autowired;
import org.springframework.data.redis.core.RedisTemplate;
import org.springframework.data.redis.core.StringRedisTemplate;
import org.springframework.data.redis.core.ValueOperations;
import org.springframework.web.bind.annotation.GetMapping;
import org.springframework.web.bind.annotation.PathVariable;
import org.springframework.web.bind.annotation.RestController;

@RestController
public class StockController {
    @Autowired
    private StockMapper mapper;
    @Autowired
    private StringRedisTemplate redisTemplate;
    @GetMapping("demoNginx/{productId}")
    public  String decreaseStock(@PathVariable int productId) {
        ValueOperations ops = redisTemplate.opsForValue();
        Boolean flag = ops.setIfAbsent("lwh::" + productId, "```");
        if (flag) {
            try {
                //查看该商品的库存数量
                Stock stock = mapper.selectById(productId);
                int count = stock.getCount();
                if (count > 0) {
                    //修改库存每次-1
                    mapper.updateStockByProductId(productId);
                    System.out.println("扣减成功!剩余库存数:" + (count - 1));
                    return "success";
                } else {
                    System.out.println("扣减失败!库存不足!");
                    return "fail";
                }
            } finally {
                redisTemplate.delete("lwh::" + productId);
            }
        }
        return "服务器正忙,请稍后在试......";
    }
}
开启nginx服务,开启jmeter测试
数据库中的数据不会出现异常


 1015
1015


 被折叠的 条评论
为什么被折叠?
被折叠的 条评论
为什么被折叠?
 到【灌水乐园】发言


