


QEMU+GDB调试内核环境
主要步骤:
-
虚拟机(Parrales Desktop,vmware等均可)中安装Ubuntu
-
下载linux kernel,编译生成bzImage
-
配置busybox
-
安装Qemu
-
GDB调试内核
-
实现宿主机与qemu文件挂载,进行文件共享
编译内核源码
#安装编译相关依赖
apt-get install libncurses5-dev libssl-dev bison flex libelf-dev gcc make openssl libc6-dev
#这里选择清华源,采用wget获取源码,也可以直接本机下载到虚拟机
wget https://mirrors.tuna.tsinghua.edu.cn/kernel/v4.x/linux-4.14.191.tar.gz
#解压
tar -xvf linux-4.14.191.tar.gz
cd linux-4.14.191
#选择需要编译的x86_64架构的内核相应功能:
export ARCH=x86
#生成针对x86_64架构的配置文件:
make x86_64_defconfig
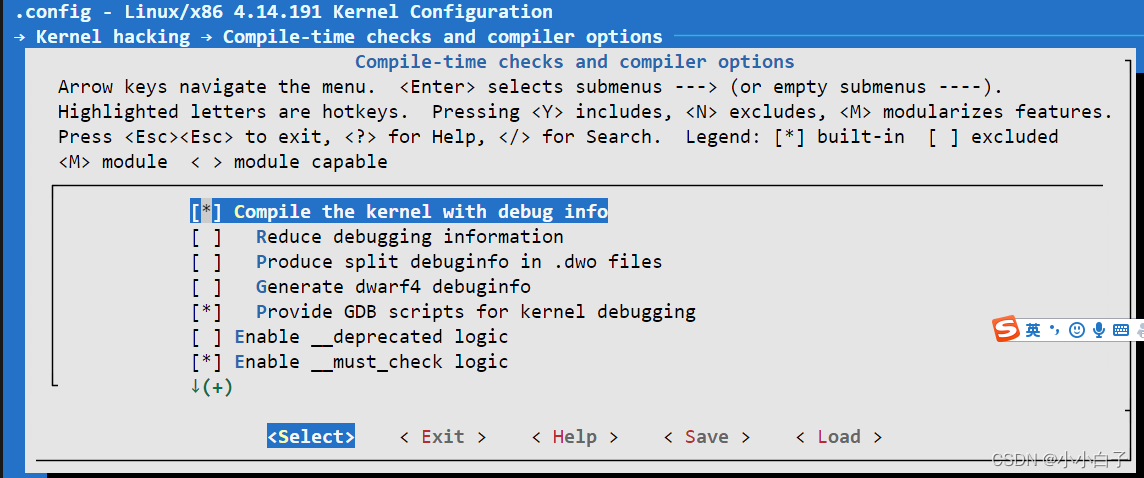
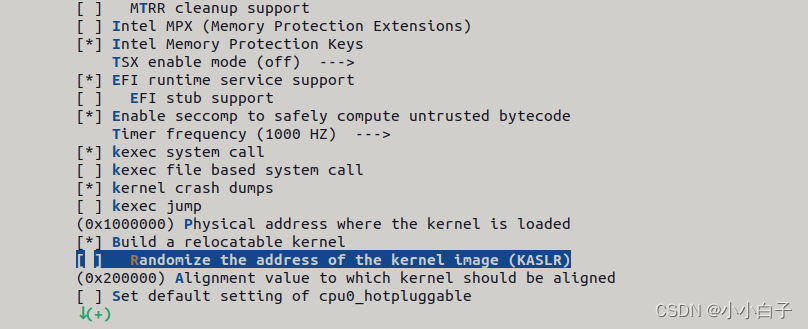
#配置编译选项,这里可以进行内核编译的各种配置,启动内核debug并且将地址随机化进行关闭,完成之后,可直接exit退出保存
make menuconfig
#开始多线程编译
make
menuconfig中配置参数
Kernel hacking
Processor type and features
y选中n取消
编译完成后,目录下会生成以下
./vmLinux(源目录下)
./arch/x86_64/boot/bzImage
至此内核编译完成
配置Busybox
启动内核还需要一个具有根文件系统的磁盘镜像文件,根文件系统中提供可供交互的shell程序以及一些常用工具命令。借助busybox工具来制作根文件系统,需要我们自行创建部分文件,生成的是最小文件系统。Busybox 的配置方法类似于 linux 内核的配置,会在本地生成一个.config 文件,它指定 busybox 在编译的过程中需要包含哪些功能。
下载地址https://busybox.net/downloads/busybox-1.33.0.tar.bz2,选择1.32.0版本,配置。
#解压
tar -jxvf busybox-1.32.0.tar.bz2
cd busybox-1.32.0
make menuconfig

把busybox配置为静态编译,制作rootfs镜像文件。
#使用dd命令创建文件,并格式化为ext4文件系统
cd busybox-1.32.0

dd if=/dev/zero of=rootfs.img bs=1M count=10

mkfs.ext4 rootfs.img
在busybox-1.32.0文件夹下面创建用于挂载该镜像文件的文件夹fs,挂载完成之后将镜像文件rootfs.img用mount命令挂在到fs文件夹下面并将busybox写入fs中,并完成对busybox的配置。
mkdir fs

sudo mount -t ext4 -o loop rootfs.img ./fs

sudo make install CONFIG_PREFIX=./fs

sudo mkdir proc dev etc home mnt

sudo cp -r ../examples/bootfloppy/etc/* etc/

sudo chmod -R 777 fs/
结果如下即成功

QEMU部分
#安装
sudo apt-get install qemu-system
#启动
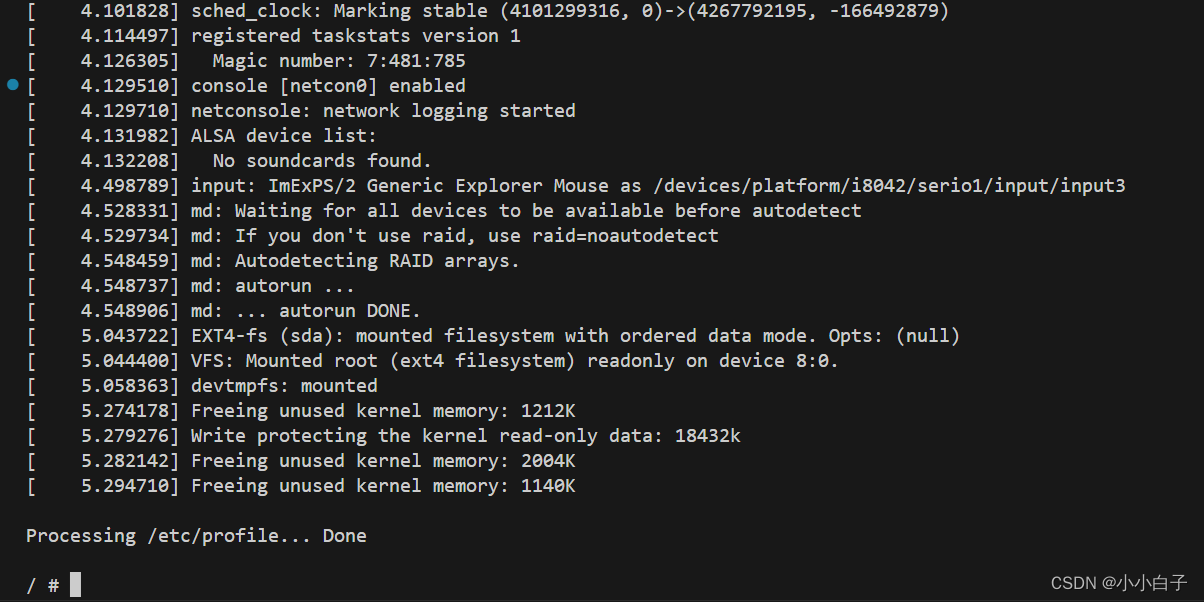
qemu-system-x86_64 -kernel ./linux-4.14.191/arch/x86_64/boot/bzImage -hda ./busybox-1.32.0/rootfs.img -append "root=/dev/sda console=ttyS0" -nographic
启动成功结果
调试部分
qemu-system-x86_64 -kernel ./linux-4.14.191/arch/x86_64/boot/bzImage -hda ./busybox-1.32.0/rootfs.img -append "root=/dev/sda console=ttyS0" -s -S -smp 1 -nographic
#启动gdb远程调试
gdb ./linux-4.14.191/vmlinux

(gdb) target remote localhost:1234

#new_sync_read函数添加断点,断点命令b
b new_sync_read

#在系统中执行ls命令,触发new_sync_read函数
结果图如下:

至此完成内核函数调试部分
共享磁盘的添加
首先,在宿主机上创建一个共享目录,然后使用QEMU的mount将其挂载到虚拟机上
mkdir mytest

cd mytest

dd if=/dev/zero of=ext4.img bs=512 count=131072

mkfs.ext4 ext4.img

#修改qemu启动命令,使用-hdb增加一个磁盘
qemu-system-x86_64 -kernel ./linux-4.14.191/arch/x86_64/boot/bzImage  -hda ./busybox-1.32.0/rootfs.img  -append "root=/dev/sda console=ttyS0" -s  -smp 1 -nographic -hdb ./mytest/ext4.img

#在原系统中挂载ext4.img
sudo mount -t ext4 -o loop ext4.img ./share
进入qemu系统后使用mount命令挂载2.c文件到mnt目录
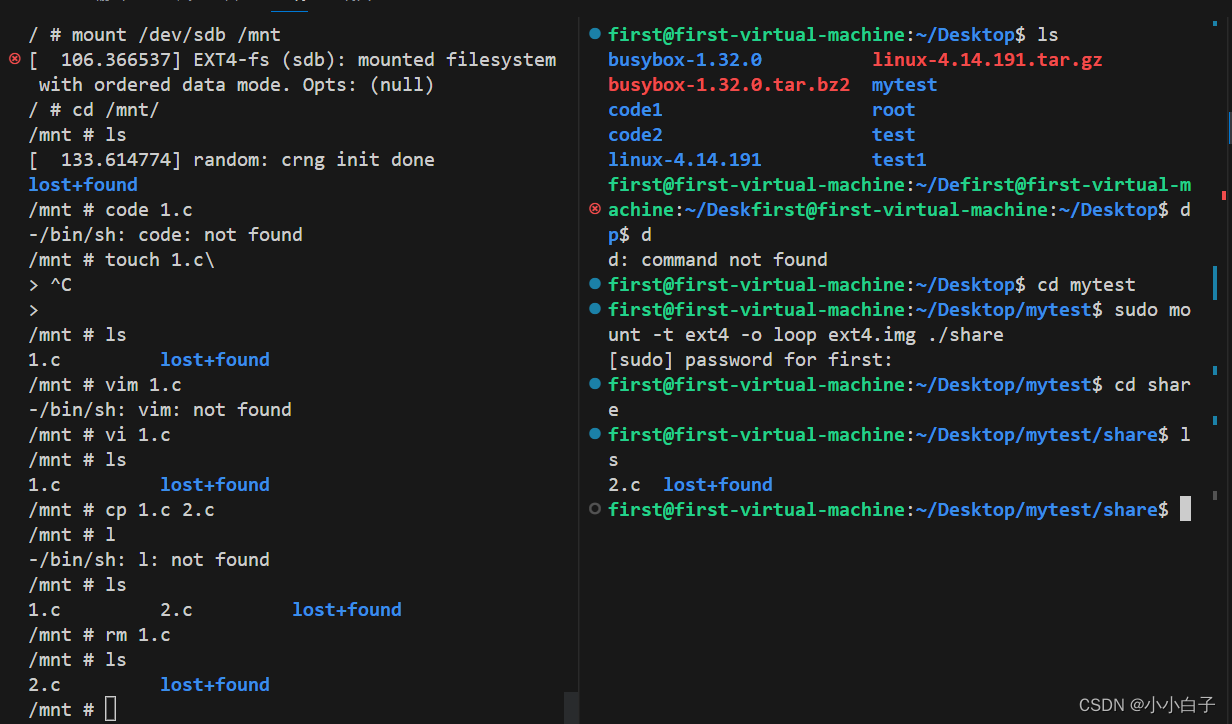
可以看到宿主机的share文件夹下面的2.c文件已经成功挂在到qemu上,完成了文件共享吗,退出qemu用Ctrl+A后按x即可退出。
记录问题
1、
首先选择linux-6.1.1.tar.gz,编译内核直接卡死
解决:换成linux-4.14.191.tar.gz成功
2、
Your display is too small to run Menuconfig!
It must be at least 19 lines by 80 columns.
make[1]: *** [menuconfig] Error 1
make: *** [menuconfig] Error 2
解决:窗口小了,弹窗没法显示,调大界面或全屏
3、
Unable to find the ncurses libraries or the
required header files.
make menuconfig’ requires the ncurses libraries.
Install ncurses (ncurses-devel) and try again.
解决:下载该文件
sudo apt-get install ncurses-dev
4、没有生成linux4.14.191/arch/x86_64/boot/bzImage文件
解决:make -j20编译结束后没生成对应文件,调大磁盘空间重新跑。


 1016
1016


 被折叠的 条评论
为什么被折叠?
被折叠的 条评论
为什么被折叠?
 到【灌水乐园】发言


