


一、下载资源

二、原理
-- 文章表
CREATE TABLE article (
 id  int PRIMARY KEY AUTO_INCREMENT, -- int文章的唯一ID
 author varchar(50) NOT NULL, -- 作者
 title  varchar(100) NOT NULL, -- 标题
 content  longtext NOT NULL, -- 文章的内容
 cid int ,-- 栏目id
 FOREIGN KEY (cid) REFERENCES scolumn(id) ON DELETE CASCADE ON UPDATE CASCADE
)

三、导入资源
这里的操作可做可不做,方便管理
在resources/static 建一个文件夹editormd目录
在 resources/templates下创建一个editor目录
-
将解压后的如下文件导入editormd
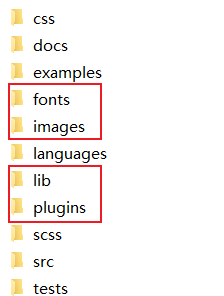
创建css、js
在解压文件中找到如下文件加入

-
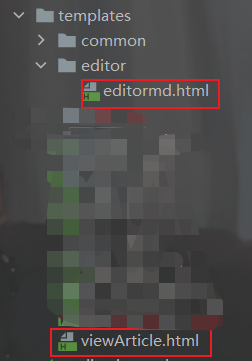
editor目录新建一个editormd.html文件(作为编辑页面)
<!DOCTYPE html>
<html lang="ch-CN" xmlns:th="http://www.thymeleaf.org">
<head>
    <meta charset="UTF-8">
    <title>Markdown</title>
    <link rel="stylesheet"  type="text/css" th:href="@{/editormd/css/style.css}"/>
    <link rel="stylesheet"  type="text/css" th:href="@{/editormd/css/editormd.css}"/>
    <link rel="shortcut icon" href="https://pandao.github.io/editor.md/favicon.ico" type="image/x-icon" />
    <script type="text/javascript" th:src="@{/editormd/js/jquery.min.js}"></script>
    <script type="text/javascript" th:src="@{/editormd/js/editormd.min.js}"></script>
    <script type="text/javascript">
        var testEditor;
        $(function() {
            testEditor = editormd("test-editormd", {
                width: "90%",
                height: 640,
                syncScrolling: "single",
                emoji: true,
                path: "../editormd/lib/",
                //图片上传
                imageUpload : true,
                imageFormats : ["jpg", "jpeg", "gif", "png", "bmp", "webp"],
                imageUploadURL : "/file/upload"
            });
        });
    </script>
</head>
<body>
<div id="layout">
    <header>
        <h1>Simple example</h1>
    </header>
    <div id="test-editormd">
        <textarea style="display:none;"></textarea>
    </div>
</div>

</body>
</html>
- 展示页面在templates下创建viewArticle.html 注意别放在editor下(我当时放在下面在搞了挺久,解析不到view)
<!DOCTYPE html>
<html lang="ch-CN" xmlns:th="http://www.thymeleaf.org">
<head>
   <meta charset="UTF-8">
   <title>Markdown</title>
   <link rel="stylesheet"  type="text/css" th:href="@{/editormd/css/style.css}"/>
   <link rel="stylesheet"  type="text/css" th:href="@{/editormd/css/editormd.css}"/>
   <link rel="shortcut icon" href="https://pandao.github.io/editor.md/favicon.ico" type="image/x-icon" />
   <script type="text/javascript" th:src="@{/editormd/js/jquery.min.js}"></script>
   <script type="text/javascript" th:src="@{/editormd/js/editormd.min.js}"></script>
   <script type="text/javascript">
       var testEditor;
       $(function() {
           testEditor = editormd("test-editormd", {
               width: "90%",
               height: 640,
               syncScrolling: "single",
               emoji: true,
               path: "../editormd/lib/",
               //图片上传
               imageUpload : true,
               imageFormats : ["jpg", "jpeg", "gif", "png", "bmp", "webp"],
               imageUploadURL : "/file/upload"
           });
       });
   </script>
</head>
<body>
<div id="layout">
   <header>
       <h1>Simple example</h1>
   </header>
   <div id="test-editormd">
       <textarea style="display:none;"></textarea>
   </div>
</div>
</body>
</html>
- 图片上传
在Controller写接口,见上传的文件保存在项目所在根目录下
@Controller
public class articleController {
    @Autowired
    private articleService articleService;

    //博客图片上传问题
    @RequestMapping("/file/upload")
    @ResponseBody
    public JSONObject fileUpload(@RequestParam(value = "editormd-image-file", required = true) MultipartFile file, HttpServletRequest request) throws IOException {
        //上传路径保存设置

        //获得SpringBoot当前项目的路径:System.getProperty("user.dir")
        String path = System.getProperty("user.dir")+"/upload/";

        //按照月份进行分类:
        Calendar instance = Calendar.getInstance();
        String month = (instance.get(Calendar.MONTH) + 1)+"月";
        path = path+month;

        File realPath = new File(path);
        if (!realPath.exists()){
            realPath.mkdirs();
        }

        //上传文件地址
        System.out.println("上传文件保存地址:"+realPath);

        //解决文件名字问题:我们使用uuid;
        String filename = "pg-"+ UUID.randomUUID().toString().replaceAll("-", "")+".jpg";
        File newfile = new File(realPath, filename);
        //通过CommonsMultipartFile的方法直接写文件(注意这个时候)
        file.transferTo(newfile);

        //给editormd进行回调
        JSONObject res = new JSONObject();
        res.put("url","/upload/"+month+"/"+ filename);
        res.put("success", 1);
        res.put("message", "upload success!");

        return res;
    }
}
将保存的文件使用适配器配置类
@Configuration
public class MvcConfig implements WebMvcConfigurer {

    /**
     * 图片路径适配器
     * @param registry
     */
    // 文件保存在真实物理路径/upload/下(即项目的物理地址下/upload/3月)
    // 访问的时候使用虚路径/upload,比如文件名为1.png,就直接/upload/1.png就ok了。
    @Override
    public void addResourceHandlers(ResourceHandlerRegistry registry) {
        //将物理地址upload下的文件映射到/upload下
        //访问的时候就直接访问http://localhost:9000/upload/文件名
        registry.addResourceHandler("/upload/**").addResourceLocations("file:"+System.getProperty("user.dir")+"/upload/");
    }

}
四、展示
1. 书写

2.展示


 1898
1898


 被折叠的 条评论
为什么被折叠?
被折叠的 条评论
为什么被折叠?
 到【灌水乐园】发言


