


目录
前言
实现功能前,需先实现 Mybatis 项目(持久层) 、SpringMVC项目(web层)
SpringMVC依赖库:https://pan.baidu.com/s/168g3ilpw6vta8SAOgCuBYw?pwd=1111
一、创建项目SsmDemo
右键工程名,F4,Modules,给java添加web支持

二、安装Springmvc依赖库
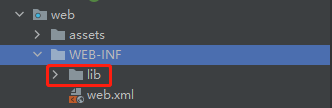
在web目录下的WEB-INF目录下新建lib文件夹,复制依赖库进lib
导入工作路径,添加tomocat,参考2.导入工作路径
三、创建resources资源文件夹
- 参考:3.创建resources资源文件夹
- 为了提高效率,我们先删除
rescources内容,再将源码中的rescources内容复制进去。 - 在
resources文件夹中建立mapper文件夹 - 修改
jdbc.properties中的数据库名、用户名和密码

- 修改
applicationContext.xml中的数据库名、用户名和密码
四、配置web.xml【配置前端控制器】
<?xml version="1.0" encoding="UTF-8"?>
<web-app xmlns="http://xmlns.jcp.org/xml/ns/javaee"
         xmlns:xsi="http://www.w3.org/2001/XMLSchema-instance"
         xsi:schemaLocation="http://xmlns.jcp.org/xml/ns/javaee http://xmlns.jcp.org/xml/ns/javaee/web-app_4_0.xsd"
         version="4.0">
    <welcome-file-list>
        <welcome-file>login.jsp</welcome-file>
    </welcome-file-list>
    <!-- 定义Spring MVC的前端控制器 -->
    <servlet>
        <servlet-name>springmvc</servlet-name>
        <servlet-class>
            org.springframework.web.servlet.DispatcherServlet
        </servlet-class>
        <!--初始化参数配置  配置xml文件路径-->
        <init-param>
            <param-name>contextConfigLocation</param-name>
            <param-value>classpath*:springMVC.xml</param-value>
        </init-param>
        <load-on-startup>1</load-on-startup>
    </servlet>
    <!-- 让Spring MVC的前端控制器拦截所有请求 -->
    <servlet-mapping>
        <servlet-name>springmvc</servlet-name>
        <url-pattern>/</url-pattern>
    </servlet-mapping>
    <!-- spring的配置文件 -->
    <context-param>
        <param-name>contextConfigLocation</param-name>
        <param-value>classpath:applicationContext*.xml</param-value>
    </context-param>
    <listener>
        <listener-class>org.springframework.web.context.ContextLoaderListener</listener-class>
    </listener>

    <!--中文过滤器 -->
    <filter>
        <filter-name>CharacterEncodingFilter</filter-name>
        <filter-class>org.springframework.web.filter.CharacterEncodingFilter</filter-class>
        <init-param>
            <param-name>encoding</param-name>
            <param-value>utf-8</param-value>
        </init-param>
    </filter>
    <filter-mapping>
        <filter-name>CharacterEncodingFilter</filter-name>
        <url-pattern>/*</url-pattern>
    </filter-mapping>
</web-app>
五、创建springMVC.xml中涉及的文件夹
springMVC.xml涉及的包如下

所以在src创建com.gec.controller

输入com.gec.controller,回车

六、创建applicationContext.xml中涉及的文件夹
在gec文件下创建service、bean、mapper文件夹

七、将逆向工程生成的文件复制进来
- 将逆向工程生成的
mapper中的xxxmapper.java复制进mapper文件夹中 - 将逆向工程生成的
mapper中的xxxmapper.xml复制进resouces文件夹中的mapper文件夹 - 将逆向工程生成的
bean中的文件复制进bean文件夹
八、测试
1.将login.jsp放入web文件夹中
2.生成war文件
右键项目名,F4

点击ok,ok

3.设置tomcat,左键单击tomcat,点击Edit Configurations

删除原本的server:选中war、-

再添加新的server:+ 、Artifact、ok

修改访问地址

点击运行(如果能跳转出来页面,ssm的配置就已经是ok了)

运行结果:
源码
项目已经实现了,源码放在Gitee(点蓝色Gitee自动跳转到仓库)


 158
158


 被折叠的 条评论
为什么被折叠?
被折叠的 条评论
为什么被折叠?
 到【灌水乐园】发言


