


1.实现微信小程序授权
在登录微信小程序前,我们首先应该先经过用户允许授权才能进行后面的操作,现在的新建的微信小程序在index中会自动给出授权代码和跳转信息,没有点击获取头像像信息,微信小程序就不能将你的信息导入进来,在原来的基础上我增加了跳转按钮和页面样式、结构做了一些修改,效果如下

index.js中的代码如下:
//index.js
//获取应用实例
const app = getApp()

Page({
  data: {
    motto: 'Hello World',
    userInfo: {},
    hasUserInfo: false,
    canIUse: wx.canIUse('button.open-type.getUserInfo')
  },

  //事件处理函数
  bindViewTap: function() {
    wx.navigateTo({
      url: '/pages/logs/logs'
    })
  },
  onLoad: function () {
    if (app.globalData.userInfo) {
      this.setData({
        userInfo: app.globalData.userInfo,
        hasUserInfo: true
      })
    } else if (this.data.canIUse){
      // 由于 getUserInfo 是网络请求,可能会在 Page.onLoad 之后才返回
      // 所以此处加入 callback 以防止这种情况
      app.userInfoReadyCallback = res => {
        this.setData({
          userInfo: res.userInfo,
          hasUserInfo: true
        })
      }
    } else {
      // 在没有 open-type=getUserInfo 版本的兼容处理
      wx.getUserInfo({
        success: res => {
          app.globalData.userInfo = res.userInfo
          this.setData({
            userInfo: res.userInfo,
            hasUserInfo: true
          })
        }
      })
    }
  },
  getUserInfo: function(e) {
    console.log(e)
    app.globalData.userInfo = e.detail.userInfo
    this.setData({
      userInfo: e.detail.userInfo,
      hasUserInfo: true
    })
  }
})
在Index.js代码中,简单介绍一下这段代码
 bindViewTap: function() {
    wx.navigateTo({
      url: '/pages/logs/logs'
    })
  },
完成从index页面跳转到logs页面,wx.navigateTo为跳转时保留原来界面
index.json的代码如下:
{
  "navigationBarTitleText": "微信小程序",
  "usingComponents": {},
  "navigationBarTextStyle":"black"
}
进行一些简单的介绍
在index.json中
navigationBarTitleText :页面的标题
navigationBarTextStyle:页面标题颜色,只有black和white两个选项,默认是black(黑色)
index.wxml的代码如下:
<view class="container">
  <view class="userinfo">
    <button wx:if="{{!hasUserInfo && canIUse}}" open-type="getUserInfo" bindgetuserinfo="getUserInfo"> 获取头像昵称 </button>
    <block wx:else>
      <image class="userinfo-avatar" src="{{userInfo.avatarUrl}}" mode="cover"></image>
      <text class="userinfo-nickname">{{userInfo.nickName}}</text>
    </block>
  </view>
  <navigator class="goStudy" style='display :inline;' url='/pages/logs/logs' open-type="navigate" hover-class="nav-hover"><ol><text>开启小程序之旅</text></ol></navigator>
</view>
其中,navigator能够实现小程序跳转按钮样式框架
index.wxss的代码如下:
/**index.wxss**/
/* 页面颜色设置 */
page{
  height: 100%;
  background: #1ff;
}
/* 使用者的属性设置 */
.userinfo {
  display: flex;
  flex-direction: column;
  align-items: center;
}
/* 使用者头像设置 */
.userinfo-avatar {
  width: 128rpx;
  height: 128rpx;
  margin: 20rpx;
  border-radius: 50%;
}
/* 使用者昵称设置 */
.userinfo-nickname {
  color: #aaa;
}
/* 间距设置 */
.usermotto {
  margin-top: 200px;
}
.container {
  height: 100%;
  display: flex;
  flex-direction: column;
  align-items: center;
  justify-content: space-between;
  padding: 200rpx 0;
  box-sizing: border-box;
}
/* 设置跳转界面长宽和颜色 */
 /* 设置字体大小和粗细、间距 */
 .goStudy{
  /* 设置边框长宽 */
 width: 280rpx;
 height: 80rpx;
 text-align: center;
 /* 设置边框离上、左、下的距离 */
 margin:50rpx 20rpx 100rpx;
 /* 设置字体大小 */
 font-size: 35rpx;
 font-weight: 700;
 /* 边框长宽 */
 border: 1rpx solid rgb(245, 229, 9);
 /* 设置边框的角圆不圆 */
 border-radius: 1000rpx;
 /* 边框与上面距离 */
 line-height: 80rpx;
}
/* 注释:设置跳转点击时的跳转颜色 */
.nav-hover{
  color:rgb(255, 0, 13);
}
具体作用在代码中已标明
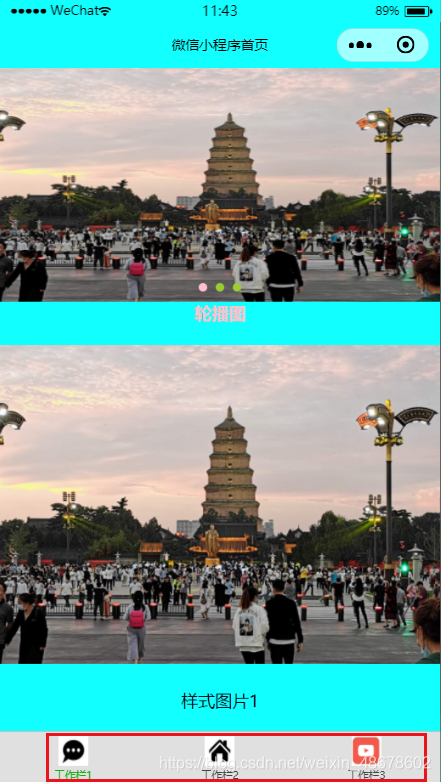
2.轮播图设置
可以左右切换图片观看效果,完成多张图片切换
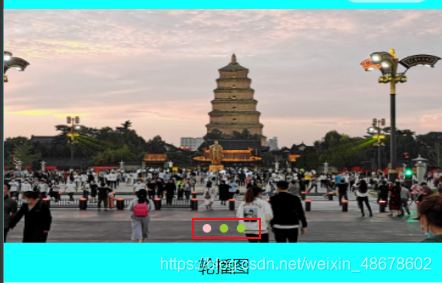
需要学习image图片插入方法,先创建一个文件夹,文件夹中设置小的文件夹,然后将准备好的图片复制粘贴进去,设置图片名字方便后面填写内容,例子:<image src='/lsq/img/luo1.jpg'></image>,主要找到图片存储地方就好。
然后用swiper-item嵌套进去,例子:
<swiper-item>
<image src='/lsq/img/luo1.jpg'></image>
</swiper-item>
需要插入几张图片就放置几个上图例子
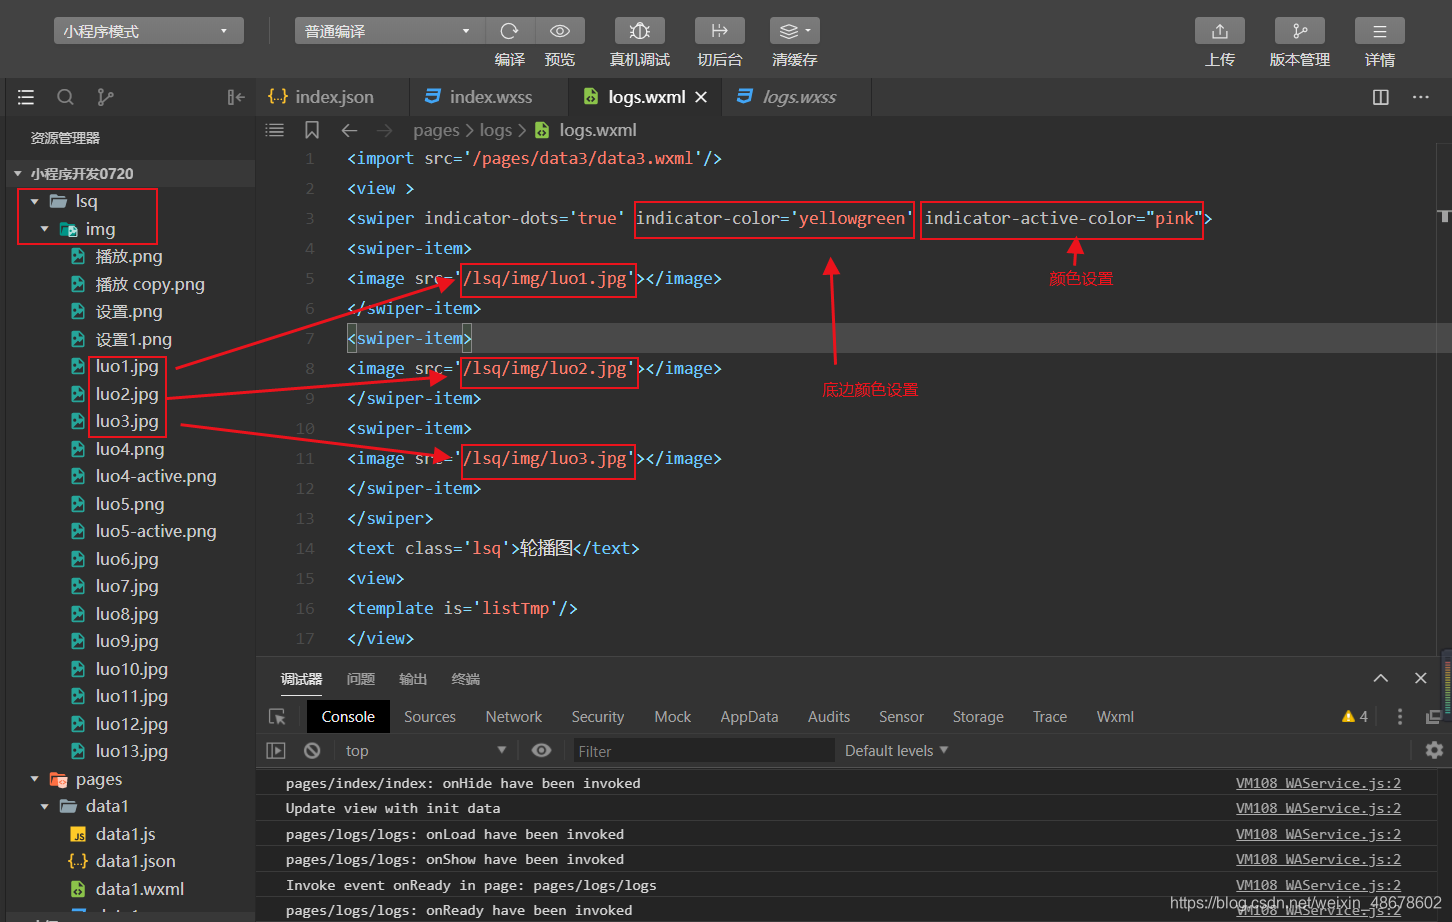
logs.wxml的代码如下:
<view >
<swiper indicator-dots='true' indicator-color='yellowgreen' indicator-active-color="pink">
<swiper-item>
<image src='/lsq/img/luo1.jpg'></image>
</swiper-item>
<swiper-item>
<image src='/lsq/img/luo2.jpg'></image>
</swiper-item>
<swiper-item>
<image src='/lsq/img/luo3.jpg'></image>
</swiper-item>
</swiper>
<text class='lsq'>轮播图</text>
<view>
logs.wxss的代码如下:
/* 轮播图设置 */
swiper{
  width: 100%;
  height: 400rpx;
}
.lsq{
  margin-top: 20rpx;
  margin-bottom: 1rpx;
  display:block;
  text-align: center;
  align-items: center;
}
swiper image{
  width: 100%;
  height: 100%;
}
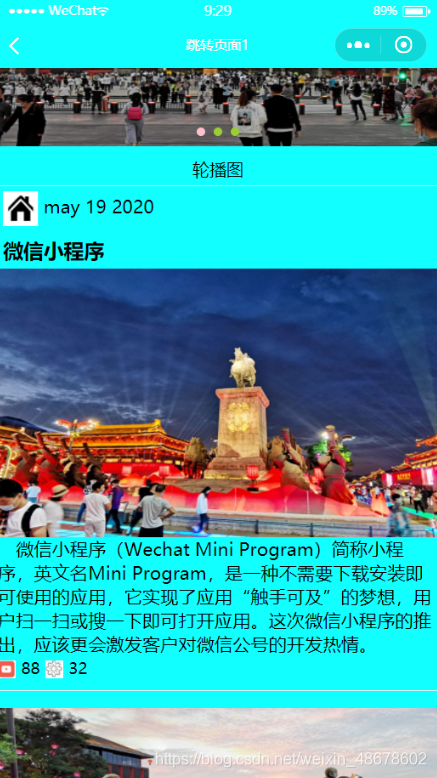
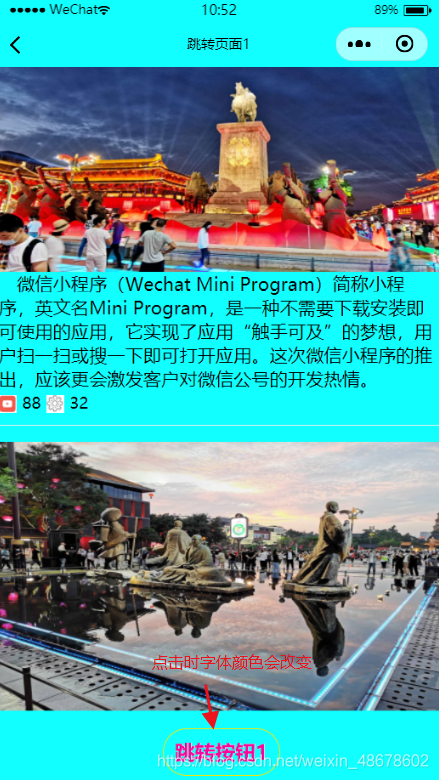
3.小程序template(模板)模块基本使用
在小程序logs中调用data3写好的模板,直接使用,效果如下
在logs.wxml中首位输入下面内容,完成模板链接调用
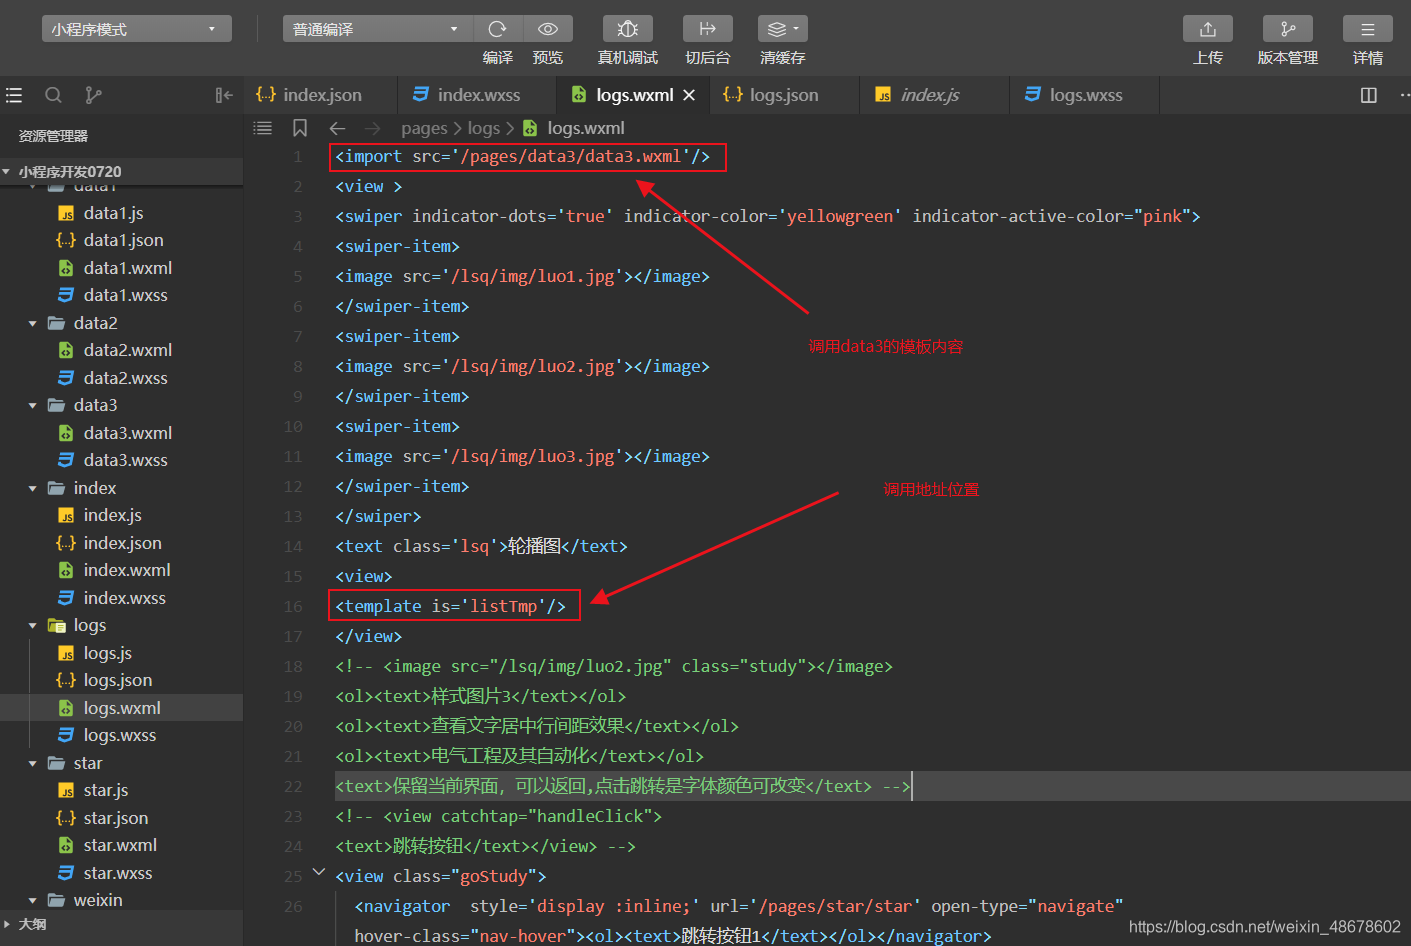
在data3.wxml第一段输入:<template name='listTmp'>,完成地址调用。data3.js和data3.json用不到可以直接删掉,但是需要在app.json中的pages页面中删除"pages/data3/data3",因为系统会自动保存到app.json,直接使用的话会出现data3.js和data3.json不存在而报错现象,需要注意一下
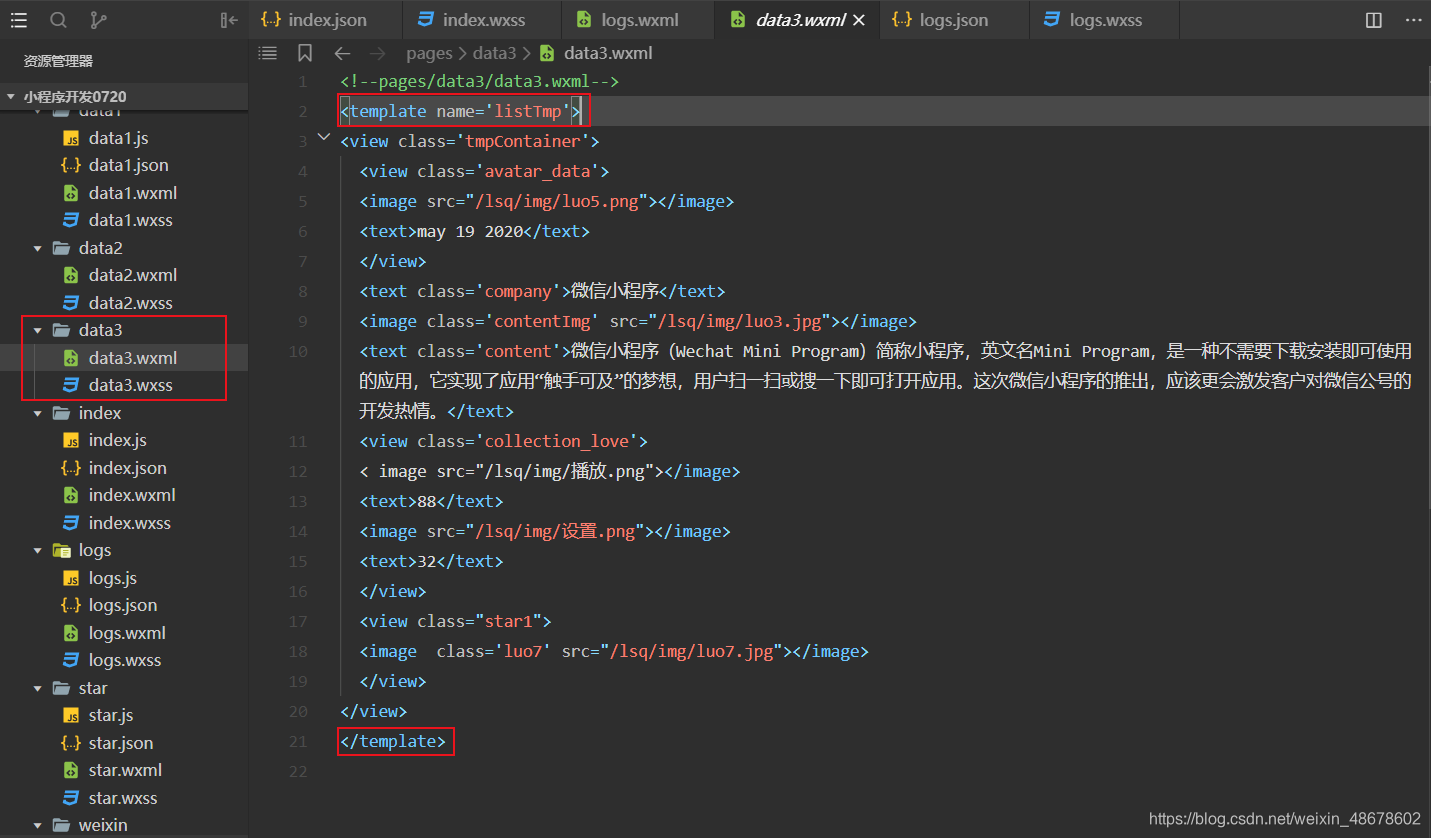
data3.wxml的代码如下:
<!--pages/data3/data3.wxml-->
<template name='listTmp'>
<view class='tmpContainer'>
  <view class='avatar_data'>
  <image src="/lsq/img/luo5.png"></image>
  <text>may 19 2020</text>
  </view>
  <text class='company'>微信小程序</text>
  <image class='contentImg' src="/lsq/img/luo3.jpg"></image>
  <text class='content'>微信小程序(Wechat Mini Program)简称小程序,英文名Mini Program,是一种不需要下载安装即可使用的应用,它实现了应用“触手可及”的梦想,用户扫一扫或搜一下即可打开应用。这次微信小程序的推出,应该更会激发客户对微信公号的开发热情。</text>
  <view class='collection_love'>
  < image src="/lsq/img/播放.png"></image>
  <text>88</text>
  <image src="/lsq/img/设置.png"></image>
  <text>32</text>
  </view>
  <view class="star1">
  <image  class='luo7' src="/lsq/img/luo7.jpg"></image>
  </view>
</view>
</template>
data3.wxss的代码如下:
/* pages/data3/data3.wxss */
.tmpContainer{
  display:flex;
  flex-direction: column;
  border-top: 1rpx solid #eee;
  border-bottom: 1rxp solid #eee;
  margin: 10rpx 0;
}
.avatar_data{
  padding: 10rpx;
}
.avatar_data image{
  width: 60rpx;
  height: 60rpx;
  vertical-align: middle;
  margin-right: 10rpx;
}
.avatar_data text{
  font-size: 32rpx;
}
.company{
  margin-left: 10rpx;
  font-size: 36rpx;
  font-weight: 700;
  margin: 10rpx;
}
.contentImg{
  width: 100%;
  height: 460rpx;
}
.content{
  font-size: 32rpx;
  text-indent: 32rpx;
}
.collection_love image{
  width: 32rpx;
  height: 32rpx;
  vertical-align: middle;
  margin-right: 10rpx;
}
.collection_love text{
  font-size: 28rpx;
  margin-right: 10rpx;
}
.star1{
  display:flex;
  flex-direction: column;
  border-top: 1rpx solid #eee;
  border-bottom: 1rxp solid #eee;
  margin: 20rpx 0;
}
.luo7{
  width: 100%;
  height: 460rpx;
  margin-top: 30rpx;
}
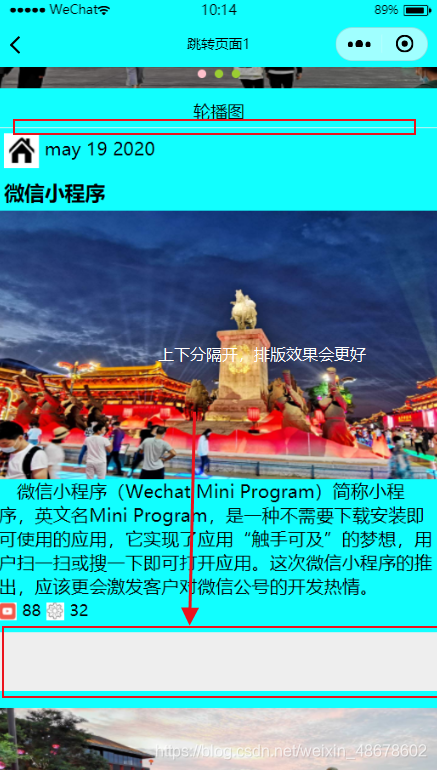
4.上下分割线排版
设置这个分割线使得排版看起来比较整洁,先设置线条名称,插入代码如下:
<view class="star1">
  </view>
方式如下
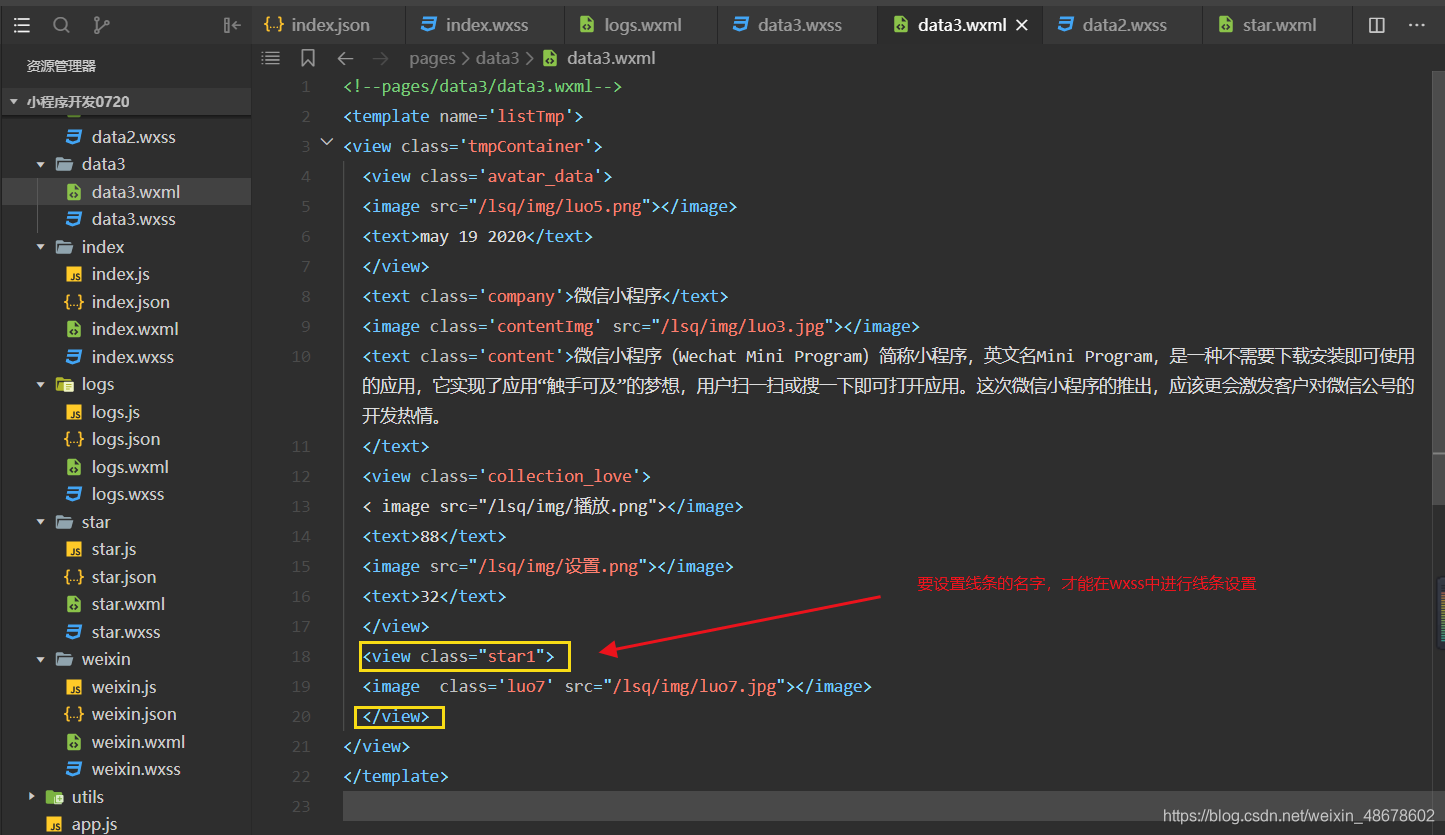
本例名称class="star1",再进行线条效果设置,代码如下
.star1{
  display:flex;
  flex-direction: column;
  border-top: 1rpx solid #eee;
  border-bottom: 1rxp solid #eee;
  margin: 20rpx 0;
}
我加粗一下效果更明显,修改代码:border-top: 100rpx solid #eee;,可以修改线条颜色、长度和宽度
5.跳转按钮设置
设置跳转到下一个界面,跳转到下一个界面
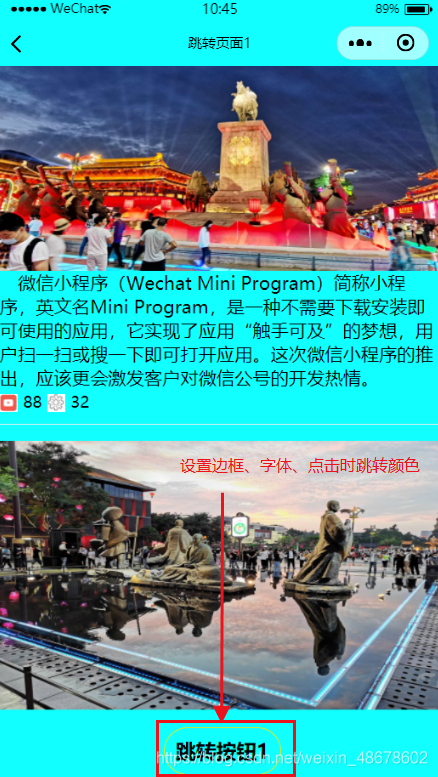
logs.wxml的代码如下:
<view class="goStudy">
  <navigator  style='display :inline;' url='/pages/star/star'
  open-type="navigate" hover-class="nav-hover"><ol><text>跳转按钮1</text></ol></navigator>
</view>
logs.wxss的代码如下:
.goStudy{
  /* 设置边框长宽 */
   width: 200rpx;
   height: 80rpx;
   text-align: center;
 /* 设置边框离上、左、下的距离 */
 margin:10rpx 280rpx 10rpx;
 /* 设置字体大小 */
 font-size: 35rpx;
 font-weight: 700;
 /* 边框长宽 */
 border: 1rpx solid rgb(245, 229, 9);
 /* 设置边框的角圆不圆 */
 border-radius: 1000rpx;
 /* 边框与上面距离 */
 line-height: 80rpx;
}
/* 注释:设置跳转点击时的跳转颜色 */
.nav-hover{
  color:rgb(255, 0, 157);
}
通过.nav-hover设置跳转时的颜色
6.设置小程序tab工具栏设置
小程序工具栏最多5个工具栏,最少2个工具栏,因为一个工具栏就不用tab就能完成,我们采用3个工具栏,先给出效果,然后再演示如何实现
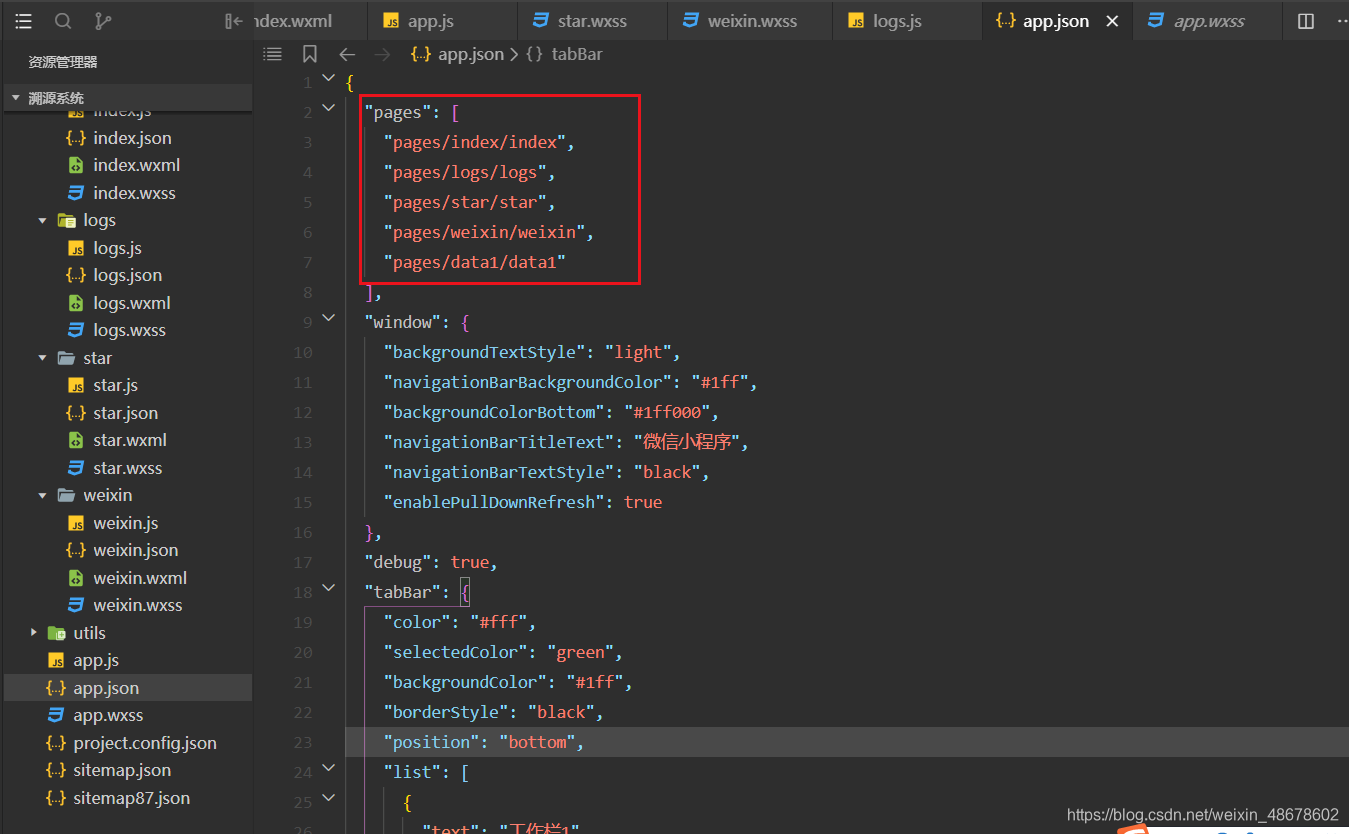
要想完成tab工具栏设置,需要在app.json设置工具栏,注意最多只能设置5个
app.json代码如下:
{
  "pages": [
    "pages/index/index",
    "pages/logs/logs",
    "pages/star/star",
    "pages/weixin/weixin",
    "pages/data1/data1"
  ],
  "window": {
    "backgroundTextStyle": "light",
    "navigationBarBackgroundColor": "#1ff",
    "backgroundColorBottom": "#1ff0000",
    "navigationBarTitleText": "微信小程序",
    "navigationBarTextStyle": "black",
    "enablePullDownRefresh": true
  },
  "debug": true,
  "tabBar": {
    "color": "#444",
    "selectedColor": "green",
    "backgroundColor": "#e0e0e0",
    "borderStyle": "black",
    "position": "bottom",
    "list": [
      {
        "text": "工作栏1",
        "pagePath": "pages/index/index",
        "iconPath": "/lsq/img/luo4.png",
        "selectedIconPath": "/lsq/img/luo4-active.png"
      },
      {
        "text": "工作栏2",
        "pagePath": "pages/logs/logs",
        "iconPath": "/lsq/img/luo5.png",
        "selectedIconPath": "/lsq/img/luo5-active.png"
      },
      {
        "text": "工作栏3",
        "pagePath": "pages/star/star",
        "iconPath": "/lsq/img/播放.png",
        "selectedIconPath": "/lsq/img/播放 copy.png"
      }
    ]
  },
  "sitemapLocation": "sitemap87.json"
}
tabBar中
"tabBar": {
    "color": "#444",
    "selectedColor": "green",
    "backgroundColor": "#e0e0e0",
    "borderStyle": "black",
    "position": "bottom",
color是设置任务栏字体颜色;
selectedColor是设置点击跳转时颜色设置;
backgroundColor是背景颜色设置;
borderStyle是字体颜色设置,只有white和black两个选项,不支持其他选项;
position是任务栏位置,只有top和bottom两个选项,不支持其他选项;
List任务栏中
"list": [
      {
        "text": "工作栏1",
        "pagePath": "pages/index/index",
        "iconPath": "/lsq/img/luo4.png",
        "selectedIconPath": "/lsq/img/luo4-active.png"
      },
text是任务栏的名称;
pagePath是任务栏的页面路径;
iconPath是任务栏未点击时显示的图标;
selectedIconPath是任务栏点击时显示的图标;
再补充一点,pages中的数组谁放在第一个,就先显示哪个页面,所以为了方便编写程序,在编写哪个页面时就把哪个页面放在第一个,再编译时就方便观看效果,节省时间


 被折叠的 条评论
为什么被折叠?
被折叠的 条评论
为什么被折叠?
 到【灌水乐园】发言


