


一:做项目前需要知道的知识(面试题):
1.集群:单机处理的并发请求是有极限的,所以复制几分单机,就构成集群了。
优点:系统扩展容易,如果一个服务器挂掉了,其他服务器还能用,客户无感知的,他们对访问那个服务器不是很在乎,从而解决高并发问题。
理解图:

2.分布式:将系统按照自身业务的功能拆分成一个个独立的子系统,多个应用相互调用来完成分布式架构。
优点:系统相互调用,提高代码的复用和开发效率。
缺点:系统之间服务要是特别多将会强耦合,调用关系复杂,很难维护。

3.SpringCloud:
(1).含义:对系统进行拆分,每一个服务对应唯一业务。
SpringCloud是基于SpringBoot为治理的微服务框架。
二:SpringCloud小项目
(1).新建项目:new Project——>Meven——>name(springcloud_demo)——>finish1
(2).导包模式改成pom,作为父工程
A.pom.xml文件加上<packaging>pom</packaging>
B.改jdk1.8
C.再加上springboot相关依赖和springcloud相关依赖
<?xml version="1.0" encoding="UTF-8"?>
<project xmlns="http://maven.apache.org/POM/4.0.0"
         xmlns:xsi="http://www.w3.org/2001/XMLSchema-instance"
         xsi:schemaLocation="http://maven.apache.org/POM/4.0.0 http://maven.apache.org/xsd/maven-4.0.0.xsd">
    <modelVersion>4.0.0</modelVersion>

    <groupId>itman.spcloud</groupId>
    <artifactId>springcloud_demo</artifactId>
    <version>1.0-SNAPSHOT</version>
    <packaging>pom</packaging>

    <!-- 统一JAR包和版本号的管理 -->
    <properties>
        <project.build.sourceEncoding>UTF-8</project.build.sourceEncoding>
        <maven.compiler.source>1.8</maven.compiler.source>
        <maven.compiler.target>1.8</maven.compiler.target>
    </properties>

    <!--
	    dependmanagement是用在父工程中声明依赖,不引用。子模块继承之后再引包。
	         作用是,锁定版本,子模块不用写grouid and version
	-->
    <dependencyManagement>

        <dependencies>
            <!--boot 2.3.3 -->
            <dependency>
                <groupId>org.springframework.boot</groupId>
                <artifactId>spring-boot-dependencies</artifactId>
                <version>2.3.3.RELEASE</version>
                <type>pom</type>
                <!-- Maven也是单继承。这里继承了spring-boot中的dependencyManagement
                     但是下面还要继承spring-cloud中的dependencyManagement。
                    使用scope=import就可以实现多继承了
                -->
                <scope>import</scope>
            </dependency>

            <!--cloud hoxton.sr9 -->
            <dependency>
                <groupId>org.springframework.cloud</groupId>
                <artifactId>spring-cloud-dependencies</artifactId>
                <version>Hoxton.SR9</version>
                <type>pom</type>
                <scope>import</scope>
            </dependency>

        </dependencies>

    </dependencyManagement>

</project>
(3)再将src文件删掉

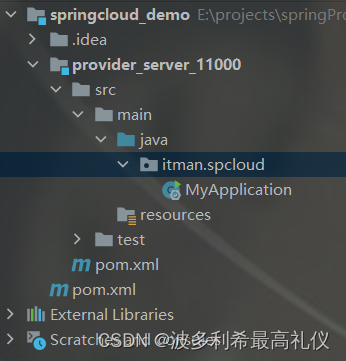
(4)创建服务者子工程
父工程右键——>new——>Module——>meaven——>next——>name

把子过程pom.xml
<properties>
    <maven.compiler.source>8</maven.compiler.source>
    <maven.compiler.target>8</maven.compiler.target>
</properties>
删除,加入springboot配置和热部署(注意,不需要搞上版本号了,因为父工程已经指定版本号)
<?xml version="1.0" encoding="UTF-8"?>
<project xmlns="http://maven.apache.org/POM/4.0.0"
         xmlns:xsi="http://www.w3.org/2001/XMLSchema-instance"
         xsi:schemaLocation="http://maven.apache.org/POM/4.0.0 http://maven.apache.org/xsd/maven-4.0.0.xsd">
    <parent>
        <artifactId>springcloud_demo</artifactId>
        <groupId>itman.spcloud</groupId>
        <version>1.0-SNAPSHOT</version>
    </parent>
    <modelVersion>4.0.0</modelVersion>

    <artifactId>provider_server_11000</artifactId>
    <dependencies>
        <!--以下是boot -->
        <dependency>
            <groupId>org.springframework.boot</groupId>
            <artifactId>spring-boot-starter-web</artifactId>
        </dependency>

        <!--热部署 gav -->
        <dependency>
            <groupId>org.springframework.boot</groupId>
            <artifactId>spring-boot-devtools</artifactId>
            <scope>runtime</scope>
            <optional>true</optional>
        </dependency>
    </dependencies>

</project>
java包下新建一个包,并且创建主启动类
package itman.spcloud;

import org.springframework.boot.SpringApplication;
import org.springframework.boot.autoconfigure.SpringBootApplication;

@SpringBootApplication
public class MyApplication {
    public static void main(String[] args) {
        SpringApplication.run(MyApplication.class,args);
    }
}
创建共同数据接口并且实现序列化接口
package itman.spcloud;

import java.io.Serializable;

public class CommonResult<T> implements Serializable {
    private Integer code;
    private String message;
    private T result;

    public CommonResult() {
    }

    public CommonResult(Integer code, String message, T result) {
        this.code = code;
        this.message = message;
        this.result = result;
    }

    public Integer getCode() {
        return code;
    }

    public void setCode(Integer code) {
        this.code = code;
    }

    public String getMessage() {
        return message;
    }

    public void setMessage(String message) {
        this.message = message;
    }

    public T getResult() {
        return result;
    }

    public void setResult(T result) {
        this.result = result;
    }

}
持久层
package itman.spcloud.po;

public class User {
    private Integer userId;
    private String username;
    private String password;

    public User() {
    }

    public User(Integer userId, String username, String password) {
        this.userId = userId;
        this.username = username;
        this.password = password;
    }

    public Integer getUserId() {
        return userId;
    }

    public void setUserId(Integer userId) {
        this.userId = userId;
    }

    public String getUsername() {
        return username;
    }

    public void setUsername(String username) {
        this.username = username;
    }

    public String getPassword() {
        return password;
    }

    public void setPassword(String password) {
        this.password = password;
    }

}
写一个表现层
package itman.spcloud.controller;

import itman.spcloud.CommonResult;
import itman.spcloud.po.User;
import org.springframework.web.bind.annotation.GetMapping;
import org.springframework.web.bind.annotation.PathVariable;
import org.springframework.web.bind.annotation.RequestMapping;
import org.springframework.web.bind.annotation.RestController;

@RestController
@RequestMapping("/user")
public class UserController {
    @GetMapping("/getUserById/{userId}")
    public CommonResult<User> getUserById(@PathVariable("userId") Integer userId){
        //模拟返回业务
        return new CommonResult(200,"success",new User(userId,"张三","123"));

    }

}
在resourse文件创建提供者服务
server:
  port: 11000

spring:
  application:
    name: provider-server
(5)创建消费者子工程
创建方式和提供者一样
pom也和提供者一样
<?xml version="1.0" encoding="UTF-8"?>
<project xmlns="http://maven.apache.org/POM/4.0.0"
         xmlns:xsi="http://www.w3.org/2001/XMLSchema-instance"
         xsi:schemaLocation="http://maven.apache.org/POM/4.0.0 http://maven.apache.org/xsd/maven-4.0.0.xsd">
    <parent>
        <artifactId>springcloud_demo</artifactId>
        <groupId>itman.spcloud</groupId>
        <version>1.0-SNAPSHOT</version>
    </parent>
    <modelVersion>4.0.0</modelVersion>

    <artifactId>consumer_server_12000</artifactId>

    <dependencies>
        <!--以下是boot -->
        <dependency>
            <groupId>org.springframework.boot</groupId>
            <artifactId>spring-boot-starter-web</artifactId>
        </dependency>

        <!--热部署 gav -->
        <dependency>
            <groupId>org.springframework.boot</groupId>
            <artifactId>spring-boot-devtools</artifactId>
            <scope>runtime</scope>
            <optional>true</optional>
        </dependency>
    </dependencies>

</project>
加上主启动类(注意和提供者不一样)
多了一个RestTemplete:主要是发送请求,去调用微服务。持久化数据模板,并且getRestTemplate方法把数据搞成json格式返回给前端,和javabean一样。
@Bean:创建对象,并且交给Spring容器
package itman.spcloud;

import org.springframework.boot.SpringApplication;
import org.springframework.boot.autoconfigure.SpringBootApplication;
import org.springframework.context.annotation.Bean;
import org.springframework.web.client.RestTemplate;

@SpringBootApplication
public class MyApplication {
    @Bean
    public RestTemplate getRestTemplate(){
        return new RestTemplate();
    }
    public static void main(String[] args) {
        SpringApplication.run(MyApplication.class,args);
    }
}

表现层
package itman.spcloud.controller;


import itman.spcloud.CommonResult;
import org.springframework.beans.factory.annotation.Autowired;
import org.springframework.web.bind.annotation.GetMapping;
import org.springframework.web.bind.annotation.PathVariable;
import org.springframework.web.bind.annotation.RequestMapping;
import org.springframework.web.bind.annotation.RestController;
import org.springframework.web.client.RestTemplate;

@RestController
@RequestMapping("/cart")
public class CartController {
    //1.注入template
    @Autowired
    private RestTemplate restTemplate;
    //2.接收并处理请求,返回对应数据。
    @GetMapping("/getUserById/{userId}")
    public CommonResult getUserById(@PathVariable("userId") Integer userId){
        //使用getForObject方法调用提供者微服务
        CommonResult result = restTemplate.getForObject(
                "http://localhost:11000/user/getUserById/"+userId, CommonResult.class);
        return result;
    }
}
在resourse文件创建消费者服务
server:
  port: 12000

spring:
  application:
    name: consumer-server
然后先启动服务者,再启动消费者

在浏览器输入:http://localhost:12000/cart/getUserById/1


 831
831


 被折叠的 条评论
为什么被折叠?
被折叠的 条评论
为什么被折叠?
 到【灌水乐园】发言


