


- 实验需求
- R5可以ping通R3
- 使用ACL协议 无法ping通R1
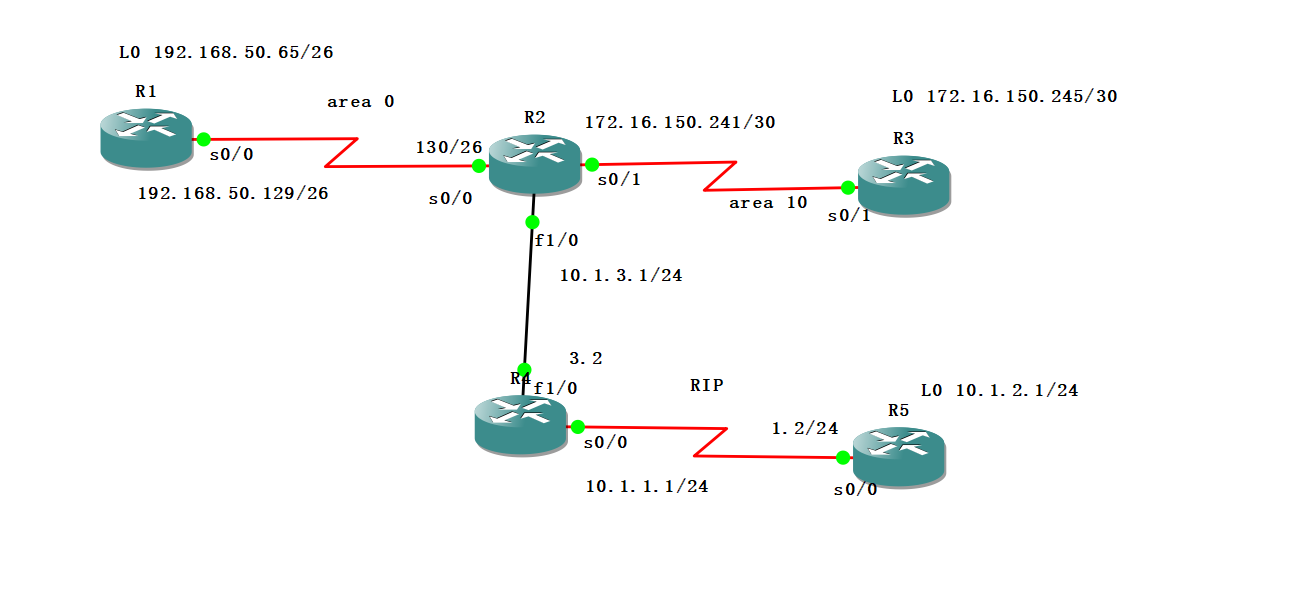
- 实验拓扑图
-
- 实验思路
- 在路由器上配置接口IP
- 在R1上配置OSPF area 0
- 在R 2上配置OSPF 把接口S0/1 加入area 10 S0/0 加入area 0
- R2 设置默认路由
- 在R2 OSPF上注入直连 注入默认
- 在R3上配置OSPF
- 在R4 S0/0上配置RIP
- 注入直连路由 注入默认路由
- 在R5上配置rip
- 实验配置
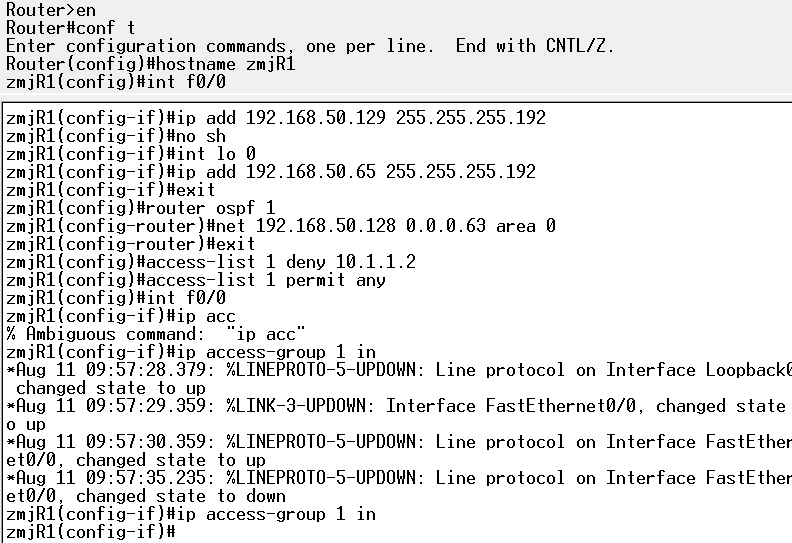
- 在R1上配置
- R1#conf t 从特权模式进入全局配置模式
- R1(config)#int s0/0 进入接口
- R1(config-if)#ip add 192.168.50.129 255.255.255.192 配置IP
- R1(config-if)#no sh 开启接口
- R1(config-if)#exit 退出
- R1(config)#router ospf 1 启动OSPF路由进程
- R1(config-router)#net 192.168.50.128 0.0.0.63 area 0 指定OSPF协议运行的接口和所在的区域
- R1(config-router)#exit 退出
- R1(config)#access-list 1 deny 10.1.1.2 拒绝10.1.1.2数据访问
- R1(config)#access-list 1 permit any 允许所有网段通信
- R1(config)#int s0/0 进入接口
- R1(config-if)#ip access-group 1 in 允许组1的数据进入
-
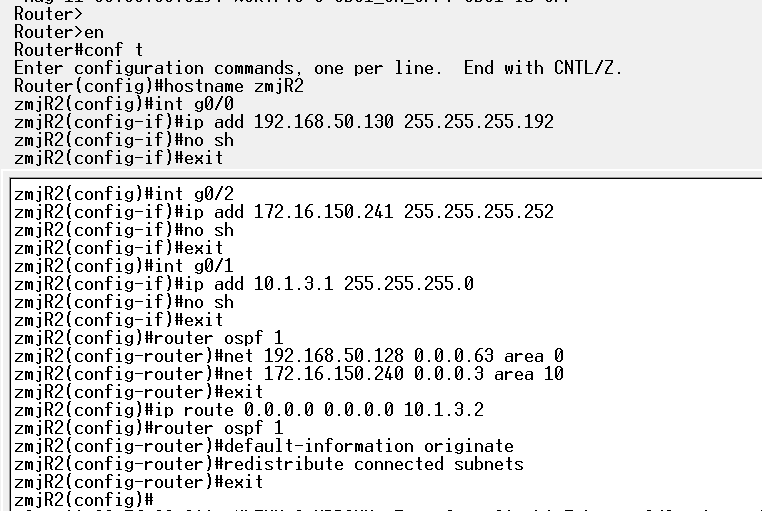
- 在R2上配置
- R2#conf t 从特权模式进入全局配置模式
- R2(config)#int s0/0 进入接口
- R2(config-if)#ip add 192.168.50.130 255.255.255.192 配置IP
- R2(config-if)#no sh 开启接口
- R2(config-if)#exit 退出
- R2(config)#int s0/1 进入接口
- R2(config-if)#ip add 172.16.150.241 255.255.255.252 配置IP
- R2(config-if)#no sh 开启接口
- R2(config-if)#exit 退出
- R2(config)#int f1/0 进入接口
- R2(config-if)#ip add 10.1.3.1 255.255.255.0 配置IP
- R2(config-if)#no sh 开启接口
- R2(config-if)#exit 退出
- R2(config)#router ospf 1 启动OSPF路由进程
- R2(config-router)#net 172.16.150.240 0.0.0.3 area 10 指定OSPF协议运行的接口和所在的区域
- R2(config-router)#exit 退出
- R2(config)#ip route 0.0.0.0 0.0.0.0 10.1.3.2 默认路由 任意网段 任意匹配 网关
- R2(config)#router ospf 1 启动OSPF路由进程
- R2(config-router)#default-information originate 重分布默认路由
- R2(config-router)#redistribute connected subnets 重分布直连路由
-
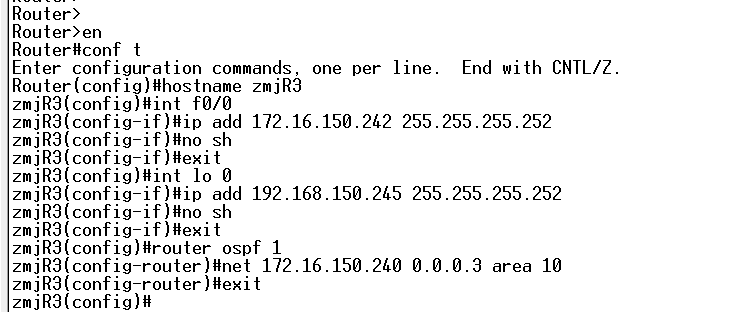
- 在R3上配置
- R3#conf t 从特权模式进入全局配置模式
- R3(config)#int s0/1 进入接口
- R3(config-if)#ip add 172.16.150.242 255.255.255.252 配置IP
- R3(config-if)#no sh 开启接口
- R3(config-if)#exit 退出
- R3(config)#int l0 进入接口
- R3(config-if)#ip add 192.168.150.245 255.255.255.252 配置IP
- R3(config-if)#no sh 开启接口
- R3(config-if)#exit 退出
- R3(config)#router ospf 1 启动OSPF路由进程
- R3(config-router)#net 192.168.150.244 0.0.0.3 area 10 指定OSPF协议运行的接口和所在的区域
- R3(config-router)#net 172.16.150.240 0.0.0.3 area 10 指定OSPF协议运行的接口和所在的区域
- R3(config-router)#exit 退出
-
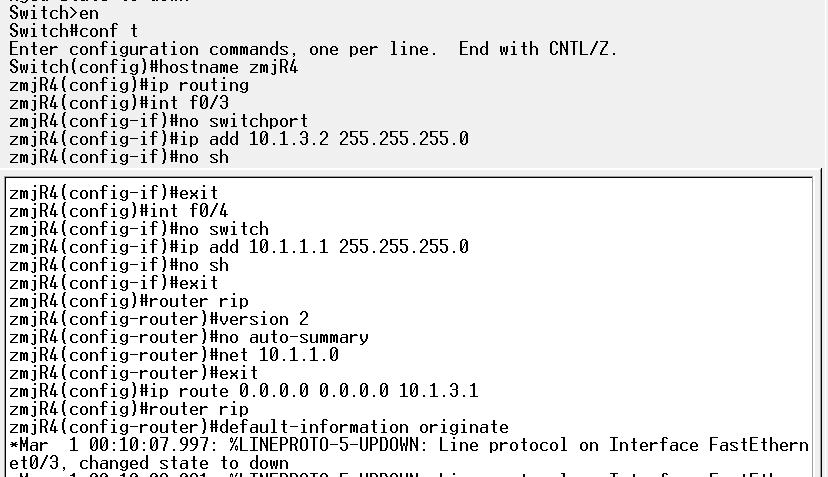
- 在R4上配置
- R4#conf t 从特权模式进入全局配置模式
- R4(config)#int f1/0 进入接口
- R4(config-if)#ip add 10.1.3.2 255.255.255.0 配置IP
- R4(config-if)#no sh 开启接口
- R4(config-if)#exit 退出
- R4(config)#int s0/0 进入接口
- R4(config-if)#ip add 10.1.1.1 255.255.255.0 配置IP
- R4(config-if)#no sh 开启接口
- R4(config-if)#exit 退出
- R4(config)#router rip 启动rip进程
- R4(config-router)#version 2 配置为使用版本2
- R4(config-router)#no auto-summary 关闭自动汇总
- R4(config-router)#net 10.1.1.0 宣告主网络号
- R4(config-router)#exit 退出
- R4(config)#ip route 0.0.0.0 0.0.0.0 10.1.3.1 默认路由 任意网段 任意匹配 网关
- R4(config)#router rip 启动rip进程
- R4(config-router)#default-information originate 重分布默认路由
-
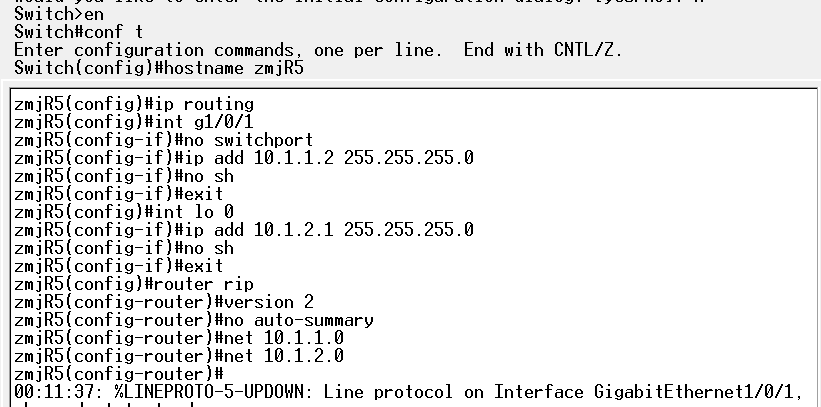
- 在R5上配置
- R5#conf t 从特权模式进入全局配置模式
- R5(config)#int s0/0 进入接口
- R5(config-if)#ip add 10.1.1.2 255.255.255.0 配置IP
- R5(config-if)#no sh 开启接口
- R5(config-if)#exit 退出
- R5(config)#int l0 进入接口
- R5(config-if)#ip add 10.1.2.1 255.255.255.0 配置IP
- R5(config-if)#no sh 开启接口
- R5(config-if)#exit 退出
- R5(config)#router rip 启动rip进程
- R5(config-router)#no auto-summary 关闭自动汇总
- R5(config-router)#net 10.1.1.0 宣告主网络号
- R5(config-router)#net 10.1.2.0 宣告主网络号
-
- 验证
-


06-10
 3077
3077
3077
05-25
1824
1824
07-14
2273
2273
“相关推荐”对你有帮助么?
-

 非常没帮助
非常没帮助 -

 没帮助
没帮助 -

 一般
一般 -

 有帮助
有帮助 -

 非常有帮助
非常有帮助
提交

 被折叠的 条评论
为什么被折叠?
被折叠的 条评论
为什么被折叠?
 到【灌水乐园】发言


