目录
一、安装MSF
1.1 在线安装
需要挂梯子!挂完梯子需要reboot重启,多试几次就可以,国内网络我试了很久都不行。没条件没梯子的看1.2离线安装
cd /opt
curl https://raw.githubusercontent.com/rapid7/metasploit-omnibus/master/config/templates/metasploit-framework-wrappers/msfupdate.erb > msfinstall && chmod 755 msfinstall && ./msfinstall
测试msf,安装成功。
[root@msf-18 opt]# msfconsole
Metasploit tip: Enable verbose logging with set VERBOSE true


                 _---------.
             .' #######   ;."
  .---,.    ;@             @@`;   .---,..
." @@@@@'.,'@@            @@@@@',.'@@@@ ".
'-.@@@@@@@@@@@@@          @@@@@@@@@@@@@ @;
   `.@@@@@@@@@@@@        @@@@@@@@@@@@@@ .'
     "--'.@@@  -.@        @ ,'-   .'--"
          ".@' ; @       @ `.  ;'
            |@@@@ @@@     @    .
             ' @@@ @@   @@    ,
              `.@@@@    @@   .
                ',@@     @   ;           _____________
                 (   3 C    )     /|___ / Metasploit! \
                 ;@'. __*__,."    \|--- \_____________/
                  '(.,...."/


       =[ metasploit v6.3.34-dev-                         ]
+ -- --=[ 2356 exploits - 1227 auxiliary - 413 post       ]
+ -- --=[ 1387 payloads - 46 encoders - 11 nops           ]
+ -- --=[ 9 evasion                                       ]

Metasploit Documentation: https://docs.metasploit.com/

msf6 >
1.2 离线安装
msf官网:Metasploit | Penetration Testing Software, Pen Testing Security | Metasploit
msf文档:Nightly Installers | Metasploit Documentation Penetration Testing Software, Pen Testing Security
msf离线rpm包下载(CentOS/RedHat):Directory Tree
下载离线安装包并安装
cd /opt
wget https://rpm.metasploit.com/metasploit-omnibus/pkg/metasploit-framework-6.3.34%2B20230914102727~1rapid7-1.el6.x86_64.rpm
yum install metasploit-framework-6.3.34+20230914102727~1rapid7-1.el6.x86_64.rpm
=====================================================================================================================
Package
Arch Version Repository Size
=====================================================================================================================
Installing:
metasploit-framework
x86_64 6.3.34+20230914102727~1rapid7-1.el6 /metasploit-framework-6.3.34+20230914102727~1rapid7-1.el6.x86_64 747 M
Transaction Summary
=====================================================================================================================
Install 1 Package
安装ruby
yum install ruby

ruby -v
[root@msf-18 opt]# msfconsole
Metasploit tip: You can pivot connections over sessions started with the
ssh_login modules
*Neutrino_Cannon*PrettyBeefy*PostalTime*binbash*deadastronauts*EvilBunnyWrote*L1T*Mail.ru*() { :;}; echo vulnerable*
*Team sorceror*ADACTF*BisonSquad*socialdistancing*LeukeTeamNaam*OWASP Moncton*Alegori*exit*Vampire Bunnies*APT593*
******
##还没安装数据库,所以是未连接状态
msf6 > db_status
[*] postgresql selected, no connection
msf6 > quit二、安装Postgresql数据库
不管是在线安装还是离线安装都需要安装Postgresql,安装Postgresql的步骤是一致的,容易出错,请按照步骤执行,不安装数据库也可以正常使用msf,只不过使用过程中产生的数据不会保存
卸载Postgresql
rpm -qa | grep postgresql    ##查看是否安装
yum remove postgresql*      ##卸载
##导入yum源
yum install -y https://download.postgresql.org/pub/repos/yum/reporpms/EL-7-x86_64/pgdg-redhat-repo-latest.noarch.rpm
##安装Postgresql数据库客户端与服务端,安装12版本,注意不要使用其它源,否则yum安装默认是9.5版本。
yum install -y postgresql12 postgresql12-server
查询是否安装
##查询是否安装
[root@msf-18 opt]# rpm -qa | grep postgresql
postgresql12-server-12.16-1PGDG.rhel7.x86_64
postgresql12-12.16-1PGDG.rhel7.x86_64
postgresql12-libs-12.16-1PGDG.rhel7.x86_64
初始化数据库
##初始化数据库
[root@msf-18 opt]# /usr/pgsql-12/bin/postgresql-12-setup initdb
Initializing database ... OK
启动和设置开机自启动
##启动和设置开机自启动
[root@msf-18 opt]# systemctl start postgresql-12
[root@msf-18 opt]# systemctl enable postgresql-12
Created symlink from /etc/systemd/system/multi-user.target.wants/postgresql-12.service to /usr/lib/systemd/system/postgresql-12.service.
PostgreSQL安装成功之后,会默认创建一个名为postgres的Linux用户,初始化数据库后,会有名为postgres的数据库,来存储数据库的基础信息。
进入数据库shell设置数据库密码
退出sql shell是\q
退出bash-4.2是exit
退出msf是quit
[root@msf-18 opt]# su postgres
bash-4.2$ psql
psql (12.16)
输入 "help" 来获取帮助信息.

postgres=# ALTER USER postgres WITH PASSWORD '123456';
ALTER ROLE
postgres=# \q
bash-4.2$ exit
exit

[root@msf-18 opt]# 使用msf用户初始化数据库,注意不要使用root用户初始化!
[root@msf-18 opt]# cd /opt/metasploit-framework/bin/

[root@msf-18 bin]# useradd msf
[root@msf-18 bin]# su msf

[msf@msf-18 bin]$ ./msfdb init
Clearing http web data service credentials in msfconsole
Running the 'init' command for the database:
Creating database at /home/msf/.msf4/db
Creating db socket file at /tmp
Starting database at /home/msf/.msf4/db...success
******
创建完成后在msf用户目录会生成一个.msf目录里面会有一个database.yml文件,然后,我们这时从msf账户切换到root用户,执行以下操作将原配置文件覆盖。
[msf@msf-18 .msf4]$ ls -a /home/msf/.msf4/
.  ..  bootsnap_cache  data  database.yml  db  history  initial_setup_complete  local  logos  logs  loot  modules  plugins  store
[msf@msf-18 .msf4]$ su root
密码:
[root@msf-18 .msf4]# cp /home/msf/.msf4/database.yml /opt/metasploit-framework/embedded/framework/config/
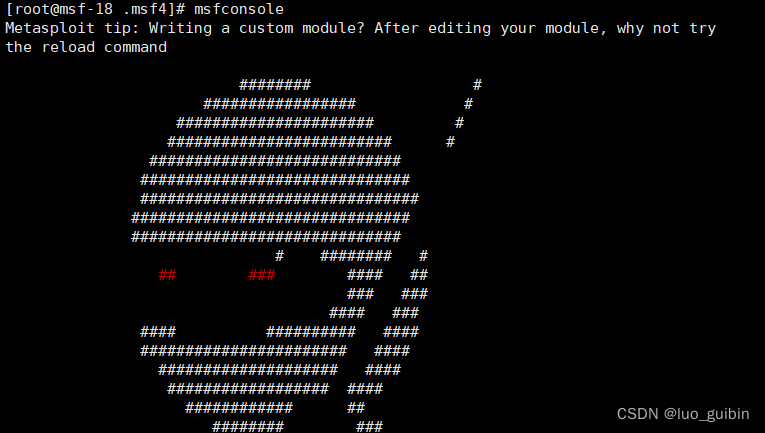
开始使用,每次启动msf的图案是随机的。
[root@msf-18 .msf4]# msfconsole
Metasploit tip: Writing a custom module? After editing your module, why not try
the reload command

                          ########                  #
                      #################            #
                   ######################         #
                  #########################      #
                ############################
               ##############################
               ###############################
              ###############################
              ##############################
                              #    ########   #
                 ##        ###        ####   ##
                                      ###   ###
                                    ####   ###
               ####          ##########   ####
               #######################   ####
                 ####################   ####
                  ##################  ####
                    ############      ##
                       ########        ###
                      #########        #####
                    ############      ######
                   ########      #########
                     #####       ########
                       ###       #########
                      ######    ############
                     #######################
                     #   #   ###  #   #   ##
                     ########################
                      ##     ##   ##     ##
                            https://metasploit.com


       =[ metasploit v6.3.34-dev-                         ]
+ -- --=[ 2356 exploits - 1227 auxiliary - 413 post       ]
+ -- --=[ 1387 payloads - 46 encoders - 11 nops           ]
+ -- --=[ 9 evasion                                       ]

Metasploit Documentation: https://docs.metasploit.com/

msf6 > 
查看数据库状态,数据库连接成功,退出msf命令是quit
msf6 > db_status
[*] Connected to msf. Connection type: postgresql.
参考文档:
在线安装
云服务器在CentOS7中安装msf工具_centos安装msf_剁椒鱼头没剁椒的博客-CSDN博客
离线安装


 2191
2191


 被折叠的 条评论
为什么被折叠?


