


1、EventLoopGroup

EventLoopGroup 是一个接口,最终还是来自于 线程池的父接口 Executor。
1.1 NioEventLoopGroup
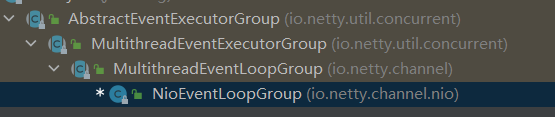
平时比较常用的实现类是 NioEventLoopGroup;
NioEventLoopGroup 主要做的事就是创建一些 EventLoop 线程,帮其初始化选择器以及执行器;
- 初始化方法
    /**
     *
     * @param nThreads:使用的线程数量
     * @param executor:使用的线程池
     * @param chooserFactory:创建选择器的工厂
     * @param args:一些额外参数信息
     */
    protected MultithreadEventExecutorGroup(int nThreads, Executor executor,
                                            EventExecutorChooserFactory chooserFactory, Object... args) {
        if (nThreads <= 0) {
            throw new IllegalArgumentException(String.format("nThreads: %d (expected: > 0)", nThreads));
        }

        if (executor == null) {
            // 创建线程任务的对应执行器
            executor = new ThreadPerTaskExecutor(newDefaultThreadFactory());
        }

        // 根据线程数,构建一个时间处理器数组
        children = new EventExecutor[nThreads];

        for (int i = 0; i < nThreads; i ++) {
            boolean success = false;
            try {
                /**
                 * return new NioEventLoop(this, executor, (SelectorProvider) args[0],
                 * ((SelectStrategyFactory) args[1]).newSelectStrategy(),
                 * (RejectedExecutionHandler) args[2], queueFactory);
                 *
                 * 为数组的每一个元素初始化一个 NioEventLoop 线程。
                 */
                children[i] = newChild(executor, args);
                success = true;
            } catch (Exception e) {
                // TODO: Think about if this is a good exception type
                throw new IllegalStateException("failed to create a child event loop", e);
            } finally {
                // 如果没有创建成功则需要把每个都优雅的关闭
                if (!success) {
                    for (int j = 0; j < i; j ++) {
                        children[j].shutdownGracefully();
                    }

                    for (int j = 0; j < i; j ++) {
                        EventExecutor e = children[j];
                        try {
                            while (!e.isTerminated()) {
                                e.awaitTermination(Integer.MAX_VALUE, TimeUnit.SECONDS);
                            }
                        } catch (InterruptedException interrupted) {
                            // Let the caller handle the interruption.
                            Thread.currentThread().interrupt();
                            break;
                        }
                    }
                }
            }
        }

        // 根据线程数创建对应的选择器,该选择器主要应用于对于线程的选择,也就是 next() 方法
        chooser = chooserFactory.newChooser(children);

        final FutureListener<Object> terminationListener = new FutureListener<Object>() {
            @Override
            public void operationComplete(Future<Object> future) throws Exception {
                if (terminatedChildren.incrementAndGet() == children.length) {
                    terminationFuture.setSuccess(null);
                }
            }
        };
        // 为每个线程创建消亡的监听器
        for (EventExecutor e: children) {
            e.terminationFuture().addListener(terminationListener);
        }

        // 为线程创建只读的副本,便于查询
        Set<EventExecutor> childrenSet = new LinkedHashSet<EventExecutor>(children.length);
        Collections.addAll(childrenSet, children);
        readonlyChildren = Collections.unmodifiableSet(childrenSet);
    }
1.2 NioEventLoop
每个 NioEventLoop 都相当于 NioEventLoopGroup 线程组里的一个线程,主要包括五个核心功能:
- 开启一个 Selector 并初始化,每个NioEventLoop 都会维护一个 selector 进行多路复用;
- 注册 ServerSocketChannl 到 Selector 上;
- 处理各种 IO 事件,主要包括 OP_ACCEPT、OP_CONNECT、OP_READ、OP_WRITE;
- 执行定时调度任务;
- 解决 JDK 空轮询 BUG
NioEventLoop 将大多数功能都委托于其他对象完成,自己则负责数据的接入,减轻负担并且增加了扩展性;
1.2.1 NioEventLoop 开启 Selector
构造出 NioEventLoop 的同时,为其创造 Selector 选择器,并加入 Netty 的优化,使用反射,将JDK nio 的 SelectorKeySet 使用数组代替 HashSet 提高遍历效率;
SelectorKey 是事件准备就绪的集合。
- NioEventLoop 创建
    /**
     * 创建 NioEventLoopGroup 的时候,在 children[i] = newChild(executor, args); 中
     *      newChild(executor, args) 创建了 NioEventLoop
     *      也就是执行该构造方法
     * @param parent:属于哪个线程组
     * @param executor:线程执行器
     * @param selectorProvider:选择器提供者
     * @param strategy:选择策略,用来控制选择循环
     * @param rejectedExecutionHandler:拒绝处理器,当接收到非 IO 任务需要拒绝。
     * @param queueFactory:队列工厂
     */
    NioEventLoop(NioEventLoopGroup parent, Executor executor, SelectorProvider selectorProvider,
                 SelectStrategy strategy, RejectedExecutionHandler rejectedExecutionHandler,
                 EventLoopTaskQueueFactory queueFactory) {
        super(parent, executor, false, newTaskQueue(queueFactory), newTaskQueue(queueFactory),
                rejectedExecutionHandler);
        this.provider = ObjectUtil.checkNotNull(selectorProvider, "selectorProvider");
        this.selectStrategy = ObjectUtil.checkNotNull(strategy, "selectStrategy");
        // 这一步就是开启每个 NioEventLoop 的 Selector 选择器
        final NioEventLoop.SelectorTuple selectorTuple = openSelector();
        this.selector = selectorTuple.selector;
        this.unwrappedSelector = selectorTuple.unwrappedSelector;
    }
- NioEventLoop 开启 Selector 选择器
    private SelectorTuple openSelector() {
        final Selector unwrappedSelector;
        try {
            // 创建出没有包装过的Selector
            unwrappedSelector = provider.openSelector();
        } catch (IOException e) {
            throw new ChannelException("failed to open a new selector", e);
        }
        // 判断禁用优化标志是否被打开,如果是,直接返回未包装的 Selector
        if (DISABLE_KEY_SET_OPTIMIZATION) {
            return new SelectorTuple(unwrappedSelector);
        }
        // 通过反射获取 SelectorImpl 对象
        Object maybeSelectorImplClass = AccessController.doPrivileged(new PrivilegedAction<Object>() {
            @Override
            public Object run() {
                try {
                    return Class.forName(
                            "sun.nio.ch.SelectorImpl",
                            false,
                            PlatformDependent.getSystemClassLoader());
                } catch (Throwable cause) {
                    return cause;
                }
            }
        });
        // 对获取的类模板做一个安全性判断
        if (!(maybeSelectorImplClass instanceof Class) ||
                // ensure the current selector implementation is what we can instrument.
                !((Class<?>) maybeSelectorImplClass).isAssignableFrom(unwrappedSelector.getClass())) {
            if (maybeSelectorImplClass instanceof Throwable) {
                Throwable t = (Throwable) maybeSelectorImplClass;
                logger.trace("failed to instrument a special java.util.Set into: {}", unwrappedSelector, t);
            }
            return new SelectorTuple(unwrappedSelector);
        }

        final Class<?> selectorImplClass = (Class<?>) maybeSelectorImplClass;
        /**
         * 构造出优化的 SelectedSelectionKeySet 替换 NIO 底层的 SelectedSelectionKeySet
         * keys = new SelectionKey[1024]; 使用数组代替原本的 HashSet 遍历效率更高;
         */
        final SelectedSelectionKeySet selectedKeySet = new SelectedSelectionKeySet();

        Object maybeException = AccessController.doPrivileged(new PrivilegedAction<Object>() {
            @Override
            public Object run() {
                try {
                    Field selectedKeysField = selectorImplClass.getDeclaredField("selectedKeys");
                    Field publicSelectedKeysField = selectorImplClass.getDeclaredField("publicSelectedKeys");
                    // 因为 JDK 9 之后,使用类加载器出现较大改动,需要特殊处理;
                    if (PlatformDependent.javaVersion() >= 9 && PlatformDependent.hasUnsafe()) {
                        // Let us try to use sun.misc.Unsafe to replace the SelectionKeySet.
                        // This allows us to also do this in Java9+ without any extra flags.
                        long selectedKeysFieldOffset = PlatformDependent.objectFieldOffset(selectedKeysField);
                        long publicSelectedKeysFieldOffset =
                                PlatformDependent.objectFieldOffset(publicSelectedKeysField);

                        if (selectedKeysFieldOffset != -1 && publicSelectedKeysFieldOffset != -1) {
                            PlatformDependent.putObject(
                                    unwrappedSelector, selectedKeysFieldOffset, selectedKeySet);
                            PlatformDependent.putObject(
                                    unwrappedSelector, publicSelectedKeysFieldOffset, selectedKeySet);
                            return null;
                        }
                        // We could not retrieve the offset, lets try reflection as last-resort.
                    }

                    // 通过反射使用 Netty 优化的 selectedKeys 替换 JDK NIO 的 selectedKeys
                    Throwable cause = ReflectionUtil.trySetAccessible(selectedKeysField, true);
                    if (cause != null) {
                        return cause;
                    }
                    cause = ReflectionUtil.trySetAccessible(publicSelectedKeysField, true);
                    if (cause != null) {
                        return cause;
                    }

                    selectedKeysField.set(unwrappedSelector, selectedKeySet);
                    publicSelectedKeysField.set(unwrappedSelector, selectedKeySet);
                    return null;
                } catch (NoSuchFieldException e) {
                    return e;
                } catch (IllegalAccessException e) {
                    return e;
                }
            }
        });

        if (maybeException instanceof Exception) {
            selectedKeys = null;
            Exception e = (Exception) maybeException;
            logger.trace("failed to instrument a special java.util.Set into: {}", unwrappedSelector, e);
            return new SelectorTuple(unwrappedSelector);
        }
        // 为 NioEventLoop 赋值
        selectedKeys = selectedKeySet;
        logger.trace("instrumented a special java.util.Set into: {}", unwrappedSelector);
        // 最后返回结果
        return new SelectorTuple(unwrappedSelector,
                new SelectedSelectionKeySetSelector(unwrappedSelector, selectedKeySet));
    }
1.2.2 NioEventLoop 处理 IO 任务
NioEventLoop 处理 IO 任务的逻辑在 run 方法里,主要其实就包括如下三步:
    protected void run() {
        for (;;) {

            // . . .

            /**
             * 轮询是否有准备就绪的 Channel 触发 IO 事件
             * 选取 IO 事件之前会判断任务队列中是否有未完成的任务,完成任务队列的任务才会继续接受 IO 事件。
             */
            strategy = select(curDeadlineNanos);

            // . . .

            /**
             * 处理上一个部分轮询到的 IO 事件
             */
            processSelectedKeys();

            // . . .

            /**
             * 执行任务队列和定时任务队列的任务,例如心跳检测,异步写操作等;
             */
            ranTasks = runAllTasks();
        }
    }
- select():底层通过 Linux 的 epoll 进行轮询
    private int select(long deadlineNanos) throws IOException {
        if (deadlineNanos == NONE) {
            return selector.select();
        }
        // Timeout will only be 0 if deadline is within 5 microsecs
        long timeoutMillis = deadlineToDelayNanos(deadlineNanos + 995000L) / 1000000L;
        return timeoutMillis <= 0 ? selector.selectNow() : selector.select(timeoutMillis);
    }
- processSelectedKeys()
    private void processSelectedKeys() {
        // 该 selectedKeys 是经过 Netty 优化的 keys
        if (selectedKeys != null) {
            // 如果经过优化则执行该方法处理对应事件
            processSelectedKeysOptimized();
        } else {
            processSelectedKeysPlain(selector.selectedKeys());
        }
    }
    private void processSelectedKeysOptimized() {
        for (int i = 0; i < selectedKeys.size; ++i) {

            // 轮询取出对应的 IO 事件,并置为 null 帮助 GC
            final SelectionKey k = selectedKeys.keys[i];
            selectedKeys.keys[i] = null;

            // 获取事件的 attachment 附件,类似于一个 ThreadLocal 信息
            final Object a = k.attachment();

            if (a instanceof AbstractNioChannel) {
                // Netty 基本只进这个方法,处理对应事件
                // 通过调用 NioUnsafe 的 read wirte 进行读写
                processSelectedKey(k, (AbstractNioChannel) a);
            } else {
                @SuppressWarnings("unchecked")
                NioTask<SelectableChannel> task = (NioTask<SelectableChannel>) a;
                processSelectedKey(k, task);
            }

            // 判断是否需要再次轮询,每处理 256 个事件就会再次进行轮询获取事件
            if (needsToSelectAgain) {
                selectedKeys.reset(i + 1);
                selectAgain();
                i = -1;
            }
        }
    }
- runAllTasks():执行任务队列的任务和定时任务
    protected boolean runAllTasks() {
        assert inEventLoop();
        boolean fetchedAll;
        boolean ranAtLeastOne = false;

        do {
            // 拉取任务队列的到期定时任务到 taskQueue
            fetchedAll = fetchFromScheduledTaskQueue();
            // 循环执行taskQueue 中任务
            if (runAllTasksFrom(taskQueue)) {
                ranAtLeastOne = true;
            }
        } while (!fetchedAll); // keep on processing until we fetched all scheduled tasks.

        // 更新最后一次执行的时间
        if (ranAtLeastOne) {
            lastExecutionTime = ScheduledFutureTask.nanoTime();
        }
        // 收尾工作
        afterRunningAllTasks();
        return ranAtLeastOne;
    }
- rebuildSelector( ):重建 Selector ,解决 JDK NIO 空轮询 bug
- 空轮询指的是 JDK NIO,在 select() 可能被异常唤醒(客户端连接发送RST等情况造成事件集合异常),而并没有 IO 事件造成一直空轮询;
- 重新构建则通过重新创建一个 Selector ,并且将旧的key(感兴趣的事件)和 attchment (附件)复制过去,关闭旧 Selector,重新构建的事件集合没有异常问题解决空轮询的问题;
        /**
         * 如果 Netty 空轮询的次数大于等于阈值(默认 512)次,就重新构建 Selector
         * SELECTOR_AUTO_REBUILD_THRESHOLD 默认 512
         */
        if (SELECTOR_AUTO_REBUILD_THRESHOLD > 0 &&
                selectCnt >= SELECTOR_AUTO_REBUILD_THRESHOLD) {
            logger.warn("Selector.select() returned prematurely {} times in a row; rebuilding Selector {}.",
                    selectCnt, selector);
            // 在此处重新构建,最终调用 rebuildSelector0() 方法重新构建
            rebuildSelector();
            return true;
        }
    private void rebuildSelector0() {
        final Selector oldSelector = selector;
        final NioEventLoop.SelectorTuple newSelectorTuple;

        if (oldSelector == null) {
            return;
        }
        // 创建一个新的 Selector
        try {
            newSelectorTuple = openSelector();
        } catch (Exception e) {
            logger.warn("Failed to create a new Selector.", e);
            return;
        }

        // 将旧的 Selector 中感兴趣的事件以及对应的附件添加到新的 Selector 上
        int nChannels = 0;
        for (SelectionKey key: oldSelector.keys()) {
            Object a = key.attachment();
            try {
                if (!key.isValid() || key.channel().keyFor(newSelectorTuple.unwrappedSelector) != null) {
                    continue;
                }

                int interestOps = key.interestOps();
                key.cancel();
                // 重新注册到新 channel 上
                SelectionKey newKey = key.channel().register(newSelectorTuple.unwrappedSelector, interestOps, a);
                if (a instanceof AbstractNioChannel) {
                    // Update SelectionKey
                    ((AbstractNioChannel) a).selectionKey = newKey;
                }
                nChannels ++;
            } catch (Exception e) {
                logger.warn("Failed to re-register a Channel to the new Selector.", e);
                if (a instanceof AbstractNioChannel) {
                    AbstractNioChannel ch = (AbstractNioChannel) a;
                    ch.unsafe().close(ch.unsafe().voidPromise());
                } else {
                    @SuppressWarnings("unchecked")
                    NioTask<SelectableChannel> task = (NioTask<SelectableChannel>) a;
                    invokeChannelUnregistered(task, key, e);
                }
            }
        }

        selector = newSelectorTuple.selector;
        unwrappedSelector = newSelectorTuple.unwrappedSelector;

        // 将原本的 Selector 关闭
        try {
            // time to close the old selector as everything else is registered to the new one
            oldSelector.close();
        } catch (Throwable t) {
            if (logger.isWarnEnabled()) {
                logger.warn("Failed to close the old Selector.", t);
            }
        }

        if (logger.isInfoEnabled()) {
            logger.info("Migrated " + nChannels + " channel(s) to the new Selector.");
        }
    }
1.3 总结

2、Channel
Channel 是 Netty 抽象出来的对网络 IO 进行读写的相关接口;
主要功能有:网络 IO 读写,客户端发起连接,关闭连接,关闭链路,获取双方的网络地址等;
2.1 AbstractChannel
AbstractChannel 是 channel 类的抽象类,因为由于网络 IO 模型及协议种类比较多,所以不同协议不同 IO 模型有对应的 channel,因此 AbstractChannel 没有与网络 IO 直接相关的操作;
AbstractChannel 的主要属性:
    /**
     * 用于实现具体的连接和读写任务,主要包括:
     *      (1)Channel 地组册,将 channel 注册到对应的 EventLoop 选择器上;
     *      (2)端口绑定监听;
     *      (3)链路的连接与关闭;
     *      (4)IO 事件的具体处理,数据的读写;
     * 是 Netty channel 的 Unsafe,表示不对外提供使用
     */
    private final Unsafe unsafe;

    /**
     * 一个 Handler 的容器,也就是一条 Handler 链
     * 处理数据的编解码以及业务逻辑
     * Netty 事件驱动模型的体现
     */
    private final DefaultChannelPipeline pipeline;

    /**
     * 每个 channel 对应的线程
     * Netty 线程模型的体现
     */
    private volatile EventLoop eventLoop;

    /**
     * 保证全局唯一的 ID
     */
    private final ChannelId id;
2.2 AbstractNioChannel
AbstractNioChannel 继承于 AbstractChannel,在它的基础上增加了一些属性和方法;主要包括了注册,连接等功能;
主要包括如下三个属性:
public abstract class AbstractNioChannel extends AbstractChannel {

    /**
     * SelectableChannel 是 SocketChannel 和 ServerSocket 的父类
     * 真正和 JDK NIO 的 channel 进行关联
     */
    private final SelectableChannel ch;

    /**
     * 注册的感兴趣的事件
     */
    protected final int readInterestOp;

    /**
     * 将 channel 注册到 Selector 后返回的 key
     * SelectionKey 中包括了如下信息:
     *      (1)感兴趣的事件集合
     *      (2)准备就绪的事件集合
     *      (3)对应的 Channel 通道
     *      (4)对应的 Selector 选择器
     *      (5) attachment 附件信息
     */
    volatile SelectionKey selectionKey;

    // . . .
}
再阅读一下主要的方法源码:
- doRegister( ):注册方法,将 channel 注册到对应的 EventLoop 线程的 Selector 选择器上;
    @Override
    protected void doRegister() throws Exception {
        boolean selected = false;
        for (;;) {
            try {
                /**
                 * javaChannel() { return ch} 得到对应的 Nio channel
                 * 再 register 到对应的 EventLoop 的 Selector 选择器上
                 * 得到一个 selectionKey 后续需要再对其设置感兴趣的事件;
                 */
                selectionKey = javaChannel().register(eventLoop().unwrappedSelector(), 0, this);
                return;
            } catch (CancelledKeyException e) {
                if (!selected) {
                    /**
                     * 因为以上过程是 for (;;) 的死循环,所以要强行退出需要通过异常
                     * 因为还没有调用 select() 方法,所以存在在缓存中没有删除但是已经取消的 selectionKey
                     * 强制调用 selectNow() 进行删除
                     */
                    eventLoop().selectNow();
                    selected = true;
                } else {
                    /**
                     * 如果调用之后还有异常,可能是 JDK 的 bug
                     */
                    throw e;
                }
            }
        }
    }
- connect() :客户端连接服务器方法,AbstractNioChannel 中内部类 AbstractNioUnsafe 的重要方法;
    @Override
    public final void connect(
            final SocketAddress remoteAddress, final SocketAddress localAddress, final ChannelPromise promise) {

        // 设置任务为不可取消,并且确定 channel 是打开状态
        if (!promise.setUncancellable() || !ensureOpen(promise)) {
            return;
        }

        try {
            // 确保没有正在进行的连接
            if (connectPromise != null) {
                throw new ConnectionPendingException();
            }
            // 判断之前的状态
            boolean wasActive = isActive();

            /**
             * 调用 doConnect 去连接服务器,因为 IO 模型以及协议的不同,
             * 具体实现由子类完成(模版方法模式)
             *
             * 连接会出现如下三种结果:
             *      (1)连接成功 返回 true
             *      (2)暂时没有连接上,服务端还没有返回 ACk ,返回 false
             *      (3)连接失败,抛出异常
             */
            if (doConnect(remoteAddress, localAddress)) {
                // 连接成功出发 channelActive,注册事件
                fulfillConnectPromise(promise, wasActive);
            // 返回 false 的情况
            } else {
                connectPromise = promise;
                requestedRemoteAddress = remoteAddress;

                // 获取连接超时的时间
                int connectTimeoutMillis = config().getConnectTimeoutMillis();
                if (connectTimeoutMillis > 0) {
                    // 设置一个定时任务去检查后续是否连接成功
                    connectTimeoutFuture = eventLoop().schedule(new Runnable() {
                        @Override
                        public void run() {
                            ChannelPromise connectPromise = AbstractNioChannel.this.connectPromise;
                            ConnectTimeoutException cause =
                                    new ConnectTimeoutException("connection timed out: " + remoteAddress);
                            if (connectPromise != null && connectPromise.tryFailure(cause)) {
                                // 失败则关闭连接释放资源
                                close(voidPromise());
                            }
                        }
                    }, connectTimeoutMillis, TimeUnit.MILLISECONDS);
                }

                /**
                 * 增加监听器监听连接结果后续情况
                 */
                promise.addListener(new ChannelFutureListener() {
                    @Override
                    public void operationComplete(ChannelFuture future) throws Exception {
                        if (future.isCancelled()) {
                            if (connectTimeoutFuture != null) {
                                connectTimeoutFuture.cancel(false);
                            }
                            connectPromise = null;
                            close(voidPromise());
                        }
                    }
                });
            }
        } catch (Throwable t) {
            promise.tryFailure(annotateConnectException(t, remoteAddress));
            // 从选择器中移除
            closeIfClosed();
        }
    }
2.3 AbstractNioByteChannel
AbstractNioByteChannel 继承自 AbstractNioChannel,提供了读写数据的能力,也就是处理 IO 任务,Netty 对于 IO 的读写,分为对象读写与 ByteBuf 和 FileRegin;
因此 AbstractNioChannel 抽象了两个子类:
- AbstractNioByteChannel:负责 ByteBuf 和 FileRegin 的读写。
- AbstractNioMessageChannel: 负责 pojo 对象的读写。
本节先对 AbstractNioByteChannel 进行分析。
- doWrite:写操作方法。
- 因为写数据并不是直接写到套接字中,而是先写到 ChannelOutboundBuffer 中来平衡 IO 设备和 CPU 的速率;
- 再通过 flush 操作,将缓冲区中的数据,刷新到套接字中进行网络传输;
- 该方法在 AbstractChannel 的 flush0() 方法中被调用;
    /**
     * 主要包括三种结果:
     *      (1)写入成功直接返回
     *      (2)由于种种原因(例如 TCP 缓冲区满了),导致实际写入数据为 0,
     *          这种会重新将该写事件加入到就绪事件集合中重新进行写操作
     *      (3)如果是发送了配置次数还没有发送完成,则会将该写任务封装为一个 flushTask
     *          利用 EventLoop 后续进行写入
     *
     * @param in
     * @throws Exception
     */
    @Override
    protected void doWrite(ChannelOutboundBuffer in) throws Exception {
        // 配置中获取写入数据循环次数
        int writeSpinCount = config().getWriteSpinCount();

        do {
            // 获取当前 ChannelOutboundBuffer 中的消息;
            Object msg = in.current();
            // 如果没有消息需要发送了
            if (msg == null) {
                // 清除准备就绪的写事件
                clearOpWrite();
                // 直接返回
                return;
            }
            // doWriteInternal 真正发送数据
            writeSpinCount -= doWriteInternal(in, msg);
        } while (writeSpinCount > 0);

        /**
         * 该方法主要是为了解决两种情况:
         *      (1)因为 TCP 缓冲区满了或者其他原因导致发送失败,
         *          也就是没有实际发送出数据 doWriteInternal 返回 Integer.MAX_VALUE,
         *          则 writeSpinCount < 0 值为 true,则重新设置感兴趣事件,进行写操作;
         *      (2)发送配置循环次数之后,数据还没写完,则 doWriteInternal 返回 0,
         *          writeSpinCount < 0 值为 false,该写操作会被封装为一个 flushTask 之后进行调用
         */
        incompleteWrite(writeSpinCount < 0);
    }
    /**
     * 继续完成写入方法
     * @param setOpWrite
     */
    protected final void incompleteWrite(boolean setOpWrite) {
        // 说明还有数据没有写完,则继续设置写事件处理
        if (setOpWrite) {
            setOpWrite();
        } else {
            // 清除准备就绪的写事件
            clearOpWrite();
            // 继续执行写操作刷新任务
            eventLoop().execute(flushTask);
        }
    }
	/**
     * 实际写数据方法
     * @param in
     * @param msg
     * @return
     * @throws Exception
     */
    private int doWriteInternal(ChannelOutboundBuffer in, Object msg) throws Exception {
        // 如果是 ByteBuf 类型
        if (msg instanceof ByteBuf) {
            ByteBuf buf = (ByteBuf) msg;
            // 如果没有可读数据,则移除数据并返回
            if (!buf.isReadable()) {
                in.remove();
                return 0;
            }
            // 真正发送数据
            final int localFlushedAmount = doWriteBytes(buf);
            if (localFlushedAmount > 0) {
                // 更新缓冲区中的发送进度
                in.progress(localFlushedAmount);
                // 写完数据则移除缓冲区中数据
                if (!buf.isReadable()) {
                    in.remove();
                }
                return 1;
            }
        // 文件源类型的操作,和 ByteBuf 类似
        } else if (msg instanceof FileRegion) {
            FileRegion region = (FileRegion) msg;
            if (region.transferred() >= region.count()) {
                in.remove();
                return 0;
            }
            long localFlushedAmount = doWriteFileRegion(region);
            if (localFlushedAmount > 0) {
                in.progress(localFlushedAmount);
                if (region.transferred() >= region.count()) {
                    in.remove();
                }
                return 1;
            }
        } else {
            // 如果是其他类型,则需要抛出异常
            throw new Error();
        }
        // 当没有发送出数据的时候,会返回该值,也就是 Integer.MAX_VALUE
        return WRITE_STATUS_SNDBUF_FULL;
    }
- read() :读数据方法,读取缓冲区中的内容,整个方法不复杂,就是分配缓冲区读取内容,进入 pipline 进行处理,例如解码等。
    @Override
    public final void read() {
        // 获取 Channel 的配置
        final ChannelConfig config = config();
        // 当 sockethChannel 被关闭的情况,清除内容
        if (shouldBreakReadReady(config)) {
            clearReadPending();
            return;
        }
        // 获取 pipline
        final ChannelPipeline pipeline = pipeline();
        // 获取内存分配器
        final ByteBufAllocator allocator = config.getAllocator();
        // 获取内存分配处理器
        final RecvByteBufAllocator.Handle allocHandle = recvBufAllocHandle();
        // 清空上一次读取字节数,重新读取
        allocHandle.reset(config);
        ByteBuf byteBuf = null;
        boolean close = false;
        try {
            do {
                // 分配读取内存
                byteBuf = allocHandle.allocate(allocator);
                // 读取 Channel 中接收缓冲区的内容
                // doReadBytes(byteBuf) 是真正读数据的方法
                allocHandle.lastBytesRead(doReadBytes(byteBuf));

                // 如果没有数据可读取或者读取完成 Channel 关闭等,则释放内存,结束读取
                if (allocHandle.lastBytesRead() <= 0) {
                    // nothing was read. release the buffer.
                    byteBuf.release();
                    byteBuf = null;
                    close = allocHandle.lastBytesRead() < 0;
                    if (close) {
                        // There is nothing left to read as we received an EOF.
                        readPending = false;
                    }
                    break;
                }
                // 更新读取的计数器
                allocHandle.incMessagesRead(1);
                readPending = false;
                // 使用 pipline 处理读取的数据
                pipeline.fireChannelRead(byteBuf);
                byteBuf = null;
            } while (allocHandle.continueReading());

            // 处理读取完成事件,空方法,子类实现
            allocHandle.readComplete();
            pipeline.fireChannelReadComplete();
            // 如果 Channel 关闭,则结束读取
            if (close) {
                closeOnRead(pipeline);
            }
        } catch (Throwable t) {
            handleReadException(pipeline, byteBuf, t, close, allocHandle);
        } finally {
            // 读取操作完毕并且没有配置自动读,则从感兴趣事件中清除该读事件
            if (!readPending && !config.isAutoRead()) {
                removeReadOp();
            }
        }
    }
2.4 AbstractNioMessageChannel
AbstractNioMessageChannel 读写的数据类型是 Object,而不是字节流,和 AbstractNioByteChannel 有所区别,在对于对象的网络传输更有优势。
- read():读数据方法,与字节流处理差距不大,不存在沾包问题;
    @Override
    public void read() {
        // 断言 eventLoop 状态
        assert eventLoop().inEventLoop();
        // 获取 Channel 配置
        final ChannelConfig config = config();
        // 获取 pipline
        final ChannelPipeline pipeline = pipeline();
        // 获取分配内存处理器
        final RecvByteBufAllocator.Handle allocHandle = unsafe().recvBufAllocHandle();
        // 清空上次的读记录
        allocHandle.reset(config);

        boolean closed = false;
        Throwable exception = null;
        try {
            try {
                // 循环读取数据
                do {
                    // 调用子类重写的 doReadMessages(readBuf) 方法,将数据包读入到 readBuf 中
                    int localRead = doReadMessages(readBuf);
                    // 数据读取完成
                    if (localRead == 0) {
                        break;
                    }
                    // 链路关闭
                    if (localRead < 0) {
                        closed = true;
                        break;
                    }
                    // 更新读取次数
                    allocHandle.incMessagesRead(localRead);
                    // 循环次数是配置中约定,默认 16 次
                } while (allocHandle.continueReading());
            } catch (Throwable t) {
                exception = t;
            }
            // 循环将数据包放入 pipline 处理
            int size = readBuf.size();
            for (int i = 0; i < size; i ++) {
                readPending = false;
                pipeline.fireChannelRead(readBuf.get(i));
            }
            // 处理完成清空缓冲区
            readBuf.clear();
            // 记录读取情况,有助于下次的内存分配
            allocHandle.readComplete();
            // 出发读数据完成事件
            pipeline.fireChannelReadComplete();

            // 异常以及Channel 关闭的处理
            if (exception != null) {
                closed = closeOnReadError(exception);

                pipeline.fireExceptionCaught(exception);
            }

            if (closed) {
                inputShutdown = true;
                if (isOpen()) {
                    close(voidPromise());
                }
            }
        } finally {
            // 没有问题则移除就绪事件
            if (!readPending && !config.isAutoRead()) {
                removeReadOp();
            }
        }
    }
}
- doWrite() :写数据方法,和字节流也类似,循环写入,没有写入成功则重新添加就绪事件;
    @Override
    protected void doWrite(ChannelOutboundBuffer in) throws Exception {
        // 获取 SelectionKey
        final SelectionKey key = selectionKey();
        // 从 key 中获取感兴趣的事件集合
        final int interestOps = key.interestOps();

        for (;;) {
            // 获取当前需要写入的消息
            Object msg = in.current();
            if (msg == null) {
                // 如果消息消息已经写完,则移除对应事件
                if ((interestOps & SelectionKey.OP_WRITE) != 0) {
                    key.interestOps(interestOps & ~SelectionKey.OP_WRITE);
                }
                break;
            }
            try {
                boolean done = false;
                // 从配置文件中得到循环写入次数(默认 16)
                for (int i = config().getWriteSpinCount() - 1; i >= 0; i--) {
                    // 写入方法
                    if (doWriteMessage(msg, in)) {
                        done = true;
                        break;
                    }
                }
                // 写入成功则从链表移除该节点,继续下一块缓冲的写入
                if (done) {
                    in.remove();
                } else {
                    // 没有写入成功则将该事件继续加入到就绪事件集合
                    if ((interestOps & SelectionKey.OP_WRITE) == 0) {
                        key.interestOps(interestOps | SelectionKey.OP_WRITE);
                    }
                    break;
                }
            } catch (Exception e) {
                // 出现异常判断是否需要继续写入
                if (continueOnWriteError()) {
                    in.remove(e);
                } else {
                    throw e;
                }
            }
        }
    }
2.5 NioSocketChannel
NioSocketChannel 是 Netty 中使用较多的 Channel 实现类,客户端连接服务器端之后,会为其创建一个 NioSocketChannel 对象,实现了 IO 数据读写和连接操作。
public class NioSocketChannel extends AbstractNioByteChannel implements io.netty.channel.socket.SocketChannel

NioSocketChannel 继承自 AbstractNioByteChannel 并实现了 netty 包下的 SocketChannel 接口。
核心方法剖析:
- doReadBytes():读数据方法,在 AbstractNioByteChannel 中的 NioByteUnSafe 的 read() 方法中被调用。
    @Override
    protected int doReadBytes(ByteBuf byteBuf) throws Exception {
        // 获取内存分配处理器
        final RecvByteBufAllocator.Handle allocHandle = unsafe().recvBufAllocHandle();
        // 设置内存尝试读取字节数为 byteBuf.writableBytes()
        allocHandle.attemptedBytesRead(byteBuf.writableBytes());
        // 从 javaChannel() 中获取的 Channel 中读取字节,写入到 buf 中
        return byteBuf.writeBytes(javaChannel(), allocHandle.attemptedBytesRead());
    }
- doWrite():写数据方法,上面的内容中也分析过,该方法中进行了重写,在 AbstractChannel 的 flush 操作中被调用,写入过程中又调用 doWriteBytes 真正写入数据。
    @Override
    protected void doWrite(ChannelOutboundBuffer in) throws Exception {
        // 获取 Channel
        SocketChannel ch = javaChannel();
        // 获取配置中循环读取的次数(默认为 16)
        int writeSpinCount = config().getWriteSpinCount();
        do {
            // 如果缓冲区中没有内容可写,则移除就绪写事件
            if (in.isEmpty()) {
                clearOpWrite();
                return;
            }

            // 获取每次最大可写的字节数
            int maxBytesPerGatheringWrite = ((NioSocketChannel.NioSocketChannelConfig) config).getMaxBytesPerGatheringWrite();
            // 构造出发送数据的缓冲区数组
            ByteBuffer[] nioBuffers = in.nioBuffers(1024, maxBytesPerGatheringWrite);
            // 计算缓冲区的个数
            int nioBufferCnt = in.nioBufferCount();
            switch (nioBufferCnt) {
                // 不是 byteBuffer 数据,则交给父类处理
                case 0:
                    writeSpinCount -= doWrite0(in);
                    break;
                // 如果只需要一块缓冲区
                case 1: {
                    // 获取第一块缓冲区
                    ByteBuffer buffer = nioBuffers[0];
                    // 获得可读写的字节数
                    int attemptedBytes = buffer.remaining();
                    // 写入到 socket 的缓冲区中
                    final int localWrittenBytes = ch.write(buffer);
                    // 写入失败,则重新添加到就绪事件
                    if (localWrittenBytes <= 0) {
                        incompleteWrite(true);
                        return;
                    }
                    // 根据成功写入的字节数和尝试写入的字节数,调整下次的最大可写入字节数
                    adjustMaxBytesPerGatheringWrite(attemptedBytes, localWrittenBytes, maxBytesPerGatheringWrite);
                    // 清除写入的内容
                    in.removeBytes(localWrittenBytes);
                    // 循环次数减 1
                    --writeSpinCount;
                    break;
                }
                // 其他情况则直接开始写数据
                default: {
                    // 获取尝试写入的字节数
                    long attemptedBytes = in.nioBufferSize();
                    // 真正写入到 socket 缓冲区中
                    final long localWrittenBytes = ch.write(nioBuffers, 0, nioBufferCnt);
                    // 发送失败的话,与上同理
                    if (localWrittenBytes <= 0) {
                        incompleteWrite(true);
                        return;
                    }
                    // 调整最大字节数
                    adjustMaxBytesPerGatheringWrite((int) attemptedBytes, (int) localWrittenBytes,
                            maxBytesPerGatheringWrite);
                    in.removeBytes(localWrittenBytes);
                    --writeSpinCount;
                    break;
                }
            }
        } while (writeSpinCount > 0);
        /**
         * 熟面孔,分两种情况
         * writeSpinCount < 0:说明发送因为某种原因失败,重新设置就绪写事件进行操作
         * writeSpinCount = 0:说明循环之后还有数据没有写完成,封装为一个 flushTask 后续调用
         */
        incompleteWrite(writeSpinCount < 0);
    }
    @Override
    protected int doWriteBytes(ByteBuf buf) throws Exception {
        // 获取缓冲区期望可写字节数
        final int expectedWrittenBytes = buf.readableBytes();
        // 向 socket 缓冲区中写入字节
        return buf.readBytes(javaChannel(), expectedWrittenBytes);
    }
2.6 NioServerSocketChannel

NioServerSocketChannel 是 AbstractNioMessageChannel 的子类,该channel在服务端使用,只负责监听 Socket 的接入,不关心 IO 的事件,所以实现要更加简单。
    @Override
    protected int doReadMessages(List<Object> buf) throws Exception {
        //通过 NIO 的 ServerSocketChannel 的 accept 接受新加入的连接
        SocketChannel ch = SocketUtils.accept(javaChannel());
        try {
            // 并为其创建一个 NioSocketChannel
            if (ch != null) {
                buf.add(new NioSocketChannel(this, ch));
                return 1;
            }
        } catch (Throwable t) {
            logger.warn("Failed to create a new channel from an accepted socket.", t);
            // 出现异常则关闭连接
            try {
                ch.close();
            } catch (Throwable t2) {
                logger.warn("Failed to close a socket.", t2);
            }
        }
        return 0;
    }
2.7 总结

3、 ByteBuf
网络传输中,字节是基本单位,NIO 采用 ByteBuffer 作为字节容器,但是由于使用复杂,所以 Netty 采用了 ByteBuf 进行代替。
NIO ByteBuffer 有一个未知指针 position,在切换读写状态的时候,需要手动调用 flip() 或者 rewind() 改变 position 位置,而且 ByteBuffer 大小是固定的,当读入内容大于缓冲区容量就会发生异常。
Netty 的 ByteBuf 对这些都做了改进,并增加了很多新特性,以下在每个实现的源码中慢慢讲解。
3.1 AbstractByteBuf
该类是 ByteBuf 的子类,抽象了 ByteBuf 的一些公有属性以及模板方法。
主要属性:
    /**
     * 读索引
     */
    int readerIndex;

    /**
     * 写索引
     */
    int writerIndex;

    /**
     * 读索引的标记
     * 可以在读取的时候做标记来复位
     * 例如,解码时,由于消息不完整无法处理需要将读指针复位
     */
    private int markedReaderIndex;

    /**
     * 写索引的标记
     */
    private int markedWriterIndex;

    /**
     * 最大容量
     */
    private int maxCapacity;
主要方法:
- writeBytes():写数据操作,会先对于容量进行校验,不足会完成自动扩容,具体写数据操作留给子类重写。
    @Override
    public ByteBuf writeBytes(ByteBuf src, int srcIndex, int length) {
        // 确保容量足够写入,不足则扩容
        ensureWritable(length);
        // 具体写数据方法,由子类重写
        setBytes(writerIndex, src, srcIndex, length);
        // 更新写指针
        writerIndex += length;
        return this;
    }
    final void ensureWritable0(int minWritableBytes) {
        /**
         * 确保缓冲区可用
         * 通过引用计数,获取返回值如果为 0,
         * 则代表该对象已经被销毁,或者需要被销毁,抛出异常
         */
        ensureAccessible();
        // 如果可写字节大于最小需要字节数,则不需要扩容
        if (minWritableBytes <= writableBytes()) {
            return;
        }
        // 获取写索引
        final int writerIndex = writerIndex();
        // 如果写入字节超出了最大容量,抛出异常
        if (checkBounds) {
            if (minWritableBytes > maxCapacity - writerIndex) {
                throw new IndexOutOfBoundsException(String.format(
                        "writerIndex(%d) + minWritableBytes(%d) exceeds maxCapacity(%d): %s",
                        writerIndex, minWritableBytes, maxCapacity, this));
            }
        }

        // 计算最小新的容量
        int minNewCapacity = writerIndex + minWritableBytes;
        /**
         * 分配新容量
         * calculateNewCapacity() 方法逻辑较复杂:
         *      阈值为 4MB
         *      (1)当容量小于 4 MB的时候,以 64 为基础不断乘 2,直到大于需求容量 newCapacity <<= 1;
         *      (2)当容量大于等于 4 MB,则一次增加一个阈值,也就是 4 MB,newCapacity += threshold;
         */
        int newCapacity = alloc().calculateNewCapacity(minNewCapacity, maxCapacity);
        // 返回不用复制和重新分配内存的最快最大的可写字节数
        int fastCapacity = writerIndex + maxFastWritableBytes();
        // 选择最优内存
        if (newCapacity > fastCapacity && minNewCapacity <= fastCapacity) {
            newCapacity = fastCapacity;
        }
        // 调整内存
        capacity(newCapacity);
    }
- readBytes():读数据方法,实现比较简答,主要读取方法也靠子类实现。
    @Override
    public ByteBuf readBytes(ByteBuf dst, int dstIndex, int length) {
        // 检查是否可读
        checkReadableBytes(length);
        // 真正读取数据方法,由子类实现
        getBytes(readerIndex, dst, dstIndex, length);
        // 更新读指针
        readerIndex += length;
        return this;
    }
3.2 AbstractReferenceCountedByteBuf
Netty 在 IO 读写的时候,可以使用堆外内存来实现零拷贝,减少数据拷贝的次数,但是堆外内存的分配和回收的效率要远低于 JVM 堆内存,Netty 使用引用计数法来管理堆外内存,并且采用内存池,复用堆外内存,当从大内存池中获取一块小内存使用就给计数增加,返回就减少。
运用引用计数法的 ByteBuf 需要继承 AbstractReferenceCountedByteBuf,利用 reCnt 属性来控制计数。
AbstractReferenceCountedByteBuf 是 AbstractByteBuf 的子类,只规定了一些内存管理相关的内容,对于数据 IO 操作没有实现。
主要属性:
    /**
     * refCnt 属性的偏移量
     */
    private static final long REFCNT_FIELD_OFFSET =
            ReferenceCountUpdater.getUnsafeOffset(AbstractReferenceCountedByteBuf.class, "refCnt");

    /**
     * 管理 reCnt 引用计数的工具类
     * 为什么使用 AtomicIntegerFieldUpdater 而不使用 AtomicInteger ?
     *      (1) AtomicInteger 每需要对一个整数进行累加就需要创建一个 AtomicInteger,消耗大
     *          而 AtomicIntegerFieldUpdater 则只需要创建一个静态的 AtomicIntegerFieldUpdater,
     *          就可以完成所有数字的累加,节省内存空间。
     *      (2) 对于 int 类型,AtomicInteger 类型创建的对象比 int 类型多占用 16B 的空间
     *
     */
    private static final AtomicIntegerFieldUpdater<AbstractReferenceCountedByteBuf> AIF_UPDATER =
            AtomicIntegerFieldUpdater.newUpdater(AbstractReferenceCountedByteBuf.class, "refCnt");

    /**
     * 引用计数的实际管理者,将 AtomicIntegerFieldUpdater 交给他使用
     */
    private static final ReferenceCountUpdater<AbstractReferenceCountedByteBuf> updater =
            new ReferenceCountUpdater<AbstractReferenceCountedByteBuf>() {
                @Override
                protected AtomicIntegerFieldUpdater<AbstractReferenceCountedByteBuf> updater() {
                    return AIF_UPDATER;
                }
                @Override
                protected long unsafeOffset() {
                    return REFCNT_FIELD_OFFSET;
                }
            };

    /**
     * 引用计数的值
     */
    @SuppressWarnings("unused")
    private volatile int refCnt = updater.initialValue();
ReferenceCountUpdater
ReferenceCountUpdater 是 AbstractReferenceCountedByteBuf 内部的工具类,用来完成引用计数值的具体操作。
- retain0():增加引用计数方法。
    private T retain0(T instance, final int increment, final int rawIncrement) {
        /**
         * 利用 updater 去更新引用值,
         * getAndAdd() 方法通过 CAS + 重试更新保证线程安全
         * 增加的值 rawIncrement 一定是 2 的倍数,引用计数偶数代表正常分配,奇数代表已经被释放
         * 使用偶数和奇数来判断是因为修改计数和分配释放内存并不是一个原子操作,利用奇偶来减少内存多次销毁
         */
        int oldRef = updater().getAndAdd(instance, rawIncrement);
        // 如果计数是奇数,抛出异常
        if (oldRef != 2 && oldRef != 4 && (oldRef & 1) != 0) {
            throw new IllegalReferenceCountException(0, increment);
        }
        // 增加计数之后,如果数据溢出,则回滚并抛出异常
        if ((oldRef <= 0 && oldRef + rawIncrement >= 0)
                || (oldRef >= 0 && oldRef + rawIncrement < oldRef)) {
            updater().getAndAdd(instance, -rawIncrement);
            throw new IllegalReferenceCountException(realRefCnt(oldRef), increment);
        }
        return instance;
    }
- release():引用计数释放方法,如果返回 false,代表还有其他引用,不作为;如果返回 true, 则说明无引用,则使用 deallocate()方法销毁(子类实现,自定义逻辑,一般采用池化方式,回归内存池)。
    public final boolean release(T instance) {
        // 先获取 rawCnt 的值,不用 volatile 获取,因为之后还会进行可见的获取
        int rawCnt = nonVolatileRawCnt(instance);

        /**
         * 该步采用了四个方法,一个一个分析:
         *  rawCnt == 2 的情况,也就是没有其他地方引用该内存
         *      (1)tryFinalRelease0(instance, 2):通过一次 CAS 更新,将 rawCnt 置为 1,
         *          如果成功,则直接返回。不成功,则进行下一个方法。
         *      (2)retryRelease0(instance, 1):获取真实引用计数值,进行死循环 CAS,
         *          如果释放的值等于引用的值,则最终释放,将 rawCnt 置为 1,并 return true,
         *          如果释放的值大于引用的值,则说明不是最终释放,会 CAS 释放对应的计数,并 return false
         *  rawCnt != 2 的情况,也就是有其他地方引用该 ByteBuf
         *      nonFinalRelease0(instance, 1, rawCnt, toLiveRealRefCnt(rawCnt, 1)):
         *      简单的使用 updater 利用 CAS + 重试,释放对应引用计数。
         *
         * 我认为 Netty 就是使用这些小小的性能提升,积少成多,打造了一个高性能的网络框架
         */
        return rawCnt == 2 ? tryFinalRelease0(instance, 2) || retryRelease0(instance, 1)
                : nonFinalRelease0(instance, 1, rawCnt, toLiveRealRefCnt(rawCnt, 1));
    }


    private boolean retryRelease0(T instance, int decrement) {
        for (;;) {
            // 获取最新的引用计数
            int rawCnt = updater().get(instance), realCnt = toLiveRealRefCnt(rawCnt, decrement);
            // 如果没有其他占用该内存,则置 rawCnt 为 1,返回 true
            if (decrement == realCnt) {
                if (tryFinalRelease0(instance, rawCnt)) {
                    return true;
                }
            // 如果还有其他引用,则更新引用返回 false
            } else if (decrement < realCnt) {
                if (updater().compareAndSet(instance, rawCnt, rawCnt - (decrement << 1))) {
                    return false;
                }
            } else {
                throw new IllegalReferenceCountException(realCnt, -decrement);
            }
            // 每一次循环,让出一次 CPU,提高吞吐量
            Thread.yield();
        }
    }
3.3 CompositeByteBuf
CompositeByteBuf 继承自 AbstractReferenceCountedByteBuf,是零拷贝的另一种体现,主要功能为可以组合多个 ByteBuf,对外提供统一的读写指针,将多个 ByteBuf 实例组合到一起,形成统一的视图,并没有进行数据的拷贝,体现了零拷贝,主要应用于数据的编解码。
本来 Netty 中的缓冲区就会存储多个 ByteBuf ,组合起来怎么就零拷贝了?
试想如下场景,对整个消息进行编码的时候,例如,在首部增加长度编码,则需要将多个 ByteBuf 合并为一个,得到具体长度,这时候使用 CompositeByteBuf 就很合适。
但是,CompositeByteBuf 使用了复杂的算法逻辑,有可能使用该 ByteBuf 效率比内存拷贝还低。
主要属性:
    /**
     * 内存分配器
     */
    private final ByteBufAllocator alloc;

    /**
     * 最大容器个数
     */
    private final int maxNumComponents;

    /**
     * 容器个数
     */
    private int componentCount;

    /**
     * 容器数组
     * Component 也是 ByteBuf 的子类
     */
    private Component[] components;

    /**
     * 是否已被释放
     */
    private boolean freed;
主要方法:
- addComponent():增加容器方法,将一个 ByteBuf 聚合到之前的 ByteBuf 集合中,对外提供统一视图和读写指针。
    public CompositeByteBuf addComponent(boolean increaseWriterIndex, int cIndex, ByteBuf buffer) {
        // 检测缓冲区是否为空
        checkNotNull(buffer, "buffer");
        /**
         * 主要添加 component 方法:
         *  将 buffer 加入到 component 数组中,也就是聚合的缓冲区集合中
         *  并对数组中中的元素进行相应的移位。
         */
        addComponent0(increaseWriterIndex, cIndex, buffer);
        /**
         * 如果超出 component 最大个数
         * 则合并为一个 ByteBuf
         */
        consolidateIfNeeded();
        return this;
    }
- removeCompRange():从原本的缓冲区集合中删除一个范围的缓冲区。
    private void removeCompRange(int from, int to) {
        if (from >= to) {
            return;
        }
        final int size = componentCount;
        // 断言起始位置和终止位置边界
        assert from >= 0 && to <= size;
        // 如果只删除中间一部分,需要拷贝数组,将后面元素向前移动
        if (to < size) {
            System.arraycopy(components, to, components, from, size - to);
        }
        int newSize = size - to + from;
        // 置空,移除元素
        for (int i = newSize; i < size; i++) {
            components[i] = null;
        }
        componentCount = newSize;
    }
- getBytes():读数据方法,将数据读取到指定 ByteBuf 中,通过下标循环遍历 component 数组进行读取。
    @Override
    public CompositeByteBuf getBytes(int index, byte[] dst, int dstIndex, int length) {
        // 检查是否能够读取,各个参数是否合法
        checkDstIndex(index, length, dstIndex, dst.length);
        if (length == 0) {
            return this;
        }
        // 根据读指针,获取 component 数组下标
        // 也就是 ByteBuf 集合读取位置
        int i = toComponentIndex0(index);
        while (length > 0) {
            // 得到应该读取的 component
            CompositeByteBuf.Component c = components[i];
            // 当前可读长度,也就是当前缓冲区可读长度和计划读取长度的小值
            int localLength = Math.min(length, c.endOffset - index);
            // 从 buf 中读取字节到 dst 中
            c.buf.getBytes(c.idx(index), dst, dstIndex, localLength);
            // 更新各个下标,直到读完长度为止
            index += localLength;
            dstIndex += localLength;
            length -= localLength;
            i ++;
        }
        return this;
    }
- setBytes():写数据方法,和读数据方法完全相似,通过循环将数据写入缓冲区。
    @Override
    public CompositeByteBuf setBytes(int index, ByteBuf src, int srcIndex, int length) {
        checkSrcIndex(index, length, srcIndex, src.capacity());
        if (length == 0) {
            return this;
        }

        int i = toComponentIndex0(index);
        while (length > 0) {
            Component c = components[i];
            int localLength = Math.min(length, c.endOffset - index);
            c.buf.setBytes(c.idx(index), src, srcIndex, localLength);
            index += localLength;
            srcIndex += localLength;
            length -= localLength;
            i ++;
        }
        return this;
    }
3.4 PooledByteBuf
PooledByteBuf 继承自 AbstractReferenceCountedByteBuf,是池化思想的重要体现,其有两个常用的实现类:
- PooledHeapByteBuf:基于堆内存池的 ByteBuf。
- PooledDirectByteBuf:基于直接内存池的 ByteBuf,是 Netty IO操作内存的默认方式。
因为分配回收内存的开销比较大,在高并发情况下,会产生和销毁大量的内存块,很耗费性能,所以 Netty 使用内存池的方式,来复用 ByteBuf 减少开销。
主要属性:
    /**
     * 对象池,对象重复利用的处理器
     */
    private final Recycler.Handle<PooledByteBuf<T>> recyclerHandle;

    /**
     * 实际内存区域
     */
    protected PoolChunk<T> chunk;

    /**
     * 定位到 chunk 中一块内存的指针
     * 可以得到该 PooledByteBuf 在 chunk 中的位置
     */
    protected long handle;

    /**
     * chunk 中具体缓冲空间
     */
    protected T memory;

    /**
     * 偏移量
     */
    protected int offset;

    /**
     * ByteBuf 可读字节数
     */
    protected int length;

    /**
     * 最大可用长度
     */
    int maxLength;

    /**
     * 线程缓存
     */
    PoolThreadCache cache;

    /**
     * 临时 ByteBuffer
     */
    ByteBuffer tmpNioBuf;

    /**
     * 内存分配器
     */
    private ByteBufAllocator allocator;
主要方法:
- init0():用于池化 ByteBuf 的初始化各种属性。
    private void init0(PoolChunk<T> chunk, ByteBuffer nioBuffer,
                       long handle, int offset, int length, int maxLength, PoolThreadCache cache) {
        // 断言传入内存指针大于 0
        assert handle >= 0;
        // 断言传入内存区域不为 null
        assert chunk != null;
        // 赋值内存区域,默认为 16MB
        this.chunk = chunk;
        // chunk 中具体的缓存空间
        memory = chunk.memory;
        tmpNioBuf = nioBuffer;
        allocator = chunk.arena.parent;
        this.cache = cache;
        this.handle = handle;
        this.offset = offset;
        this.length = length;
        this.maxLength = maxLength;
    }
- getBytes():具体得到数据的方法,对于其他校验和读指针的变化,由 AbstractByteBuf 维护。
    @Override
    public final int getBytes(int index, FileChannel out, long position, int length) throws IOException {
        // 将数据写入到缓冲区
        return out.write(duplicateInternalNioBuffer(index, length), position);
    }
    /**
     * 从内存池中分配一段内存,
     * 共享底层对应内存,维护独立的读写指针
     * @param index
     * @param length
     * @return
     */
    ByteBuffer duplicateInternalNioBuffer(int index, int length) {
        // 检查索引是否合法
        checkIndex(index, length);
        // 分配内存
        return _internalNioBuffer(index, length, true);
    }

    final ByteBuffer _internalNioBuffer(int index, int length, boolean duplicate) {
        // 获取读索引
        index = idx(index);
        /**
         * 判断 duplicate 值
         *  如果为 true,在内存池中创建新的缓冲区;
         *  如果为 false,则从 tmpNioBuf 中获取,没有的话再创建
         */
        ByteBuffer buffer = duplicate ? newInternalNioBuffer(memory) : internalNioBuffer();
        // 给缓冲区设置读写指针和 limit 边界
        buffer.limit(index + length).position(index);
        return buffer;
    }

    protected final ByteBuffer internalNioBuffer() {
        ByteBuffer tmpNioBuf = this.tmpNioBuf;
        // 如果 tmpNioBuf 为空,则创建一块内存
        if (tmpNioBuf == null) {
            this.tmpNioBuf = tmpNioBuf = newInternalNioBuffer(memory);
        }
        return tmpNioBuf;
    }
- setBytes():写数据方法,和读数据类似,将数据从缓冲区中取得。
    @Override
    public final int setBytes(int index, FileChannel in, long position, int length) throws IOException {
        try {
            return in.read(internalNioBuffer(index, length), position);
        } catch (ClosedChannelException ignored) {
            return -1;
        }
    }
- capacity():扩容方法,确定新的容量,然后重新分配内存空间
    @Override
    public final ByteBuf capacity(int newCapacity) {

        // 如果新的扩容容量和旧长度相等,则直接返回
        if (newCapacity == length) {
            ensureAccessible();
            return this;
        }
        // 检查新的容量是否超过限制
        checkNewCapacity(newCapacity);
        // 池化的内存分配,只需要更改新的容量边界
        if (!chunk.unpooled) {
            if (newCapacity > length) {
                if (newCapacity <= maxLength) {
                    length = newCapacity;
                    return this;
                }
            } else if (newCapacity > maxLength >>> 1 &&
                    (maxLength > 512 || newCapacity > maxLength - 16)) {
                // here newCapacity < length
                length = newCapacity;
                trimIndicesToCapacity(newCapacity);
                return this;
            }
        }
        // 重新分配内存,释放旧的内存空间
        chunk.arena.reallocate(this, newCapacity, true);
        return this;
    }
- deallocate():对象回收方法。
    @Override
    protected final void deallocate() {
        // 如果分配了内存没有回收
        if (handle >= 0) {
            final long handle = this.handle;
            this.handle = -1;
            memory = null;
            // 清空内存
            chunk.arena.free(chunk, tmpNioBuf, handle, maxLength, cache);
            tmpNioBuf = null;
            chunk = null;
            // 把对象放回对象池中
            recycle();
        }
    }
这部分对于底层内存的分配回收,确实比较复杂,没有理得很清晰,还需再多多学习!
3.5 总结

4、 Pipline 和 Handler
4.1 Pipline
Pipline 就是一条处理数据的管道,里面存放了一连串的 handler,通过双向指针进行连接,链式调用处理逻辑(责任链模式)。实现了一些双向链表增删的方法,为了保证线程安全,会使用 synchronized 进行加锁。
public class DefaultChannelPipeline implements ChannelPipeline {

    // ...

    /**
     * 首尾指针
     */
    final AbstractChannelHandlerContext head;
    final AbstractChannelHandlerContext tail;

    /**
     * 绑定的对应 channel
     */
    private final Channel channel;

    // ...

}
4.2 Handler
Handler 在 pipline 中以 AbstractChannelHandlerContext 上下文的形式封装保存,提供前驱和后继节点,让增删的效率达到 O(1)。
创建 Handler 一般创建 ChannelHandler 的具体实现,例如实现 ChannelInboundHandlerAdapter 类重写方法来处理进入 pipline 的数据。


 490
490


 被折叠的 条评论
为什么被折叠?
被折叠的 条评论
为什么被折叠?
 到【灌水乐园】发言


