


1.创建一个canvas
<template>
      <div>
        <canvas id="canvas" height="300" width="300" class="canvas"></canvas>
        <div class="btn">
          <el-button type="primary" plain @click="handleClear">清空</el-button>
          <el-button type="primary" @click="handleSave">保存</el-button>
        </div>
      </div>
</template>
2.创建一些需要编辑的变量
 	const startText = ref(false)
    let routeList = reactive([])
    let context = ref()
    let ctx = reactive()
3.挂载canvas签名时的函数
nextTick(() => {
        ctx = document.getElementById('canvas')
        context.value = ctx.getContext('2d')
        ctx.addEventListener('mousedown', (e) => {
          startText.value = !startText.value
          context.value.beginPath()
          routeList.push({
            x: e.offsetX,
            y: e.offsetY,
          })
        })
        ctx.addEventListener('mousemove', (e) => {
          if(startText.value && routeList.length === 1) {
            routeList.push({
              x: e.offsetX,
              y: e.offsetY,
            })
            const line = routeList.splice(0 ,1)
            context.value.lineTo(line[0].x, line[0].y)
            context.value.stroke()
            context.value.save()
          }
        })
        ctx.addEventListener('mouseup', (e) => {
          startText.value = !startText.value
          routeList = []
        })
        context.value.lineWidth = 3
        context.value.lineWidth='#000'
        context.value.stroke()
    })
4.清空与下载的函数
function handleClear() {
  context.value.clearRect(0, 0, 300, 300)
 }
 function handleSave() {
   var link = document.createElement('a')
   var imgData =ctx.toDataURL({format: 'png', quality:1, width:300, height:300})
   var blob = dataURLtoBlob(imgData)
   var objurl = URL.createObjectURL(blob)
   link.download = 'grid1.png'
   link.href = objurl
   link.click()
 }
 function  dataURLtoBlob(dataurl) {
     var arr = dataurl.split(','), mime = arr[0].match(/:(.*?);/)[1],
       bstr = atob(arr[1]), n = bstr.length, u8arr = new Uint8Array(n)
     while(n--){
       u8arr[n] = bstr.charCodeAt(n)
     }
     return new Blob([u8arr], {type:mime})
 }
5.朴实无华的样式
<style lang="less" scoped>
  .canvas{
    background-color: #aaa;
  }
  .btn{
    width: 300px;
    display: flex;
    justify-content: center;
  }
</style>
6.整体
<template>
      <div>
        <canvas id="canvas" height="300" width="300" class="canvas"></canvas>
        <div class="btn">
          <el-button type="primary" plain @click="handleClear">清空</el-button>
          <el-button type="primary" @click="handleSave">保存</el-button>
        </div>
      </div>
</template>

<script setup>
    import { nextTick, reactive, ref } from 'vue'
    const startText = ref(false)
    let routeList = reactive([])
    let context = ref()
    let ctx = reactive()
    nextTick(() => {
        ctx = document.getElementById('canvas')
        context.value = ctx.getContext('2d')
        ctx.addEventListener('mousedown', (e) => {
          startText.value = !startText.value
          context.value.beginPath()
          routeList.push({
            x: e.offsetX,
            y: e.offsetY,
          })
        })
        ctx.addEventListener('mousemove', (e) => {
          if(startText.value && routeList.length === 1) {
            routeList.push({
              x: e.offsetX,
              y: e.offsetY,
            })
            const line = routeList.splice(0 ,1)
            context.value.lineTo(line[0].x, line[0].y)
            context.value.stroke()
            context.value.save()
          }
        })
        ctx.addEventListener('mouseup', (e) => {
          startText.value = !startText.value
          routeList = []
        })
        context.value.lineWidth = 3
        context.value.lineWidth='#000'
        context.value.stroke()
    })
    function handleClear() {
      context.value.clearRect(0, 0, 300, 300)
    }
    function handleSave() {
      var link = document.createElement('a')
      var imgData =ctx.toDataURL({format: 'png', quality:1, width:300, height:300})
      var blob = dataURLtoBlob(imgData)
      var objurl = URL.createObjectURL(blob)
      link.download = 'grid1.png'
      link.href = objurl
      link.click()
    }
    function  dataURLtoBlob(dataurl) {
        var arr = dataurl.split(','), mime = arr[0].match(/:(.*?);/)[1],
          bstr = atob(arr[1]), n = bstr.length, u8arr = new Uint8Array(n)
        while(n--){
          u8arr[n] = bstr.charCodeAt(n)
        }
        return new Blob([u8arr], {type:mime})
    }
</script>

<style lang="less" scoped>
  .canvas{
    background-color: #aaa;
  }
  .btn{
    width: 300px;
    display: flex;
    justify-content: center;
  }
</style>
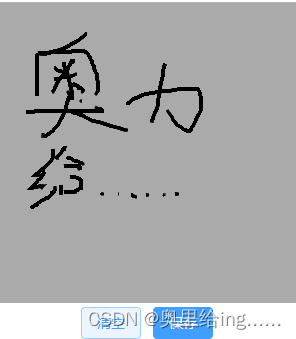
最后就是这样了
写的比较简单,算是一气呵成,有bug,如果你用到了并且还存在问题,请发我我再努力修改,谢谢。


 被折叠的 条评论
为什么被折叠?
被折叠的 条评论
为什么被折叠?
 到【灌水乐园】发言


