


目录
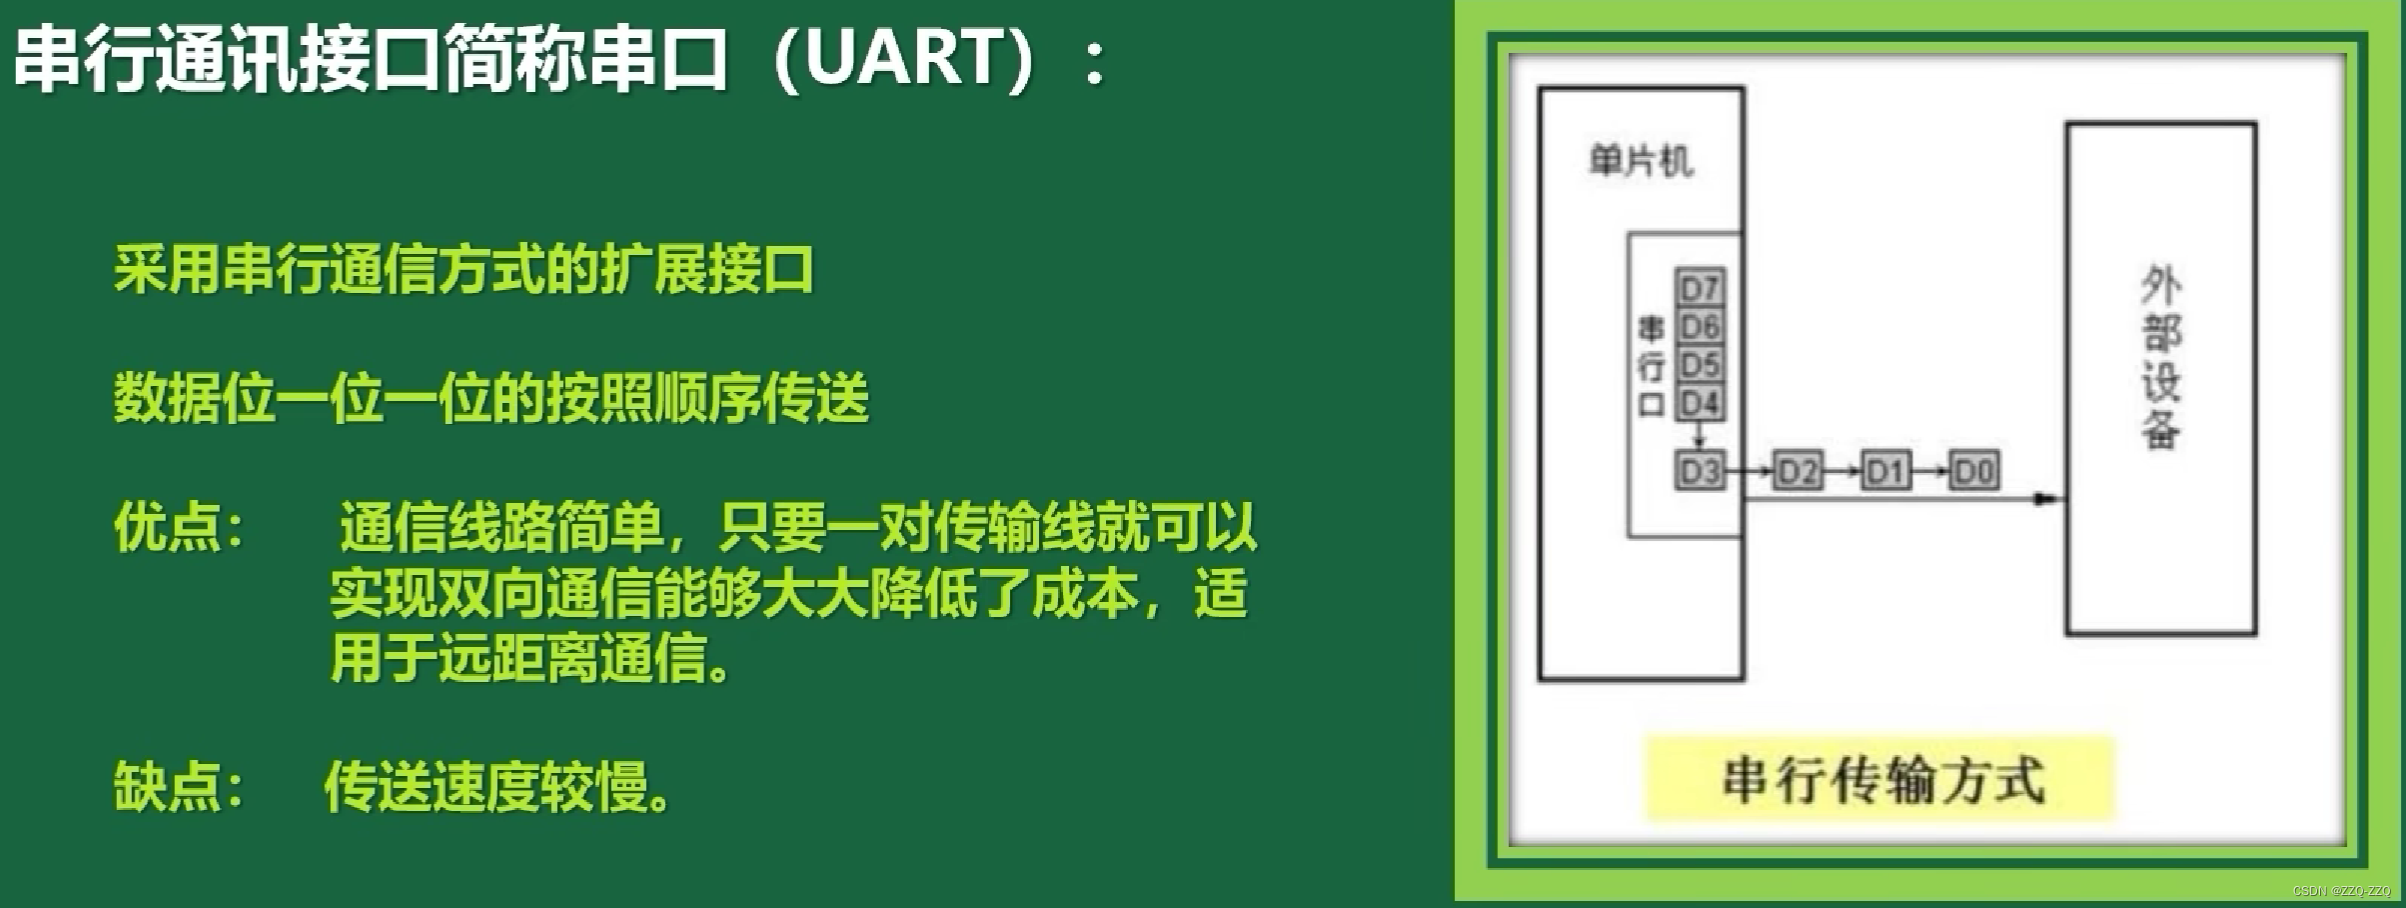
【串口简介】
树莓派:USB串口线控制树莓派(无显示器)_韩大狗的博客-CSDN博客
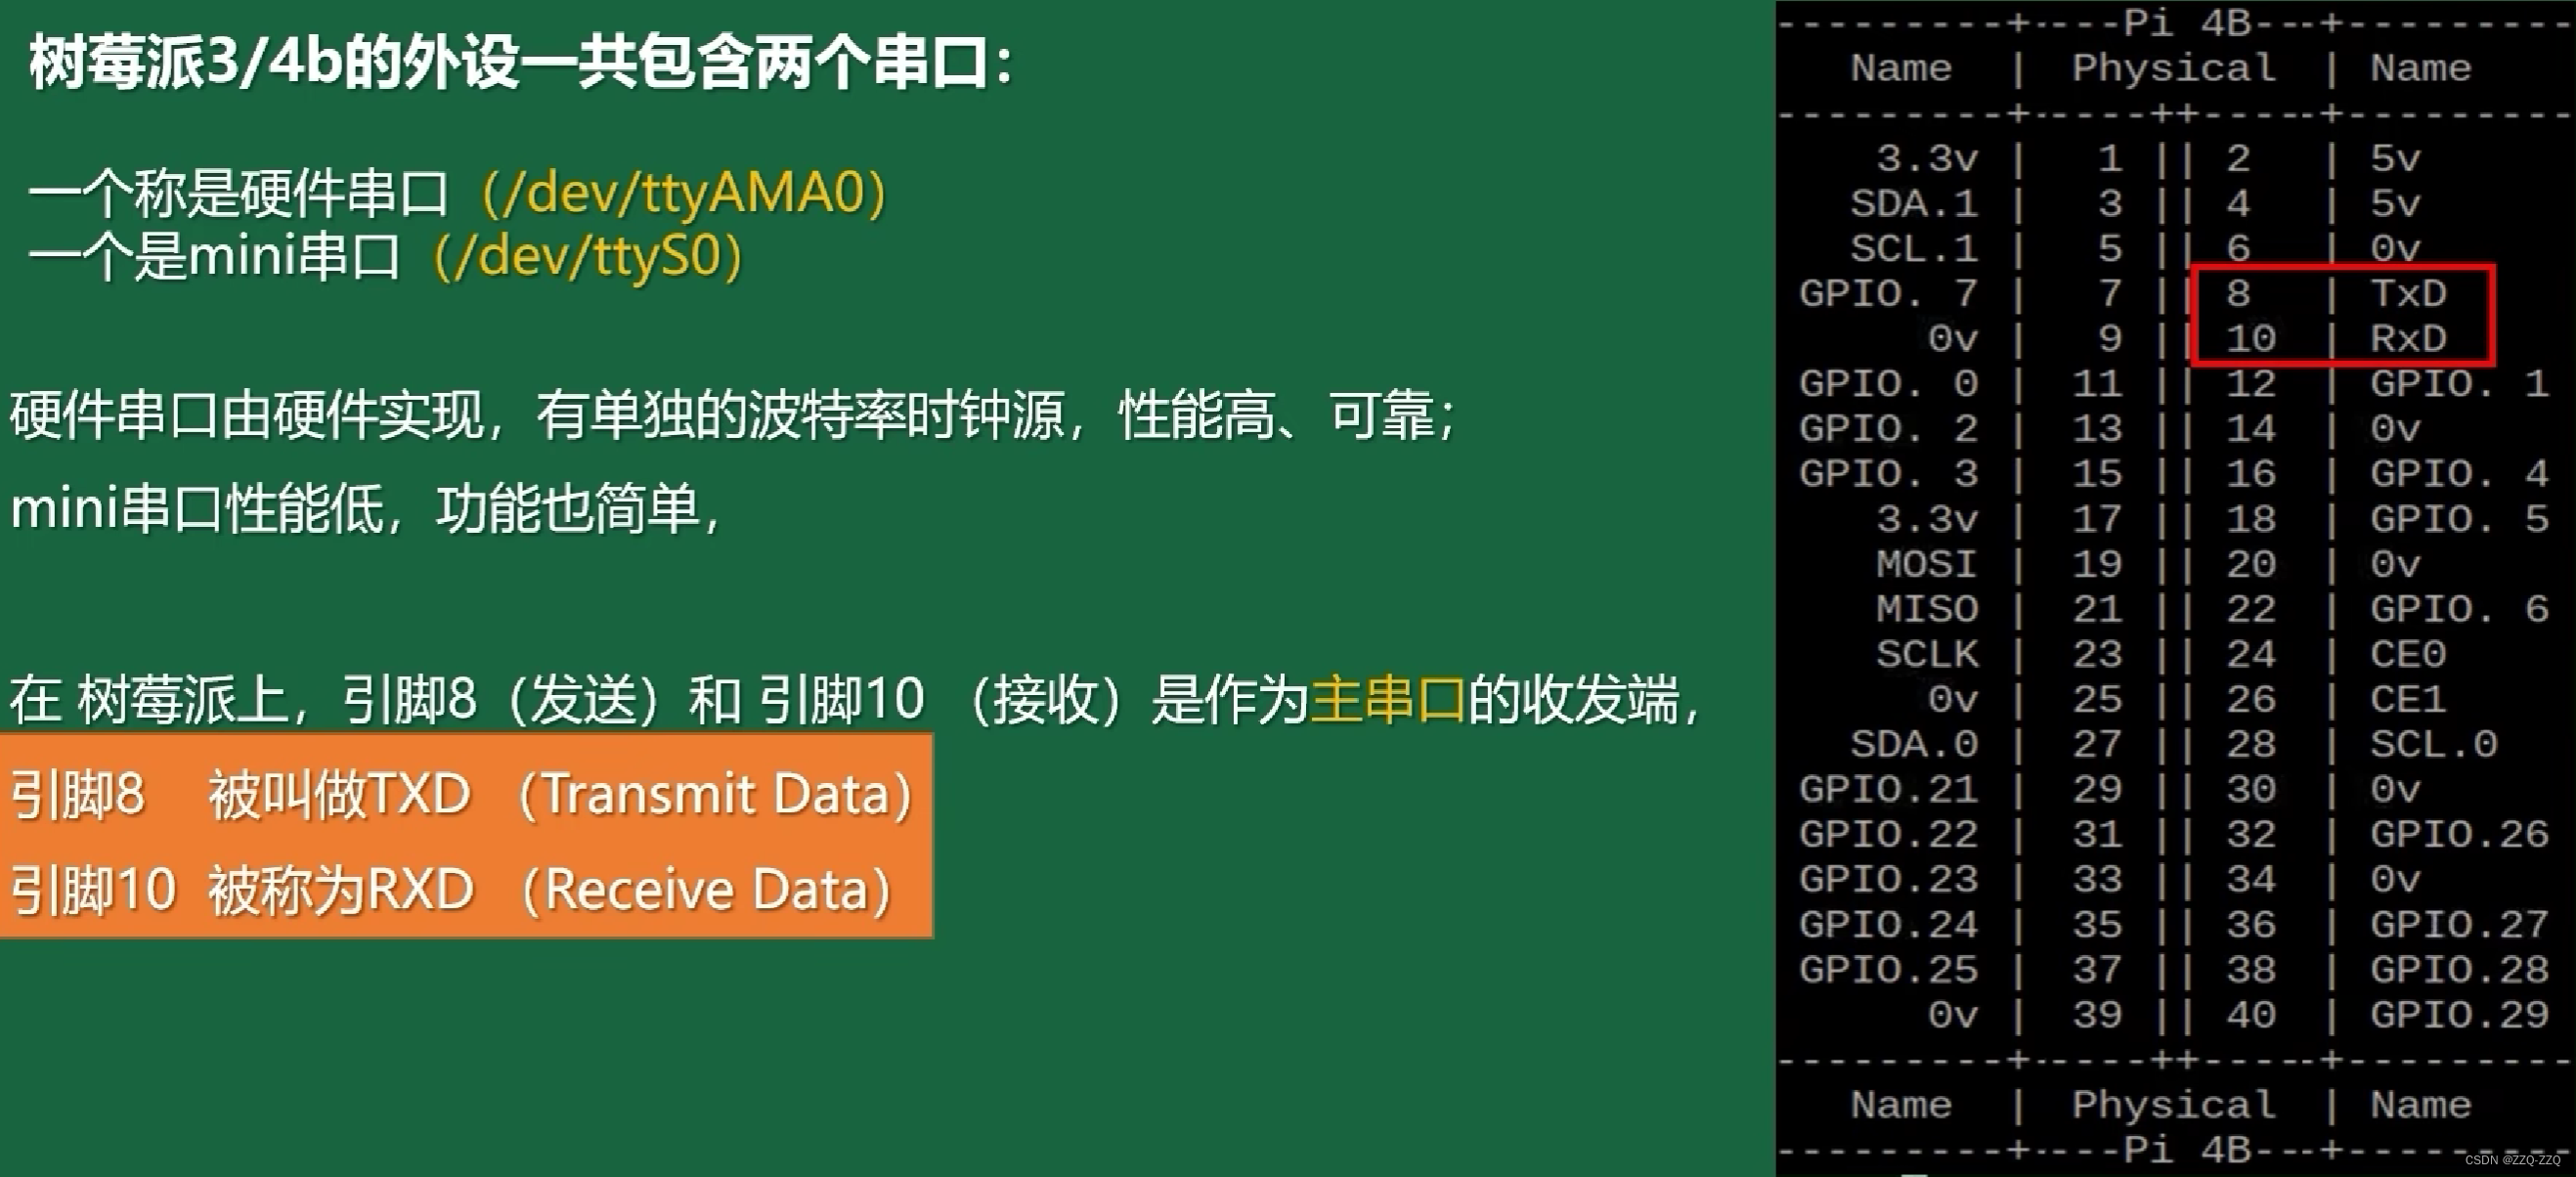
【开机串口登录】
1.打开SD卡根目录的"config.txt"文件,在最后添加下面命令
dtoverlay=pi3-miniuart-bt
2.打开SD卡根目录的"cmdline.txt"文件,将原有内容替换为下面命令
# 原内容:console=serial0,115200 console=tty1 root=PARTUUID=8660dfdf-02 rootfstype=ext4 fsck.repair=yes rootwait quiet splash plymouth.ignore-serial-consoles

# 新内容
dwc_otg.lpm_enable=0 console=tty1 console=serial0,115200 root=/dev/mmcblk0p2 rootfstype=ext4 elevator=deadline fsck.repair=yes rootwait
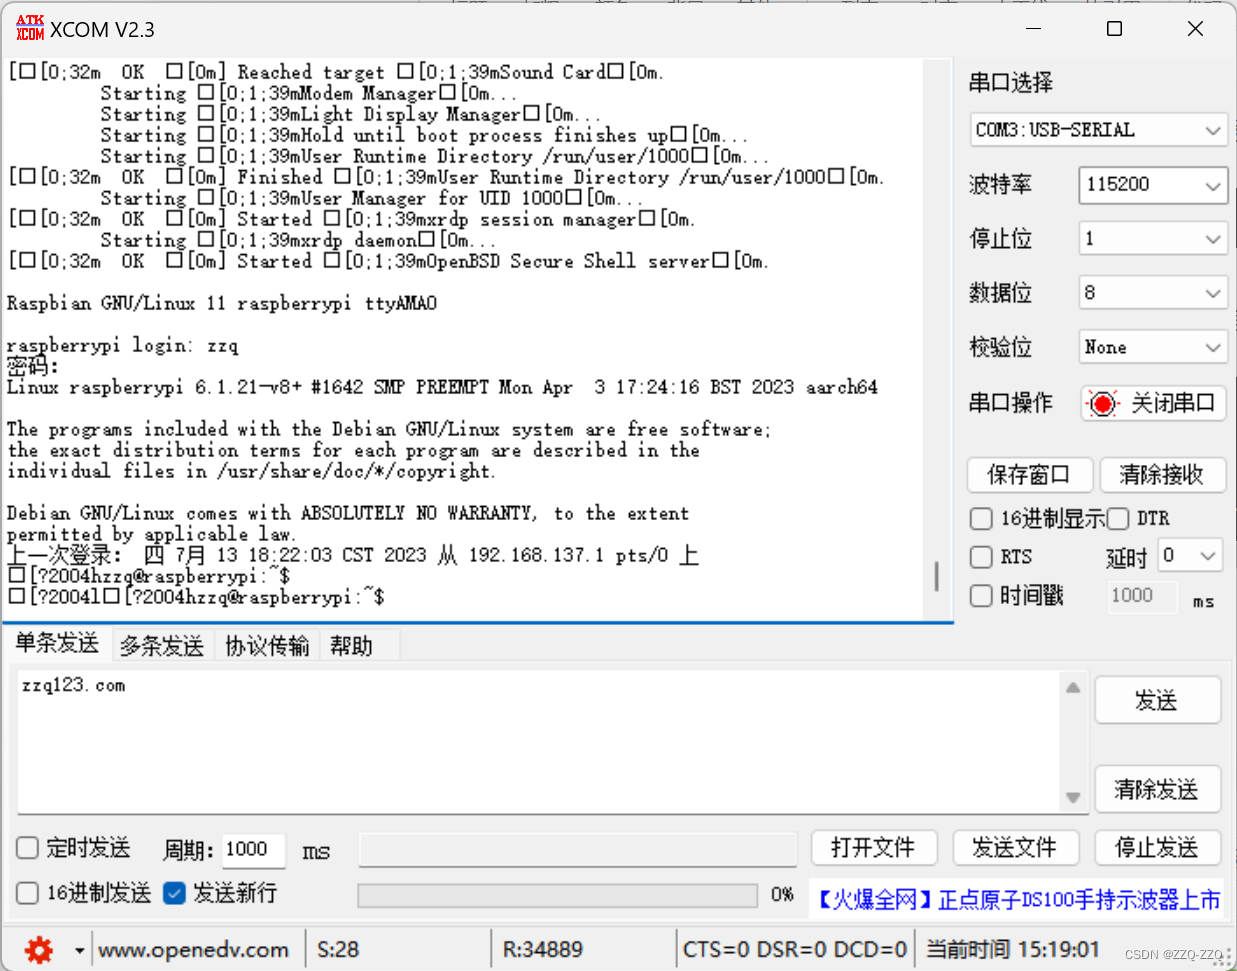
3.通过串口工具查看启动内容和登录
【使用串口开发】
(一)环境配置
1.打开SD卡根目录的"cmdline.txt"文件,删除【】和【】之间的内容
dwc_otg.lpm_enable=0 【console=ttyAMA0,115200】 kgdboc=ttyAMA0,115200 console=tty1 root=/dev/mmcblk0p2 rootfstype=ext4 elevator=deadline rootwaitbuster系统的是
dwc_otg.lpm_enable=0 console=tty1 console=serial0,115200 root=/dev/mmcblk0p2 rootfstype=ext4 elevator=deadline fsck.repair=yes rootwait即替换为
dwc_otg.lpm_enable=0 console=tty1 root=/dev/mmcblk0p2 rootfstype=ext4 elevator=deadline fsck.repair=yes rootwait
2.若有inittab文件
        /*修改 inittab文件 */
        >cd /etc/
        >sudo vim inittab

        注释掉最后一行内容:,在前面加上 # 号
        #T0:23:respawn:/sbin/getty -L ttyAMA0 115200 vt100
3.重启
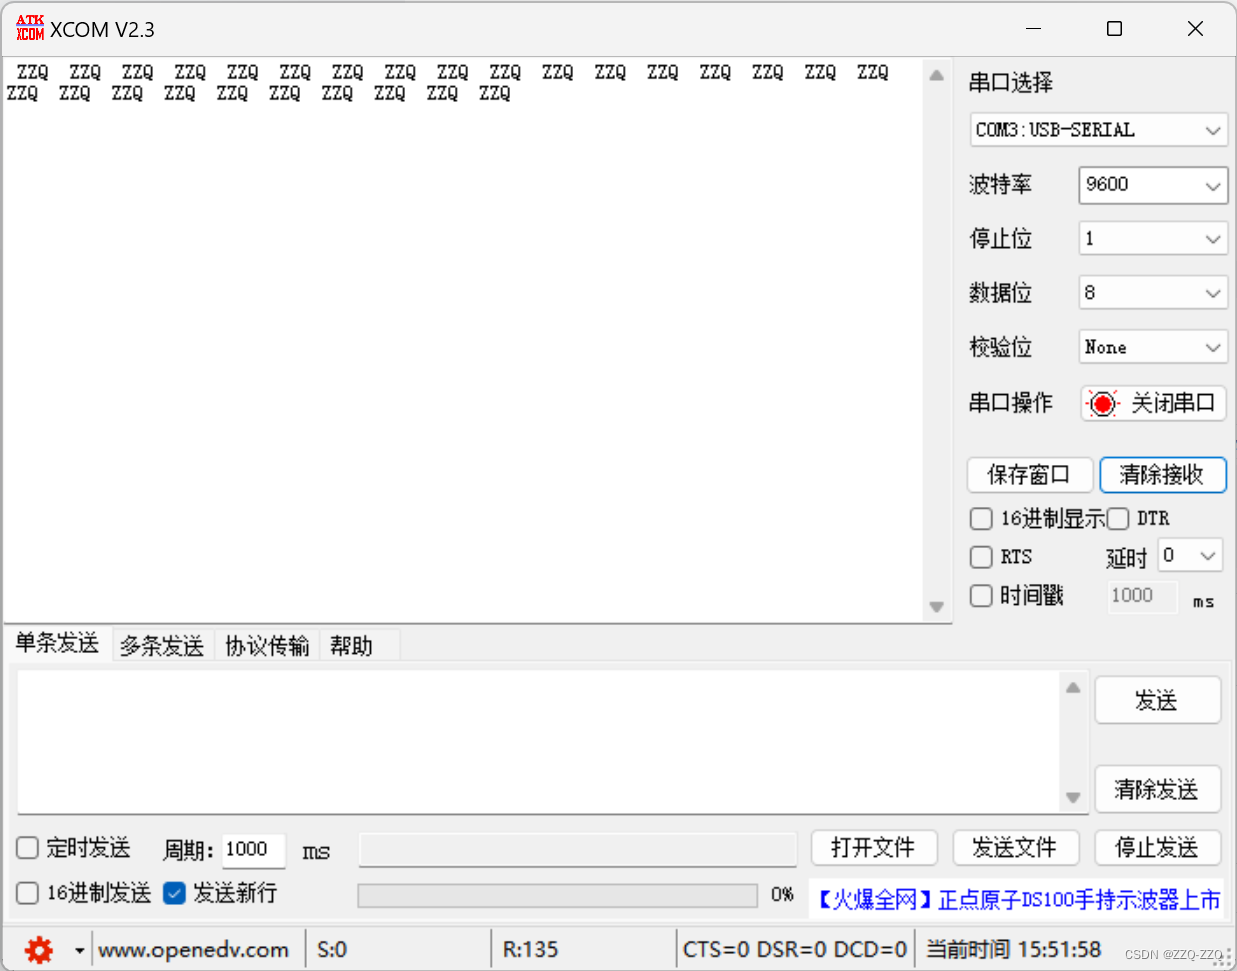
(二)demo
#include<wiringPi.h>
#include<wiringSerial.h>
int main()
{
	int fd;
	if(wiringPiSetup()==-1)	{
		return -1;
	}
	fd = serialOpen("/dev/ttyAMA0",9600);
	while(1)
	{
			serialPuts(fd," ZZQ ");
			delayMicroseconds(1000000);
	}
	return 0;
}
gcc 4_serial.c -lwiringPi
./a.out


 1556
1556


 被折叠的 条评论
为什么被折叠?
被折叠的 条评论
为什么被折叠?
 到【灌水乐园】发言


