


一、安装openwrt
解压openwrt-shx-22.03.tar.gz,进入目录/openwrt-shx-22.03,运行
1. 下载feeds软件包源码
sudo ./scripts/feeds update -a此命令需要翻墙,如不可翻墙
(1)可选择国内镜像源,可参考 https://blog.csdn.net/yao1500/article/details/105948229
src-git-full packages https://gitee.com/harvey520/packages.git
src-git-full luci https://gitee.com/harvey520/luci.git
src-git-full routing https://gitee.com/harvey520/routing.git
src-git-full telephony https://gitee.com/harvey520/telephony.git
(2)也可更换源为
src-git packages https://github.com/openwrt/packages.git
src-git luci https://github.com/openwrt/luci.git
src-git routing https://github.com/openwrt-routing/packages.git
src-git telephony https://github.com/openwrt/telephony.git
下载下来的源可能会不全,若编译报错可自行搜索缺失包,拷贝到dl中
2. 安装feeds软件包
sudo ./scripts/feeds install -a3. 选择openwrt系统组件
sudo make menuconfig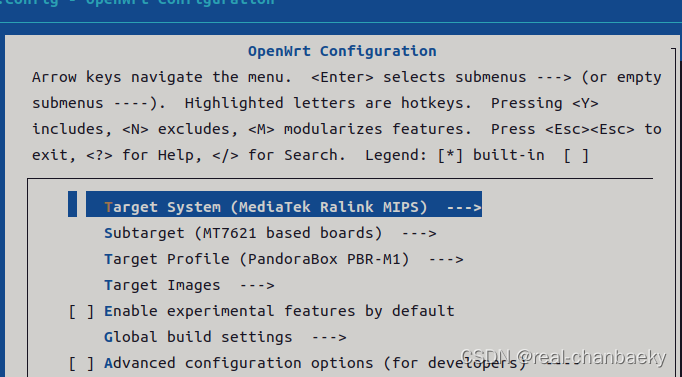
与usb通讯须配置以下功能,参考:https://blog.csdn.net/l0605020112/article/details/14002875
添加USB挂载
Base system —> <*>block-mount
添加硬盘格式支持()
Kernel modules —> Filesystems —> <*> kmod-fs-ext4 (移动硬盘EXT4格式选择)
Kernel modules —> Filesystems —> <*> kmod-fs-vfat (FAT16 / FAT32 格式 选择)
Kernel modules —> Filesystems —> <*> kmod-fs-ntfs (NTFS 格式 选择)
添加UTF8编码,CP437编码,ISO8859-1编码
Kernel modules —> Native Language Support —> <*> kmod-nls-cp437
Kernel modules —> Native Language Support —> <*> kmod-nls-iso8859-1
Kernel modules —> Native Language Support —> <*> kmod-nls-utf8
添加SCSI支持
Kernel modules —> Block Devices —> <*>kmod-scsi-core
添加USB相关支持
Kernel modules —> USB Support —> <*> kmod-usb-core.
Kernel modules —> USB Support —> <*> kmod-usb-ohci.
Kernel modules —> USB Support —> <*> kmod-usb-storage.
Kernel modules —> USB Support —> <*> kmod-usb-storage-extras.
Kernel modules —> USB Support —> <*> kmod-usb2. //此为usb2.0,用3.0开3.0
添加自动挂载工具
Utilities —> Filesystem —> <*> badblocks
4. 编译
sudo make V=99
5. 上传固件到openwrt
固件路径/openwrt-shx-22.03/bin/targets/ramips/mt7621/
sudo scp openwrt-ramips-mt7621...xx...-sysupgrade.bin root@192.168.1.1:/tmp/
编译可能报错:you should not run configure as root (set FORCE_UNSAFE_CONFIGURE=1 in environment)
1.在/etc/profile中加入export FORCE_UNSAFE_CONFIGURE=1,并source /etc/profile
2.若不起作用,看看是否存在~/profile文件,如果存在,在~/profile中也添加相应内容
参考:https://blog.csdn.net/rjszz1314/article/details/114637638
二、登录openwrt及openwrt简单指令
1.虚拟机中 运行
sudo ssh root@192.168.1.1
2.openwrt简单指令:xx为应用名,要在上传目录下运行,
升级固件:sysupgrade -F -n openwrt-ramips-mt7621...xx...-sysupgrade.bin
安装应用:opkg install xx.ipk
删除应用:opkg remove xx - 1 //xx - 1为已安装应用名称,具体需要查看已安装应用列表
查看已安装应用:opkg list_installed
报错 Unable to negotiate with 192.168.1.152 port 22: nomatching host host key type found. Their offer:ssh-
(1)生成ssh_key
 ssh-keygen -t rsa -f /etc/ssh/ssh_host_rsa_key
 ssh-keygen -t dsa -f /etc/ssh/ssh_host_dsa_key
(2)若还不可以:
xinxin@xinxin-virtual-machine:/.ssh$ sudo vim config 添加
  Host*
    HostKeyAlgorithms +ssh-rsa
    PubkeyAcceptedKeyTypes +ssh-rsa
重启ssh service ssh restart
(3)若还不可以:
删除ssh下的id开头文件,重新生成ssh_key
报错Collected errors:
* opkg_conf_load: Could not lock /var/lock/opkg.lock: Resource temporarily unavail
rm -f /var/lock/opkg.lock
三、编写简单应用并上传
1.在openwrt-shx-22.03/package/utils/中新建文件夹mytoolno,里边包含一个src文件夹与一个makefile文件,src文件夹中包含代码文件与编译文件
现贴出外层makefile作为参考:
include $(TOPDIR)/rules.mk

    PKG_NAME:=mytoolno //文件夹名
    PKG_BUILD_DIR := $(BUILD_DIR)/$(PKG_NAME)
    PKG_RELEASE:=1

    include $(INCLUDE_DIR)/package.mk

    define Package/mytoolno
      SECTION:=utils //所在文件夹
      CATEGORY:=Utilities //menuconfig中的上级目录
      TITLE:=mytoolno
      DEPENDS:= +libusb-1.0 //依赖库
    endef
    # #+libInterface_Usb
    #  DEPENDS:=+kmod-spi-dev +libhello

    define Package/mytoolno/description
      mytoolno.
    endef

    define Build/Compile
        $(MAKE) -C $(PKG_BUILD_DIR) \
            CC="$(TARGET_CC)" \
            CFLAGS="$(TARGET_CFLAGS) -Wall" \
            LDFLAGS="$(TARGET_LDFLAGS)"
    endef

    define Package/mytoolno/install
        $(INSTALL_DIR) $(1)/usr/sbin
        $(INSTALL_BIN) $(PKG_BUILD_DIR)/mytoolno $(1)/usr/sbin/
    endef

    $(eval $(call BuildPackage,mytoolno))
2.运行 sudo make menuconfig,在Utilities中找到mytoolno,将其置为m
3.在/openwrt-shx-22.03下编译
sudo make package/mytoolno/compile V=s
4.编译成功后在/home/xinxin/openwrt-shx-22.03/bin/packages/mipsel_24kc/base/目录下已生成mytoolno_1_mipsel_24kc.ipk
在该目录下上传ipk文件到openwrt的/tmp文件夹下指令:
sudo scp mytoolno_1_mipsel_24kc.ipk root@192.168.1.1:/tmp/
5. 在openwrt中安装应用:opkg install xx.ipk
四、编译所依赖的lib库
依赖库为libusb,在/openwrt-shx-22.03/package/libs/中有这个库
1.编译:在/openwrt-shx-22.03下编译
sudo make package/libusb/compile V=s
2.编译成功后在/home/xinxin/openwrt-shx-22.03/bin/packages/mipsel_24kc/base/目录下已生成libusb-1.0-0_1.0.24-231125.65937_mipsel_24kc.ipk
在该目录下上传ipk文件到openwrt的/tmp文件夹下指令:
sudo scp libusb-1.0-0_1.0.24-231125.65937_mipsel_24kc.ipk root@192.168.1.1:/tmp/
3.在openwrt中安装:opkg install xx.ipk
tips:
1. 依赖库可以在/openwrt-shx-22.03/package/utils/mytool/Makefile中的 DEPENDS下 +libusb-1.0 指定,
也可在/openwrt-shx-22.03/staging_dir/target-mipsel_24kc_musl/pkginfo/libc.provides 中 加 libusb-1.0.so.0
安装mytoolno之前要先安装依赖库,不然会报错。
2. 编译报错,缺少libc.so.6,直接在/openwrt-shx-22.03/staging_dir/target-mipsel_24kc_musl/pkginfo/libc.provides 中 加 libc.so.6即可


 7225
7225

 被折叠的 条评论
为什么被折叠?
被折叠的 条评论
为什么被折叠?
 到【灌水乐园】发言


