


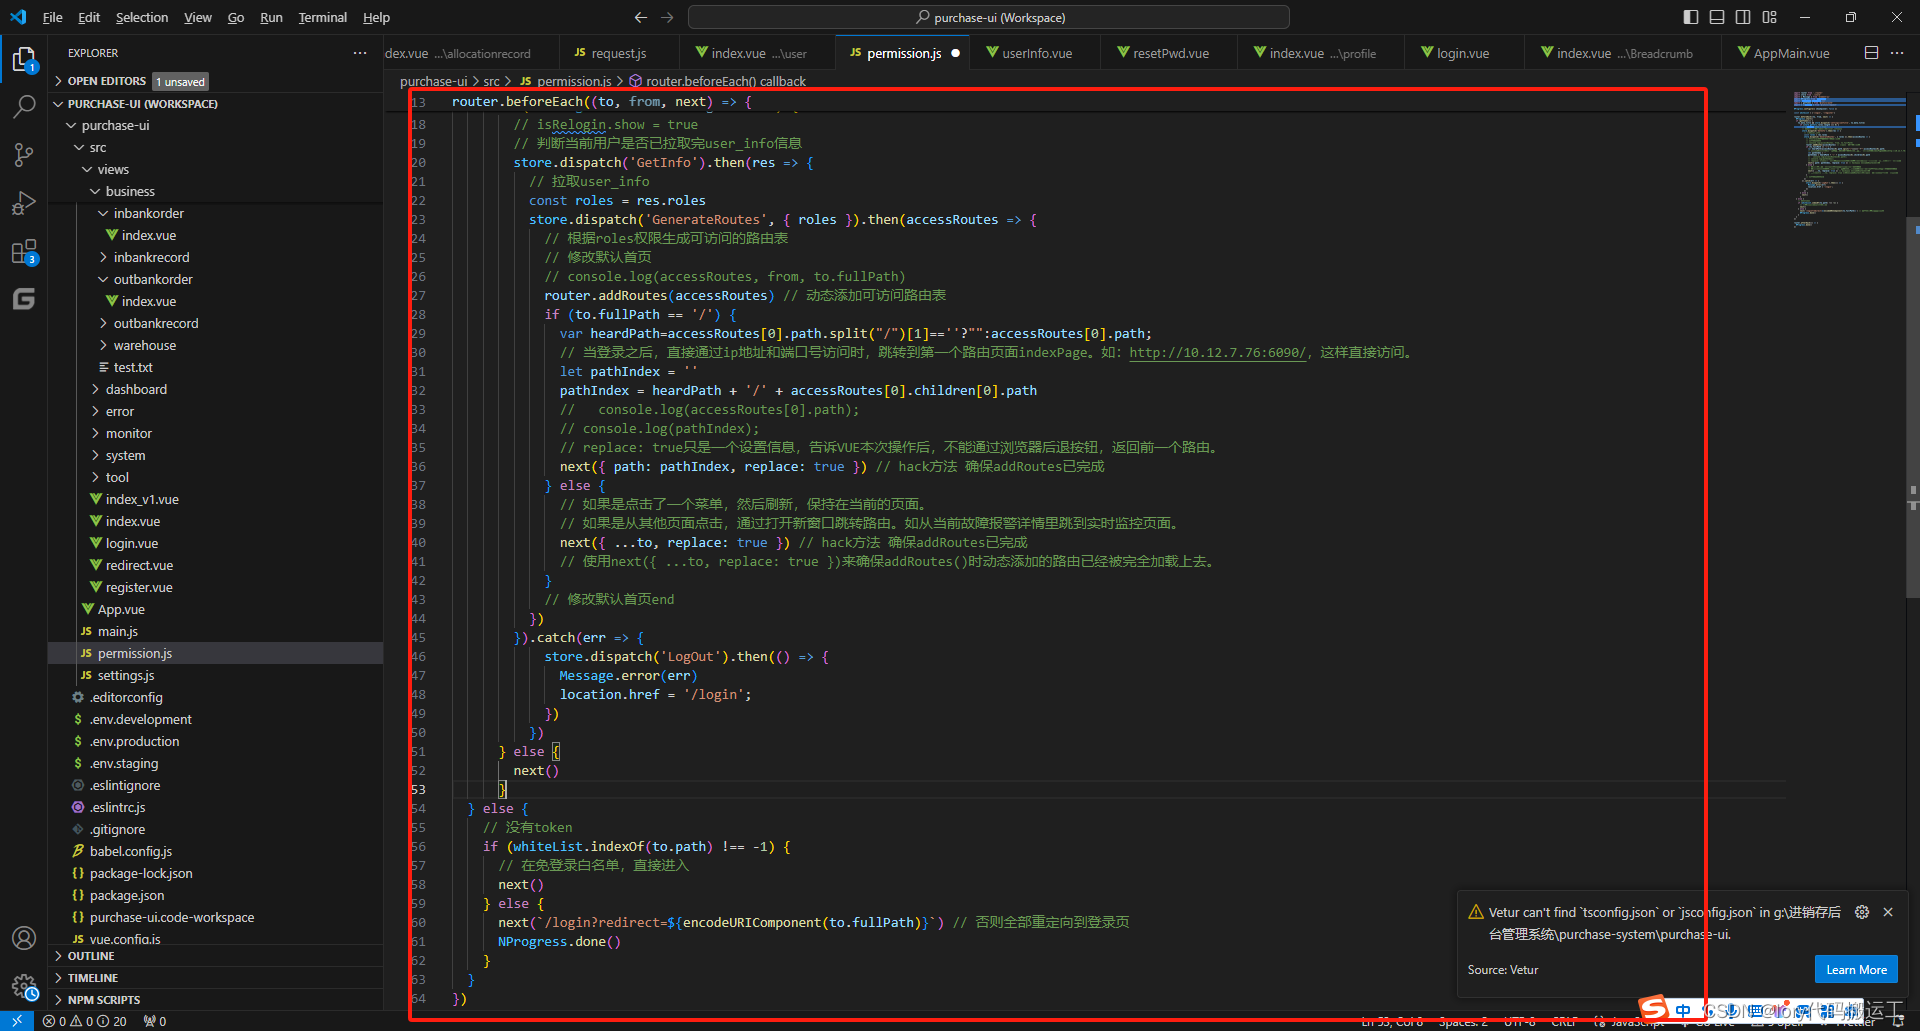
一、找到src/permission.js ,修改router.beforeEach代码
router.beforeEach((to, from, next) => {
  NProgress.start()
  if (getToken()) {
    to.meta.title && store.dispatch('settings/setTitle', to.meta.title)

      if (store.getters.roles.length === 0) {
        // isRelogin.show = true
        // 判断当前用户是否已拉取完user_info信息
        store.dispatch('GetInfo').then(res => {
          // 拉取user_info
          const roles = res.roles
          store.dispatch('GenerateRoutes', { roles }).then(accessRoutes => {
            // 根据roles权限生成可访问的路由表
            // 修改默认首页
            // console.log(accessRoutes, from, to.fullPath)
            router.addRoutes(accessRoutes) // 动态添加可访问路由表
            if (to.fullPath == '/') {
              var heardPath=accessRoutes[0].path.split("/")[1]==''?"":accessRoutes[0].path;
              // 当登录之后,直接通过ip地址和端口号访问时,跳转到第一个路由页面indexPage。如:http://10.12.7.76:6090/,这样直接访问。
              let pathIndex = ''
              pathIndex = heardPath + '/' + accessRoutes[0].children[0].path
              //   console.log(accessRoutes[0].path);
              // console.log(pathIndex);
              // replace: true只是一个设置信息,告诉VUE本次操作后,不能通过浏览器后退按钮,返回前一个路由。
              next({ path: pathIndex, replace: true }) // hack方法 确保addRoutes已完成
            } else {
              // 如果是点击了一个菜单,然后刷新,保持在当前的页面。
              // 如果是从其他页面点击,通过打开新窗口跳转路由。如从当前故障报警详情里跳到实时监控页面。
              next({ ...to, replace: true }) // hack方法 确保addRoutes已完成
              // 使用next({ ...to, replace: true })来确保addRoutes()时动态添加的路由已经被完全加载上去。
            }
            // 修改默认首页end
          })

        }).catch(err => {
            store.dispatch('LogOut').then(() => {
              Message.error(err)
              location.href = '/login';
            })
          })
      } else {
        next()
      }

  } else {
    // 没有token
    if (whiteList.indexOf(to.path) !== -1) {
      // 在免登录白名单,直接进入
      next()
    } else {
      next(`/login?redirect=${encodeURIComponent(to.fullPath)}`) // 否则全部重定向到登录页
      NProgress.done()
    }
  }
})
根据下图将以上代码修改即可:
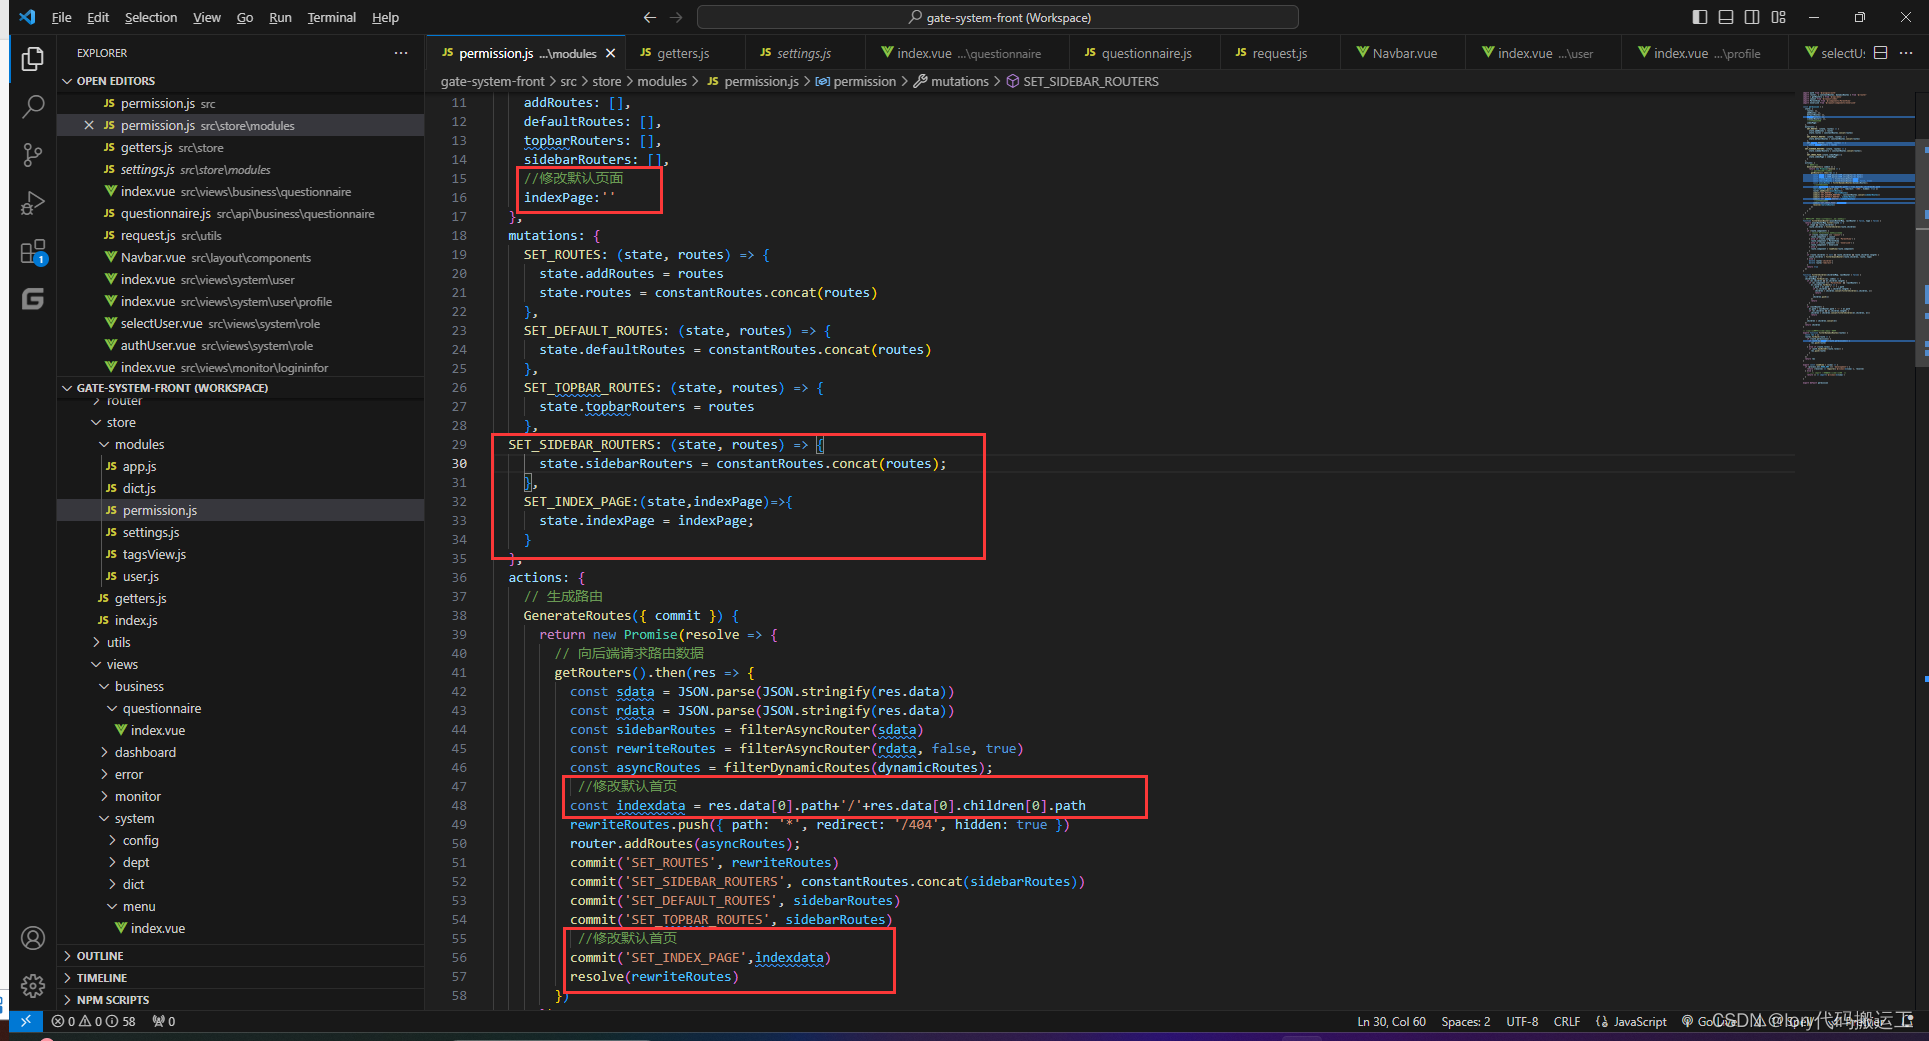
2、src/store/modules/permission.js 修改四处代码
const permission = {
  state: {
    routes: [],
    addRoutes: [],
    defaultRoutes: [],
    topbarRouters: [],
    sidebarRouters: [],
    //修改默认页面
    indexPage:''
  },
  mutations: {
    SET_ROUTES: (state, routes) => {
      state.addRoutes = routes
      state.routes = constantRoutes.concat(routes)
    },
    SET_DEFAULT_ROUTES: (state, routes) => {
      state.defaultRoutes = constantRoutes.concat(routes)
    },
    SET_TOPBAR_ROUTES: (state, routes) => {
      state.topbarRouters = routes
    },
    SET_SIDEBAR_ROUTERS: (state, routes) => {
      state.sidebarRouters = constantRoutes.concat(routes);
    },
     SET_INDEX_PAGE:(state,indexPage)=>{
      state.indexPage = indexPage;
    }
  },
  actions: {
    // 生成路由
    GenerateRoutes({ commit }) {
      return new Promise(resolve => {
        // 向后端请求路由数据
        getRouters().then(res => {
          const sdata = JSON.parse(JSON.stringify(res.data))
          const rdata = JSON.parse(JSON.stringify(res.data))
          //修改默认首页
          const indexdata = res.data[0].path+'/'+res.data[0].children[0].path
          const sidebarRoutes = filterAsyncRouter(sdata)
          const rewriteRoutes = filterAsyncRouter(rdata, false, true)
          const asyncRoutes = filterDynamicRoutes(dynamicRoutes);
          rewriteRoutes.push({ path: '*', redirect: '/404', hidden: true })
          router.addRoutes(asyncRoutes);
          commit('SET_ROUTES', rewriteRoutes)
          commit('SET_SIDEBAR_ROUTERS', constantRoutes.concat(sidebarRoutes))
          commit('SET_DEFAULT_ROUTES', sidebarRoutes)
          commit('SET_TOPBAR_ROUTES', sidebarRoutes)
          //修改默认首页
          commit('SET_INDEX_PAGE',indexdata)
          resolve(rewriteRoutes)
        })
      })
    }
  }
}
根据下图将以上代码修改即可:
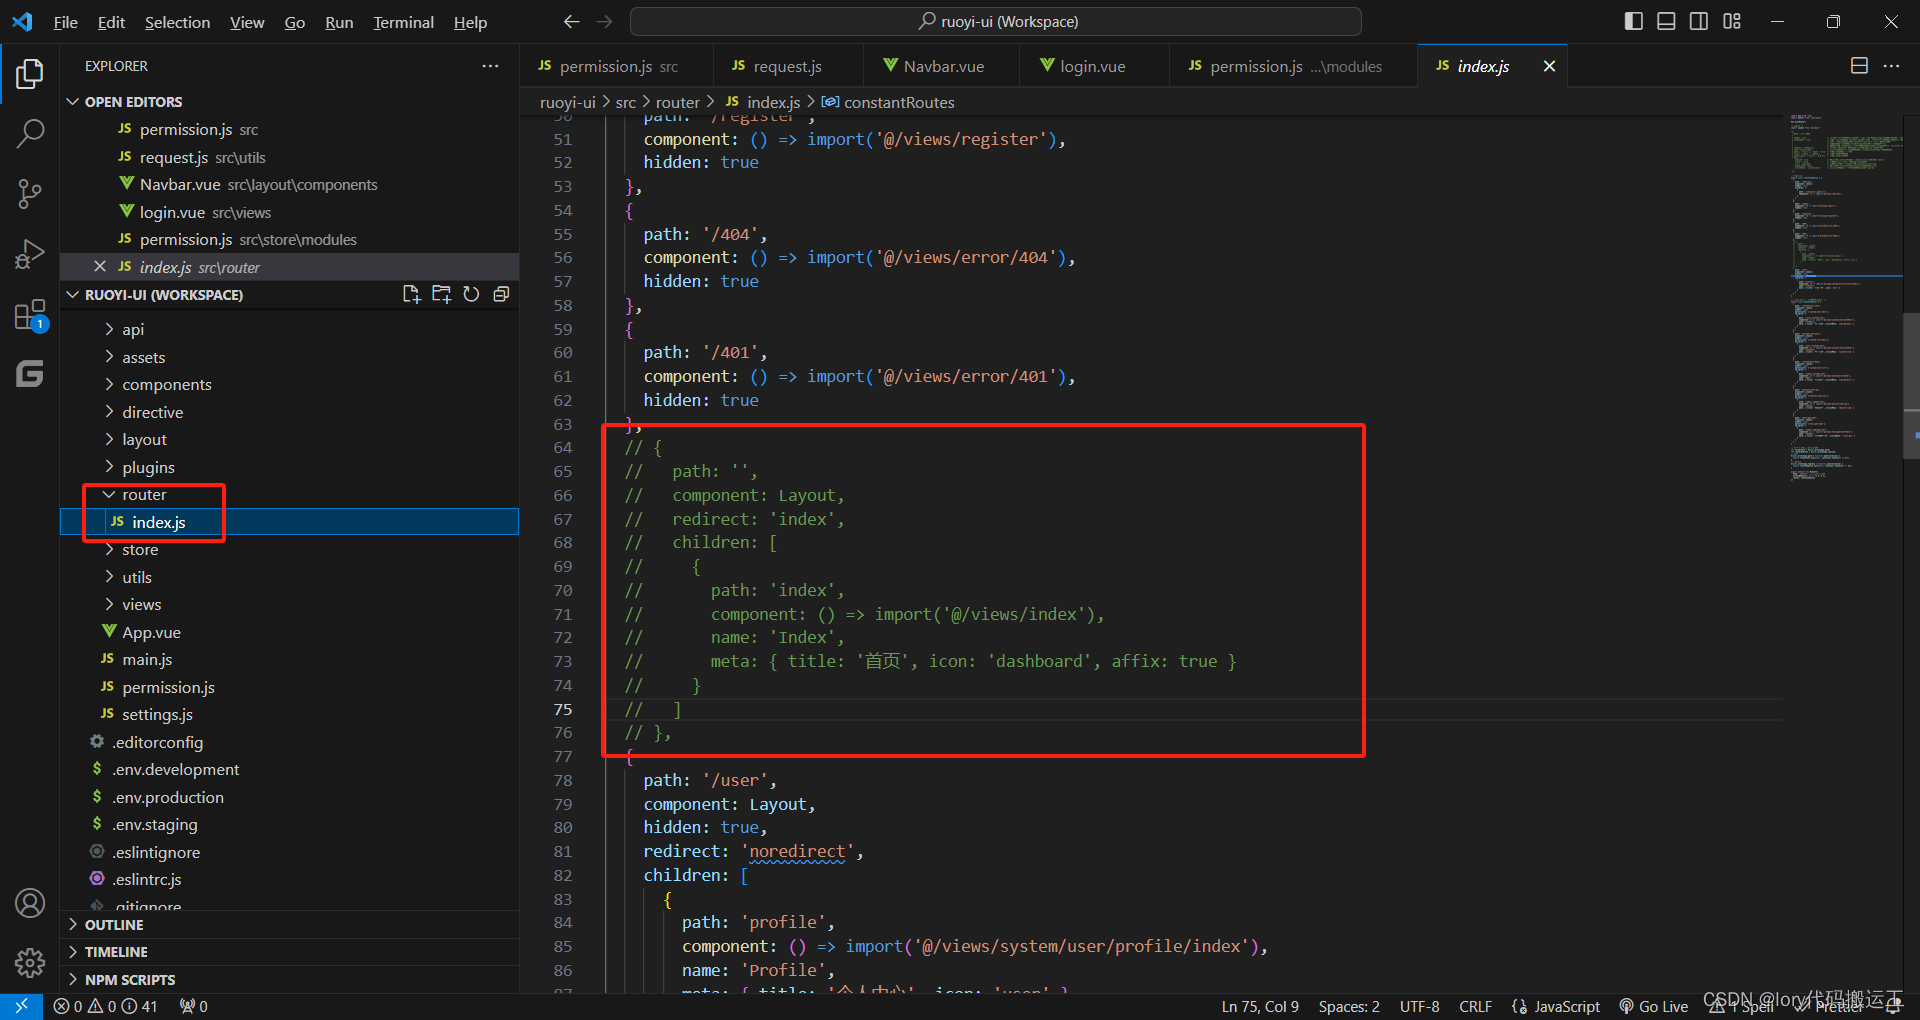
3、 src/router/index.js 把首页注释掉
如图:
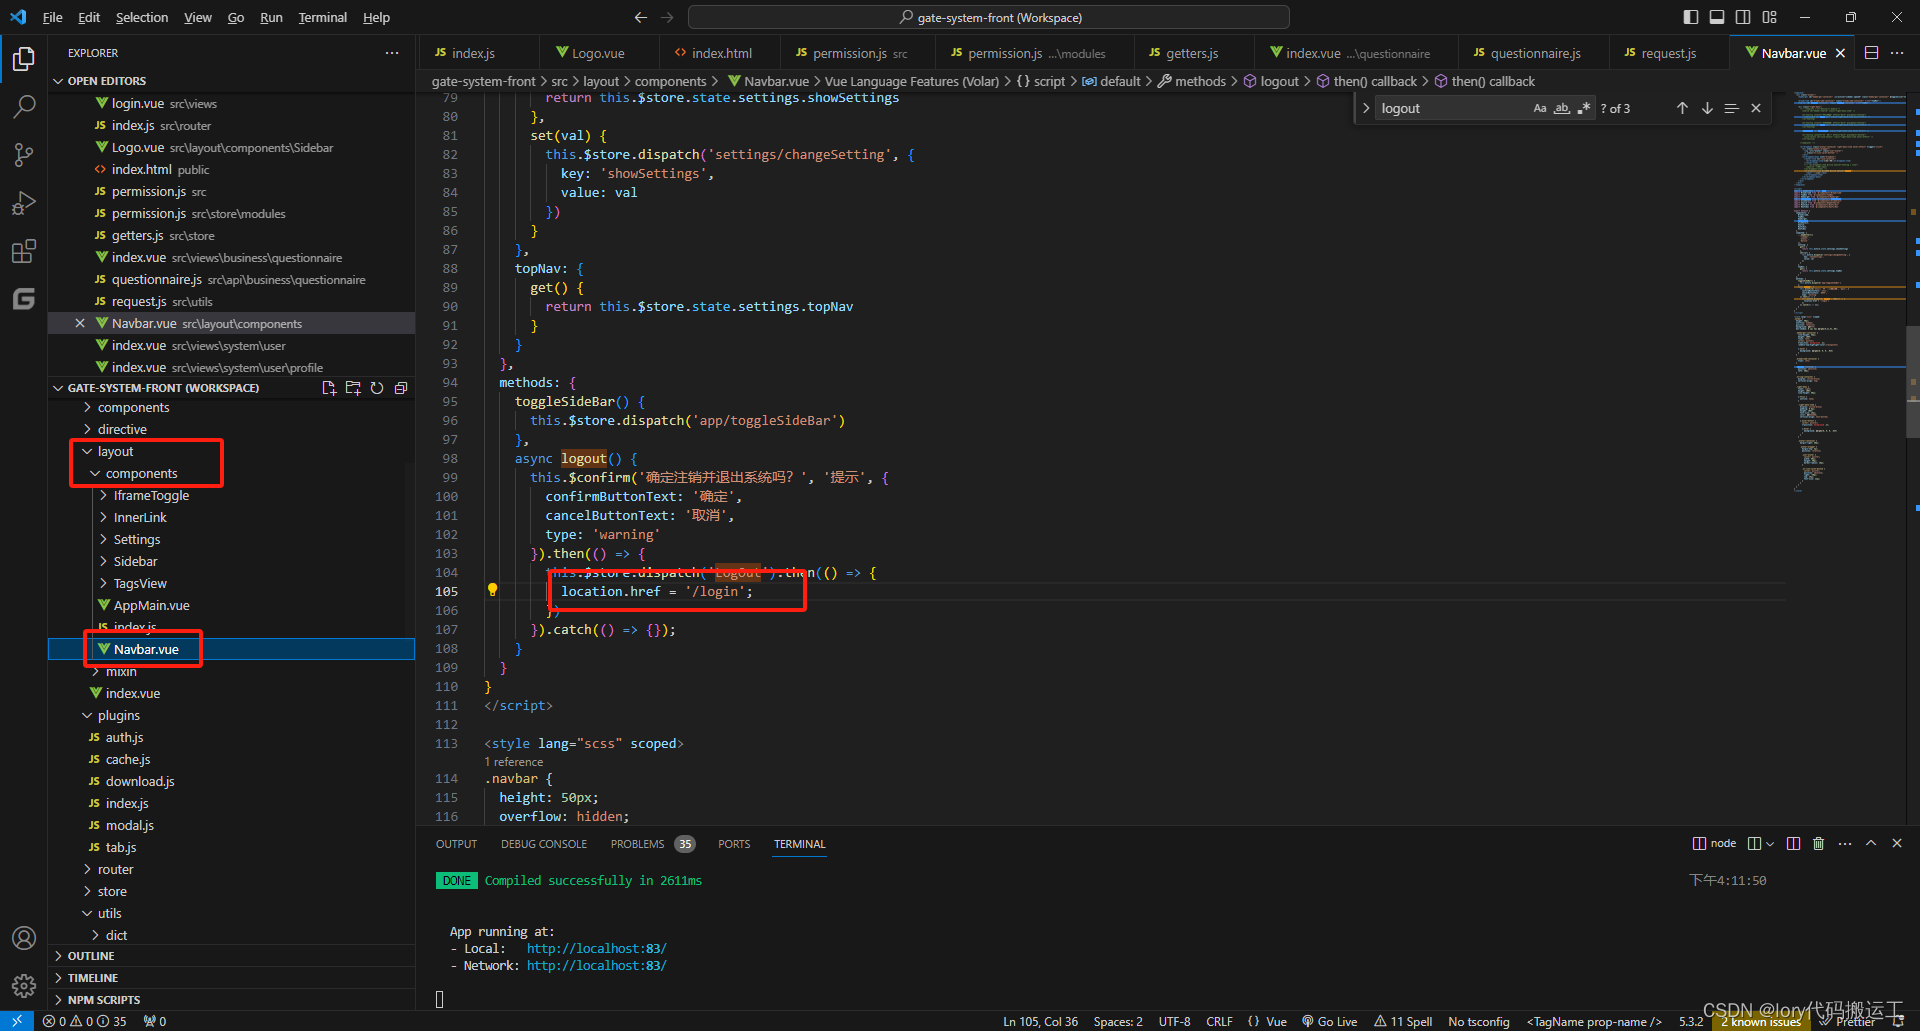
4、src/utils/request.js 和 src/layout/components/Navbar.vue 修改一处代码
  store.dispatch('LogOut').then(() => {
            location.href = '/login';
          })
根据下图将以上代码修改即可:

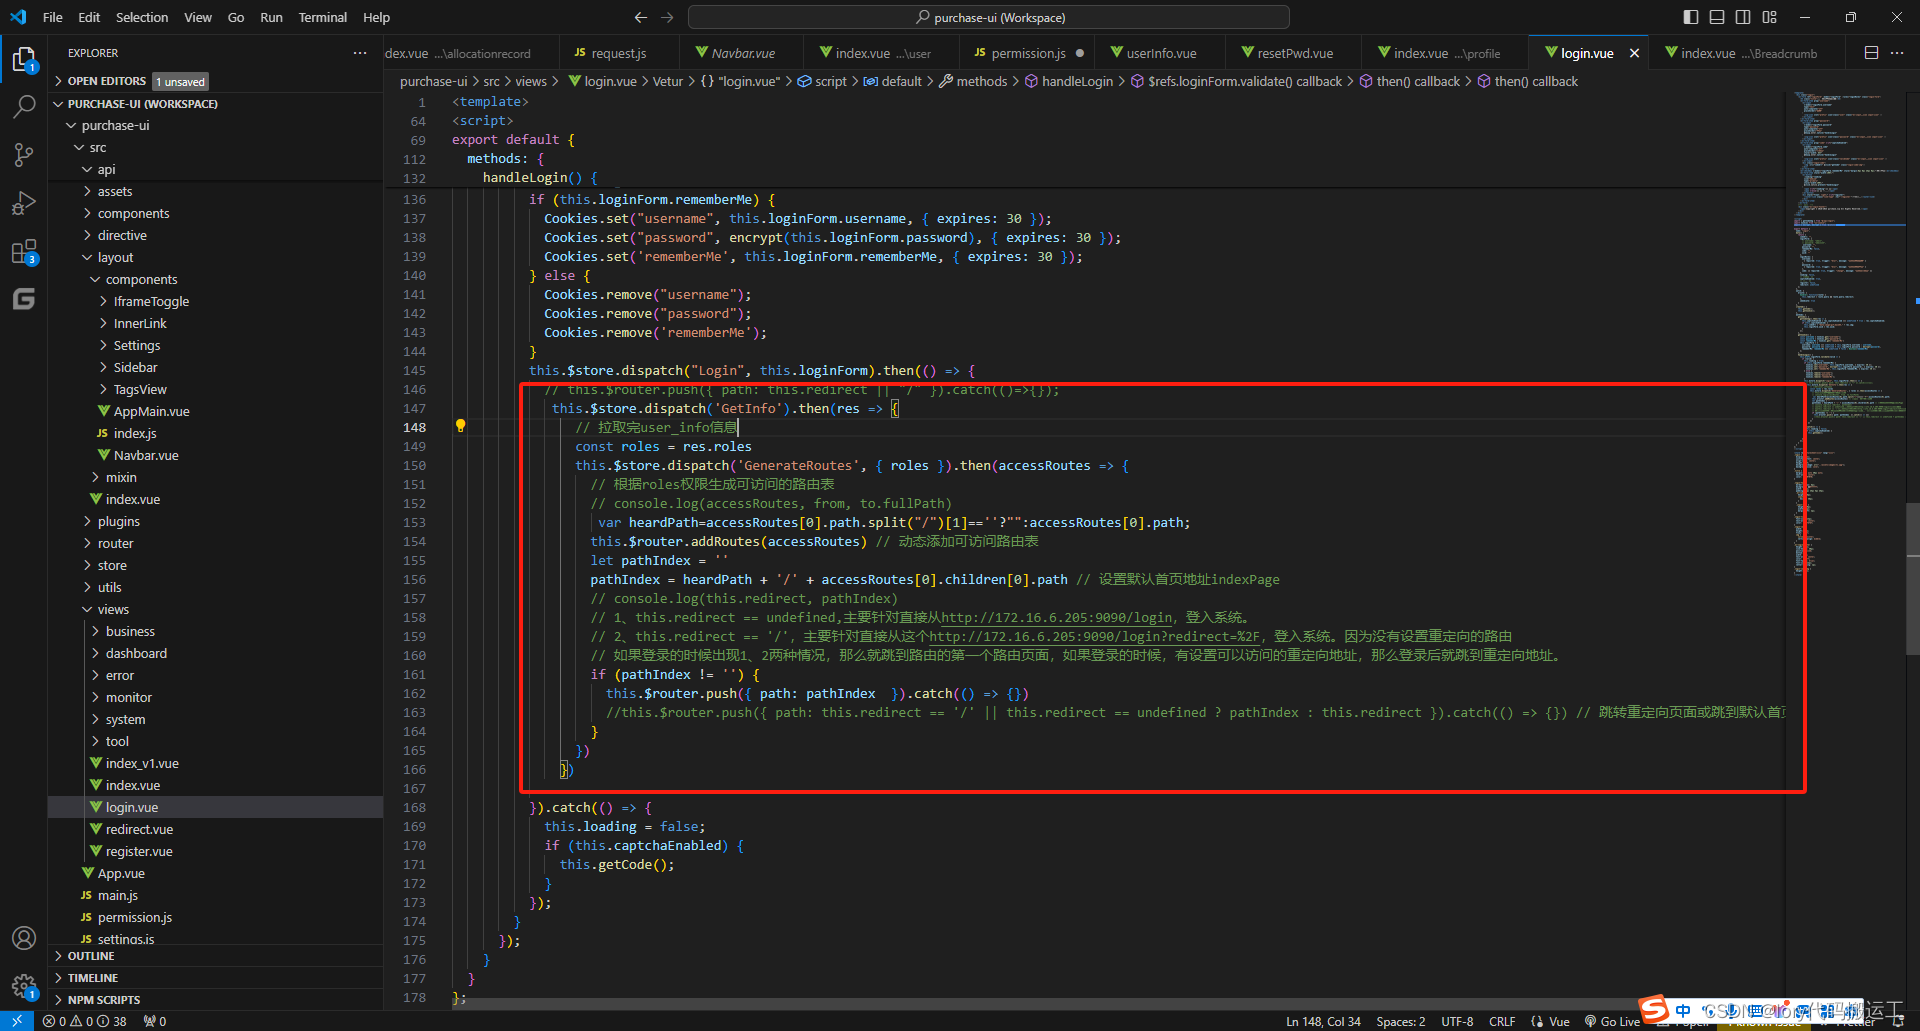
5、login.vue修改以下代码
  // this.$router.push({ path: this.redirect || "/" }).catch(()=>{});
             this.$store.dispatch('GetInfo').then(res => {
                // 拉取完user_info信息
                const roles = res.roles
                this.$store.dispatch('GenerateRoutes', { roles }).then(accessRoutes => {
                  // 根据roles权限生成可访问的路由表
                  // console.log(accessRoutes, from, to.fullPath)
                   var heardPath=accessRoutes[0].path.split("/")[1]==''?"":accessRoutes[0].path;
                  this.$router.addRoutes(accessRoutes) // 动态添加可访问路由表
                  let pathIndex = ''
                  pathIndex = heardPath + '/' + accessRoutes[0].children[0].path // 设置默认首页地址indexPage
                  // console.log(this.redirect, pathIndex)
                  // 1、this.redirect == undefined,主要针对直接从http://172.16.6.205:9090/login,登入系统。
                  // 2、this.redirect == '/',主要针对直接从这个http://172.16.6.205:9090/login?redirect=%2F,登入系统。因为没有设置重定向的路由
                  // 如果登录的时候出现1、2两种情况,那么就跳到路由的第一个路由页面,如果登录的时候,有设置可以访问的重定向地址,那么登录后就跳到重定向地址。
                  if (pathIndex != '') {
                    this.$router.push({ path: pathIndex  }).catch(() => {})
                    //this.$router.push({ path: this.redirect == '/' || this.redirect == undefined ? pathIndex : this.redirect }).catch(() => {}) // 跳转重定向页面或跳到默认首页indexPage
                  }
                })
              })
如图:
最后保存即可!!!


 2万+
2万+


 被折叠的 条评论
为什么被折叠?
被折叠的 条评论
为什么被折叠?
 到【灌水乐园】发言


