


关于浏览器的cookit的操作
使用的express的服务端请求之后服务器操作cookie,以及读取cookie的操作
关于前端的操作
全文为6727个字 阅读应为10分钟,实践demo尝试+阅读约为20分钟
扩展阅读:
关于express模块:浅谈express模块
浏览器来操作cookie
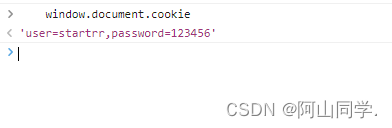
1,在浏览器里面查看cookie
window.document.cookie
当我们在浏览器的控制台输入上面的代码时
我们可以查看当前的cookie
如何设置cookit呢?
其实很简单
我们在script标签或者控制台里面输入如下代码
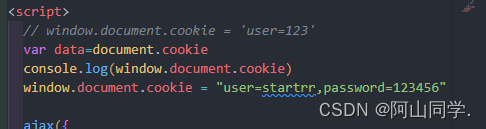
	var data=document.cookie
      console.log(window.document.cookie)
      window.document.cookie = "user=startrr,password=123456"
其实最核心的也就是
window.document.cookie = "user=startrr,password=123456"
附上前端代码【下面的后端操作用的到】
<!DOCTYPE html>
<html lang="en">
  <head>
    <meta charset="UTF-8" />
    <meta http-equiv="X-UA-Compatible" content="IE=edge" />
    <meta name="viewport" content="width=device-width, initial-scale=1.0" />
    <title>Document</title>
    <link rel="stylesheet" href="./index.css" />
    <script src="./ajax.js"></script>
  </head>
  <body>
        <a href="./html.html">tiaozhuan</a>
    <script>
    	//设置cookit
      // window.document.cookie = 'user=123'
      var data=document.cookie
      console.log(window.document.cookie)
      window.document.cookie = "user=startrr,password=123456"
      //ajax请求数据提交
      ajax({
          method: "post",
          url: "http://localhost:4000/user/cooklogin",
          data: {
            user: document.cookie
          },
          success: function (data) {
            console.log(data);
          },
        });
    </script>
  </body>
</html>
封装的ajax函数【记得引入否则会报错】
// var xhr = new XMLHttpRequest();
function resolveData(data) {
    var arr = [];
    for (let k in data) {
        var str = k + '=' + data[k]
        arr.push(str);
    }
    return arr.join('&');
}

function ajax(options) {
    var xhr = new XMLHttpRequest();
    var str = resolveData(options.data);
    if (options.method.toUpperCase() == 'GET'){
        xhr.open(options.method, options.url + '?' + str)
        xhr.send()
    } else if (options.method.toUpperCase()== "POST") {
        xhr.open(options.method, options.url)
        xhr.setRequestHeader('Content-Type','application/x-www-form-urlencoded');
        xhr.send(str);
    }

    xhr.onreadystatechange = function () {
        if (xhr.readyState == 4 && xhr.status == 200) {
            var result = JSON.parse(xhr.responseText);
            options.success(result)
        }
    }

}
后端的cookit的操作
在web中后端对前端的cookie的权限比前端是要大的
我们要实现后端对cookie的操作
这时候我们就需要用到 cookie-parser 模块了
安装
npm i cookie-parser
搭建服务器
需要用到的模块:
express模块
cookie-parser模块
npm i cookie-parser
npm i express
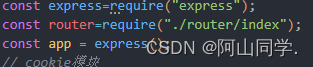
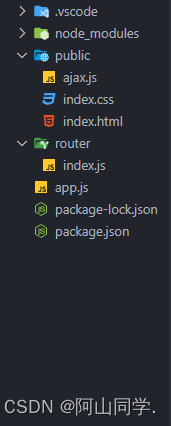
我们创建app.js
const express=require("express");
const router=require("./router/index");
const app = express();
// cookie模块
const cookieParser = require('cookie-parser');
// 监听端口
app.listen(4000,()=>{
    console.log("http://localhost:4000")
})
// 使用cookie模块
app.use(cookieParser());
// post请求的转换
app.use(
    express.urlencoded()
);
// 静态托管
app.use(express.static("./public"));
// 使用路由
app.use("/user",router)
在同级目录下创建 router 目录
//主要是为了路由
文件目录
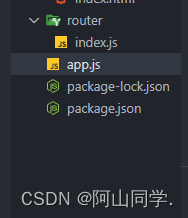
创建index.js
//index.js
var express = require("express");
var router = express.Router();
// 设置cookie
router.post("/reguser", function (req, res, next) {
//文件路径
// 如果前端允许传递cookie,加上这一句
res.header("Access-Control-Allow-Credentials", "true");
// 返回并修改cookie
res.cookie("user", "123456");
// res.setHeader('Set-Cookie', 'msg=hello;')
// res.cookie("token", "123456789");
res.send("hello the cookie");
console.log(req.cookies);
});
// cookie验证
router.post("/cooklogin", function (req, res, next) {
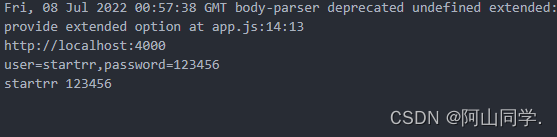
console.log(req.body.user);
const str = req.body.user;
// 获取账号位置
const nalen = str.indexOf("user=") + 4;
// 获取密码位置
const pwdlen = str.indexOf(",password=");
// 获取长度
const strlo = str.length;
// 获取账号
var user = str.slice(nalen + 1, pwdlen);
// 获取密码
var password = str.slice(pwdlen + 10, strlo);
console.log(user, password);
// 获取之后去服务器查数据
});
// 把路由暴露出去
module.exports = router;
接下来我们再public目录下创建index.html
<!DOCTYPE html>
<html lang="en">
  <head>
    <meta charset="UTF-8" />
    <meta http-equiv="X-UA-Compatible" content="IE=edge" />
    <meta name="viewport" content="width=device-width, initial-scale=1.0" />
    <title>Document</title>
    <link rel="stylesheet" href="./index.css" />
    <script src="./ajax.js"></script>
  </head>
  <body>
    <div id="reguserto">
      <div>
        <h1>用户注册</h1>
        <span>
          <img id="headimg" src="./ico/user.png" alt="" />
        </span>
        <p>点击上传头像</p>
        <div>
          <p>登录ID</p>
          <input type="text" placeholder="id" id="user" value="123" />
        </div>
        <div>
          <p>昵称</p>
          <input type="text" placeholder="用户名" id="name" value="123" />
        </div>
        <button onclick="reguser()">提交</button>
      </div>
    </div>
    <script>
      // window.document.cookie = 'user=123'
      var data=document.cookie
      console.log(window.document.cookie)
      window.document.cookie = "user=startrr,password=123456"

      ajax({
          method: "post",
          url: "http://localhost:4000/user/cooklogin",
          data: {
            user: document.cookie
          },
          success: function (data) {
            console.log(data);
          },
        });
      function reguser() {
        // 获取值
        var user = document.getElementById("user").value;
        var name = document.getElementById("name").value;
        ajax({
          method: "post",
          url: "http://localhost:4000/user/reguser",
          data: {
            user: user,
            name: name,
          },
          success: function (data) {
            console.log(data);
          },
        });
      }
    </script>
  </body>
</html>
index.css
*{
  margin: 0;
  padding: 0;
}
#reguserto {
  width: 100vw;
  height: 100vh;
  display: flex;
  align-items: center;
  justify-content: center;
  background-color: rgba(228, 60, 60, 0.63);
}

/* 注册页面 */
#reguserto {
  width: 100vw;
  height: 100vh;
  display: flex;
  align-items: center;
  justify-content: center;
  background-color: rgba(17, 17, 17, 0.63);
}
/* 中间主体 */
#reguserto > div {
  width: 300px;
  height: 600px;
  border-radius: 20px;
  display: flex;
  align-items: center;
  flex-direction: column;
  background-color: rgb(48, 63, 63);
}
/* 头像 */
#reguserto>div>span {
  display: inline-block;
  width: 100%;
  height: 100px;
  display: flex;
  justify-content: center;
  /* background-color: rgba(17, 17, 17, 0.63); */
}
/* 头像 */
#reguserto>div>span>img {
  width: 100px;
  height: 100px;
  border-radius: 50px;
}
/* 头像下面的文字 */
#reguserto>div>p {
  margin:10px;
  color: #fff
}
/* 输入框主题框架 */
#reguserto > div>div {
  width: 300px;
  height: 50px;
  border-radius: 20px;
  display: flex;
  align-items: center;
  margin: 5px;
  justify-content: space-around;
  background-color: rgb(48, 63, 63);
}
/* 性别下拉选项 */
#reguserto > div>div>select {
  margin-top: 2px;
  width: 200px;
  height: 40px;
  color: rgb(7, 34, 58);
  border: 10px solid rgba(255, 255, 255, 0);
  margin: 15px;
  font-size: 20px;
  border-radius: 10px;
}
/* 输入框旁边的标题 */
#reguserto > div>div>p {
  color: rgb(245, 250, 255);
  font-size: 20px;
  border-radius: 10px;
  padding-left: 5px;
}
/* 上面的标题 */
#reguserto > div > h1 {
  width: 300px;
  color: aliceblue;
  margin: 15px;
  text-align: center;
}
/* 输入框 */
#reguserto > div >div> input {
  margin-top: 2px;
  width: 170px;
  height: 20px;
  color: rgb(7, 34, 58);
  border: 10px solid rgba(255, 255, 255, 0);
  margin: 15px;
  font-size: 20px;
  border-radius: 10px;
  padding-left: 5px;
}
/* 提交按钮 */
#reguserto > div > button {
  width: 200px;
  height: 50px;
  color: rgb(76, 121, 161);
  border: 10px solid rgba(255, 255, 255, 0);
  margin: 15px;
  font-size: 20px;
  border-radius: 10px;
}
最后文件目录
启动服务器我们可以看到
当我们刷新后在控制台输入
window.document.cookie
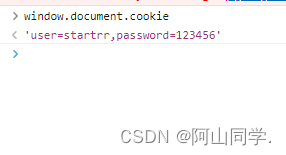
可以看到cookit以及由服务器下发下来了


 877
877


 被折叠的 条评论
为什么被折叠?
被折叠的 条评论
为什么被折叠?
 到【灌水乐园】发言


