


一、简述CGI与FASTCGI区别
1.1 CGI
CGI:Common Gateway Interface 公共网关接口
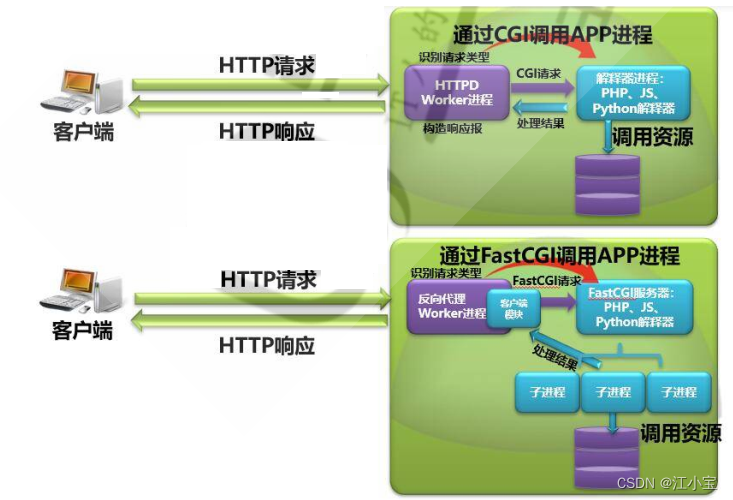
CGI 在碰到一个动态请求怎么办呢?web服务器会根据这次请求的内容,然后会 fork 一个新进程来运行外部的 C 程序或者bash,perl脚本等,这个进程会把处理完的数据返回给web服务器,最后web服务器把内容发送给用户,刚才fork的进程也随之退出。 如果下次用户还请求改动态脚本,那么web服务器又再次fork一个新进程,周而复始的进行。
CGI 可以让一个客户端,从网页浏览器通过http服务器向执行在网络服务器上的程序传输数据;CGI描述了客户端和服务器程序之间传输的一种标准。
1.2 fastcgi
fastcgi的方式是,web服务器收到一个请求时,不会重新fork一个进程(因为这个进程在web服务器启动时就开启了,而且不会退出),web服务器直接把内容传递给这个进程(进程间通信,但fastcgi使用了别的方式,tcp方式通信),这个进程收到请求后进行处理,把结果返回给web服务器,最后自己接着等待下一个请求的到来,而不是退出
1.3 CGI和fastcgi 比较
- CGI: 一次性的服务
- FASTCGI:全周期的持续式的服务
| 名称 | 在web服务器方面 | 在对数据进行处理的进程方面 |
|---|---|---|
| cgi | fork一个新的进行处理 | 读取参数,处理数据,然后就结束生命周期 |
| fastcgi | 用TCP方式跟远程机子上的进程或本地进程建立连接 | 要开启TCP端口,进入循环,等待数据的到来,处理数据 |
二、编译安装基于fastcgi模式的多虚拟主机的wordpress和discuz的LAMP架构
2.1 环境准备
一台主机:httpd+php(fastcgi模式) 192.168.1.30
一台主机:mysql 服务器 192.168.1.33
2.2 二进制安装mysql
[root@CentOS7 ~]# cat online_install_mysql5.7.sh
#!/bin/bash
Install_DIR=/data/mysql
URL=https://mirrors.163.com/mysql/Downloads/MySQL-5.7
MySQL_Version=mysql-5.7.38
Tar_Package=$MySQL_Version-linux-glibc2.12-x86_64.tar.gz
Full_NAME=$MySQL_Version-linux-glibc2.12-x86_64

if [ $UID -ne 0 ]; then
   echo "Permission denied,must be root!"
   exit 1
fi

if [ -d /usr/local/mysql ]; then
   echo "MySQL already exists, install failed."
   exit 1
fi

rpm -q wget libaio numactl-libs tar &>/dev/null || yum install -y -q wget libaio numactl-libs tar
[ ! -f $Tar_Package ] || wget $URL/$Tar_Package
tar -xvf $Tar_Package -C /usr/local/
if [ $? -ne 0 ]; then
  echo "mysql-5.7.38 file is not exists,please try again download and tar."
  exit 1
fi

ln -s /usr/local/$Full_NAME /usr/local/mysql
id mydql &>/dev/null
if [ $? -ne 0 ]; then
   useradd -s /sbin/nologin -r mysql
fi

[ -d $Install_DIR ] || mkdir $Install_DIR -p
chown -R mysql.mysql $Install_DIR
ln -s /usr/local/mysql/bin/* /usr/bin/ &>/dev/null

cat> /etc/my.cnf.d/mysql-server.cnf <<EOF
[mysqld]
server-id=1
log-bin=$Install_DIR/mysql-binlog
datadir=$Install_DIR
socket=$Install_DIR/mysql.sock
log-error=$Install_DIR/mysql.log
pid-file=$Install_DIR/mysql.pid
[client]
socket=$Install_DIR/mysql.sock
EOF

mysqld --initialize --user=mysql --datadir=$Install_DIR
cp /usr/local/mysql/support-files/mysql.server /etc/init.d/mysqld
chkconfig --add mysqld
systemctl start mysqld

[root@CentOS7 ~]# mysqladmin -uroot -p'NoGU=or9H:dZ' password Test@123
[root@CentOS7 ~]# mysql -uroot -pTest@123    #测试登录数据库
2.3 编译安装 httpd 2.4
[root@httpd ~]# cat offline_install_httpd2-4.sh
#!/bin/bash

Install_Dir=/data/httpd
File_Suffix=tar.bz2
Apr_File=apr-1.7.0
Apr_util_File=apr-util-1.6.1
Httpd_File=httpd-2.4.46
MPM=event
CPU=`lscpu | awk '/^CPU\(s\)/{print $2}'`

rpm -q gcc pcre-devel openssl-devel expat-devel tar bzip2 &>/dev/null || yum install -y -q tar bzip2 gcc pcre-devel openssl-devel expat-devel
tar -xf $Httpd_File.$File_Suffix && tar -xf $Apr_File.$File_Suffix && tar -xf $Apr_util_File.$File_Suffix
mv $Apr_File $Httpd_File/srclib/apr
mv $Apr_util_File $Httpd_File/srclib/apr-util

if [ -d $Install_Dir ]; then
   echo "dir alearly exist,install exit."
   exit 1
else
   mkdir -p $Install_Dir
   cd $Httpd_File
   ./configure --prefix=$Install_Dir --enable-so --enable-ssl --enable-cgi --enable-rewrite --with-zlib --with-pcre --with-included-apr --enable-modules=most --enable-mpms-shared=all --with-mpm=$MPM
   make -j $CPU && make install
fi

id apache &>/dev/null ||  useradd -r -s /sbin/nologin apache
sed -i.bak 's/daemon/apache/' $Install_Dir/conf/httpd.conf

cat > /usr/lib/systemd/system/httpd.service << EOF
[Unit]
Description=The Apache HTTP Server
After=network.target remote-fs.target nss-lookup.target
Documentation=man:httpd(8)
Documentation=man:apachectl(8)

[Service]
Type=forking
ExecStart=$Install_Dir/bin/apachectl start
ExecReload=$Install_Dir/bin/apachectl graceful
ExecStop=$Install_Dir/bin/apachectl stop
KillSignal=SIGCONT
PrivateTmp=true

[Install]
WantedBy=multi-user.target
EOF

systemctl daemon-reload
systemctl start httpd
systemctl status httpd &>/dev/null
if [ $? -eq 0 ] ; then
   echo "The installation is successful and the httpd service is running"
else
   echo "Service startup failed."
fi
[root@localhost ~]# curl 127.0.0.1
<html><body><h1>It works!   jiangde</h1></body></html>
2.4 编译安装 fastcgi 方式的 php 7.4
- 安装相关依赖包
- 编译php7.4
- 准备php配置文件和启动文件,修改相关配置项
- 修改配置 httpd 支持 php-fpm
[root@localhost ~]# yum -y install gcc libxml2-devel bzip2-devel libmcrypt-devel sqlite-devel oniguruma-devel
[root@localhost ~]# tar xf php-7.4.29.tar.bz2
[root@localhost ~]# cd php-7.4.29
[root@localhost php-7.4.29]# ./configure --prefix=/data/php74 --enable-mysqlnd --with-mysqli=mysqlnd --with-pdo-mysql=mysqlnd --with-openssl --with-zlib --with-config-file-path=/etc --with-config-file-scan-dir=/etc/php.d --enable-mbstring --enable-xml --enable-sockets --enable-fpm --enable-maintainer-zts --disable-fileinfo
[root@localhost php-7.4.29]# make -j 2 && make install
[root@localhost php-7.4.29]# /data/php74/bin/php --version
PHP 7.4.29 (cli) (built: May 16 2022 21:55:25) ( ZTS )
Copyright (c) The PHP Group
Zend Engine v3.4.0, Copyright (c) Zend Technologies

[root@localhost php-7.4.29]# cp php.ini-production /etc/php.ini
[root@localhost php-7.4.29]# cp sapi/fpm/php-fpm.service /usr/lib/systemd/system/
[root@localhost php-7.4.29]# cd /data/php74/etc
[root@localhost etc]# cp php-fpm.conf.default php-fpm.conf
[root@localhost etc]# cp php-fpm.d/www.conf.default php-fpm.d/www.conf

[root@localhost etc]#vim /data/php74/etc/php-fpm.d/www.conf
user apache
group apache
pm.status_path = /status
ping.path = /ping

[root@localhost etc]# mkdir /etc/php.d/
[root@localhost etc]# vim /etc/php.d/opcache.ini
[opcache]
zend_extension=opcache.so
opcache.enable=1
[root@localhost etc]# systemctl daemon-reload
[root@localhost etc]# systemctl start php-fpm.service
[root@localhost etc]# systemctl status php-fpm.service
● php-fpm.service - The PHP FastCGI Process Manager
   Loaded: loaded (/usr/lib/systemd/system/php-fpm.service; disabled; vendor preset: disabled)
   Active: active (running) since Mon 2022-05-16 22:11:39 CST; 1s ago
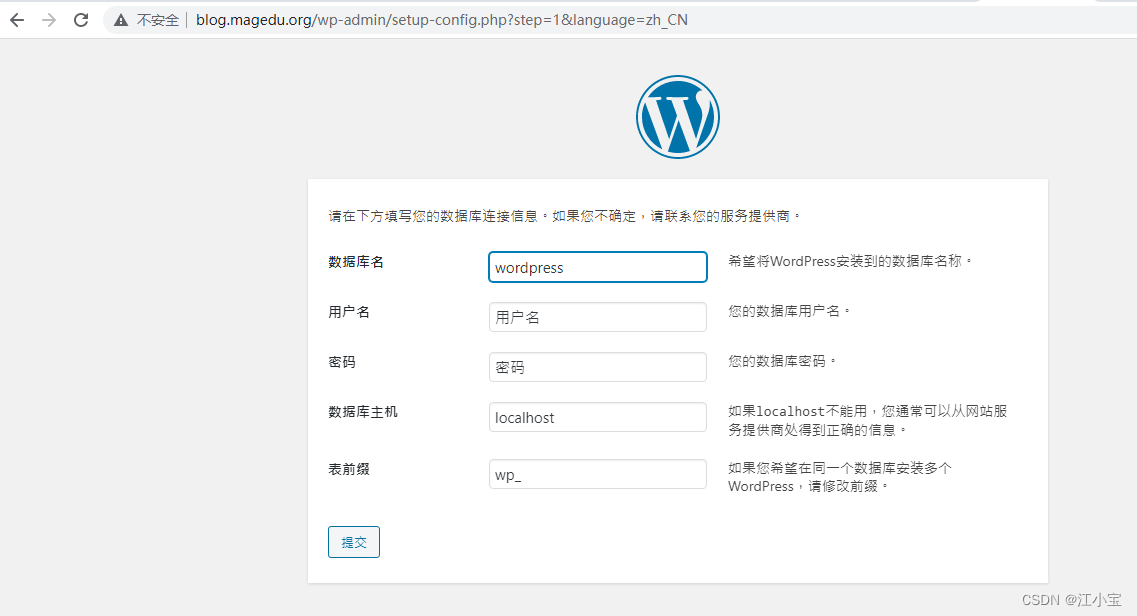
2.5 准备wordpress和discuz! 相关文件
[root@localhost etc]#mkdir /data/
[root@localhost etc]#tar xvf wordpress-5.4.2-zh_CN.tar.gz
[root@localhost etc]#mv wordpress/ /data
[root@localhost etc]#setfacl –R –m u:apache:rwx /data/wordpress/
#或者chown –R apache.apache /data/wordpress

[root@localhost etc]#mkdir /data/discuz
[root@localhost etc]#unzip Discuz_X3.4_SC_UTF8_20220406.zip -d /root/discuz
[root@localhost etc]#mv root/discuz/upload/* /data/discuz/
[root@localhost etc]#setfacl –R –m u:apache:rwx /data/discuz/
#或者chown –R apache.apache /data/discuz
2.6 测试访问
三、通过loganalyzer展示数据库中的日志
loganalyzer是用 php 语言实现的日志管理系统,可将MySQL数据库的日志用丰富的WEB方式进行展示。
官网:https://loganalyzer.adiscon.com
3.1 环境准备
- 一台日志服务器 192.168.1.42
- 一台数据库服务器 192.168.1.33
- 一台当httpd+php 服务器,并安装loganalyzer展示web图形 192.168.1.40
3.2 日志服务器安装
在rsyslog服务器上安装连接mysql模块相关的程序包
[root@centos8 ~]#yum install rsyslog-mysql
[root@centos8 ~]#scp /usr/share/doc/rsyslog/mysql-createDB.sql 192.168.1.33
[root@centos8 ~]#vim /etc/rsyslog.conf
#### MODULES ####
module(load="ommysql")

#### RULES ####
*.info :ommysql:192.168.1.33,Syslog,rsyslog,Test@123
3.3 数据库配置
此处的数据库为上个例子中的二进制安装的。
[root@mysql-server ~]#mysql -uroot -pTest@123
mysql>source /root/mysql-createDB.sql
mysql>GRANT ALL ON Syslog.* TO 'rsyslog'@'192.168.1.%' IDENTIFIED BY 'Test@123';
3.4 测试数据是否发送至数据库
#在日志服务器上生成日志
[root@centos8 ~]#logger "this is a test log------"


#在数据库上查询到上面的测试日志
mysql>select * from Syslog.SystemEvents\G
*************************** 35. row ***************************
                ID: 35
        CustomerID: NULL
        ReceivedAt: 2022-05-17 20:13:25
DeviceReportedTime: 2022-05-17 20:13:25
          Facility: 1
          Priority: 5
          FromHost: localhost
           Message: this is a test log------
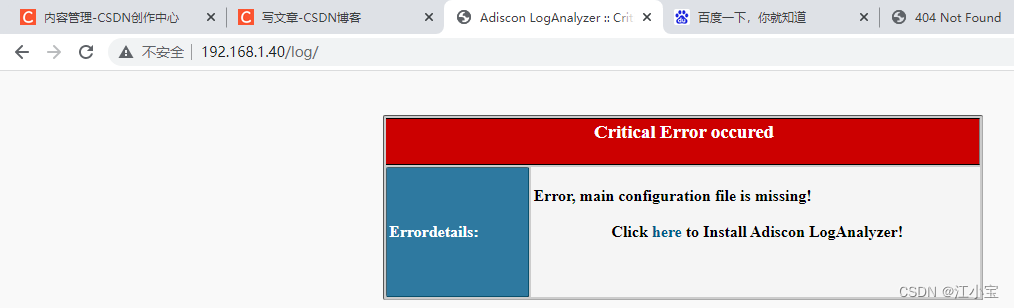
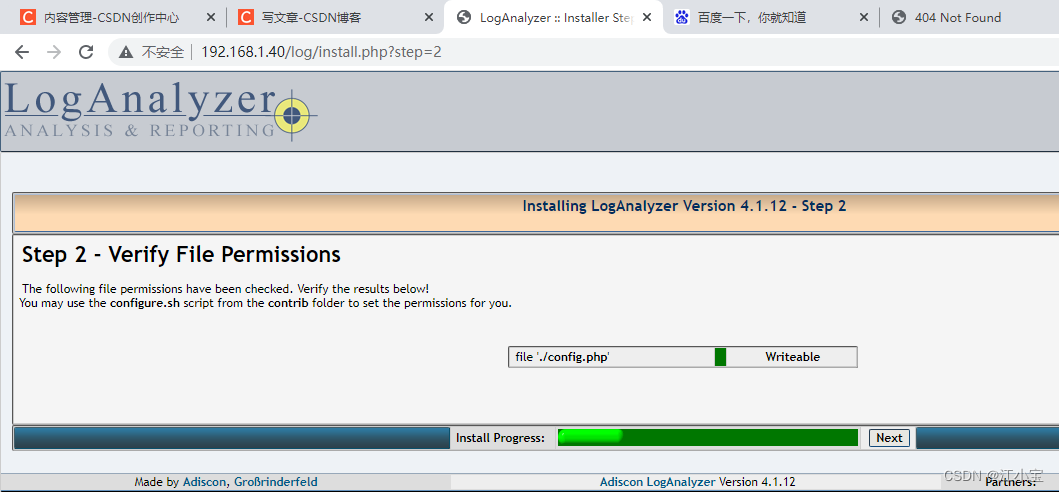
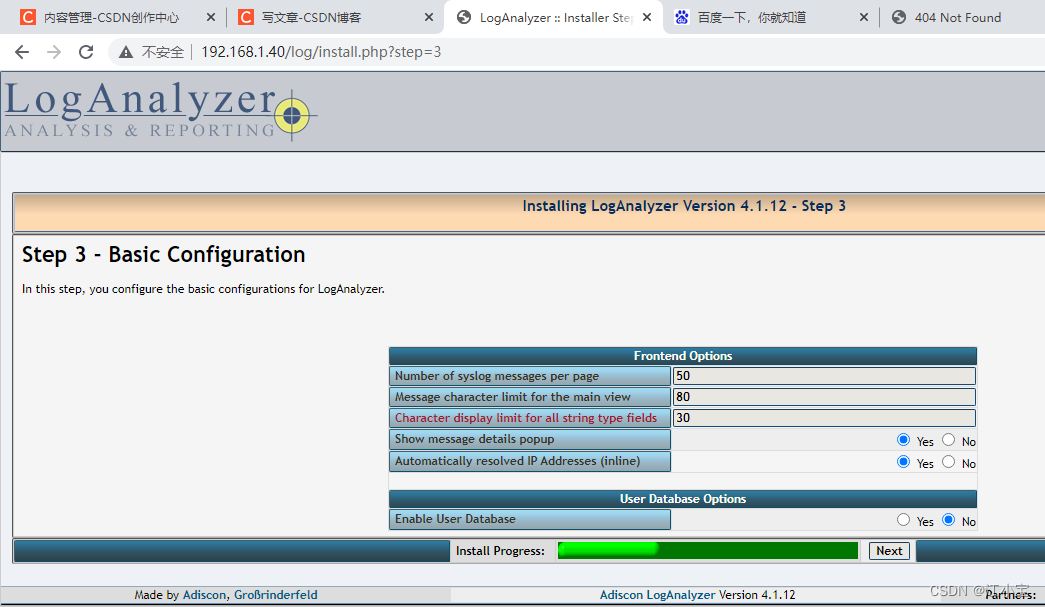
3.5 配置httpd、php以及loganalyzer展示数据库中的日志
[root@centos8 ~]#yum -y install httpd php-fpm php-mysqlnd php-gd
[root@centos8 ~]#systemctl enable --now httpd php-fpm
[root@centos8 ~]#tar xvf loganalyzer-4.1.10.tar.gz
[root@centos8 ~]#mv loganalyzer-4.1.10/src/ /var/www/html/log
[root@centos8 ~]#touch /var/www/html/log/config.php
[root@centos8 ~]#chmod 666 /var/www/html/log/config.php
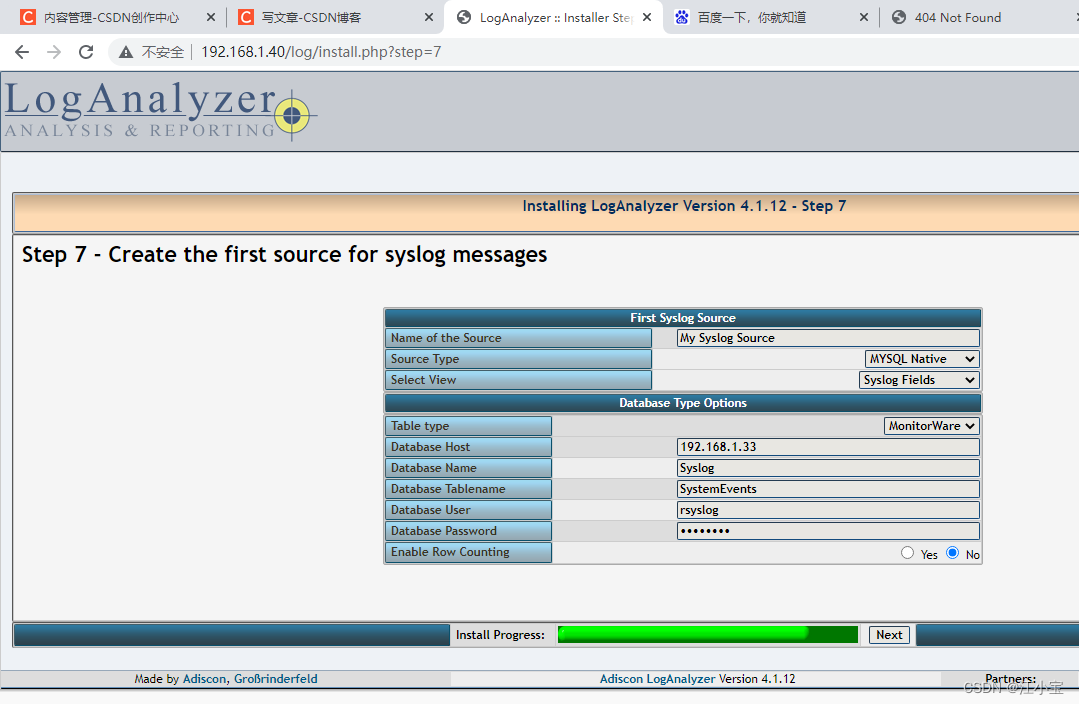
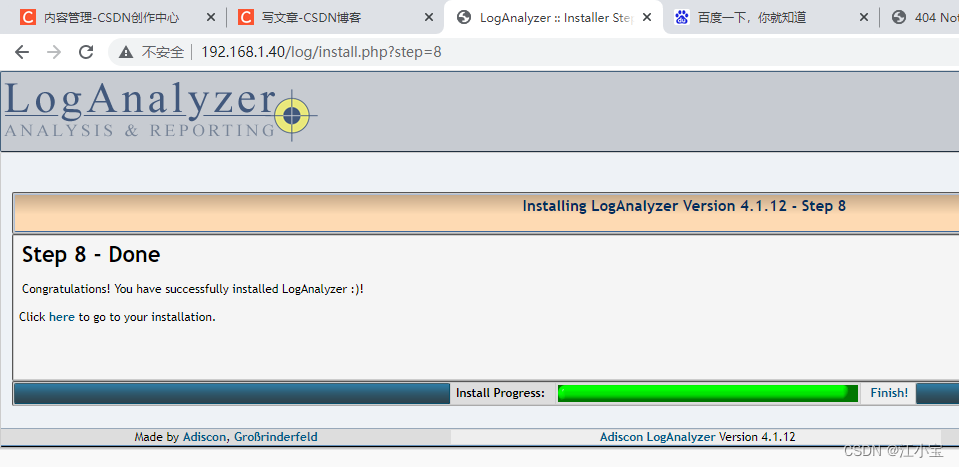
访问http://192.168.1.40/log 实现初始化,选择:MySQL Native, Syslog Fields, Monitorware
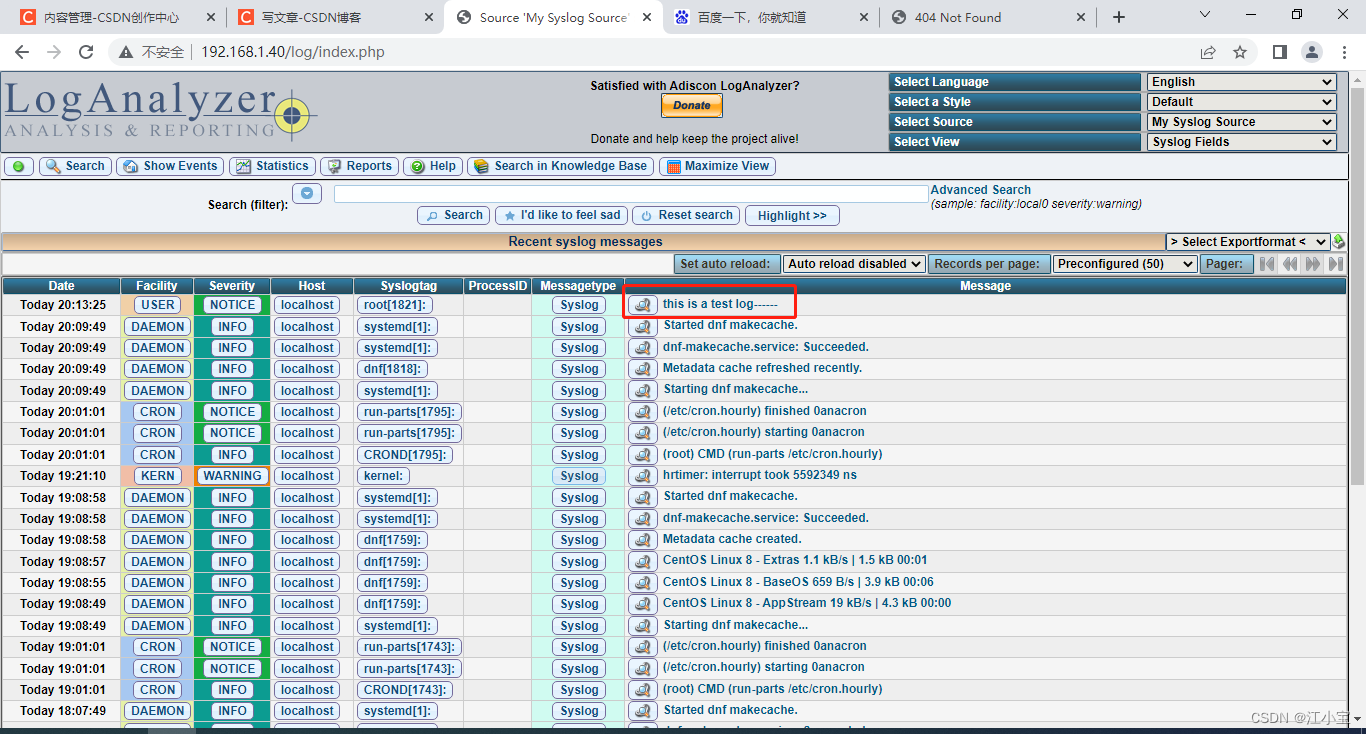
可以看到刚刚测试的语句: this is a test log------


 2万+
2万+


 被折叠的 条评论
为什么被折叠?
被折叠的 条评论
为什么被折叠?
 到【灌水乐园】发言


