


系列文章目录
Flume第一章:环境安装
文章目录
前言
之前由于学校考试,写博客就中断了,后来等学校基本考完了,准备休息两天继续学习,然后就阳性了,休息了差不多一个星期了,又赶上了学校实训,这篇博客,真的是命运多舛
一、Flume是什么?
Flume is a distributed, reliable, and available service for efficiently collecting, aggregating, and moving large amounts of log data. It has a simple and flexible architecture based on streaming data flows. It is robust and fault tolerant with tunable reliability mechanisms and many failover and recovery mechanisms. It uses a simple extensible data model that allows for online analytic application.
这是官方的原文。
Flume是一种分布式、可靠且可用的服务,用于高效地收集、聚合和移动大量日志数据。它具有基于流数据流的简单而灵活的架构。它具有可调的可靠性机制和许多故障切换和恢复机制,具有鲁棒性和容错性。它使用一个简单的可扩展数据模型,允许在线分析应用程序。
以上是百度翻译 看看就行了
简单来说
Flume最主要的作用就是,实时读取服务器本地磁盘的数据,将数据写入到HDFS。
二、环境安装
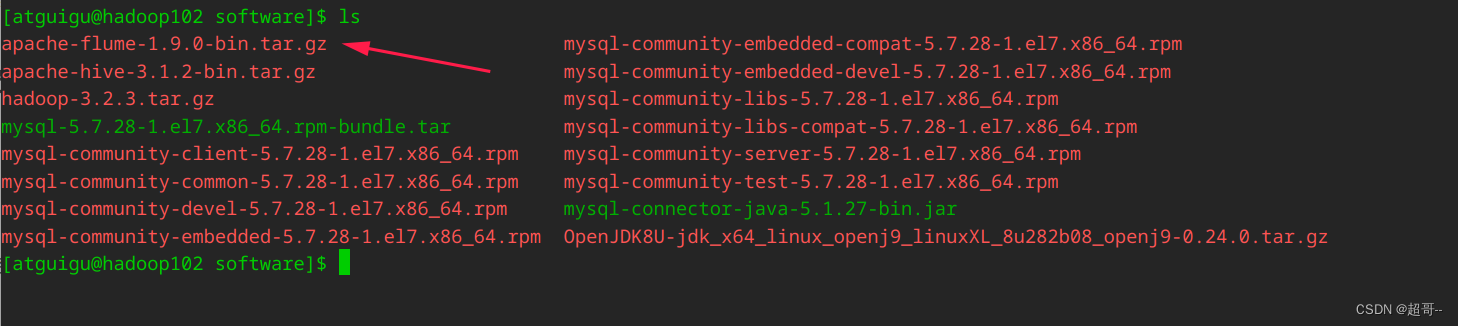
1.文件下载
官方下载连接
由于下载服务器在国外,可能网速不太稳定,尽量在网络环境较好的情况下下载。
本实验使用flume1.9版本(本来是使用最新的1.11的后来发现兼容有问题,不能正常使用)
2.环境安装
为了实验方便,请在hive环境下安装。
-
上传文件
-
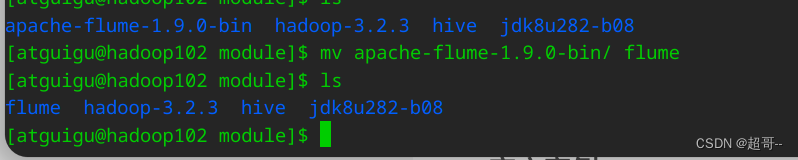
解压并改名
tar -xvf apache-flume-1.9.0-bin.tar.gz -C /opt/module/
mv apache-flume-1.9.0-bin/ flume
flume 依靠java和hadoop所以需要提前配置相关环境,这个以前做过,就不做了。
- 删除guava
rm -rf /opt/module/flume/lib/guava-11.0.2.jar
到此flume的环境安装结束,此时可以抓一个快照留存。
3.官方案例
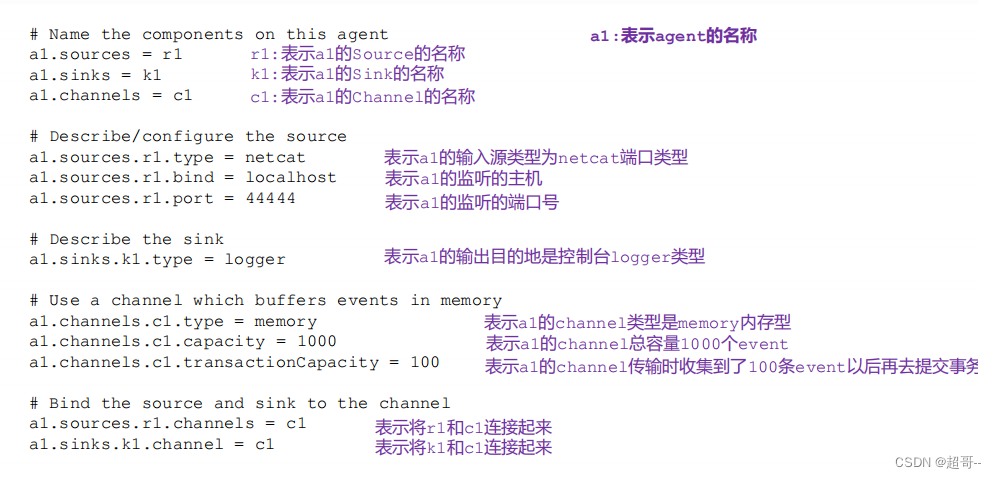
在 flume 目录下创建 job 文件夹并进入 job 文件夹,创建flume-netcat-logger.conf文件

并添加以下内容,此代码可以在官方文档中找到。
# Name the components on this agent
a1.sources = r1
a1.sinks = k1
a1.channels = c1
# Describe/configure the source
a1.sources.r1.type = netcat
a1.sources.r1.bind = localhost
a1.sources.r1.port = 44444
# Describe the sink
a1.sinks.k1.type = logger
# Use a channel which buffers events in memory
a1.channels.c1.type = memory
a1.channels.c1.capacity = 1000
a1.channels.c1.transactionCapacity = 100
# Bind the source and sink to the channel
a1.sources.r1.channels = c1
a1.sinks.k1.channel = c1
代码解析
开启服务器端。
以下两条命令二选一
bin/flume-ng agent --conf conf/ --name a1 --conf-file job/flume-netcat-logger.conf -Dflume.root.logger=INFO,console


bin/flume-ng agent -c conf/ -n a1 -f job/flume-netcat-logger.conf -Dflume.root.logger=INFO,console
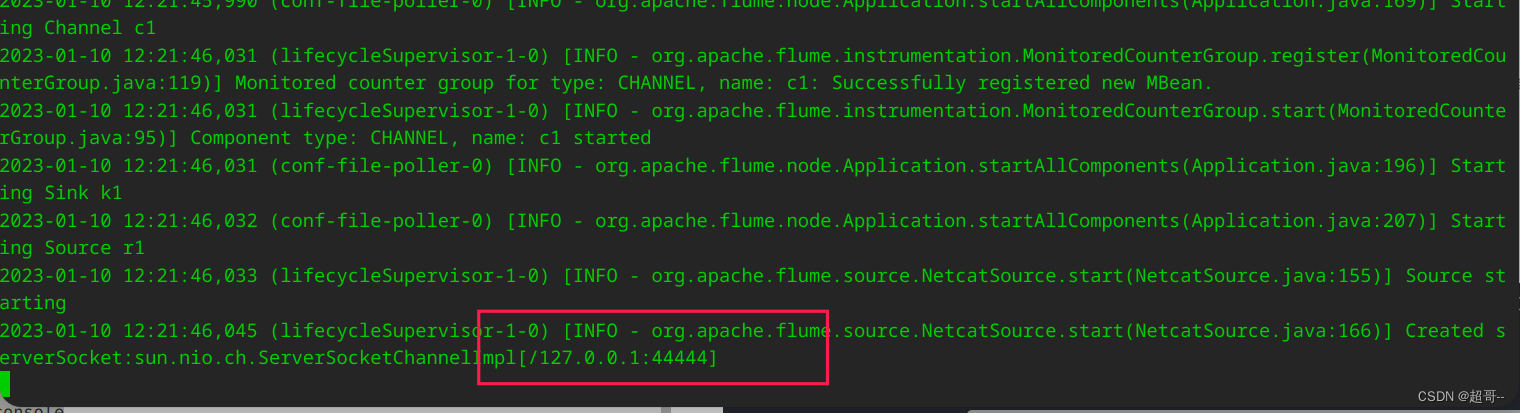
启动成功。
再开一个终端,监听44444端口。
nc localhost 44444
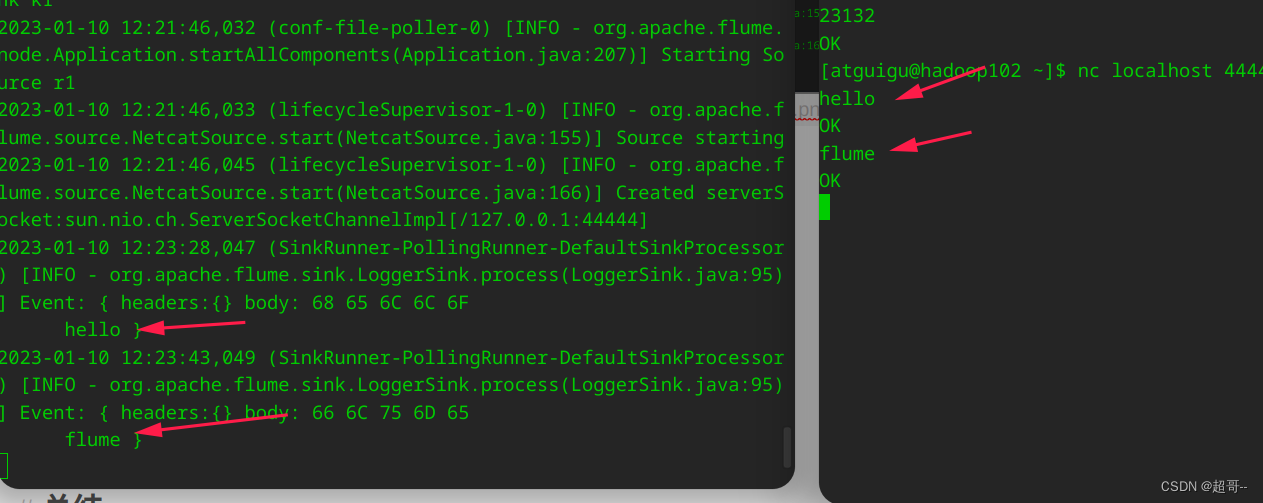
随便写点内容,确认两边可以通信。
三、几个案例
1.实时监控 Hive 日志,并上传到 HDFS 中
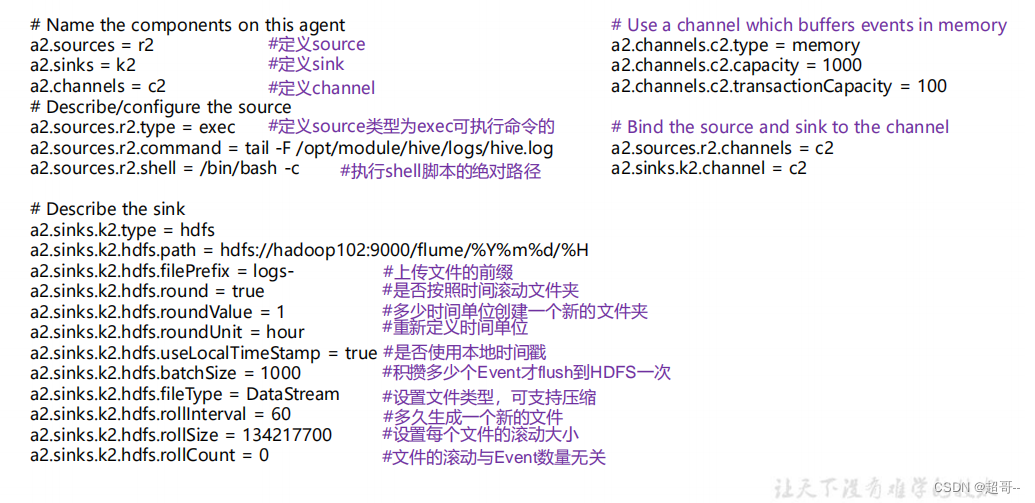
创建 flume-file-hdfs.conf
# Name the components on this agent
a2.sources = r2
a2.sinks = k2
a2.channels = c2
# Describe/configure the source
a2.sources.r2.type = exec
a2.sources.r2.command = tail -F /opt/module/hive/logs/hive.log
# Describe the sink
a2.sinks.k2.type = hdfs
a2.sinks.k2.hdfs.path = hdfs://hadoop102:8020/flume/%Y%m%d/%H
#上传文件的前缀
a2.sinks.k2.hdfs.filePrefix = logs-
#是否按照时间滚动文件夹
a2.sinks.k2.hdfs.round = true
#多少时间单位创建一个新的文件夹
a2.sinks.k2.hdfs.roundValue = 1
#重新定义时间单位
a2.sinks.k2.hdfs.roundUnit = hour
#是否使用本地时间戳
a2.sinks.k2.hdfs.useLocalTimeStamp = true
#积攒多少个 Event 才 flush 到 HDFS 一次
a2.sinks.k2.hdfs.batchSize = 100
#设置文件类型,可支持压缩
a2.sinks.k2.hdfs.fileType = DataStream
#多久生成一个新的文件
a2.sinks.k2.hdfs.rollInterval = 60
#设置每个文件的滚动大小
a2.sinks.k2.hdfs.rollSize = 134217700
#文件的滚动与 Event 数量无关
a2.sinks.k2.hdfs.rollCount = 0
# Use a channel which buffers events in memory
a2.channels.c2.type = memory
a2.channels.c2.capacity = 1000
a2.channels.c2.transactionCapacity = 100
# Bind the source and sink to the channel
a2.sources.r2.channels = c2
a2.sinks.k2.channel = c2
由于我们要将flume监控的日志上传到HDFS目录,所以要先启动hadoop,自行启动。
然后启动flume
bin/flume-ng agent --conf conf/ --name a2 --conf-file job/flume-file-hdfs.conf
然后启动hive
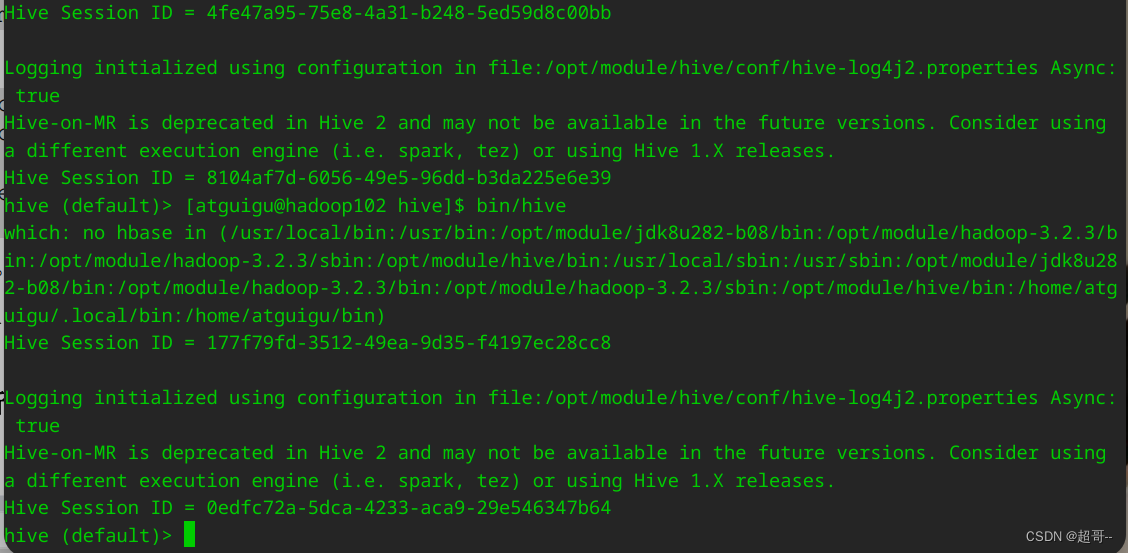
现在可以查看hdfs,会发现根目录下多了一个flume文件。
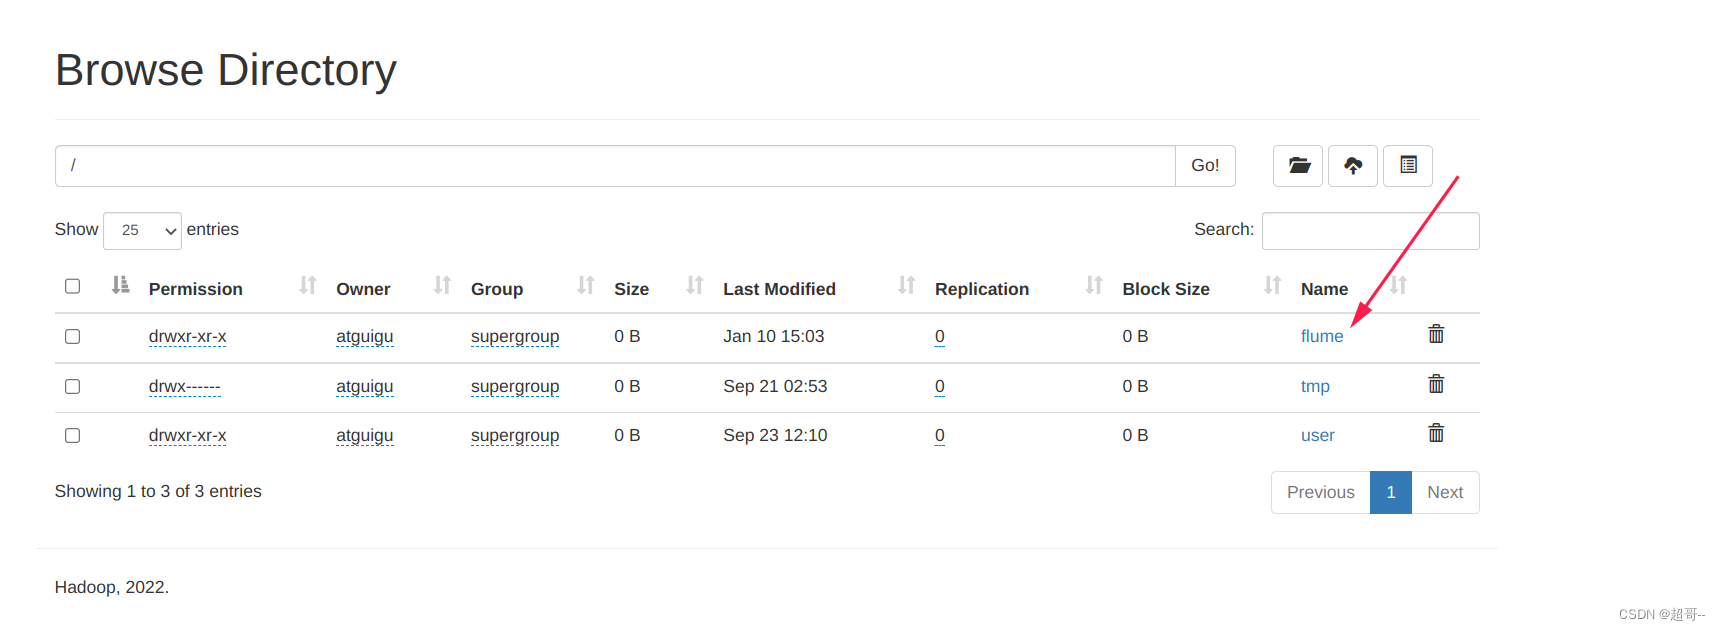
进入即可查看日志,根据设定每30秒生成一个日志文件。
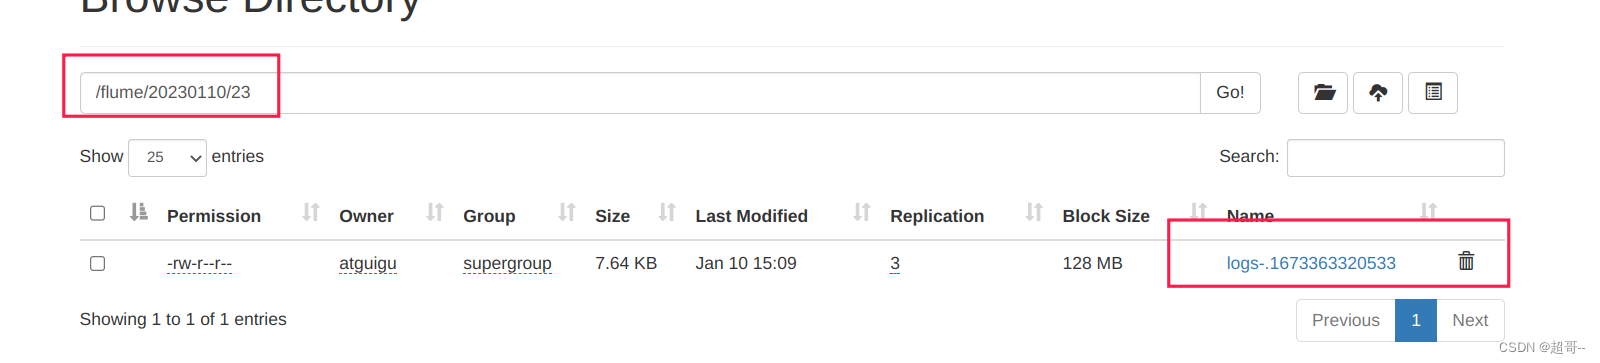
并且会生成tmp临时文件。

2.使用 Flume 监听整个目录的文件,并上传至 HDFS
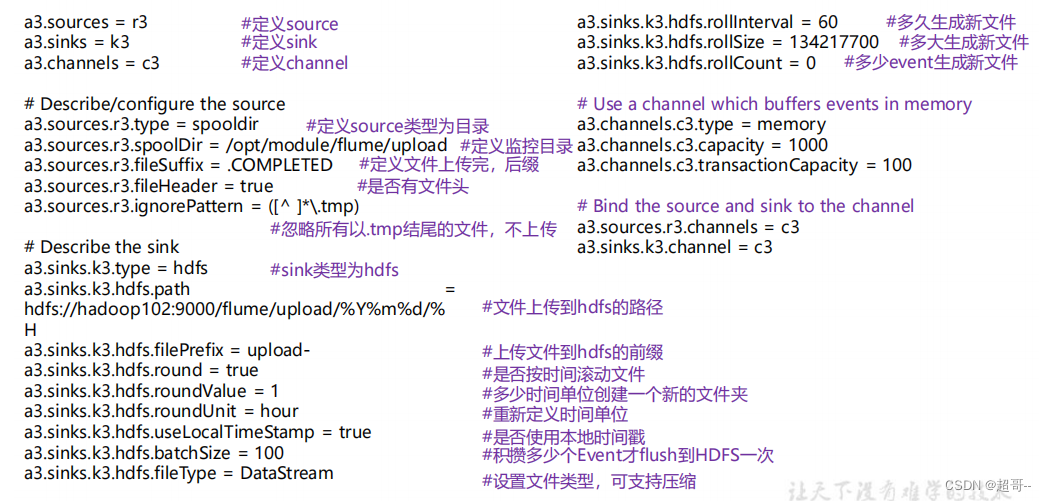
创建flume-dir-hdfs.conf
a3.sources = r3
a3.sinks = k3
a3.channels = c3
# Describe/configure the source
a3.sources.r3.type = spooldir
a3.sources.r3.spoolDir = /opt/module/flume/upload
a3.sources.r3.fileSuffix = .COMPLETED
a3.sources.r3.fileHeader = true
#忽略所有以.tmp 结尾的文件,不上传
a3.sources.r3.ignorePattern = ([^ ]*\.tmp)
# Describe the sink
a3.sinks.k3.type = hdfs
a3.sinks.k3.hdfs.path = hdfs://hadoop102:8020/flume/upload/%Y%m%d/%H
#上传文件的前缀
a3.sinks.k3.hdfs.filePrefix = upload-
#是否按照时间滚动文件夹
a3.sinks.k3.hdfs.round = true
#多少时间单位创建一个新的文件夹
a3.sinks.k3.hdfs.roundValue = 1
#重新定义时间单位
a3.sinks.k3.hdfs.roundUnit = hour
#是否使用本地时间戳
a3.sinks.k3.hdfs.useLocalTimeStamp = true
#积攒多少个 Event 才 flush 到 HDFS 一次
a3.sinks.k3.hdfs.batchSize = 100
#设置文件类型,可支持压缩
a3.sinks.k3.hdfs.fileType = DataStream
#多久生成一个新的文件
a3.sinks.k3.hdfs.rollInterval = 60
#设置每个文件的滚动大小大概是 128M
a3.sinks.k3.hdfs.rollSize = 134217700
#文件的滚动与 Event 数量无关
a3.sinks.k3.hdfs.rollCount = 0
# Use a channel which buffers events in memory
a3.channels.c3.type = memory
a3.channels.c3.capacity = 1000
a3.channels.c3.transactionCapacity = 100
# Bind the source and sink to the channel
a3.sources.r3.channels = c3
a3.sinks.k3.channel = c3
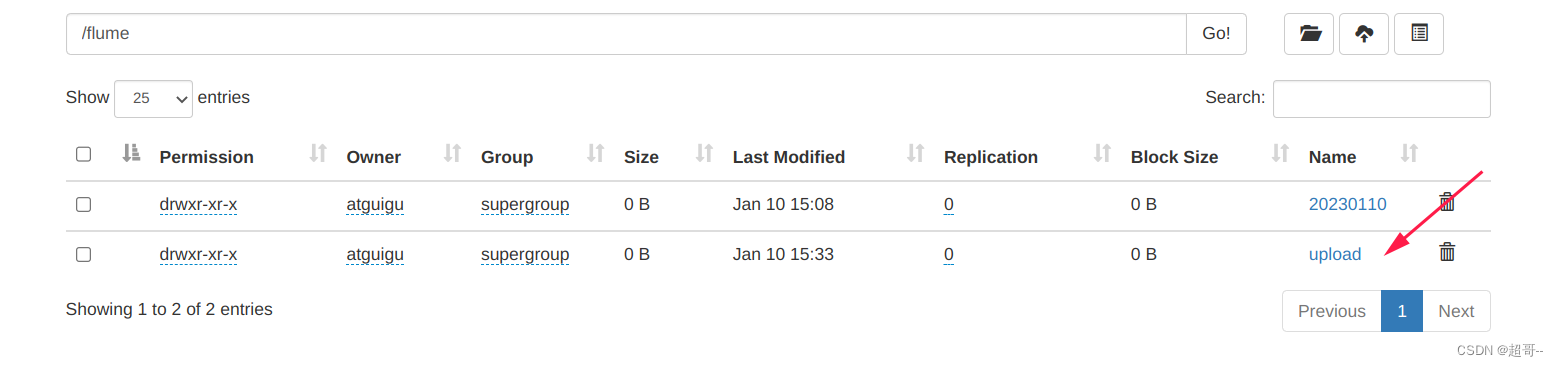
创建测试目录

启动flume
bin/flume-ng agent --conf conf/ --name a3 --conf-file job/flume-dir-hdfs.conf
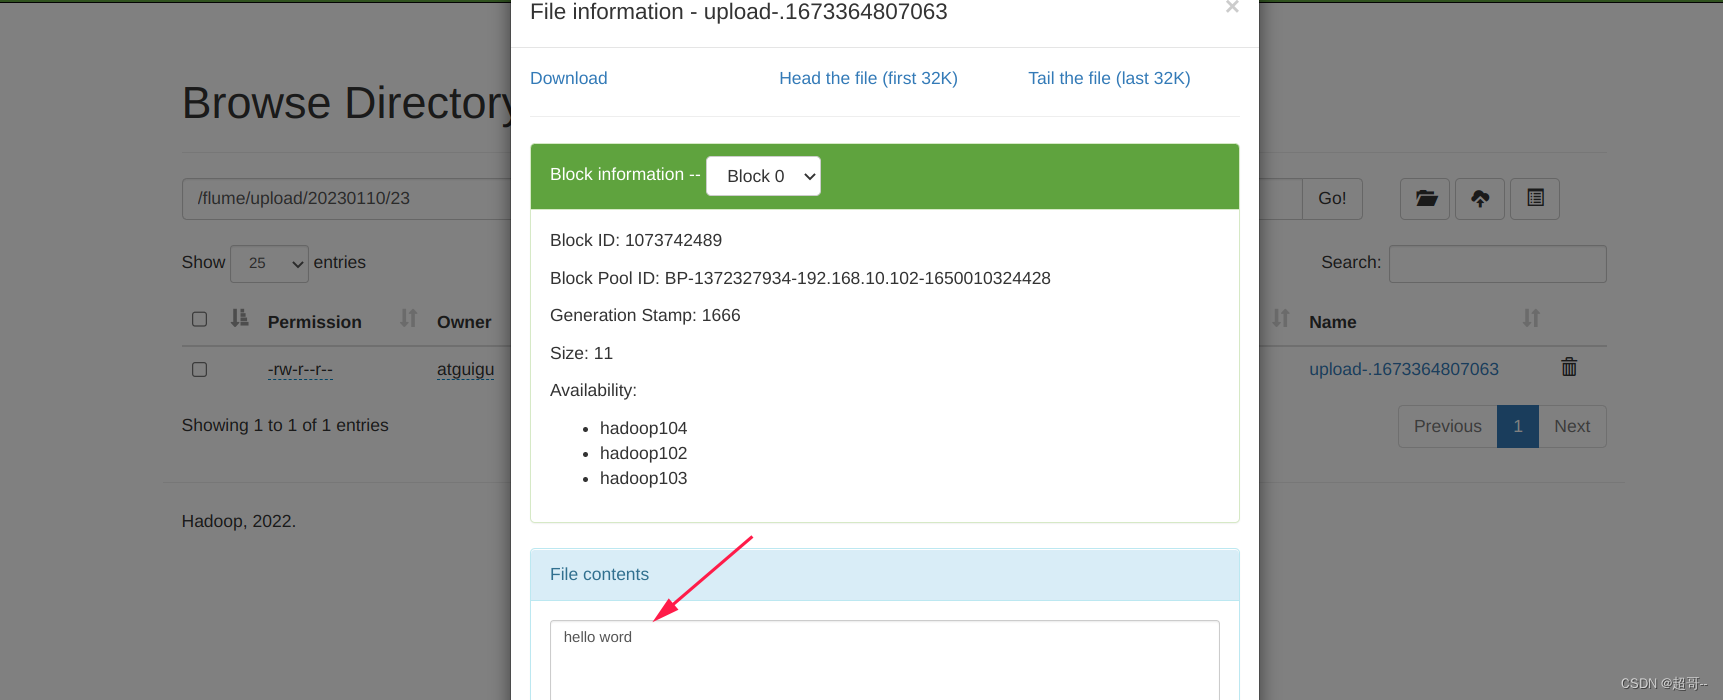
然后随便写点测试数据扔到监控目录中,注意先写好后在移动进去,不能在检测目录里动态修改文件。
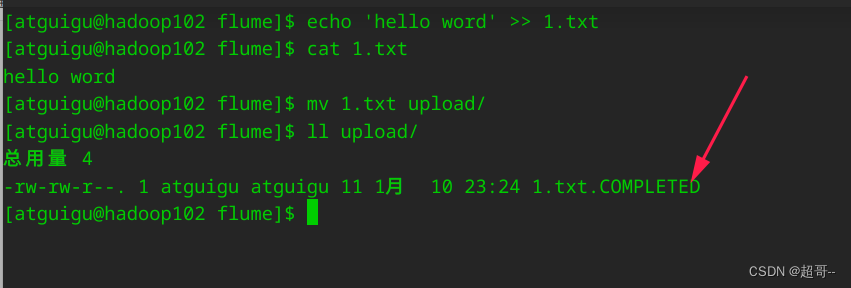
出现这个标志,代表这个文件已经到达集群,速度非常快。
3.使用 Flume 监听整个目录的文件,并上传至 HDFS
创建配置文件 flume-taildir-hdfs.conf
a3.sources = r3
a3.sinks = k3
a3.channels = c3
# Describe/configure the source
a3.sources.r3.type = TAILDIR
a3.sources.r3.positionFile = /opt/module/flume/tail_dir.json
a3.sources.r3.filegroups = f1 f2
a3.sources.r3.filegroups.f1 = /opt/module/flume/files/.*file.*
a3.sources.r3.filegroups.f2 = /opt/module/flume/files2/.*log.*
# Describe the sink
a3.sinks.k3.type = hdfs
a3.sinks.k3.hdfs.path = hdfs://hadoop102:8020/flume/upload2/%Y%m%d/%H
#上传文件的前缀
a3.sinks.k3.hdfs.filePrefix = upload-
#是否按照时间滚动文件夹
a3.sinks.k3.hdfs.round = true
#多少时间单位创建一个新的文件夹
a3.sinks.k3.hdfs.roundValue = 1
#重新定义时间单位
a3.sinks.k3.hdfs.roundUnit = hour
#是否使用本地时间戳
a3.sinks.k3.hdfs.useLocalTimeStamp = true
#积攒多少个 Event 才 flush 到 HDFS 一次
a3.sinks.k3.hdfs.batchSize = 100
#设置文件类型,可支持压缩
a3.sinks.k3.hdfs.fileType = DataStream
#多久生成一个新的文件
a3.sinks.k3.hdfs.rollInterval = 60
#设置每个文件的滚动大小大概是 128M
a3.sinks.k3.hdfs.rollSize = 134217700
#文件的滚动与 Event 数量无关
a3.sinks.k3.hdfs.rollCount = 0
# Use a channel which buffers events in memory
a3.channels.c3.type = memory
a3.channels.c3.capacity = 1000
a3.channels.c3.transactionCapacity = 100
# Bind the source and sink to the channel
a3.sources.r3.channels = c3
a3.sinks.k3.channel = c3

启动flume
bin/flume-ng agent --conf conf/ --name a3 --conf-file job/flume-taildir-hdfs.conf
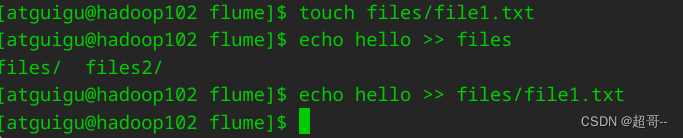
创建测试文件。

随便往里边写点数据,这次可动态修改。
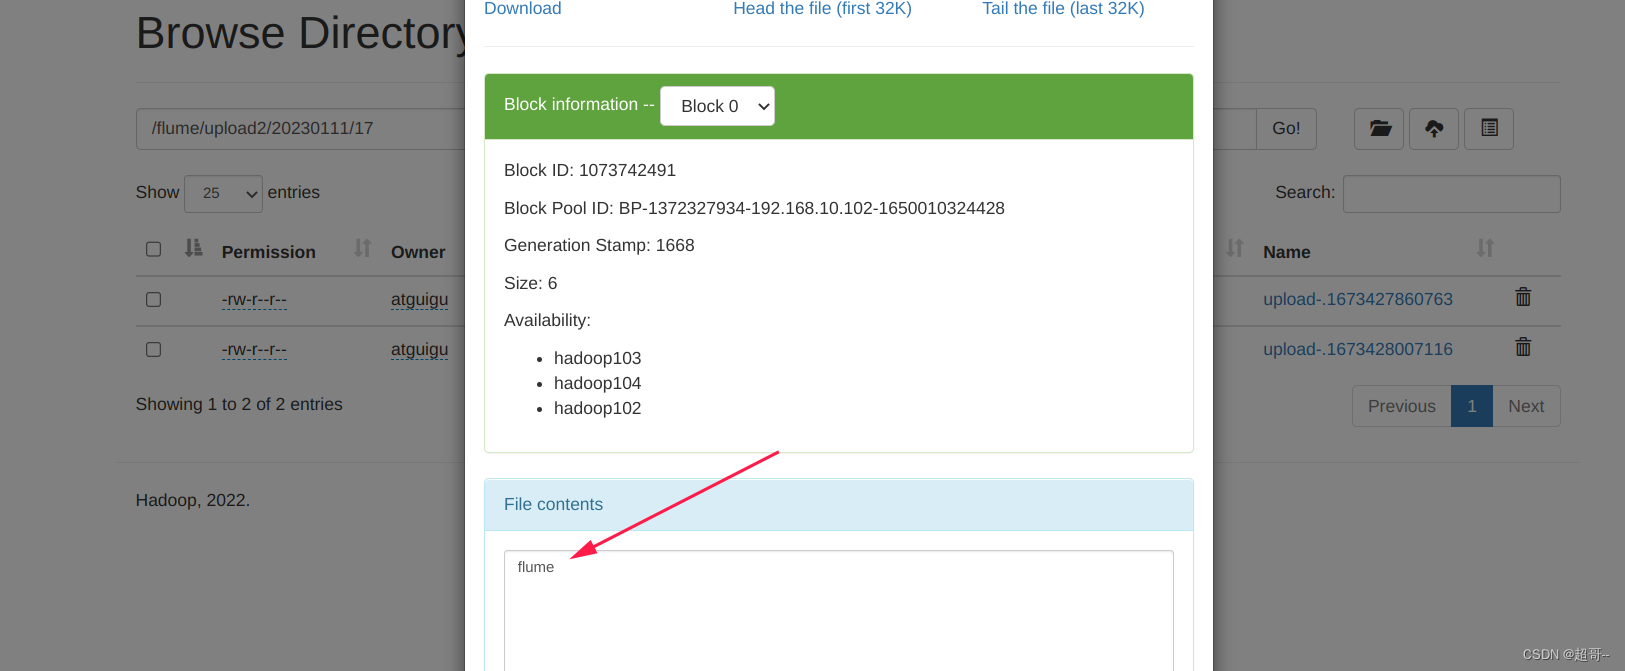
在hdfs中查看

继续动态追加数据。
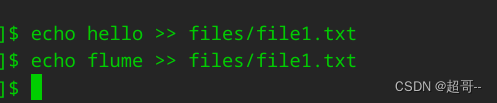
hdfs中会继续增加数据
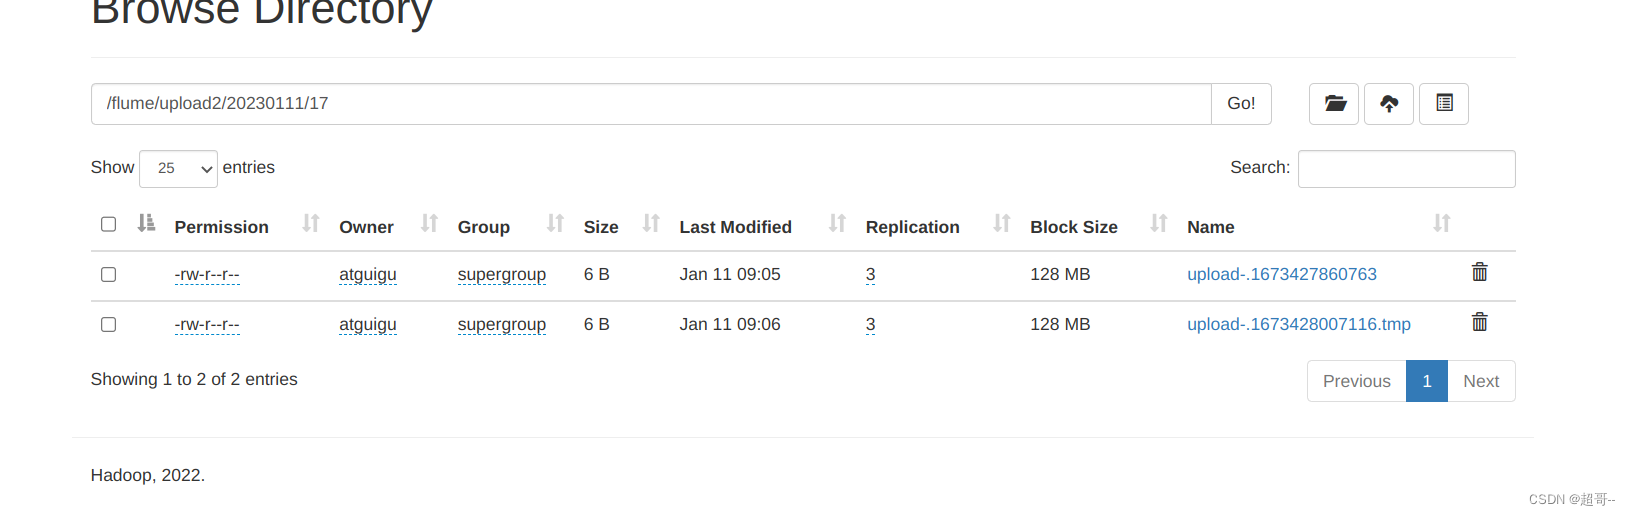
等待文件上传结束后,继续查看。
另一个文件同理,不做示例了。
总结
flume也是hadoop生态中比较重要的一个核心组件,难度不是很高,但也要学习一下。


 2002
2002


 被折叠的 条评论
为什么被折叠?
被折叠的 条评论
为什么被折叠?
 到【灌水乐园】发言


