


项目使用:
jdk:1.8
nacos:1.2.1
springboot:2.1.6
springcloud:Greenwich.SR2
nacos下载地址:https://github.com/alibaba/nacos/releases
下载安装好后点击启动

项目架构图:

父模块加入依赖:
 <parent>
        <groupId>org.springframework.boot</groupId>
        <artifactId>spring-boot-starter-parent</artifactId>
        <version>2.1.6.RELEASE</version>
        <relativePath/>
    </parent>

    <properties>
        <project.build.sourceEncoding>UTF-8</project.build.sourceEncoding>
        <project.reporting.outputEncoding>UTF-8</project.reporting.outputEncoding>
        <java.version>1.8</java.version>
        <spring-cloud.version>Greenwich.SR2</spring-cloud.version>
    </properties>

    <dependencyManagement>
        <dependencies>
            <!-- springCloud -->
            <dependency>
                <groupId>org.springframework.cloud</groupId>
                <artifactId>spring-cloud-dependencies</artifactId>
                <version>${spring-cloud.version}</version>
                <type>pom</type>
                <scope>import</scope>
            </dependency>
        </dependencies>
    </dependencyManagement>
pwl_item模块:
加入依赖
<dependencies>
    <!--nacos客户端-->
    <dependency>
        <groupId>com.alibaba.cloud</groupId>
        <artifactId>spring-cloud-starter-alibaba-nacos-discovery</artifactId>
        <version>2.1.0.RELEASE</version>
    </dependency>
    <!--web环境-->
    <dependency>
        <groupId>org.springframework.boot</groupId>
        <artifactId>spring-boot-starter-web</artifactId>
    </dependency>
        <dependency>
            <groupId>org.springframework.boot</groupId>
            <artifactId>spring-boot-starter-test</artifactId>
        </dependency>
    </dependencies>
yml配置:
server:
  port: 8081 #启动端口号
spring:
  application:
    name: item-service #在nacos注册中心的服务名
  cloud:
    nacos:
      discovery:
        server-addr: 127.0.0.1:8848 #nacos的ip端口
编写启动类:
package com.pwl;

import org.springframework.boot.SpringApplication;
import org.springframework.boot.autoconfigure.SpringBootApplication;
import org.springframework.cloud.client.discovery.EnableDiscoveryClient;

@SpringBootApplication
@EnableDiscoveryClient //开启服务注册
public class ItemApplication {
    public static void main(String[] args) {
        SpringApplication.run(ItemApplication.class,args);
    }
}
编写controller
package com.pwl.controller;

import org.springframework.web.bind.annotation.GetMapping;
import org.springframework.web.bind.annotation.RequestParam;
import org.springframework.web.bind.annotation.RestController;

@RestController
public class ItemController {

    @GetMapping("/item/test")
    public String itemTest(@RequestParam("msg") String msg){
        return "返回信息:"+msg;
    }
}
图:

pwl_user模块:
加入依赖
<dependencies>
    <!--nacos客户端-->
    <dependency>
        <groupId>com.alibaba.cloud</groupId>
        <artifactId>spring-cloud-starter-alibaba-nacos-discovery</artifactId>
        <version>2.1.0.RELEASE</version>
    </dependency>
    <!--web环境-->
    <dependency>
        <groupId>org.springframework.boot</groupId>
        <artifactId>spring-boot-starter-web</artifactId>
    </dependency>
        <dependency>
            <groupId>org.springframework.boot</groupId>
            <artifactId>spring-boot-starter-test</artifactId>
        </dependency>
    <!--依赖feign接口-->
        <dependency>
            <groupId>com.pengwenliang</groupId>
            <artifactId>pwl_client</artifactId>
            <version>1.0-SNAPSHOT</version>
        </dependency>
        <!--导入feign启动依赖-->
        <dependency>
            <groupId>org.springframework.cloud</groupId>
            <artifactId>spring-cloud-starter-openfeign</artifactId>
        </dependency>
    </dependencies>
yml配置:
server:
  port: 8082 #启动端口号
spring:
  application:
    name: user-service #在nacos注册中心的服务名
  cloud:
    nacos:
      discovery:
        server-addr: 127.0.0.1:8848 #nacos的ip端口
编写启动类:
package com.pwl;

import org.springframework.boot.SpringApplication;
import org.springframework.boot.autoconfigure.SpringBootApplication;
import org.springframework.cloud.client.discovery.EnableDiscoveryClient;

@SpringBootApplication
@EnableDiscoveryClient //开启服务注册
@EnableFeignClients //开启feign
public class UserApplication {
    public static void main(String[] args) {
        SpringApplication.run(UserApplication.class,args);
    }
}
编写controller
package pwl.controller;

import com.pwl.client.ItemClient;
import org.springframework.beans.factory.annotation.Autowired;
import org.springframework.web.bind.annotation.GetMapping;
import org.springframework.web.bind.annotation.RestController;

@RestController
public class UserController {

    @Autowired
    private ItemClient itemClient;

    @GetMapping("/user/test")
    public String userTest(){
        String msg = itemClient.itemTest("user服务调用item服务");
        return msg;
    }
}
图:

pwl_client模块
导入依赖
<dependencies>
        <!--只能导入核心包,不要导入启动器-->
        <dependency>
            <groupId>org.springframework.cloud</groupId>
            <artifactId>spring-cloud-openfeign-core</artifactId>
        </dependency>
        <dependency>
            <groupId>org.springframework</groupId>
            <artifactId>spring-web</artifactId>
        </dependency>
    </dependencies>
package com.pwl.client;
import org.springframework.cloud.openfeign.FeignClient;
import org.springframework.web.bind.annotation.GetMapping;
import org.springframework.web.bind.annotation.RequestParam;
@FeignClient("item-service")
public interface ItemClient {
/**
* 注意:@RequestParam("msg")这个注解一定不能漏,否则feign调用会失败
* @param msg
* @return
*/
@GetMapping("/item/test")
public String itemTest(@RequestParam("msg") String msg);
}
图:

(注意:feign的调用者和被调用者的目录结构要一样,这里是com.pwl)
pwl_gateway模块
导入依赖:
    <dependencies>
        <!--网关-->
        <dependency>
            <groupId>org.springframework.cloud</groupId>
            <artifactId>spring-cloud-starter-gateway</artifactId>
        </dependency>
        <!--注册中心-->
        <dependency>
            <groupId>com.alibaba.cloud</groupId>
            <artifactId>spring-cloud-starter-alibaba-nacos-discovery</artifactId>
            <version>2.1.0.RELEASE</version>
        </dependency>
        <!--熔断器-->
        <dependency>
            <groupId>org.springframework.cloud</groupId>
            <artifactId>spring-cloud-starter-netflix-hystrix</artifactId>
        </dependency>
    </dependencies>
yml:
server:
  port: 10010
spring:
  application:
    name: api-gateway
  cloud:
    nacos:
      discovery:
        server-addr: 127.0.0.1:8848
    gateway:
      globalcors:
        corsConfigurations:
          '[/**]':
            allowedOrigins: #配置允许跨域的域名
              - "http://xxx.com"
              - "http://xxx.com"
            allowedHeaders:
              - "*"
            allowCredentials: true
            maxAge: 360000
            allowedMethods:
              - GET
              - POST
              - DELETE
              - PUT
              - OPTIONS
              - HEAD
      default-filters:
        - name: Hystrix
          args:
            name: fallbackcmd
            fallbackUri: forward:/fallback #指定服务降级转发到
      routes:
        - id: item-service   # 路由id,可以随意写
          # 代理的服务地址;lb表示负载均衡(从nacos中获取具体服务)
          uri: lb://item-service
          # 路由断言,可以配置映射路径
          predicates:
            - Path=/api/item/**
          filters:
            # 表示过滤1个路径,2表示两个路径,以此类推
            - StripPrefix=2
        - id: user-service   # 路由id,可以随意写
          # 代理的服务地址;lb表示负载均衡(从nacos中获取具体服务)
          uri: lb://user-service
          # 路由断言,可以配置映射路径
          predicates:
            - Path=/api/user/**
          filters:
            # 表示过滤1个路径,2表示两个路径,以此类推
            - StripPrefix=2
hystrix:
  command:
    default:
      execution:
        isolation:
          thread:
            #设置API网关中路由转发请求的HystrixCommand执行超时时间
            timeoutInMilliseconds: 5000
编写启动类
package com.pwl;

import org.springframework.boot.SpringApplication;
import org.springframework.cloud.client.SpringCloudApplication;
/**
 * 网关微服务
 */
/*@SpringBootApplication
@EnableDiscoveryClient // 开启服务注册
@EnableCircuitBreaker // 开启熔断器*/
@SpringCloudApplication
public class GatewayApplication {
    public static void main(String[] args) {
        SpringApplication.run(GatewayApplication.class,args);
    }
}
服务降级方法:
package com.pwl.fallback;


import org.springframework.web.bind.annotation.RequestMapping;
import org.springframework.web.bind.annotation.RestController;

/**
 * 服务降级方法
 */
@RestController   // @Controller+@ResonseBody
public class FallbackController {

    @RequestMapping("/fallback")
    public String fallback(){
        //log.warn("服务转发失败,检查服务名是否对应");
        return "服务繁忙,请稍等...";
    }
}
图

启动项目

查看nacos中是否注册成功,访问地址:http://127.0.0.1:8848/nacos/index.html 账号和密码默认是:nacos

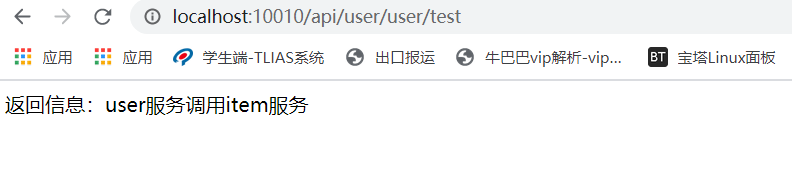
访问网关转发到具体微服务


 2430
2430


 被折叠的 条评论
为什么被折叠?
被折叠的 条评论
为什么被折叠?
 到【灌水乐园】发言


