


提示:文章写完后,目录可以自动生成,如何生成可参考右边的帮助文档
文章目录
前言
一、vue是什么?
vue的两大特性:1.数据驱动视图 2. 双向数据绑定
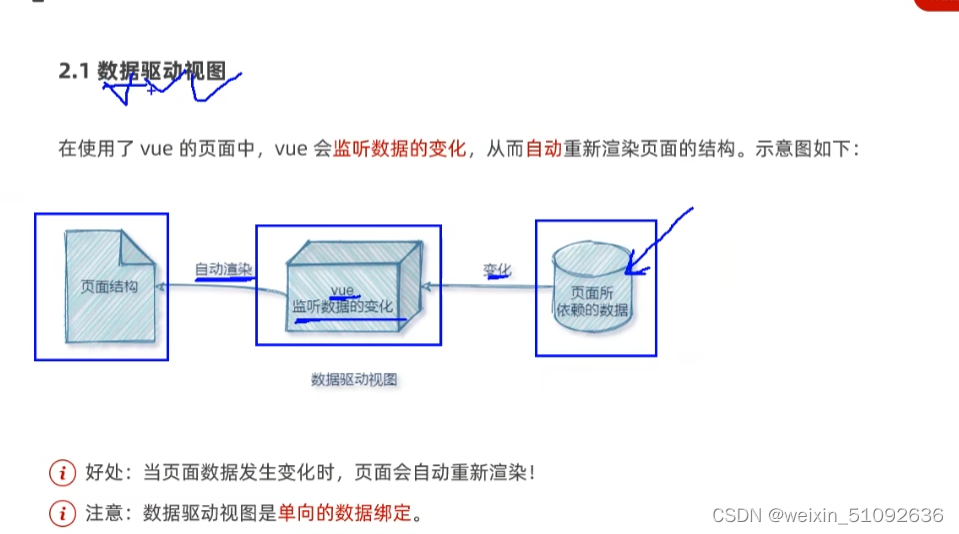
1.1 数据驱动视图
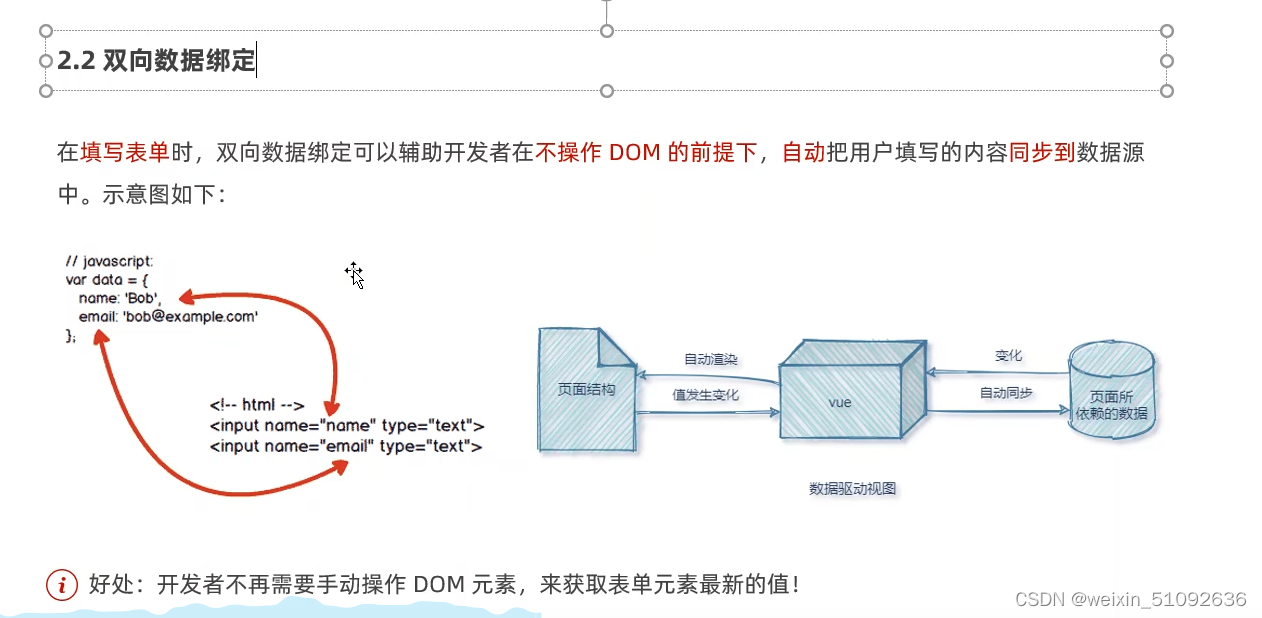
2.2 双向数据绑定
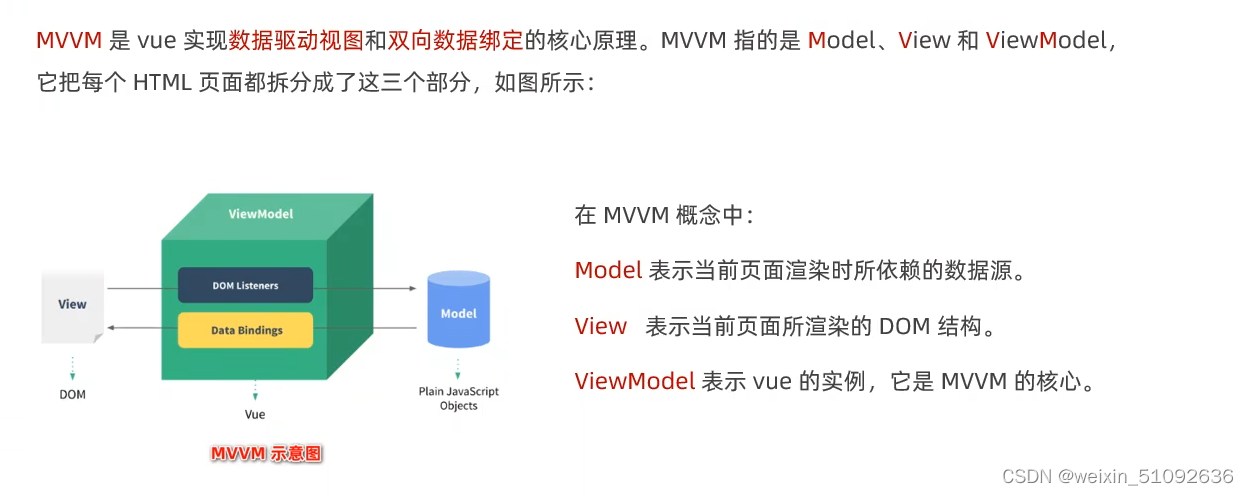
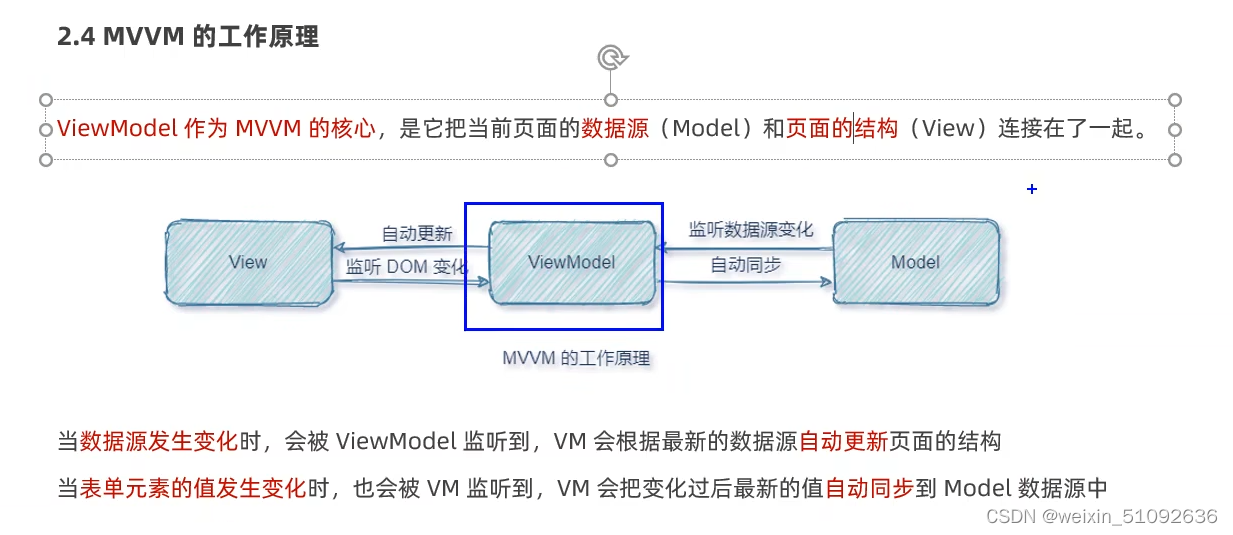
2.3 MVVM
二、vue的基本使用
1.1 导入vue.js脚本
<!-- 在线导入 -->
<!-- 开发环境版本,包含了用帮助的命令行警告 -->
<script src="https://cdn.jsdelivr.net/npm/vue/dist/vue.js"></script>
<!-- 生产环境版本,优化了尺寸和速度 -->
<script src="https://cdn.jsdelivr.net/npm/vue"></script>

<!-- 本地导入 -->
<script src="node_modules/vue/dist/vue.js"></script>
1.2 在页面中声明一个将要被vue控制的DOM区域
1.3 创建vm实例对象

<body>
          <div id="root">{{username}}</div>

           <script>
                     const vm = new Vue({
                               el: '#root',
                               data: {
                                      username: 'duanrui'
                               }
                     })
           </script>


</body>
三、Vue指令
1.1 内容渲染指令
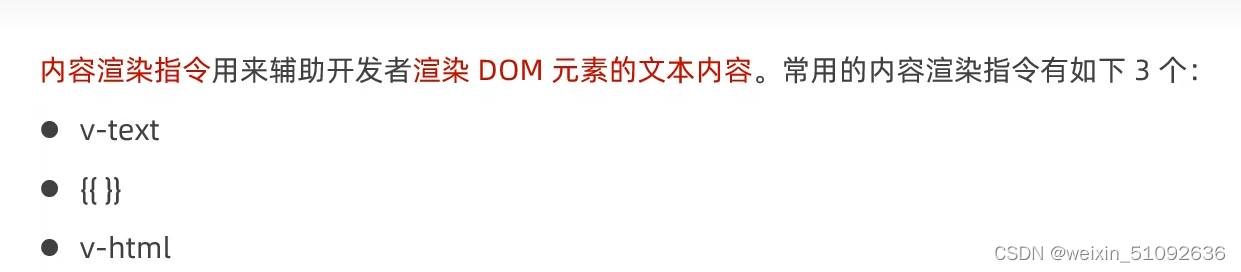
v-text 指令会覆盖元素内部原有的内容(使用比较少)。
{{}}插值表达式:在实际开发中使用最多,只是内容上的占位符,不会覆盖原来的内容。
v-html:可以将带有标签的字符串渲染成真正的标签。
  <div id="root">{{username}}

                    <p v-text="gender">性别:</p>
          </div>

           <script>
                     const vm = new Vue({
                               el: '#root',
                               data: {
                                      username: 'duanrui',
                                      gender: '女'
                               }
                     })
           </script>
1.2 属性绑定
v-bind表示单向数据属性绑定,单向数据绑定可以简写成:
<body>
          <div id="root">
          <a v-bind:href="url">点击跳转</a>
          </div>

          <script>
                     const vm = new Vue({
                               el: '#root',
                               data: {
                                      username: 'duanrui',
                                      gender: '女',
                                      url:'http://www.baidu.com'
                               }
                     })
          </script>

</body>
1.3事件绑定
v-on 表示事件绑定可以简写成@click
<body>
          <div id="root">
          <h1>数量目前是:{{count}}</h1></h1>
          <button v-on:click="add">点击数量加1</button>
          </div>

          <script>
                     const vm = new Vue({
                               el: '#root',
                               data: {
                                      count:1
                               },
                               methods: {
                              add(){
                                        this.count++;
                              }

                               }
                     })
          </script>
绑定事件并传参
在绑定函数后面加()
<body>
          <div id="root">
                    <a v-bind:href="url">点击跳转</a>


                    <h1>数量目前是:{{count}}</h1>
                    </h1>
                    <button v-on:click="add">点击数量加1</button>
                    <button v-on:click="sub(2)">点击数量减1</button>
          </div>

          <script>
                    const vm = new Vue({
                              el: '#root',
                              data: {
                                        username: 'duanrui',
                                        gender: '女',
                                        url: 'http://www.baidu.com',
                                        count: 1
                              },
                              methods: {
                                        add() {
                                                  this.count++;
                                        },
                                        sub(n){
                                             this.count = this.count - n;
                                        }

                              }
                    })
          </script>

</body>
vue中内置对象$event,可以获取到操作事件源
<body>
          <div id="root">
                    <a v-bind:href="url">点击跳转</a>


                    <h1>数量目前是:{{count}}</h1>
                    </h1>
                    <button v-on:click="even(2,$event)">检测even对象</button></button>
          </div>

          <script>
                    const vm = new Vue({
                              el: '#root',
                              data: {
                                        username: 'duanrui',
                                        gender: '女',
                                        url: 'http://www.baidu.com',
                                        count: 1
                              },
                              methods: {
                                        add() {
                                                  this.count++;
                                        },
                                        sub(n){
                                             this.count = this.count - n;
                                        },
                                        even(n,e){
                                        console.log(e);
                                        }

                              }
                    })
          </script>

</body>
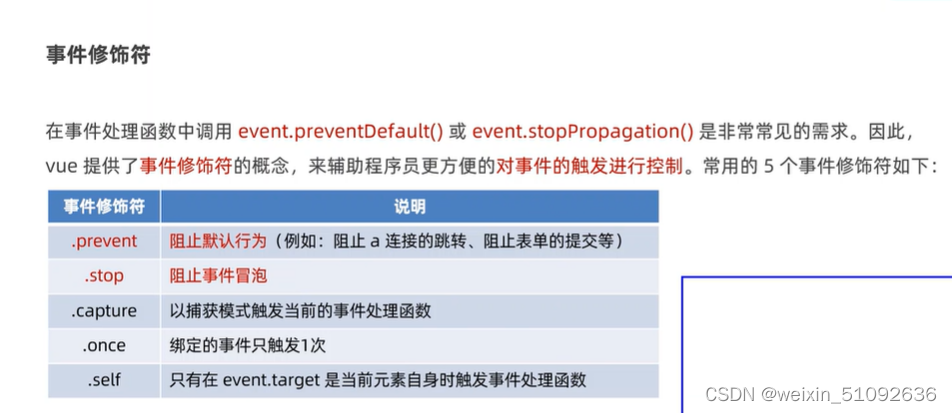
事件修饰符.prevent .stop
<a href="http://www.baidu.com" @click.prevent="show">事件修饰符</a>

 show(){
           console.log("链接被点击了一下!");
                                    }
1.4 按键修饰符
<!DOCTYPE html>
<html>
	<head>
		<meta charset="UTF-8" />
		<title>键盘事件</title>
		<script type="text/javascript" src="../js/vue.js"></script>
	</head>
	<body>
		<div id="root">
			<h2>欢迎来到{{name}}学习</h2>
			<input type="text" placeholder="按下回车提示输入" @keydown.enter="showInfo">
		</div>
	</body>

	<script type="text/javascript">
		Vue.config.productionTip = false

		new Vue({
			el:'#root',
			data:{
				name:'尚硅谷'
			},
			methods: {
				showInfo(e){
					console.log(e.target.value)
				}
			},
		})
	</script>
</html>
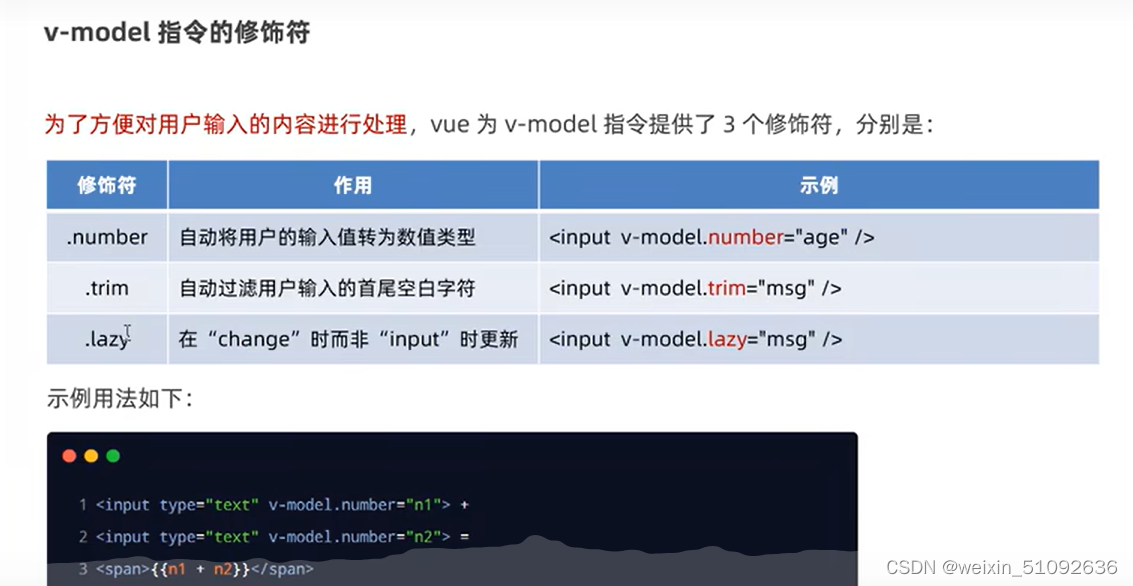
1.5 双向数据绑定
v-model
   <select name="城市" id="root" v-model="city">
                    <option value="">请选择城市</option>
                    <option value="1">南京</option>
                    <option value="2">北京</option>
          </select>


          <script>
          new Vue({
                  el:'#root',
                  data:{
                          city:''
                   }
             })
          </script>
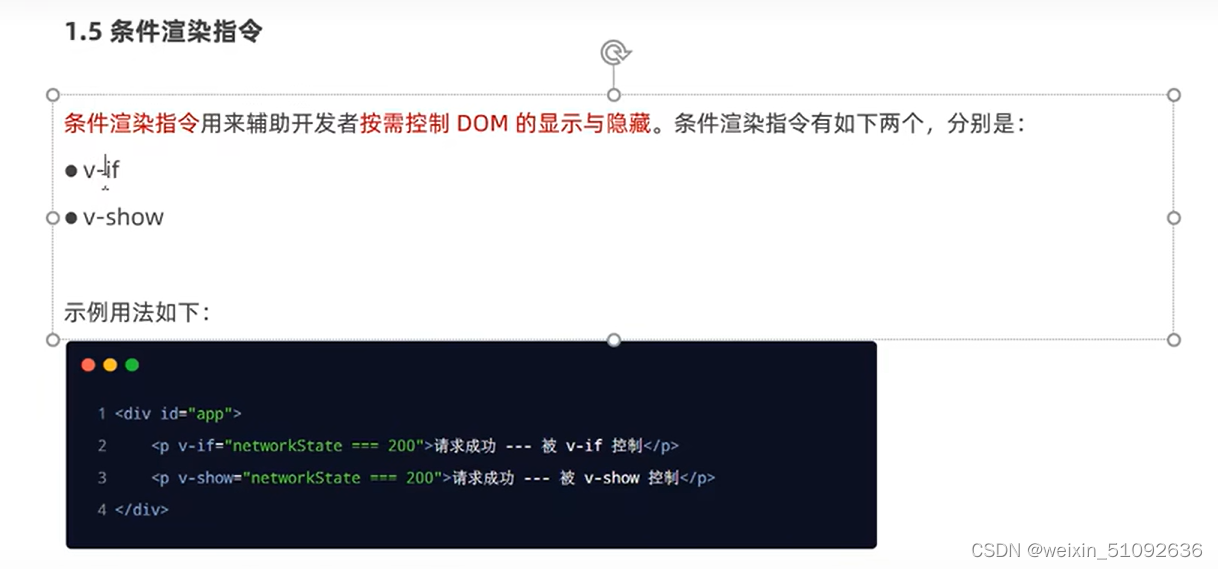
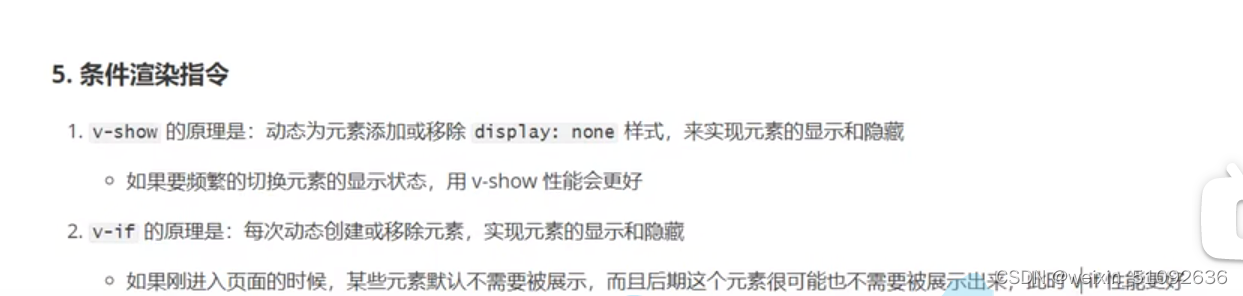
1.6 条件渲染指令
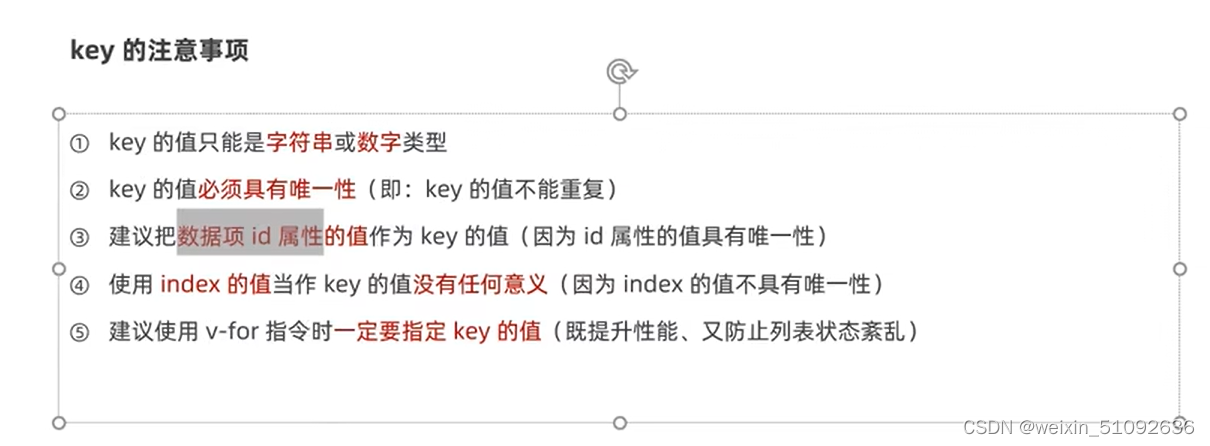
1.7 列表渲染
v-for 具体用法 v-for='item in list
<body>
          <div id="root">
                    <table>
                              <thead>
                                     <tr>
                                        <th style="width: 200px;">序列</th>
                                        <th style="width: 200px;">姓名</th>
                                        <th style="width: 200px;">身份证</th>
                                     </tr>

                              </thead>
                              <tbody>
                                        <tr v-for='item in list'>
                                                  <td>{{item.id}}</td>
                                                  <td>{{item.name}}</td>
                                                  <td>{{item.idcard}}</td>
                                        </tr>
                              </tbody>
                    </table>
          </div>


          <script>
                      const vm = new Vue({
                               el: '#root',
                               data: {
                                      username: 'duanrui',
                                      gender: '女',
                                      list:[
                                                {id:1,name:'张三',idcard:'342626199607184713'},
                                                {id:2,name:'赵四',idcard:'342626199607184713'},
                                                {id:1,name:'王五',idcard:'342626199607184713'}
                                      ]
                               }
                     })

          </script>

</body>
Vue 过滤器


 1万+
1万+


 被折叠的 条评论
为什么被折叠?
被折叠的 条评论
为什么被折叠?
 到【灌水乐园】发言


