


Byte和bit
Byte : 字节. 数据存储的基本单位,比如移动硬盘1T , 单位是byte
bit : 比特, 又叫位. 一个位要么是0要么是1. 数据传输的单位 , 比如家里的宽带100MB,下载速度并没有达到100MB,一般都是12-13MB,那么是因为需要使用 100 / 8
关系: 1Byte = 8bit
public class ByteBit {
public static void main(String[] args) {
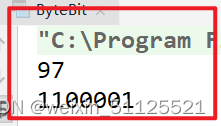
String a = "a";
byte[] bytes = a.getBytes();
for (byte b : bytes) {
int c=b;
// 打印发现byte实际上就是ascii码
System.out.println(c);
}
}
}运行程序:

byte对应bit
public class ByteBit {
    public static void main(String[] args) {
        String a = "a";
        byte[] bytes = a.getBytes();
        for (byte b : bytes) {
            int c=b;
            // 打印发现byte实际上就是ascii码
            System.out.println(c);
            // 我们在来看看每个byte对应的bit,byte获取对应的bit
            String s = Integer.toBinaryString(c);
            System.out.println(s);
        }
    }
}
运行程序
打印出来应该是8个bit,但前面是0,没有打印 ,从打印结果可以看出来,一个英文字符 ,占一个字节
中文对应的字节:
public class ByteBitDemo {
public static void main(String[] args) throws Exception {
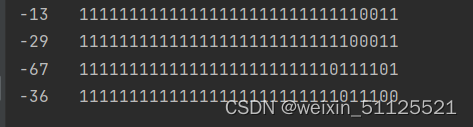
String a = "筱杰";
byte[] bytes = a.getBytes();
for (byte b : bytes) {
System.out.print(b + " ");
String s = Integer.toBinaryString(b);
System.out.println(s);
}
}
}运行程序:我们发现一个中文是有 3 个字节组成

我们修改 编码格式 , 编码格式改成 GBK ,我们在运行发现变成了 2 个字节
public class ByteBitDemo {
    public static void main(String[] args) throws Exception {

        String a = "筱杰";
        byte[] bytes = a.getBytes("gbk");
        for (byte b : bytes) {
            System.out.print(b + "   ");
            String s = Integer.toBinaryString(b);
            System.out.println(s);
        }
    }
}
运行结果:
英文对应的字节
再看看英文,在不同编码格式占用多少字节
public class ByteBit {
    public static void main(String[] args) throws Exception{

        String a = "A";
        byte[] bytes = a.getBytes();
        // 在中文情况下,不同的编码格式,对应不同的字节
//        byte[] bytes = a.getBytes("GBK");
        for (byte b : bytes) {
            System.out.print(b + "   ");
            String s = Integer.toBinaryString(b);
            System.out.println(s);
        }
    }
}
运行程序:

常见加密方式
对称加密
- 采用单钥密码系统的加密方法,同一个密钥可以同时用作信息的加密和解密,这种加密方法称为对称加密,也称为单密钥加密。
- 示例
- 我们现在有一个原文3要发送给B
- 设置密钥为108, 3 * 108 = 324, 将324作为密文发送给B
- B拿到密文324后, 使用324/108 = 3 得到原文
- 常见加密算法
- DES : Data Encryption Standard,即数据加密标准,是一种使用密钥加密的块算法,1977年被美国联邦政府的国家标准局确定为联邦资料处理标准(FIPS),并授权在非密级政府通信中使用,随后该算法在国际上广泛流传开来。
- AES : Advanced Encryption Standard, 高级加密标准 .在密码学中又称Rijndael加密法,是美国联邦政府采用的一种区块加密标准。这个标准用来替代原先的DES,已经被多方分析且广为全世界所使用。
- 特点
- 加密速度快, 可以加密大文件
- 密文可逆, 一旦密钥文件泄漏, 就会导致数据暴露
- 加密后编码表找不到对应字符, 出现乱码
- 一般结合Base64使用
DES加密
public class DesAesDemo {
    public static void main(String[] args) throws Exception{
        // 原文
        String input = "筱杰";
        // des加密必须是8位
        String key = "123456";
        // 算法
        String algorithm = "DES";

        String transformation = "DES";
        // Cipher:密码,获取加密对象
        // transformation:参数表示使用什么类型加密
        Cipher cipher = Cipher.getInstance(transformation);
        // 指定秘钥规则
        // 第一个参数表示:密钥,key的字节数组
        // 第二个参数表示:算法
        SecretKeySpec sks = new SecretKeySpec(key.getBytes(), algorithm);
        // 对加密进行初始化
        // 第一个参数:表示模式,有加密模式和解密模式
        // 第二个参数:表示秘钥规则
        cipher.init(Cipher.ENCRYPT_MODE,sks);
        // 进行加密
        byte[] bytes = cipher.doFinal(input.getBytes());
        // 打印字节,因为ascii码有负数,解析不出来,所以乱码
//        for (byte b : bytes) {
//            System.out.println(b);
//        }
        // 打印密文
        System.out.println(new String(bytes));
    }
}
运行:

修改 密钥 key = “12345678” ,再次运行 ,出现乱码是因为对应的字节出现负数,但负数,没有出现在 ascii 码表里面,所以出现乱码,需要配合base64进行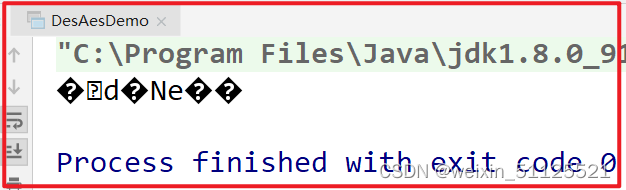 转码
转码
使用 base64 进行编码
base64 导包的时候,需要注意 ,别导错了,需要导入 apache 包
import com.sun.org.apache.xml.internal.security.utils.Base64;

import javax.crypto.Cipher;
import javax.crypto.spec.SecretKeySpec;

public class DesAesDemo {
    public static void main(String[] args) throws Exception{
        // 原文
        String input = "筱杰";
        // des加密必须是8位
        String key = "12345678";
        // 算法
        String algorithm = "DES";

        String transformation = "DES";
        // Cipher:密码,获取加密对象
        // transformation:参数表示使用什么类型加密
        Cipher cipher = Cipher.getInstance(transformation);
        // 指定秘钥规则
        // 第一个参数表示:密钥,key的字节数组
        // 第二个参数表示:算法
        SecretKeySpec sks = new SecretKeySpec(key.getBytes(), algorithm);
        // 对加密进行初始化
        // 第一个参数:表示模式,有加密模式和解密模式
        // 第二个参数:表示秘钥规则
        cipher.init(Cipher.ENCRYPT_MODE,sks);
        // 进行加密
        byte[] bytes = cipher.doFinal(input.getBytes());
        //进行base64可读性编码
        String encode = Base64.encode(bytes);
        // 打印密文
        System.out.println(encode);
    }
}
再次运行:

DES解密
使用 ctrl + alt + m 快捷键抽取代码
import com.sun.org.apache.xml.internal.security.exceptions.Base64DecodingException;
import com.sun.org.apache.xml.internal.security.utils.Base64;
import org.junit.Test;
import org.springframework.boot.test.context.SpringBootTest;
import javax.crypto.BadPaddingException;
import javax.crypto.Cipher;
import javax.crypto.IllegalBlockSizeException;
import javax.crypto.NoSuchPaddingException;
import javax.crypto.spec.SecretKeySpec;
import java.security.InvalidKeyException;
import java.security.NoSuchAlgorithmException;
@SpringBootTest
public class DesAesTest {
@Test
public void test01()throws Exception{
// 定义原文
String input="hello";
// 定义密文
String key="1234567812345678";
// 算法 DES加密,密钥必须是8字节
// String algorithm="DES";
String algorithm="AES";
// 加密方式
// String transformation="DES";
// AES加密算法,比较高级,所以key的大小必须是16个字节
String transformation="AES";
String encryptDES = encryptDES(input, key, algorithm, transformation);
System.out.println("加密:"+encryptDES);
String decryptDES = decryptDES(key, algorithm, transformation, encryptDES);
System.out.println("解密 = " + decryptDES);
}
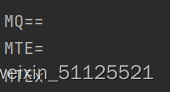
/** base64补等号测试
* base64算法三个字节为一组,一个字节8位,一共24位,
* 然后,把3个字节转成4组,每组6位,
* 3 * 8 = 4 * 6 = 24 ,每组6位,缺少的2位,会在高位进行补0
* ,不足的会补等号
*/
@Test
public void testBase64(){
System.out.println(Base64.encode("1".getBytes()));
System.out.println(Base64.encode("11".getBytes()));
System.out.println(Base64.encode("111".getBytes()));
}
// 解密
private static String decryptDES(String key, String algorithm, String transformation, String encryptDES) throws NoSuchAlgorithmException, NoSuchPaddingException, InvalidKeyException, IllegalBlockSizeException, BadPaddingException, Base64DecodingException {
// 获取加密对象,参数:指定加密模式
Cipher cipher = Cipher.getInstance(transformation);
// 指定加密规则,第一个参数:key.getBytes()(密钥的字节数组),第二个参数:算法
SecretKeySpec secretKeySpec = new SecretKeySpec(key.getBytes(), algorithm);
// 初始化cipher 第一个参数指定模式:是加密还是解密 第二个参数:解密规则
cipher.init(Cipher.DECRYPT_MODE,secretKeySpec);
// base64算法,此算法不是为了保证数据安全性,是未来增加可读性
byte[] bytes = cipher.doFinal(Base64.decode(encryptDES));
return new String(bytes);
}
// 加密
private static String encryptDES(String input, String key, String algorithm, String transformation) throws NoSuchAlgorithmException, NoSuchPaddingException, InvalidKeyException, IllegalBlockSizeException, BadPaddingException {
//获取加密对象 param:加密方式
Cipher cipher = Cipher.getInstance(transformation);
// 指定加密规则 第一个参数:密钥的字节数组,第二个参数:算法
SecretKeySpec secretKeySpec = new SecretKeySpec(key.getBytes(), algorithm);
// 初始化加密信息 第一个参数指定模式:是加密还是解密 第二个参数:解密规则
cipher.init(Cipher.ENCRYPT_MODE, secretKeySpec);
// 进行加密
byte[] bytes = cipher.doFinal(input.getBytes());
// 对数据进行base64算法,此算法是可视化算法,增加可读性
String encode = Base64.encode(bytes);
return encode;
}
}
运行结果:

base64补等号测试运行结果:
Base64 算法简介:
Base64是网络上最常见的用于传输8Bit字节码的可读性编码算法之一
可读性编码算法不是为了保护数据的安全性,而是为了可读性
可读性编码不改变信息内容,只改变信息内容的表现形式
所谓Base64,即是说在编码过程中使用了64种字符:大写A到Z、小写a到z、数字0到9、“+”和“/”
Base58是Bitcoin(比特币)中使用的一种编码方式,主要用于产生Bitcoin的钱包地址
相比Base64,Base58不使用数字"0",字母大写"O",字母大写"I",和字母小写"i",以及"+"和"/"符号
toString()与new String ()用法区别:
public class TestBase64 {
    public static void main(String[] args) {
        String str="TU0jV0xBTiNVYys5bEdiUjZlNU45aHJ0bTdDQStBPT0jNjQ2NDY1Njk4IzM5OTkwMDAwMzAwMA==";

        String rlt1=new String(Base64.decode(str));

        String rlt2=Base64.decode(str).toString();

        System.out.println(rlt1);

        System.out.println(rlt2);
    }
}
运行结果:
MM#WLAN#Uc+9lGbR6e5N9hrtm7CA+A==#646465698#399900003000

[B@1540e19d
哪一个是正确的?为什么?
这里应该用new String()的方法,因为Base64加解密是一种转换编码格式的原理
toString()与new String ()用法区别
str.toString是调用了这个object对象的类的toString方法。一般是返回这么一个String:[class name]@[hashCode]
new String(str)是根据parameter是一个字节数组,使用java虚拟机默认的编码格式,将这个字节数组decode为对应的字符。若虚拟机默认的编码格式是ISO-8859-1,按照ascii编码表即可得到字节对应的字符。
什么时候用什么方法呢?
new String()一般使用字符转码的时候,byte[]数组的时候
toString()对象打印的时候使用
加密模式
ECB
ECB : Electronic codebook, 电子密码本. 需要加密的消息按照块密码的块大小被分为数个块,并对每个块进行独立加密
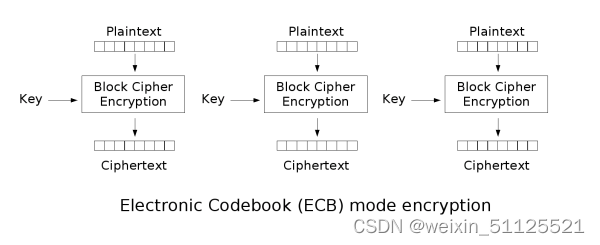
- 优点 : 可以并行处理数据
- 缺点 : 同样的原文生成同样的密文, 不能很好的保护数据
- 同时加密,原文是一样的,加密出来的密文也是一样的
CBC
CBC : Cipher-block chaining, 密码块链接. 每个明文块先与前一个密文块进行异或后,再进行加密。在这种方法中,每个密文块都依赖于它前面的所有明文块

- 优点 : 同样的原文生成的密文不一样
- 缺点 : 串行处理数据.
填充模式
- 当需要按块处理的数据, 数据长度不符合块处理需求时, 按照一定的方法填充满块长的规则
NoPadding
- 不填充.
- 在DES加密算法下, 要求原文长度必须是8byte的整数倍
- 在AES加密算法下, 要求原文长度必须是16byte的整数倍
PKCS5Padding
数据块的大小为8位, 不够就补足
Tips
- 默认情况下, 加密模式和填充模式为 : ECB/PKCS5Padding
- 如果使用CBC模式, 在初始化Cipher对象时, 需要增加参数, 初始化向量IV : IvParameterSpec iv = new IvParameterSpec(key.getBytes());
AES/CBC/NoPadding (128)
AES/CBC/PKCS5Padding (128)
AES/ECB/NoPadding (128)
AES/ECB/PKCS5Padding (128)
DES/CBC/NoPadding (56)
DES/CBC/PKCS5Padding (56)
DES/ECB/NoPadding (56)
DES/ECB/PKCS5Padding (56)
DESede/CBC/NoPadding (168)
DESede/CBC/PKCS5Padding (168)
DESede/ECB/NoPadding (168)
DESede/ECB/PKCS5Padding (168)
RSA/ECB/PKCS1Padding (1024, 2048)
RSA/ECB/OAEPWithSHA-1AndMGF1Padding (1024, 2048)
RSA/ECB/OAEPWithSHA-256AndMGF1Padding (1024, 2048)
加密模式和不填充模式例子(默认填充)
import com.sun.org.apache.xml.internal.security.exceptions.Base64DecodingException;
import com.sun.org.apache.xml.internal.security.utils.Base64;
import org.junit.Test;
import org.junit.runner.RunWith;
import org.springframework.boot.test.context.SpringBootTest;
import org.springframework.test.context.junit4.SpringJUnit4ClassRunner;


import javax.crypto.BadPaddingException;
import javax.crypto.Cipher;
import javax.crypto.IllegalBlockSizeException;
import javax.crypto.NoSuchPaddingException;
import javax.crypto.spec.IvParameterSpec;
import javax.crypto.spec.SecretKeySpec;
import java.security.InvalidAlgorithmParameterException;
import java.security.InvalidKeyException;
import java.security.NoSuchAlgorithmException;


//测试填充模式
@SpringBootTest
@RunWith(SpringJUnit4ClassRunner.class)
public class NoPaddingAndPKCS5PaddingTest {

    /**
     * NoPadding(默认情况下自动填充)
     * 不填充.
     * 在DES加密算法下, 要求原文长度必须是8byte的整数倍
     * 在AES加密算法下, 要求原文长度必须是16byte的整数倍
     */
    @Test
    public void test01() throws Exception {
//        定义原文
        String input = "筱杰11";
//        定义密钥.DES加密密钥必须是8个字节
        String key = "12345678";
//        定义算法
        String arithmetic = "DES";
//        定义加密方式 算法/模式/填充
//        CBC模式NoPadding不填充,要求原文必须为8字节,不足的需要补充
//        每个明文块先与前一个密文块进行异或后,再进行加密。在这种方法中,每个密文块都依赖于它前面的所有明文块
        String transformation = "DES/CBC/NoPadding";
        String encryptDES = encryptDES(input, key, arithmetic, transformation);
        System.out.println("加密 = " + encryptDES);


        String decryptDES = decryptDES(key, arithmetic, transformation, encryptDES);
        System.out.println("解密 = " + decryptDES);


    }

//    解密
    private static String decryptDES(String key, String arithmetic, String transformation, String encryptDES) throws NoSuchAlgorithmException, NoSuchPaddingException, InvalidKeyException, InvalidAlgorithmParameterException, IllegalBlockSizeException, BadPaddingException, Base64DecodingException {
        //        获取加密对象,参数:加密方式
        Cipher cipher = Cipher.getInstance(transformation);
//        指定密钥规则
        SecretKeySpec secretKeySpec = new SecretKeySpec(key.getBytes(), arithmetic);
//        创建iv向量(加密时使用了iv向量,解密需要进行逆向操作,也需要使用iv向量)
        IvParameterSpec ivParameterSpec = new IvParameterSpec(key.getBytes());
//        初始化加密模式和算法,参数1:加密还是解密,参数2:密钥规则
        cipher.init(Cipher.DECRYPT_MODE,secretKeySpec,ivParameterSpec);
        byte[] bytes = cipher.doFinal(Base64.decode(encryptDES));
        return new String(bytes);
    }

    //    加密
    private static String  encryptDES(String input, String key, String arithmetic, String transformation) throws NoSuchAlgorithmException, NoSuchPaddingException, InvalidKeyException, IllegalBlockSizeException, BadPaddingException, InvalidAlgorithmParameterException {
        //获取加密对象 参数:加密方式
        Cipher cipher = Cipher.getInstance(transformation);
//        指定密钥规则 参数:算法
        SecretKeySpec secretKeySpec = new SecretKeySpec(key.getBytes(), arithmetic);
//      创建iv向量,因为每个明文块先与前一个密文块进行异或后,再进行加密
        IvParameterSpec ivParameterSpec = new IvParameterSpec(key.getBytes());
//        初始化加密模式和规则,第一个参数:指定要加密还是解密,第二个参数:规则
        cipher.init(Cipher.ENCRYPT_MODE, secretKeySpec,ivParameterSpec);
//        开始加密
        byte[] bytes = cipher.doFinal(input.getBytes());
        return Base64.encode(bytes);
    }

}
运行:

消息摘要
- 消息摘要(Message Digest)又称为数字摘要(Digital Digest)
- 它是一个唯一对应一个消息或文本的固定长度的值,它由一个单向Hash加密函数对消息进行作用而产生
- 使用数字摘要生成的值是不可以篡改的,为了保证文件或者值的安全
特点
无论输入的消息有多长,计算出来的消息摘要的长度总是固定的。例如应用MD5算法摘要的消息有128个比特位,用SHA-1算法摘要的消息最终有160比特位的输出
只要输入的消息不同,对其进行摘要以后产生的摘要消息也必不相同;但相同的输入必会产生相同的输出
消息摘要是单向、不可逆的
常见算法 :
- MD5
- SHA1
- SHA256
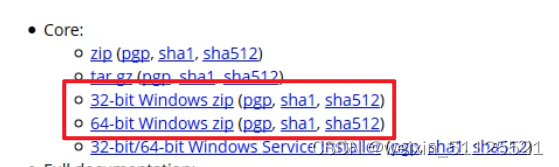
- SHA51 百度搜索 tomcat ,进入官网下载 ,会经常发现有 sha1,sha512 , 这些都是数字摘要
数字摘要

获取字符串消息摘要
public class DigestDemo1 {
public static void main(String[] args) throws Exception{
// 原文
String input = "aa";
// 算法
String algorithm = "MD5";
// 获取数字摘要对象
MessageDigest messageDigest = MessageDigest.getInstance(algorithm);
// 获取消息数字摘要的字节数组
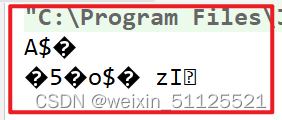
byte[] digest = messageDigest.digest(input.getBytes());
System.out.println(new String(digest));
}
}运行:
base64 编码
public class DigestDemo1 {

    public static void main(String[] args) throws Exception{
        // 原文
        String input = "aa";
        // 算法
        String algorithm = "MD5";
        // 获取数字摘要对象
        MessageDigest messageDigest = MessageDigest.getInstance(algorithm);
        // 消息数字摘要
        byte[] digest = messageDigest.digest(input.getBytes());
//        System.out.println(new String(digest));
        // base64编码
        System.out.println(Base64.encode(digest));
    }
}
运行:

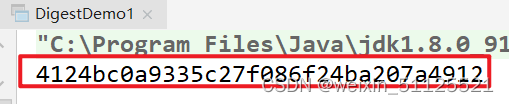
使用在线 md5 加密 ,发现我们生成的值和代码生成的值不一样,那是因为消息摘要不是使用base64进行编码的,所以我们需要把值转成16进制
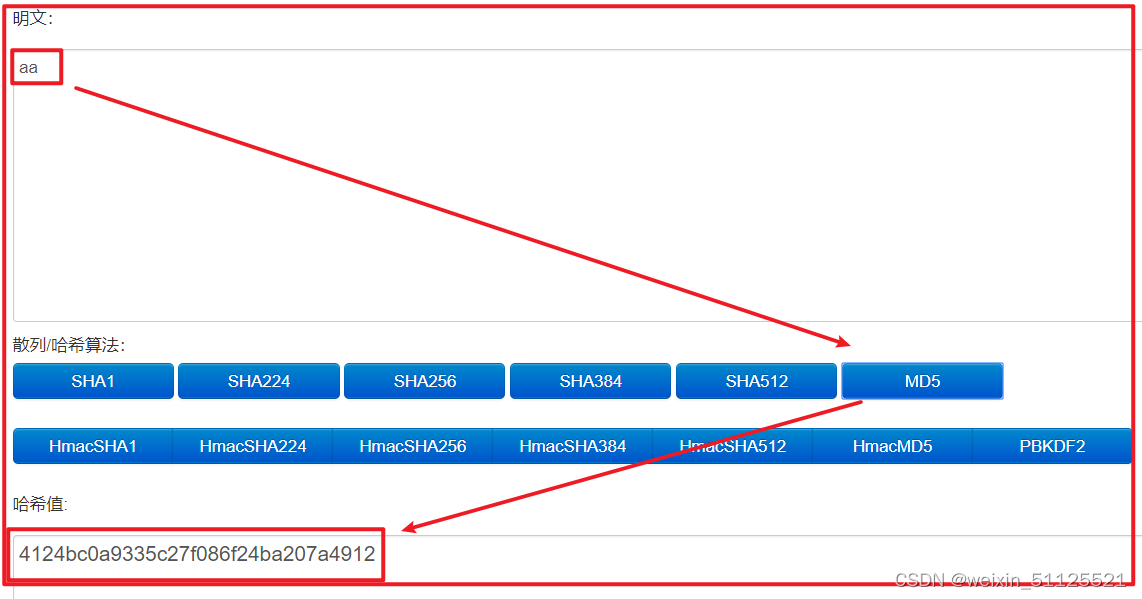
数字摘要转换成 16 进制
// 4124bc0a9335c27f086f24ba207a4912     md5 在线校验
// QSS8CpM1wn8IbyS6IHpJEg==             消息摘要使用的是16进制
代码转成16进制
public class DigestDemo1 {

    public static void main(String[] args) throws Exception{
        // 4124bc0a9335c27f086f24ba207a4912     md5 在线校验
        // QSS8CpM1wn8IbyS6IHpJEg==             消息摘要使用的是16进制
        // 原文
        String input = "aa";
        // 算法
        String algorithm = "MD5";
        // 获取数字摘要对象
        MessageDigest messageDigest = MessageDigest.getInstance(algorithm);
        // 消息数字摘要
        byte[] digest = messageDigest.digest(input.getBytes());
//        System.out.println(new String(digest));
        // base64编码
//        System.out.println(Base64.encode(digest));
        // 创建对象用来拼接
        StringBuilder sb = new StringBuilder();

        for (byte b : digest) {
            // 转成 16进制
            String s = Integer.toHexString(b & 0xff);
            //System.out.println(s);
            if (s.length() == 1){
                // 如果生成的字符只有一个,前面补0
                s = "0"+s;
            }
            sb.append(s);
        }
        System.out.println(sb.toString());

    }
}
运行:
其他数字摘要算法
public class DigestDemo1 {
public static void main(String[] args) throws Exception{
// 4124bc0a9335c27f086f24ba207a4912 md5 在线校验
// QSS8CpM1wn8IbyS6IHpJEg== 消息摘要使用的是16进制
// 原文
String input = "aa";
// 算法
String algorithm = "MD5";
// 获取数字摘要对象
String md5 = getDigest(input, "MD5");
System.out.println(md5);
String sha1 = getDigest(input, "SHA-1");
System.out.println(sha1);
String sha256 = getDigest(input, "SHA-256");
System.out.println(sha256);
String sha512 = getDigest(input, "SHA-512");
System.out.println(sha512);
}
private static String toHex(byte[] digest) throws Exception {
// System.out.println(new String(digest));
// base64编码
// System.out.println(Base64.encode(digest));
// 创建对象用来拼接
StringBuilder sb = new StringBuilder();
for (byte b : digest) {
// 转成 16进制
String s = Integer.toHexString(b & 0xff);
if (s.length() == 1){
// 如果生成的字符只有一个,前面补0
s = "0"+s;
}
sb.append(s);
}
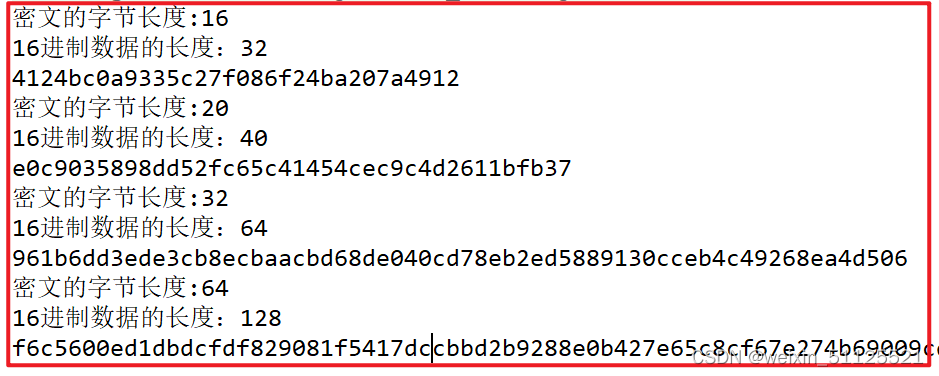
System.out.println("16进制数据的长度:" + sb.toString().getBytes().length);
return sb.toString();
}
private static String getDigest(String input, String algorithm) throws Exception {
MessageDigest messageDigest = MessageDigest.getInstance(algorithm);
// 消息数字摘要
byte[] digest = messageDigest.digest(input.getBytes());
System.out.println("密文的字节长度:" + digest.length);
return toHex(digest);
}
}运行:
获取文件消息摘要
public class DigestDemo {

    public static void main(String[] args) throws Exception{
        String input = "aa";
        String algorithm = "MD5";

        // sha1 可以实现秒传功能

        String sha1 = getDigestFile("apache-tomcat-9.0.10-windows-x64.zip", "SHA-1");
        System.out.println(sha1);

        String sha512 = getDigestFile("apache-tomcat-9.0.10-windows-x64.zip", "SHA-512");
        System.out.println(sha512);

        String md5 = getDigest("aa", "MD5");
        System.out.println(md5);

        String md51 = getDigest("aa ", "MD5");
        System.out.println(md51);
    }

    private static String getDigestFile(String filePath, String algorithm) throws Exception{
        FileInputStream fis = new FileInputStream(filePath);
        int len;
        byte[] buffer = new byte[1024];
        ByteArrayOutputStream baos = new ByteArrayOutputStream();
        while ( (len =  fis.read(buffer))!=-1){
            baos.write(buffer,0,len);
        }
        // 获取消息摘要对象
        MessageDigest messageDigest = MessageDigest.getInstance(algorithm);
        // 获取消息摘要
        byte[] digest = messageDigest.digest(baos.toByteArray());
        System.out.println("密文的字节长度:"+digest.length);
        return toHex(digest);
    }

    private static String getDigest(String input, String algorithm) throws Exception{
        MessageDigest messageDigest = MessageDigest.getInstance(algorithm);
        byte[] digest = messageDigest.digest(input.getBytes());
        System.out.println("密文的字节长度:"+digest.length);
        return toHex(digest);
    }

    private static String toHex(byte[] digest) {
        //        System.out.println(new String(digest));
        // 消息摘要进行表示的时候,是用16进制进行表示
        StringBuilder sb = new StringBuilder();
        for (byte b : digest) {
            // 转成16进制

            String s = Integer.toHexString(b & 0xff);
            // 保持数据的完整性,前面不够的用0补齐
            if (s.length()==1){
                s="0"+s;
            }
            sb.append(s);
        }
        System.out.println("16进制数据的长度:"+ sb.toString().getBytes().length);
        return sb.toString();
    }
}
运行程序 ,获取 sha-1 和 sha-512 的值
非对称加密
简介:
① 非对称加密算法又称现代加密算法。
② 非对称加密是计算机通信安全的基石,保证了加密数据不会被破解。
③ 与对称加密算法不同,非对称加密算法需要两个密钥:公开密钥(publickey) 和私有密(privatekey)
④ 公开密钥和私有密钥是一对
⑤ 如果用公开密钥对数据进行加密,只有用对应的私有密钥才能解密。
⑥ 如果用私有密钥对数据进行加密,只有用对应的公开密钥才能解密。
⑦ 因为加密和解密使用的是两个不同的密钥,所以这种算法叫作非对称加密算法。
- 示例
- 首先生成密钥对, 公钥为(5,14), 私钥为(11,14)
- 现在A希望将原文2发送给B
- A使用公钥加密数据. 2的5次方mod 14 = 4 , 将密文4发送给B
- B使用私钥解密数据. 4的11次方mod14 = 2, 得到原文2
- 特点
- 加密和解密使用不同的密钥
- 如果使用私钥加密, 只能使用公钥解密
- 如果使用公钥加密, 只能使用私钥解密
- 处理数据的速度较慢, 因为安全级别高
- 常见算法
- RSA
- ECC
public class RSAdemo {
public static void main(String[] args) throws Exception {
// 加密算法
String algorithm = "RSA";
// 创建密钥对生成器对象
KeyPairGenerator keyPairGenerator = KeyPairGenerator.getInstance(algorithm);
// 生成密钥对
KeyPair keyPair = keyPairGenerator.generateKeyPair();
// 生成私钥
PrivateKey privateKey = keyPair.getPrivate();
// 生成公钥
PublicKey publicKey = keyPair.getPublic();
// 获取私钥字节数组
byte[] privateKeyEncoded = privateKey.getEncoded();
// 获取公钥字节数组
byte[] publicKeyEncoded = publicKey.getEncoded();
// 对公私钥进行base64编码
String privateKeyString = Base64.encode(privateKeyEncoded);
String publicKeyString = Base64.encode(publicKeyEncoded);
// 打印私钥
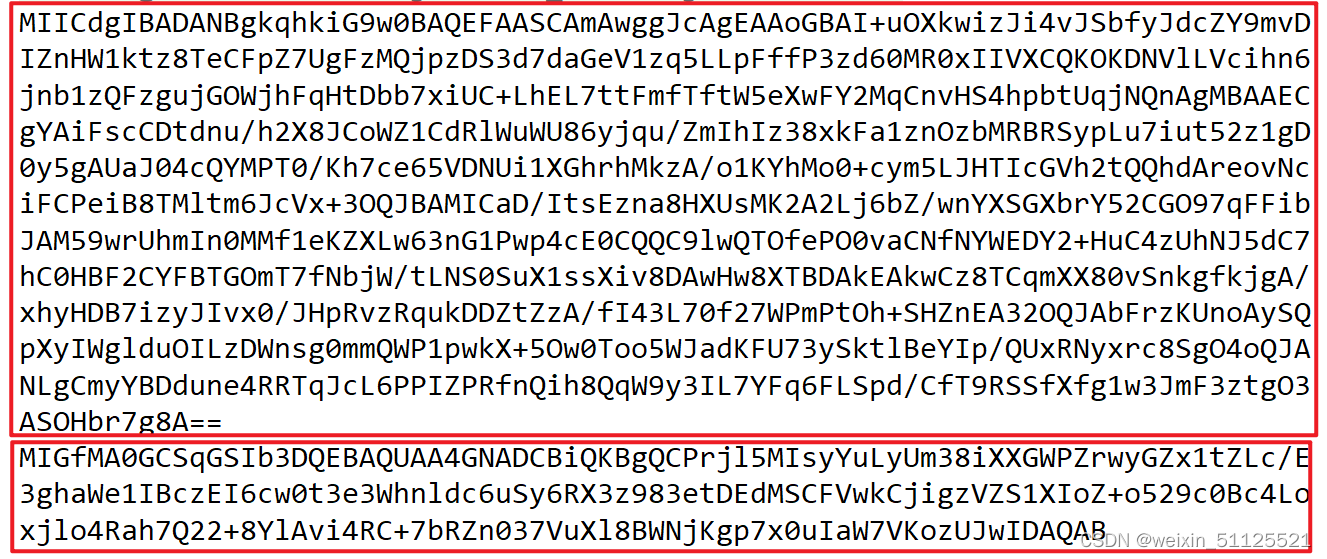
System.out.println(privateKeyString);
// 打印公钥
System.out.println(publicKeyString);
}
}运行程序:先打印的是私钥 , 后面打印的是公钥
私钥加密
    @Test //公钥加密,私钥解密
    public void test02() throws NoSuchAlgorithmException, NoSuchPaddingException, InvalidKeyException, IllegalBlockSizeException, BadPaddingException, Base64DecodingException {
//        原文
        String input = "2023/7/13";
//        定义加密算法
        String algorithm = "RSA";
//        获取密钥对生成器对象
        KeyPairGenerator keyPairGenerator = KeyPairGenerator.getInstance(algorithm);
//        获取密钥对
        KeyPair generateKeyPair = keyPairGenerator.generateKeyPair();
//        获取公钥
        PublicKey publicKey = generateKeyPair.getPublic();
//        获取私钥
        PrivateKey privateKey = generateKeyPair.getPrivate();
/*//        获取公钥的字节数组
        byte[] publicKeyEncoded = publicKey.getEncoded();
//        获取私钥字节数组
        byte[] privateKeyEncoded = privateKey.getEncoded();*/
//        创建加密对象
        String encryptResult = encryptRSA(input, algorithm, publicKey);
        System.out.println("公钥加密后 = " + encryptResult);

        String decryptRSA = decryptRSA(algorithm, privateKey, encryptResult);
        System.out.println("通过私钥进行解密 =" + decryptRSA);


    }


 //    使用私钥解密
    private static String decryptRSA(String algorithm, PrivateKey privateKey, String encryptResult) throws NoSuchAlgorithmException, NoSuchPaddingException, InvalidKeyException, IllegalBlockSizeException, BadPaddingException, Base64DecodingException {
        //        获取加密对象 参数:算法
        Cipher cipher = Cipher.getInstance(algorithm);
//        初始化cipher对象 参数1:指定模式(加密还是解密),参数2:规则(加密或者解密规则)
        cipher.init(Cipher.DECRYPT_MODE, privateKey);
//        开始解密
        byte[] bytes = cipher.doFinal(Base64.decode(encryptResult.getBytes()));
        return new String(bytes);
    }

    //    使用公钥加密
    private static String encryptRSA(String input, String algorithm, PublicKey publicKey) throws NoSuchAlgorithmException, NoSuchPaddingException, InvalidKeyException, IllegalBlockSizeException, BadPaddingException {
        Cipher cipher = Cipher.getInstance(algorithm);
//        初始化加密对象 参数1:指定模式(加密or解密) 参数2:规则(解密或者加密的规则)
        cipher.init(Cipher.ENCRYPT_MODE, publicKey);
//        开始加密
        byte[] bytes = cipher.doFinal(input.getBytes());
//        base64编码(可读性算法)
        return Base64.encode(bytes);

    }
运行:

保存公钥和私钥并读取
前面代码每次都会生成 加密和解密 ,咱们需要把加密和解密的方法全部到本地的根目录下面。
import com.sun.org.apache.xml.internal.security.exceptions.Base64DecodingException;
import com.sun.org.apache.xml.internal.security.utils.Base64;
import org.apache.commons.io.FileUtils;
import org.junit.Test;
import org.junit.runner.RunWith;
import org.springframework.boot.test.context.SpringBootTest;
import org.springframework.test.context.junit4.SpringJUnit4ClassRunner;

import javax.crypto.BadPaddingException;
import javax.crypto.Cipher;
import javax.crypto.IllegalBlockSizeException;
import javax.crypto.NoSuchPaddingException;
import java.io.File;
import java.io.IOException;
import java.nio.charset.Charset;
import java.security.*;
import java.security.spec.InvalidKeySpecException;
import java.security.spec.X509EncodedKeySpec;

//非对称加密
@SpringBootTest
@RunWith(SpringJUnit4ClassRunner.class)
public class RsaTest {

    @Test //获取私钥和密钥
    public void test01() throws NoSuchAlgorithmException {
//        算法
        String algorithm = "RSA";
//        获取密钥对生成器对象
        KeyPairGenerator keyPairGenerator = KeyPairGenerator.getInstance(algorithm);
//          生成密钥对
        KeyPair keyPair = keyPairGenerator.generateKeyPair();
//        获取公钥
        PublicKey publicKey = keyPair.getPublic();
//        获取私钥
        PrivateKey privateKey = keyPair.getPrivate();
//        获取公钥字节数组
        byte[] publicKeyEncoded = publicKey.getEncoded();
//        获取私钥数组
        byte[] privateKeyEncoded = privateKey.getEncoded();
//        对公钥进行base64编码
        String publicCode = Base64.encode(publicKeyEncoded);
        String privateCode = Base64.encode(privateKeyEncoded);
        System.out.println("publicCode = " + publicCode);
        System.out.println("\n\n\n");
        System.out.println("privateCode = " + privateCode);

    }

    @Test //公钥加密,私钥解密
    public void test02() throws NoSuchAlgorithmException, NoSuchPaddingException, InvalidKeyException, IllegalBlockSizeException, BadPaddingException, Base64DecodingException {
//        原文
        String input = "2023/7/13";
//        定义加密算法
        String algorithm = "RSA";
//        获取密钥对生成器对象
        KeyPairGenerator keyPairGenerator = KeyPairGenerator.getInstance(algorithm);
//        获取密钥对
        KeyPair generateKeyPair = keyPairGenerator.generateKeyPair();
//        获取公钥
        PublicKey publicKey = generateKeyPair.getPublic();
//        获取私钥
        PrivateKey privateKey = generateKeyPair.getPrivate();
/*//        获取公钥的字节数组
        byte[] publicKeyEncoded = publicKey.getEncoded();
//        获取私钥字节数组
        byte[] privateKeyEncoded = privateKey.getEncoded();*/
//        创建加密对象
        String encryptResult = encryptRSA(input, algorithm, publicKey);
        System.out.println("公钥加密后 = " + encryptResult);

        String decryptRSA = decryptRSA(algorithm, privateKey, encryptResult);
        System.out.println("通过私钥进行解密 =" + decryptRSA);


    }

    @Test //保存公钥和私钥
    public void test03() throws NoSuchAlgorithmException, IOException {
//        定义算法
        String algorithm = "RSA";

//        公钥存储位置
        File pubFilePath = new File("pub.txt");
//        私钥存储位置
        File priFilePath = new File("pri.txt");
        saveKeyPair(algorithm, pubFilePath, priFilePath);
    }


    @Test //读取已保存密钥 对加密解密数据
    public void test04() throws IOException, NoSuchAlgorithmException, Base64DecodingException, InvalidKeySpecException {
//       加密算法
        String algorithm = "RSA";
//      定义公钥文件位置
        File pubFilePath = new File("pub.txt");
//      定义私钥文件位置
        File priFilePath = new File("pri.txt");

//        获取公钥
        PublicKey publicKey = readPublicKeyFile(algorithm, pubFilePath);

        PrivateKey privateKey = readPrivateKeyFile(algorithm, priFilePath);


    }

//    读取私钥
    public static PrivateKey readPrivateKeyFile(String algorithm, File priFilePath) throws IOException, NoSuchAlgorithmException, Base64DecodingException, InvalidKeySpecException {
        // 将文件内容转为字符串
        String readPriFile = FileUtils.readFileToString(priFilePath, Charset.forName("utf-8"));
//        构建密钥工厂
        KeyFactory keyFactory = KeyFactory.getInstance(algorithm);
//        创建密钥规范
        X509EncodedKeySpec spec = new X509EncodedKeySpec(Base64.decode(readPriFile));
//        生成私钥并返回
       return keyFactory.generatePrivate(spec);
    }

    //    读取公钥
    public static PublicKey readPublicKeyFile(String algorithm, File pubFilePath) throws IOException, NoSuchAlgorithmException, Base64DecodingException, InvalidKeySpecException {
        //将文件内容转为字符串
        String readPubFile = FileUtils.readFileToString(pubFilePath, Charset.forName("utf-8"));
//        获取密钥工厂
        KeyFactory keyFactory = KeyFactory.getInstance(algorithm);
//        创建密钥规范(存入的数据进行过base64编码,这里需要解码)
        X509EncodedKeySpec spec = new X509EncodedKeySpec(Base64.decode(readPubFile));
//        生成公钥
        return keyFactory.generatePublic(spec);
    }

    //    保存密钥对
    private static void saveKeyPair(String algorithm, File pubFilePath, File priFilePath) throws NoSuchAlgorithmException, IOException {
        // 获取密钥对生成器对象
        KeyPairGenerator keyPairGenerator = KeyPairGenerator.getInstance(algorithm);
//        获取密钥对
        KeyPair keyPair = keyPairGenerator.generateKeyPair();
//        获取公钥
        PublicKey publicKey = keyPair.getPublic();
//        获取私钥
        PrivateKey privateKey = keyPair.getPrivate();
//        获取公钥字节数组
        byte[] publicKeyEncoded = publicKey.getEncoded();
//        获取私钥字节数组
        byte[] privateKeyEncoded = privateKey.getEncoded();
//        将它们进行Base64(可读性)编码
        String pub = Base64.encode(publicKeyEncoded);
        String pri = Base64.encode(privateKeyEncoded);

        FileUtils.writeStringToFile(pubFilePath, pub, Charset.forName("utf-8"));
        FileUtils.writeStringToFile(priFilePath, pri, Charset.forName("utf-8"));
    }


    //    使用私钥解密
    private static String decryptRSA(String algorithm, PrivateKey privateKey, String encryptResult) throws NoSuchAlgorithmException, NoSuchPaddingException, InvalidKeyException, IllegalBlockSizeException, BadPaddingException, Base64DecodingException {
        //        获取加密对象 参数:算法
        Cipher cipher = Cipher.getInstance(algorithm);
//        初始化cipher对象 参数1:指定模式(加密还是解密),参数2:规则(加密或者解密规则)
        cipher.init(Cipher.DECRYPT_MODE, privateKey);
//        开始解密
        byte[] bytes = cipher.doFinal(Base64.decode(encryptResult.getBytes()));
        return new String(bytes);
    }

    //    使用公钥加密
    private static String encryptRSA(String input, String algorithm, PublicKey publicKey) throws NoSuchAlgorithmException, NoSuchPaddingException, InvalidKeyException, IllegalBlockSizeException, BadPaddingException {
        Cipher cipher = Cipher.getInstance(algorithm);
//        初始化加密对象 参数1:指定模式(加密or解密) 参数2:规则(解密或者加密的规则)
        cipher.init(Cipher.ENCRYPT_MODE, publicKey);
//        开始加密
        byte[] bytes = cipher.doFinal(input.getBytes());
//        base64编码(可读性算法)
        return Base64.encode(bytes);

    }
}
数字签名
数字签名(又称公钥数字签名)是只有信息的发送者才能产生的别人无法伪造的一段数字串,这段数字串同时也是对信息的发送者发送信息真实性的一个有效证明。它是一种类似写在纸上的普通的物理签名,但是使用了公钥加密领域的技术来实现的,用于鉴别数字信息的方法。一套数字签名通常定义两种互补的运算,一个用于签名,另一个用于验证。数字签名是非对称密钥加密技术与数字摘要技术的应用。
1.11.1 简单认识
相信我们都写过信,在写信的时候落款处总是要留下自己的名字,用来表示写信的人是谁。我们签的这个字就是生活中的签名:
而数字签名呢?其实也是同样的道理,他的含义是:在网络中传输数据时候,给数据添加一个数字签名,表示是谁发的数据,而且还能证明数据没有被篡改。
OK,数字签名的主要作用就是保证了数据的有效性(验证是谁发的)和完整性(证明信息没有被篡改)。下面我们就来好好地看一下他的底层实现原理是什么样子的。
1.11.2 基本原理
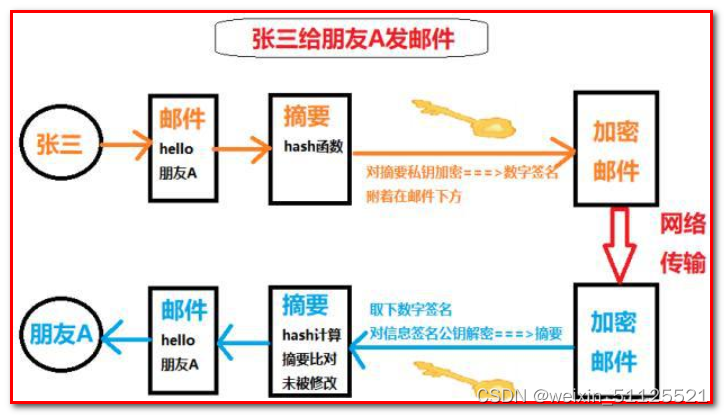
为了理解得清楚,我们通过案例一步一步来讲解。话说张三有俩好哥们A、B。由于工作原因,张三和AB写邮件的时候为了安全都需要加密。于是张三想到了数字签名:
整个思路是这个样子的:
第一步:加密采用非对称加密,张三有三把钥匙,两把公钥,送给朋友。一把私钥留给自己。
第二步:A或者B写邮件给张三:A先用公钥对邮件加密,然后张三收到邮件之后使用私钥解密。
第三步:张三写邮件给A或者B:
(1)张三写完邮件,先用hash函数生成邮件的摘要,附着在文章上面,这就完成了数字签名,然后张三再使用私钥加密。就可以把邮件发出去了。
(2)A或者是B收到邮件之后,先把数字签名取下来,然后使用自己的公钥解密即可。这时候取下来的数字签名中的摘要若和张三的一致,那就认为是张三发来的,再对信件本身使用Hash函数,将得到的结果,与上一步得到的摘要进行对比。如果两者一致,就证明这封信未被修改过。
上面的流程我们使用一张图来演示一下:
首先把公钥送给朋友A和B:

数字证书
上面提到我们对签名进行验证时,需要用到公钥。如果公钥是伪造的,那我们无法验证数字签名了,也就根本不可能从数字签名确定对方的合法性了。这时候证书就闪亮登场了。我们可能都有考各种证书的经历,比如说普通话证书,四六级证书等等,但是归根结底,到任何场合我们都能拿出我们的证书来证明自己确实已经考过了普通话,考过了四六级。这里的证书也是同样的道理。
如果不理解证书的作用,我们可以举一个例子,比如说我们的毕业证书,任何公司都会承认。为什么会承认?因为那是国家发得,大家都信任国家。也就是说只要是国家的认证机构,我们都信任它是合法的。
那么这个证书是如何生成的呢?我们再来看一张图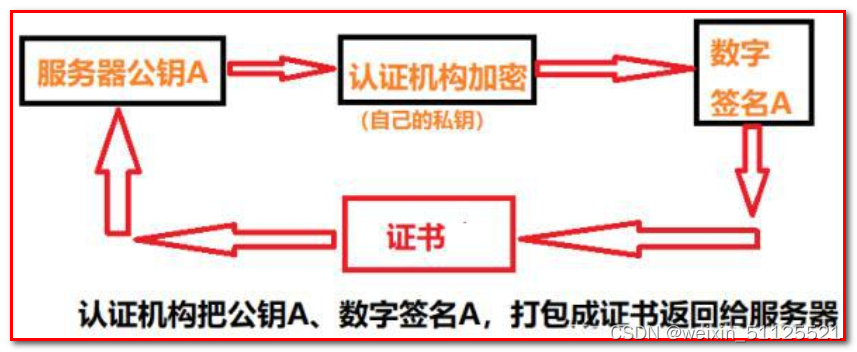
此时即使张三的朋友A把公钥弄错了,张三也可以通过这个证书验证。
1.11.4 网页加密
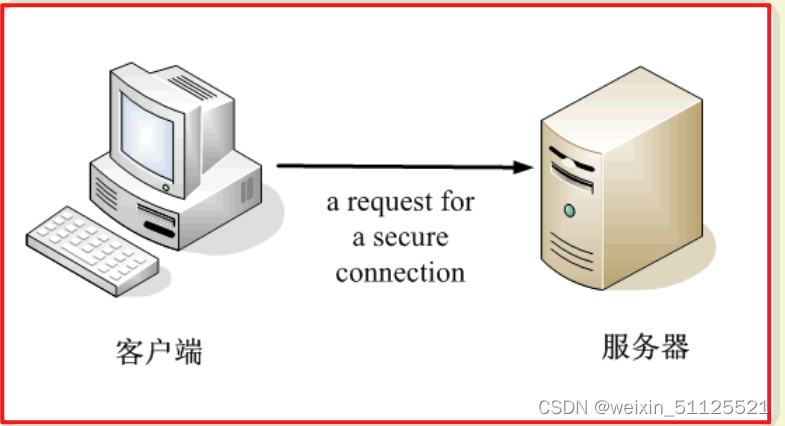
我们看一个应用“数字证书”的实例:https协议。这个协议主要用于网页加密
首先,客户端向服务器发出加密请求。
服务器用自己的私钥加密网页以后,连同本身的数字证书,一起发送给客户端。

客户端(浏览器)的“证书管理器”,有“受信任的根证书颁发机构”列表。客户端会根据这张列表,查看解开数字证书的公钥是否在列表之内。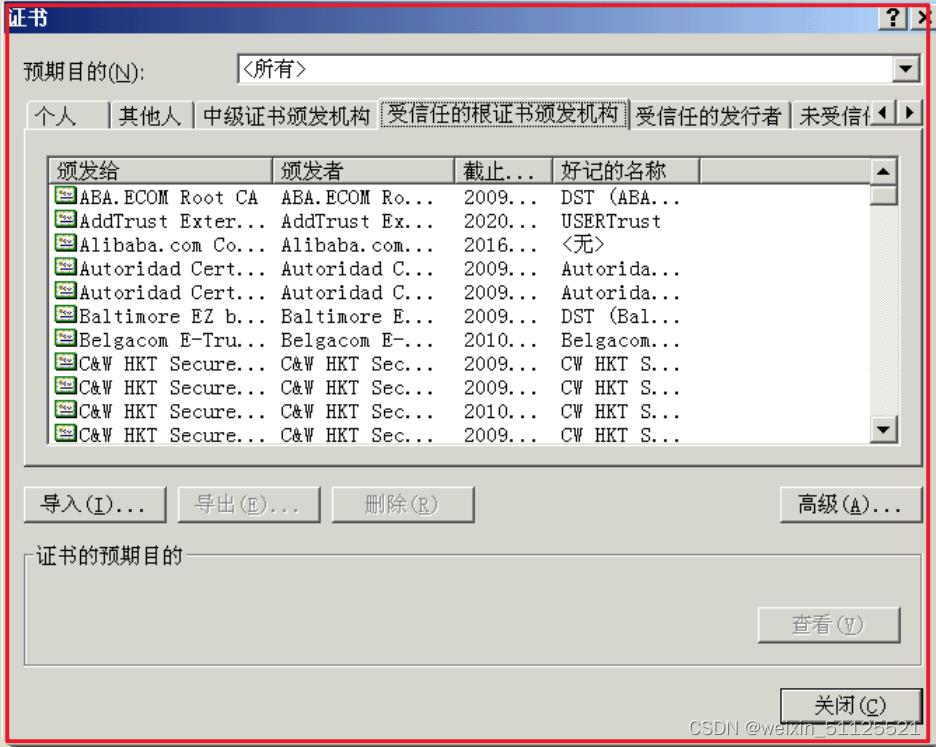
如果数字证书记载的网址,与你正在浏览的网址不一致,就说明这张证书可能被冒用,浏览器会发出警告。
如果这张数字证书不是由受信任的机构颁发的,浏览器会发出另一种警告。
如果数字证书是可靠的,客户端就可以使用证书中的服务器公钥,对信息进行加密,然后与服务器交换加密信息

代码实现:
import com.sun.org.apache.xml.internal.security.exceptions.Base64DecodingException;
import com.sun.org.apache.xml.internal.security.utils.Base64;
import org.apache.commons.io.FileUtils;
import org.junit.Test;
import org.junit.runner.RunWith;
import org.springframework.boot.test.context.SpringBootTest;
import org.springframework.test.context.junit4.SpringJUnit4ClassRunner;

import java.io.File;
import java.io.IOException;
import java.nio.charset.Charset;
import java.security.*;
import java.security.spec.InvalidKeySpecException;
import java.security.spec.PKCS8EncodedKeySpec;
import java.security.spec.X509EncodedKeySpec;

//数字签名
@SpringBootTest
@RunWith(SpringJUnit4ClassRunner.class)
public class SignatureDemo {

    @Test
    public void test01() throws Exception {
//      定义原文
        String input = "111";

//      定义算法
        String algorithm = "RSA";

//        定义签名算法
        String signatureAlgorithm="sha256withrsa";

//      获取公钥
        PublicKey publicKey = readPublicKeyFile(algorithm, new File("pub.txt"));
//        获取私钥
        PrivateKey privateKey = readPrivateKeyFile(algorithm, new File("pri.txt"));

//        进行签名校验 注意:这里第二个参数是签名的算法
        String signature = getSignature(input, signatureAlgorithm, privateKey);
        boolean b = verifySignature(input, signatureAlgorithm, publicKey, signature);
        System.out.println(b);

    }

    /**
     * 生成数字签名
     *
     * @param input      原文
     * @param algorithm  算法
     * @param privateKey 私钥
     * @return 签名
     */
    private static String getSignature(String input, String algorithm, PrivateKey privateKey) throws NoSuchAlgorithmException, InvalidKeyException, SignatureException, SignatureException {
//        获取签名对象
        Signature signature = Signature.getInstance(algorithm);
//        初始化签名
        signature.initSign(privateKey);
//        传入原文
        signature.update(input.getBytes());
//        开始签名
        byte[] sign = signature.sign();
        return Base64.encode(sign);
    }

    /**
     * 校验数字签名
     *
     * @param input         原文
     * @param algorithm     算法
     * @param publicKey     公钥
     * @param signatureData 签名
     * @return
     * @throws NoSuchAlgorithmException
     * @throws InvalidKeyException
     * @throws SignatureException
     * @throws Base64DecodingException
     */
    private static boolean verifySignature(String input, String algorithm, PublicKey publicKey, String signatureData) throws NoSuchAlgorithmException, InvalidKeyException, SignatureException, Base64DecodingException {
//        获取签名对象
        Signature signature = Signature.getInstance(algorithm);
//        初始化签名对象
        signature.initVerify(publicKey);
//        传入原文
        signature.update(input.getBytes());
//        校验数据
        return signature.verify(Base64.decode(signatureData));
    }


    //    读取私钥
    public static PrivateKey readPrivateKeyFile(String algorithm, File priFilePath) throws IOException, NoSuchAlgorithmException, Base64DecodingException, InvalidKeySpecException {
        // 将文件内容转为字符串
        String readPriFile = FileUtils.readFileToString(priFilePath, Charset.forName("utf-8"));
//        构建密钥工厂
        KeyFactory keyFactory = KeyFactory.getInstance(algorithm);
//        创建密钥规范
        PKCS8EncodedKeySpec spec = new PKCS8EncodedKeySpec(Base64.decode(readPriFile));
//        生成私钥并返回
        return keyFactory.generatePrivate(spec);
    }

    //    读取公钥
    public static PublicKey readPublicKeyFile(String algorithm, File pubFilePath) throws IOException, NoSuchAlgorithmException, Base64DecodingException, InvalidKeySpecException {
        //将文件内容转为字符串
        String readPubFile = FileUtils.readFileToString(pubFilePath, Charset.forName("utf-8"));
//        获取密钥工厂
        KeyFactory keyFactory = KeyFactory.getInstance(algorithm);
//        创建密钥规范(存入的数据进行过base64编码,这里需要解码)
        X509EncodedKeySpec spec = new X509EncodedKeySpec(Base64.decode(readPubFile));
//        生成公钥
        return keyFactory.generatePublic(spec);
    }


}


 9684
9684


 被折叠的 条评论
为什么被折叠?
被折叠的 条评论
为什么被折叠?
 到【灌水乐园】发言


