


1,入门
1,Spring Boot 入门
1,Spring Boot简介
- 简化Spring 应用开发的一个框架
- 整个Spring 技术栈的一个大整合
- j2EE开发的一站式解决方案
2,优点:
- 快速创建独立运行的Spring项目以及与主流框架集成
- 使用嵌入式的Servlet容器,应用无需打成war包
- starters自动依赖与版本控制
- 大量的自动配置,简化开发,也可修改默认值
- 无需配置xml,无代码生成,开箱即用
- 准生产环境的运行时应用监控
- 与云计算的天然集成
3,缺点:
入门容易精通难
4,微服务
微服务:架构风格
一个应用应该是一组小型服务,可以通过http的方式进行互通
单体应用
每一个功能元素最终都是一个可独立替换和独立升级的软件单元;
2,Spring Boot Helloworld
一个功能:
浏览器发送Hello请求,服务器接受请求并处理,响应Helloworld字符串
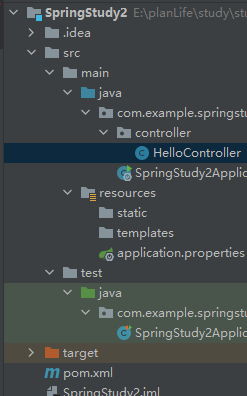
1:创建maven工程
2:导入Spring Boot相关依赖
<parent>
<groupId>org.springframework.boot</groupId>
<artifactId>spring-boot-starter-parent</artifactId>
<version>1.5.9.RELEASE</version>
</parent>
<dependencies>
<dependency>
<groupId>org.springframework.boot</groupId>
<artifactId>spring-boot-starter-web</artifactId>
</dependency>
</dependencies>
3:编写一个主程序:启动springboot应用
package com.ln;

import org.springframework.boot.SpringApplication;
import org.springframework.boot.autoconfigure.SpringBootApplication;

/*
    @SpringBootApplication来标注一个主程序类,说明这是一个Spring Boot应用
 */
@SpringBootApplication
public class HelloWorldMainApplication {

    public static void main(String[] args) {
        //Spring应用启动
        SpringApplication.run(HelloWorldMainApplication.class,args);
    }
}
4:编写相关的Controller,Service
@Controller
public class HelloController {

    @ResponseBody
    @RequestMapping("/hello")
    public String hello(){
        return "Hello World!";
    }

}
5:运行主程序测试
6:简化部署
<build>
        <plugins>
            <plugin>
                <groupId>org.springframework.boot</groupId>
                <artifactId>spring-boot-maven-plugin</artifactId>
            </plugin>
        </plugins>
    </build>
将这个应用打包成jar包,直接使用java -jar的命令进行执行
3,Helloworld探究
1:pom文件
父项目
导入依赖(启动器)
2:主程序类,主入口类
@SpringBootApplication
public class HelloWorldMainApplication {

    public static void main(String[] args) {
        //Spring应用启动
        SpringApplication.run(HelloWorldMainApplication.class,args);
    }
}
@SpringBootApplication:标注一个主程序类
@Target({ElementType.TYPE})
@Retention(RetentionPolicy.RUNTIME)
@Documented
@Inherited
@SpringBootConfiguration
@EnableAutoConfiguration
@ComponentScan(
    excludeFilters = {@Filter(
    type = FilterType.CUSTOM,
    classes = {TypeExcludeFilter.class}
), @Filter(
    type = FilterType.CUSTOM,
    classes = {AutoConfigurationExcludeFilter.class}
)}
)
public @interface SpringBootApplication {
@SpringBootConfiguration:SpringBoot的配置类
配置类也是容器的一个组件@Component
@EnableAutoConfiguration:开启自动配置功能
@AutoConfigurationPackage
@Import({AutoConfigurationImportSelector.class})
public @interface EnableAutoConfiguration {
@AutoConfigurationPackage:自动配置包
@Import({AutoConfigurationImportSelector.class})
Spring底层注解@Impor,给容器中导入一个组件
4,使用Spring Initializer快速创建Spring Boot项目


2,配置文件
5,配置文件
使用全局的配置文件,配置文件名是固定的
application.properties
application.yml
配置文件的作用:修改SpringBoot项目自动配置的默认值
YAML
标记语言:
以前:xml
现在:YAML(数据为中心)
6,YAML
1,基本语法
K:(空格)V :表示一个键值对(空格必须有)
以空格的缩进来控制层级关系;
左对齐的一列数据就是同一个层级;
属性和值也是大小写敏感;
server:
  port: 8081
2,值的写法
-
字面量:普通的词(数字,字符串,布尔)
k:v:字面直接写
字符串默认不用加上单引号或双引号
“”:双引号:不会转义字符串里面的特殊字符;特殊字符会作为本身想表达的意思
‘’:单引号:会转义特殊字符,特殊字符最终只是一个普通的字符串数据
-
对象(属性和值)(键值对):
k:v:在下一行写对象的属性和值的关系;注意缩进
对象还是k:v的方式
eg:friends:
lastName:zhangsan
age:20
行内写法:
friends: {lastName: zhangsan,age: 20} -
数组(List,Set):
eg:
pets:
 - cat
 - dog
 - pig
行内写法:
friends: {cat,dog,pig}
7,配置文件值注入
配置文件
person:
  lastName: zhangsan
  age: 18
  birth: 2017/12/12
  maps: {k1: v1,k2: v2}
  lists:
    - lisi
    - zhaoliu
  dog:
    name: xiaogou
    age: 2
javaBean:
/*
将配置文件中配置的每个属性的值,映射到这个组件
ConfigurationProperties告诉SpringBoot将本类中的所有属性和配置文件中相关配置绑定
 prefix = "person"配置文件中哪个下面的所有属性进行一一映射
 */
@Component
@ConfigurationProperties(prefix = "person")
public class Person {
    private String lastName;
    private Integer age;
    private boolean boss;
    private Date birth;

    private Map<String,Object> maps;
    private List<Object> lists;
    private Dog dog;
导入配置文件
<dependency>
            <groupId>org.springframework.boot</groupId>
            <artifactId>spring-boot-configuration-processor</artifactId>
            <optional>true</optional>
        </dependency>

8,@PropertySource&@ImportResourse
@PropertySource:获取指定配置文件
/*
将配置文件中配置的每个属性的值,映射到这个组件
ConfigurationProperties告诉SpringBoot将本类中的所有属性和配置文件中相关配置绑定
 prefix = "person"配置文件中哪个下面的所有属性进行一一映射
 默认从全局配置文件中获取值
 */
@PropertySource(value={"classpath:person.properties"})  //获取指定配置文件
@Component
@ConfigurationProperties(prefix = "person")
public class Person {
@ImportResourse:导入Spring的配置文件,让配置文件内容生效
springboot里面没有spring的配置文件,我们自己编写的配置文件,也不能自动识别;想让spring的配置文件生效,加载进来,需要@ImportResourse标注在配置类上
@ImportResource(locations = {"classpath:beans.xml"})
导入spring的配置文件让其生效
<?xml version="1.0" encoding="UTF-8"?>
<beans xmlns="http://www.springframework.org/schema/beans"
       xmlns:xsi="http://www.w3.org/2001/XMLSchema-instance"
       xsi:schemaLocation="http://www.springframework.org/schema/beans http://www.springframework.org/schema/beans/spring-beans.xsd">

    <bean id="helloService" class="com.example.springstudy2.server.HelloServer">

    </bean>
</beans>
SpringBoot推荐给容器中添加组件的方式;推荐使用全注解的方式;
1,配置类 配置文件
2,使用@bean添加组件
//配置类的注解
@Configuration
public class MyAppConfig {

    //将方法的返回值添加到容器中:容器中这个组件默认的id就是方法名
    //helloService02
    @Bean
    public HelloServer helloService02(){
        System.out.println("配置类@bean给容器中添加组件了");
        return new HelloServer();
    }
}
9,配置文件占位符

1,随机数

2,占位符获取之前配置的值,如果没有可以是用:指定默认值
person.last-name=张三${person.birth}
person.age=${random.int}
person.birth=2017/12/16
person.boss=false
person.maps.k1=v1
person.maps.k2=v2
person.lists=a,b,c
person.dog.name=${person.hello:hello}
person.dog.age=2
10,profile
1,多profile文件
我们在主配置文件编写的时候,文件名可以是 application-{profile}.properties/yml
默认使用application.properties的配置;
2,yml支持多文档块方式
server:
  port: 8081
spring:
  profiles:
    active: dev

---
server:
  port: 8083
spring:
  profiles: dev

---
server:
  port: 8084
spring:
  profiles: prod
3,激活指定profile
- 在配置文件中指定 spring.profiles.active=dev
- 命令行–spring.profiles.active=dev

- 虚拟机
VM options:-Dspring.profiles.active=dev
11,配置文件加载位置
springboot启动会扫描以下位置的application.properties或者application.yml文件作为springboot的默认配置
-file:/config/
-file:/
-classpath:/config/
-classpath:/
优先级由高到低,优先级高的覆盖优先级低的
springboot会从这四个位置全部加载主配置文件;互补配置。
还可以通过spring.config.location来改变默认的配置文件位置
12,外部配置加载顺序
springboot也可以从以下位置加载配置;
优先级从高到低;
互补配置。

命令行参数:多个配置用空格分开
由jar包外向jar包内进行寻找
优先加载带profile,再来加载不带profile
13,自动配置原理
1,@EnableAutoConfiguration自动配置
2,@EnableAutoConfiguration作用:
利用@Import({AutoConfigurationImportSelector.class})给容器导入组件
插件selectImports()方法
3,每一个自动配置类开始自动配置
自动配置类在一定的条件下才能生效
可以通过启用debug=true属性来让控制台打印自动配置,就能知道哪些配置类生效了
Negative matches:(没有匹配到的)
-----------------

   ActiveMQAutoConfiguration:
      Did not match:
         - @ConditionalOnClass did not find required class 'javax.jms.ConnectionFactory' (OnClassCondition)

   AopAutoConfiguration.AspectJAutoProxyingConfiguration:
      Did not match:
         - @ConditionalOnClass did not find required class 'org.aspectj.weaver.Advice' (OnClassCondition)

   ArtemisAutoConfiguration:
      Did not match:
         - @ConditionalOnClass did not find required class 'javax.jms.ConnectionFactory' (OnClassCondition)
Positive matches:(匹配到的)
-----------------

   AopAutoConfiguration matched:
      - @ConditionalOnProperty (spring.aop.auto=true) matched (OnPropertyCondition)

   AopAutoConfiguration.ClassProxyingConfiguration matched:
      - @ConditionalOnMissingClass did not find unwanted class 'org.aspectj.weaver.Advice' (OnClassCondition)
      - @ConditionalOnProperty (spring.aop.proxy-target-class=true) matched (OnPropertyCondition)

   DispatcherServletAutoConfiguration matched:
      - @ConditionalOnClass found required class 'org.springframework.web.servlet.DispatcherServlet' (OnClassCondition)
      - found 'session' scope (OnWebApplicationCondition)
3,日志
14,日志框架
市面上的日志框架:
JUL,JCL,Jboss.logging,logback,log4j,log4j2,slf4j…

日志门面(日志的抽象层):slf4j
日志实现:logback
15,slf4j的使用
1,如何在系统中使用slf4j
import org.slf4j.Logger;
import org.slf4j.LoggerFactory;

public class HelloWorld {
  public static void main(String[] args) {
    Logger logger = LoggerFactory.getLogger(HelloWorld.class);
    logger.info("Hello World");
  }
}

每一个日志的实现框架都有自己的配置文件,使用slf4j以后,配置文件还是做成日志实现框架自己变身的配置文件
2,遗留问题
统一日志纪录
http://www.slf4j.org/legacy.html
适配层
1:将系统中其他日志框架先排除出去
2:用中间包来替换原有的日志框架
3:导入slf4j其他的实现
3,springboot日志关系


总结:
1)SpringBoot底层也是使用slf4j+logback的方式进行日志记录
2)SpringBoot也把其他的日志都替换成了slf4j
3)中间替换包
4)如果我们要引入其他框架,一定要把这个框架的默认日志依赖移除掉
SpringBoot能自动适配所有的日志,而且底层使用slf4j+logback的方式记录日志,引入其他框架的时候,只需要把这个框架依赖的日志框架排除掉
16,日志使用
1,日志使用
SpringBoot帮我们配置好了日志
//记录器
    protected static final Logger logger = LoggerFactory.getLogger(SpringStudy4ApplicationTests.class);

    @Test
    void contextLoads() {
        //日志的级别
        //低到高  trace<debug<info<warn<error
        //
        logger.trace("这是trace日志");
        logger.debug("这是debug日志");
        logger.info("这是info日志");
        logger.warn("这是warn日志");
        logger.error("这是error日志");

    }
2,指定配置
给类路径下放上每个日志框架自己的配置文件即可

logback.xml:直接被日志框架识别
logback-spring.xml:日志框架就不直接加载日志的配置项,由SpringBoot解析日志配置,可以使用SpringBoot的高级Profile功能
<springProfile name="!dev">
                <pattern>====%d{yyyy-MM-dd HH:mm:ss} [%thread] %-5level %C.%M:%L - %m%n</pattern>
            </springProfile>
否则报错
3,切换日志框架
4,Web开发
17,映射
1,简介
使用SpringBoot
1),创建SpringBoot应用,选中我们需要的模块
2),SpringBoot已经默认将这些场景配置好了,只需要在配置文件进行少量配置就可以运行
3),自己编写业务代码
2,SpringBoot对静态资源的映射规则
public void addResourceHandlers(ResourceHandlerRegistry registry) {
            if (!this.resourceProperties.isAddMappings()) {
                logger.debug("Default resource handling disabled");
            } else {
                Duration cachePeriod = this.resourceProperties.getCache().getPeriod();
                CacheControl cacheControl = this.resourceProperties.getCache().getCachecontrol().toHttpCacheControl();
                if (!registry.hasMappingForPattern("/webjars/**")) {
                    this.customizeResourceHandlerRegistration(registry.addResourceHandler(new String[]{"/webjars/**"}).addResourceLocations(new String[]{"classpath:/META-INF/resources/webjars/"}).setCachePeriod(this.getSeconds(cachePeriod)).setCacheControl(cacheControl));
                }

                String staticPathPattern = this.mvcProperties.getStaticPathPattern();
                if (!registry.hasMappingForPattern(staticPathPattern)) {
                    this.customizeResourceHandlerRegistration(registry.addResourceHandler(new String[]{staticPathPattern}).addResourceLocations(WebMvcAutoConfiguration.getResourceLocations(this.resourceProperties.getStaticLocations())).setCachePeriod(this.getSeconds(cachePeriod)).setCacheControl(cacheControl));
                }

            }
        }
        //欢迎页
        @Bean
        public WelcomePageHandlerMapping welcomePageHandlerMapping(ApplicationContext applicationContext, FormattingConversionService mvcConversionService, ResourceUrlProvider mvcResourceUrlProvider) {
            WelcomePageHandlerMapping welcomePageHandlerMapping = new WelcomePageHandlerMapping(new TemplateAvailabilityProviders(applicationContext), applicationContext, this.getWelcomePage(), this.mvcProperties.getStaticPathPattern());
            welcomePageHandlerMapping.setInterceptors(this.getInterceptors(mvcConversionService, mvcResourceUrlProvider));
            welcomePageHandlerMapping.setCorsConfigurations(this.getCorsConfigurations());
            return welcomePageHandlerMapping;
        }
1)所有/webjars/**都去classpath:/META-INF/resources/webjars/找资源
webjars:以jar包的方式引入静态资源
https://www.webjars.org/
<dependency>
            <groupId>org.webjars</groupId>
            <artifactId>jquery</artifactId>
            <version>3.3.1</version>
        </dependency>
2)/**访问当前项目的任何资源(静态资源的文件夹)
"classpath:/META-INF/resources/", "classpath:/resources/", "classpath:/static/", "classpath:/public/"
3)欢迎页;静态资源文件夹下的所有index.html页面;被“/**”映射
4)图标:所有的**/favicon.ico都是在静态资源文件夹下找
3,模板引擎
JSP,Velocity,Freemarker,Thymeleaf;
SpringBoot推荐使用Thymeleaf
语法简单,功能强大
18,Thymeleaf
1,引入Thymeleaf
<dependency>
            <groupId>org.springframework.boot</groupId>
            <artifactId>spring-boot-starter-thymeleaf</artifactId>
        </dependency>

        #切换thymeleaf版本<thymeleaf.version>3.0.2.RELEASE</thymeleaf.version>
        <thymeleaf-layout-dialect.version>2.2.2</thymeleaf-layout-dialect.version>
2,thymeleaf使用&语法
@ConfigurationProperties(
    prefix = "spring.thymeleaf"
)
public class ThymeleafProperties {
    private static final Charset DEFAULT_ENCODING;
    public static final String DEFAULT_PREFIX = "classpath:/templates/";
    public static final String DEFAULT_SUFFIX = ".html";
    private boolean checkTemplate = true;
    private boolean checkTemplateLocation = true;
    private String prefix = "classpath:/templates/";
    private String suffix = ".html";
    private String mode = "HTML";
    //只要把html页面放在classpath:/templates/,Thymeleaf就能自动渲染
使用:
1)导入Thymeleaf的名称空间
<html lang="en" xmlns:th="http://www.thymeleaf.org">
2)使用Thymeleaf语法
<!DOCTYPE html>
<html lang="en" xmlns:th="http://www.thymeleaf.org">
<head>
    <meta charset="UTF-8">
    <title>Title</title>
</head>
<body>
    <h1>成功!</h1>
    <!--th:text:将div里面的文本内容设置为-->
    <div th:text="${hello}">

    </div>
</body>
</html>
3,语法规则
1)th:text:改变当前元素里面的文本内容
th: 任意html属性,来替换原生属性的值

片段包含:jsp:include(1)
遍历: c:forEach(2)
条件判断:c:if(3)
声明变量:c:set(4)
任意属性修改支持prepend,append(5)
修改指定属性默认值(6)
修改标签体内容 u:不转义(7)
声明片段(8)
2)表达式
简单表达式:
变量表达式:$ {...}
1)获取对象的属性,调用方法
2)使用内置的基本对象
#ctx:上下⽂对象。
#vars:上下⽂变量。
#locale:上下⽂区域设置。
#request :(仅在Web Contexts中)HttpServletRequest对象。
#response:(仅在Web上下⽂中)HttpServletResponse对象。
#session :(仅在Web上下⽂中)HttpSession对象。
#servletContext :(仅在Web上下⽂中)ServletContext对象。

${session.foo};
3)内置的一些工具对象
#execInfo:有关正在处理的模板的信息。
#messages:⽤于在变量表达式中获取外部化消息的⽅法,与使⽤#
{...}语法获得的⽅式相同。
#uris:转义URL / URI部分的⽅法
#conversions:执⾏配置的转换服务(如果有的话)的⽅法。
#dates:java.util.Date对象的⽅法:格式化,组件提取等
#calendars:类似于#dates,但对于java.util.Calendar对象。
#numbers:⽤于格式化数字对象的⽅法。
#strings:String对象的⽅法:contains,startsWith,prepending /
appending等
#objects:⼀般对象的⽅法。
#bools:布尔评估的⽅法。
#arrays:数组的⽅法。
#lists:列表的⽅法。
#sets:集合的⽅法。
#maps:地图⽅法。
#aggregates:在数组或集合上创建聚合的⽅法。
#ids:处理可能重复的id属性的⽅法(例如,作为迭代的结果)。

选择变量表达式:\* {...}:我们不仅可以将变量表达式写为$ {...},还可以作为* {...}。配合th:object="${session.user}使用

消息表达式:#{...}:获取国际化内容
链接⽹址表达式:@ {...}
⽚段表达式:〜{...}
⽂字
⽂字⽂字: 'one text' , 'Another one!'
数字字⾯值:0,34,3.0,12.3,...
布尔⽂字:true,false
空字⾯值:null
⽂字Token:one,sometext,main,...
⽂本操作
字符串连接:+
⽂本替换:|The name is ${name}|
算术运算符
⼆进制运算符:+,-,\*,/,%
负号(⼀元运算符):-
布尔运算符
⼆进制运算符:and 、or
布尔否定(⼀元运算符):!,not
⽐较和相等运算符:
⽐较运算符:>,<,> =,<=(gt,lt,ge,le)
相等运算符:==,!=(eq,ne)
条件运算符:
If-then:\(if\) ? \(then\)
If-then-else:\(if\) ? \(then\) : \(else\)
Default:\(value\) ?: \(defaultvalue\)
特殊符号:
哑操作符:\_
4,SpringMVC自动配置
SpringBoot自动配置好了SpringMVC
可修改SpringBoot的默认配置
5,扩展SpringMVC
<mvc:view-controller path="/hello" view-name="success"/>
    <mvc:interceptors>
        <mvc:interceptor>
            <mvc:mapping path="/hello"/>
            <bean></bean>
        </mvc:interceptor>
    </mvc:interceptors>
@EnableWebMvc:全面接管(慎用)
5,Web开发实例
1,引入资源
2,国际化
3,登录&拦截器
{…}
⽂字
⽂字⽂字: ‘one text’ , ‘Another one!’
数字字⾯值:0,34,3.0,12.3,…
布尔⽂字:true,false
空字⾯值:null
⽂字Token:one,sometext,main,…
⽂本操作
字符串连接:+
⽂本替换:|The name is ${name}|
算术运算符
⼆进制运算符:+,-,*,/,%
负号(⼀元运算符):-
布尔运算符
⼆进制运算符:and 、or
布尔否定(⼀元运算符):!,not
⽐较和相等运算符:
⽐较运算符:>,<,> =,<=(gt,lt,ge,le)
相等运算符:==,!=(eq,ne)
条件运算符:
If-then:(if) ? (then)
If-then-else:(if) ? (then) : (else)
Default:(value) ?: (defaultvalue)
特殊符号:
哑操作符:_
4,SpringMVC自动配置
SpringBoot自动配置好了SpringMVC
可修改SpringBoot的默认配置
5,扩展SpringMVC
<mvc:view-controller path="/hello" view-name="success"/>
    <mvc:interceptors>
        <mvc:interceptor>
            <mvc:mapping path="/hello"/>
            <bean></bean>
        </mvc:interceptor>
    </mvc:interceptors>
@EnableWebMvc:全面接管(慎用)


 4663
4663


 被折叠的 条评论
为什么被折叠?
被折叠的 条评论
为什么被折叠?
 到【灌水乐园】发言


